When Agencies decide to move their applications to the commercial cloud, the Defense Information Systems Agency (DISA) mandates specific approval and certification to connect the Cloud Access Point (CAP). In this blog post, I will describe the process for establishing connectivity for a mission application on Azure Government IL 5 environment to DoD the DISA CAP. This post is based on the document provided by DISA DoD Cloud Connection Process Guide. The site has information including connecting to the DoD DISA CAP for both cloud providers (AWS, AZURE …) and cloud consuming applications (“Mission Applications”). Unfortunately, I found the document to be outdated and hard to follow.
Here are some assumptions that you may have already done or are doing before requesting the CAP connection:
- Designed network architecture
- Identified the components used in the mission application (VM, OS, Application, Database, data at rest/transit, vulnerability compliance report)
- Performed assessment and authorization such as:
- Start applying STIGs to all servers. This process may take time, and you maybe continue to implement STIGs beyond the CAP connection
- Deployed agent for Host–Based Security Service (HBSS)
- Applied patches to all VMs
- Approved for an Interim Authority to Test (IATT) or Authority to Operate (ATO)
BEST PRACTICES FOR DATA INTELLIGENCE IN THE DOD
Discover the relationship between your data and your mission with our free whitepaper download on the AIS data intelligence framework and best practices.
Registration Process
Here is the starting point for the DISA CAP connection journey:
- DISA Systems/Network Approval Process (SNAP) Registration – The SNAP database stores the required documents and provides workflow status. To obtain a SNAP account go to https://snap.dod.mil site for registration (CAC required). The registration will ask for materials such as a DoD 2875 System Authorization Access Request (SAAR) form with Justification for Access. The diagram below shows detail steps for getting the SNAP account.

- SNAP Project Registration
- Register C-ITPS Project
- Submit Consent to Monitor Agreement
- Submit a Business Case Analysis
- Submit an Initial Contact form
- Develop SNAP artifact package
- Input the Ports, Protocols, and Services Management (PPSM) Registration Number – Obtained from the DoD PPSM Registry
- DoD NIC IP Range – Request the IP address space from DISA Network Information Center (NIC)
- Interim Authorization to Test (IATT) or an Authorization to Operate (ATO) Memo – Received a formal statement from an Authorizing Official (AO)
- Authorizing Official (AO) Memo – AO Appointment Letter
- Cybersecurity Service Provider (CSSP) Agreement
- Network Diagram of the application
- Plan of Actions & Milestones (POA&M) report
- Security Assessment Report (SAR)
- System Security Plan (SSP)
- Obtain Connection Approval
- Submit the Package within SNAP
- Receive Cloud Permission to Connect (CPTC) within five business days
- Acknowledgment of Registration – DISA Cloud Approval Office (CAO) issues a CPTC Memo (or returns package for rework/resubmission)
- Complete Secure Cloud Computing Architecture (SCCA) Onboarding
- Complete SCCA Onboarding Form
- Complete DISA Firewall Request Sheet
- Complete Express Route Steps
- Technical exchange meeting with DISA Engineering Team
- Provided Service key and Peering location
- Received shared key from the DISA
Connect to Authorized CSP-CSO (Azure)
The steps for connecting via DISA enterprise BCAP depends on the impact level. The following steps apply for both Level 4 and 5.
- Obtain IP Addresses – Requested DoD IP address range for the mission application from DoD NIC
- Obtain DNS name with A record (forward lookup) and PTR (reverse DNS) for:
- Application
- Federation server (ADFS)
- Mail server
- Obtain certificates for the DNS and server certificate for each VM
- Configure the app to use the Enterprise Email Security Gateway (EEMSG)
Create and Modify Azure ExpressRoute Circuit
- Create ExpressRoute following these steps:
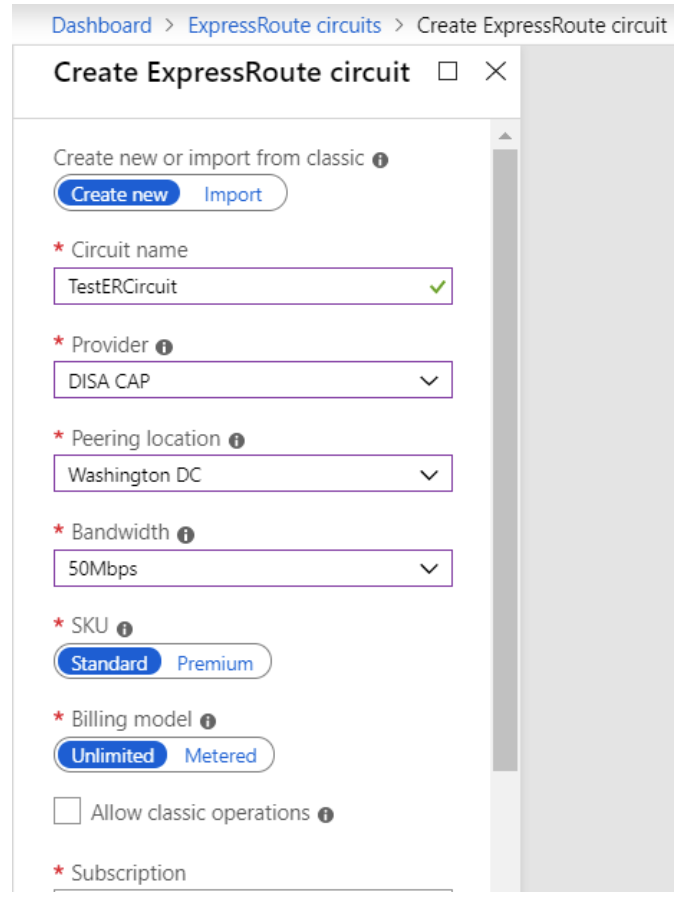
- Send the service key, Peering location to the DISA BCAP team
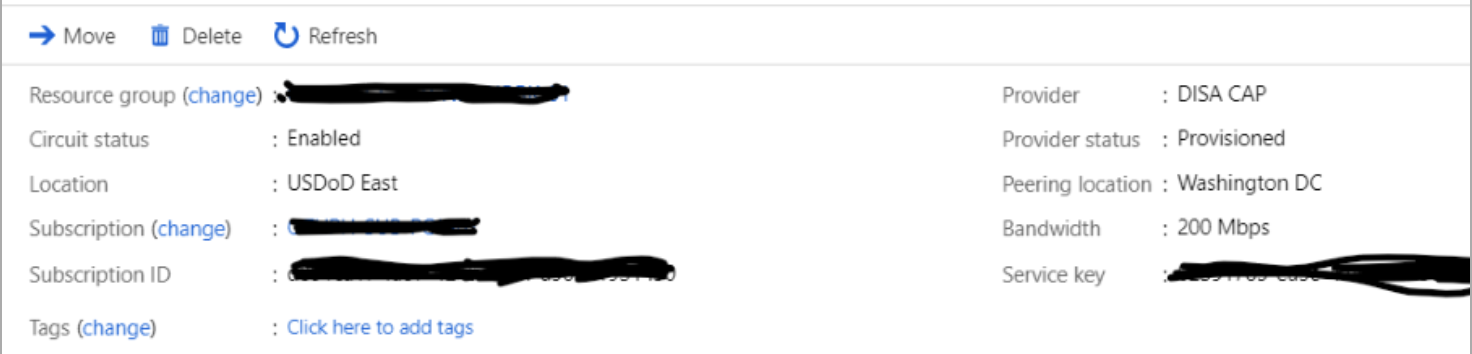
- Periodically check the status and the state of the circuit key. When the Circuit status changed to Enabled and Provider status change to Provisioned, then the connection is established.
- Provision Virtual Network
- Change the DNS Servers to Custom and provide the following IP addressed so that traffic can pass through CAP connection (214.16.26.1, 214.71.0.1, 214.27.166.1)
- Link the Virtual Network to the Express Route Circuit
AIS has a team specialized in navigating the process of getting ATO and connecting to DISA CAP. Contact us today and let’s start the conversation of getting you connected to DISA CAP.