


Did you know you can build an intelligent twitter bot and run it for just pennies a month using Azure’s Logic and Function apps, coupled with Microsoft’s Language Understanding Intelligence Service (LUIS)? LUIS can “read” a tweet and determine the tweet’s sentiment with a little help from you. Run selected tweets through your LUIS app, determine their meaning, and then use that meaning to create a personalized tweet back at the original.
Here’s how…
Step One: Select a Twitter Query
Use Twitter’s advanced search tools to craft a query to narrow down your selection of tweets to the specific messages you want your bot to respond to. Your Azure charges will be usage-based, so you want this query to be specific enough to only pick up the kinds of messages your LUIS app will know how to respond to.
Step Two: Create an App with LUIS
If you don’t already have a LUIS app to use, follow the steps here to create your new LUIS app. For your utterances, I recommend using a sampling of tweets that were returned using the twitter query you created. Copy as many tweets from your query as possible into the LUIS test tool and assign them to the correct intent as needed. Train and publish your app before continuing.
Step Three: Create a Function App
Use the steps here to create a new Function App with a HTTP trigger.
Once you have the app and trigger created, download the function by clicking “Download app content.”

Unzip your app and open it in Visual Studio. Add classes for the LUIS Prediction:
public class Prediction
    {
        [JsonProperty(PropertyName = "query")]
        public string Query { get; set; }

        [JsonProperty(PropertyName = "topScoringIntent")]
        public Intent TopScoringIntent { get; set; }

        [JsonProperty(PropertyName = "intents")]
        public List Intents { get; set; }

        [JsonProperty(PropertyName = "entities")]
        public List Entities { get; set; }

        [JsonProperty(PropertyName = "luisPrediction")]
        public string LuisPrediction { get; set; }

        [JsonProperty(PropertyName = "desiredIntent")]
        public string DesiredIntent { get; set; }

        [JsonProperty(PropertyName = "isDesiredIntent")]
        public bool IsDesiredIntent { get; set; }
    }

public class Intent
    {
        [JsonProperty(PropertyName = "intent")]
        public string IntentValue { get; set; }

        [JsonProperty(PropertyName = "score")]
        public decimal Score { get; set; }
    }

   public class Entity
    {
        [JsonProperty(PropertyName = "entity")]
        public string EntityValue { get; set; }

        [JsonProperty(PropertyName = "type")]
        public string Type { get; set; }

        [JsonProperty(PropertyName = "startIndex")]
        public int StartIndex { get; set; }

        [JsonProperty(PropertyName = "endIndex")]
        public int EndIndex { get; set; }

        [JsonProperty(PropertyName = "score")]
        public decimal Score { get; set; }
    }
Then Modify your HTTPTrigger to parse the prediction:
[FunctionName("HttpTrigger")]
        public static async Task Run([HttpTrigger(AuthorizationLevel.Anonymous, "post", Route = null)]HttpRequestMessage req, TraceWriter log)
        {
            log.Info("C# HTTP trigger function processed a request.");

            dynamic data = await req.Content.ReadAsAsync
            var prediction = ((JObject)data).ToObject();

            var message = GetTweetMessage(prediction);

            if (!string.IsNullOrEmpty(message))
            {
                return req.CreateResponse(HttpStatusCode.OK, message);
            }

            return req.CreateResponse(HttpStatusCode.NotFound);
        }
Replace “GetTweetMessage” with your own code to interpret the intent and entities (if defined/provided) and generate your tweet message. Then send the message string back in the response. Deploy your changes back to Azure. (Right click project in visual studio, select “Publish”, follow instructions)
Note: In order to use a free dev service plan for your function, you must turn its AlwaysOn setting to Off. You can only do this if you are using a HTTP trigger; a timer trigger won’t fire if you turn off AlwaysOn.
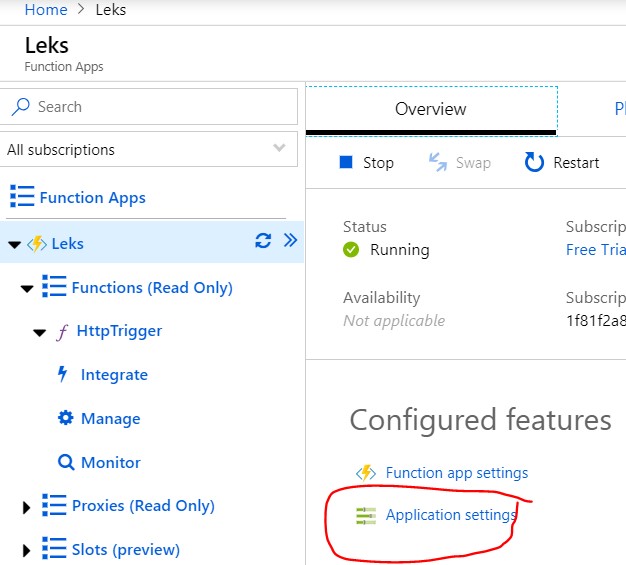
Do this by going to Application settings:
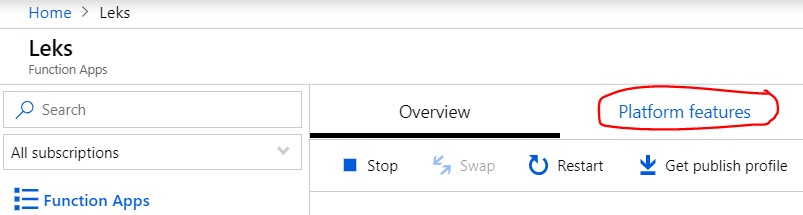
Toggle AlwaysOn and save the changes. You may now go to Platform features:
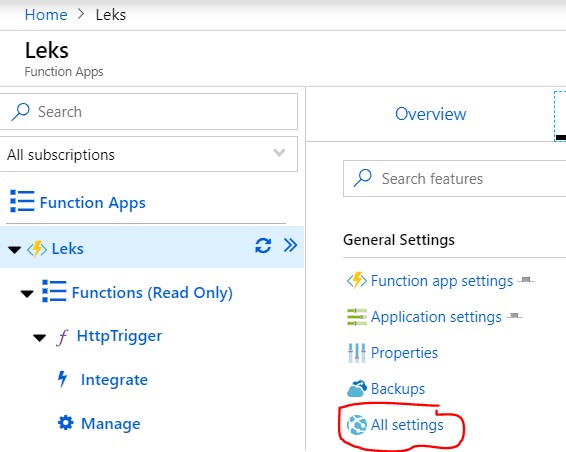
Then All Settings:
Then scroll down to App Service Plan and choose Change App Service Plan:
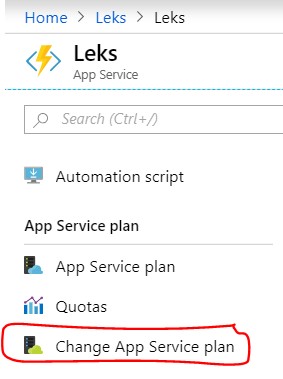
Change the app service plan to your devtest (free) service plan.
Step Four: Create a Logic App
General information on creating new logic apps can be found here.
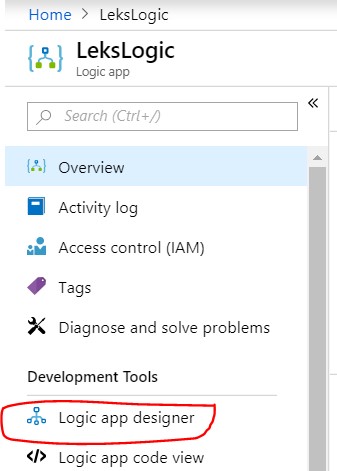
Once you’ve created your logic app, go to the Logic app designer:
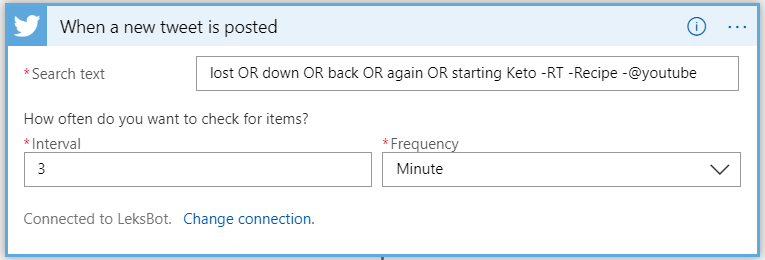
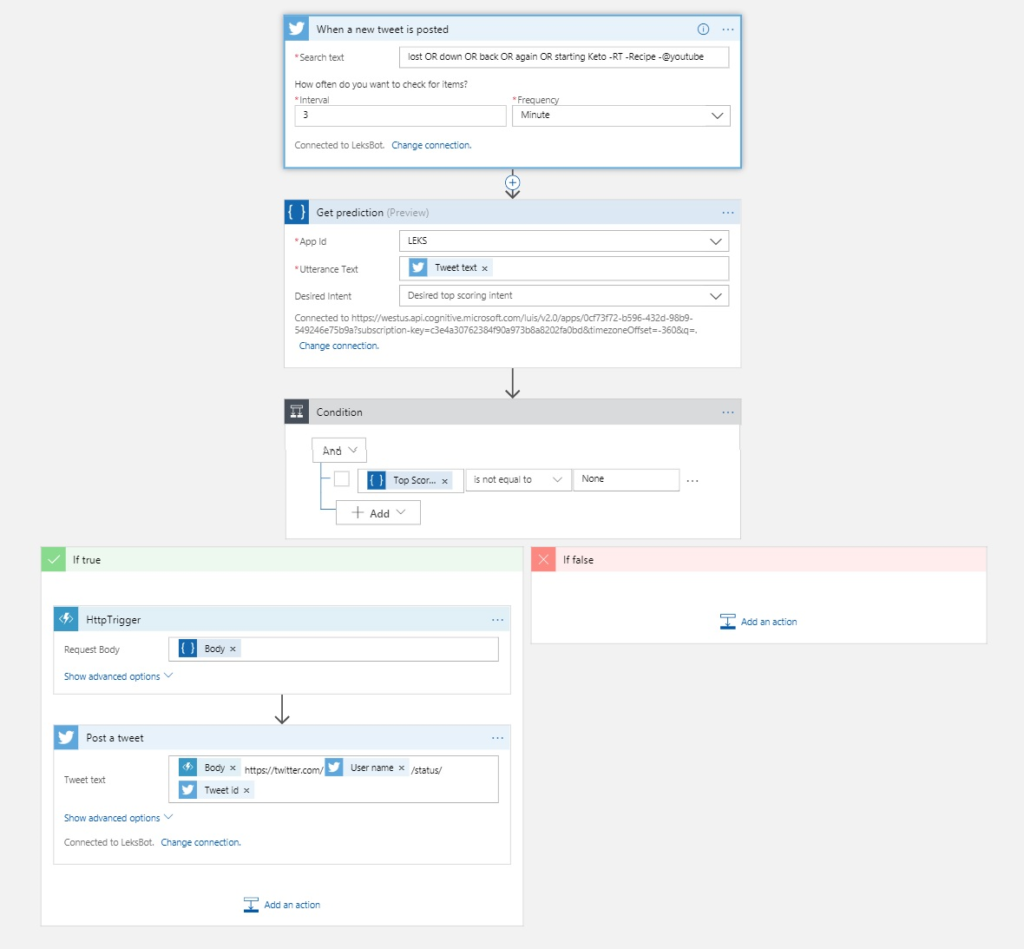
Create your first workflow item: a Twitter search tweets trigger. Use your search query from above and change the interval as needed:
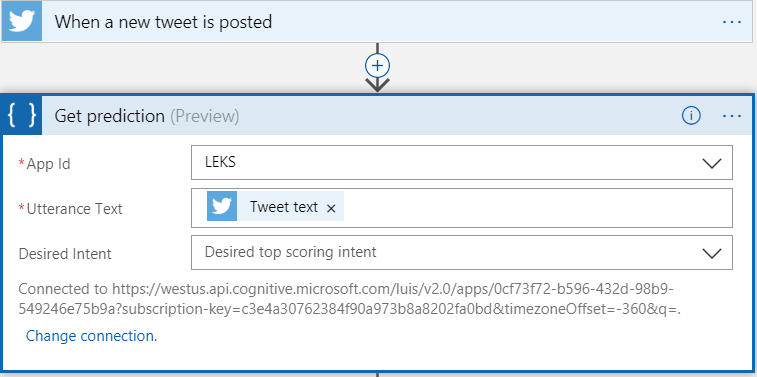
Create your next workflow item by clicking the plus button at the bottom of your twitter search tweets trigger. Add a new LUIS get prediction action. (You will be prompted for your LUIS connection and key; you can find these in your LUIS app.) The connection value is your LUIS endpoint. Select your LUIS-connected app for the APP Id and then click on Utterance Text field. A flyout list of dynamic options will appear; choose Tweet text under the Twitter options. Leave Desired Intent blank.
Add a new flow item under Control -> Condition:
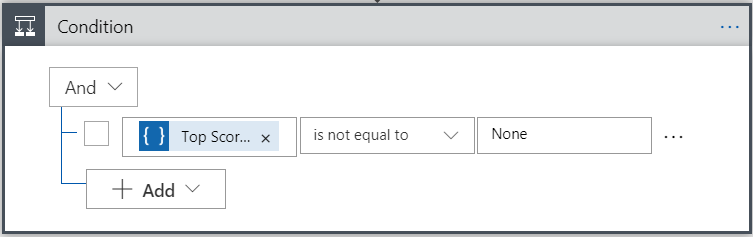
This workflow checks for the Top Scoring Intent Name from LUIS. We don’t want to continue passing this message to our Azure function if LUIS did not recognize its intent, so we only continue if Top Scoring Intent is not equal to None.
The control flow added two boxes below it. One for If True, the other for If False. Leave If False blank, the workflow will stop here if LUIS has not returned a usable intent. In the If True box, add a new action for Azure Functions and select the function you created above.
In the Request Body field of your function trigger, put the LUIS Body parameter. Then add another Twitter action to Post a tweet. Use the Function’s body to post the resulting message. Include a link back to the original tweet to make the tweet appear as a quoted retweet:

Your overall logic should look something like this: (You can see this bot in action at @LeksBot.)
Step Five: Train & Improve Your Bot
Open your logic app and scroll down to Runs history. You can see each time your bot has triggered. If you see tweets that weren’t responded to properly, you can open up each run and inspect the flow. You can see the run’s parameters and make adjustments. Paste the tweet into your LUIS app and train it on the correct intent. Each time you do this your app will become “smarter” and make fewer mistakes.
After you have re-trained LUIS, (make sure you click Publish!), or made any adjustments to your flow, you can resubmit the same run (tweet) and make sure it’s processed correctly. Re-train and adjust as needed to improve your bot’s experience.


