As promised in the previous blog post, here is a detailed explanation of how to connect to APIs secured in the Azure AD from SharePoint Framework (SPFx) web parts. Please read part I of this blog for a thorough understanding of the SharePoint Framework, comparing it with other models, and its constraints/disadvantages before diving in further.
Connecting to APIs is essential functionality in today’s communication as it extends the versatile communication with outside data repositories. SharePoint web parts can render data not only from SharePoint lists and libraries but also from external repositories. The data can be owned by anyone outside the organization. The external repositories can be connected for data retrieval from SharePoint via API (Application Programming Interface) call. The external repositories can be on different platforms, domains, etc. SPFx comes with many namespaces to leverage the communication between the SPFx web part from SharePoint online with other repositories via API call.
Types of API Communications from SPFx
- Connect to SharePoint APIs to access data residing in SharePoint (SPHttpClient with OData)
- This is access data residing in SharePoint lists/libraries
- Connect to Microsoft Graph (MSGraphClient through MSGraphClientFactory)
- This is access users and other user-related info from Azure Active Directory (AAD)
- Connect to enterprise APIs secured in Azure AD (enterprise APIs using AadHttpClient & aadHttpClientFactory)
- Connect to Azure API secured in Azure AD from the SharePoint Framework web part in single-tenant implementation, where both Azure and SharePoint online are under the same tenant. This blog covers the details of implementing this functionality.
- Connect to Azure API secured in Azure AD from the SharePoint Framework web part in multi-tenant implementation, where both Azure and SharePoint online are in different tenant’s
- Connect to anonymous APIs (using HttpClient to connect to public APIs for weather etc.)
- Anonymous API’s are used to access any weather and other publicly available API’s
Connect to Azure AD Secured APIs
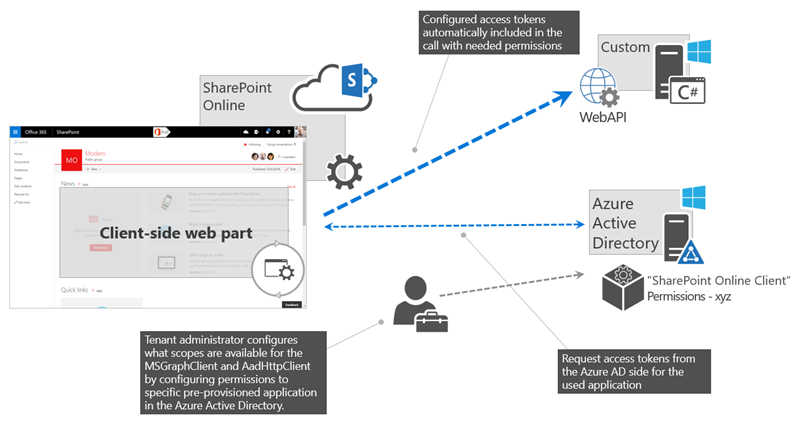
Figure Credit: Microsoft
Pre-Requisites
- Office 365/SharePoint online (Free developer edition)
- Azure subscription (Free subscription)
- Developer environment (steps to set up a developer environment)
If your environment is already set up, ensure you have the latest version of Yeoman SharePoint generator by entering:
npm update – g @microsoft/generator-sharepoint@latest
Steps to Develop, Deploy, and Test SPFx Connecting to Function API Secured in Azure AD
Once all the pre-requisites are met, follow the steps below to develop, deploy, and test the SharePoint Framework connecting to Azure API secured in an Azure active directory.
1. Create an Azure function (HttpTrigger) returning mock data
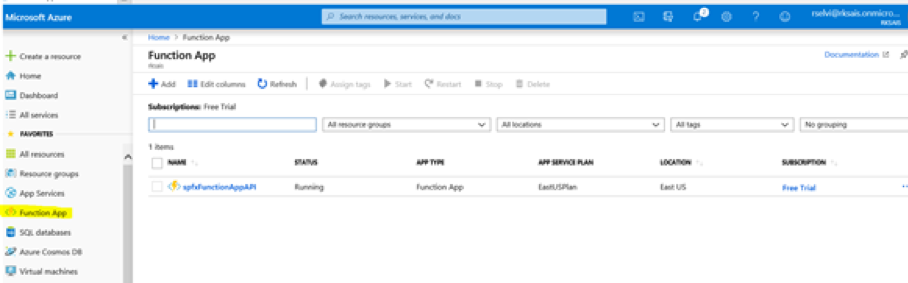
Figure: Create a new Azure function
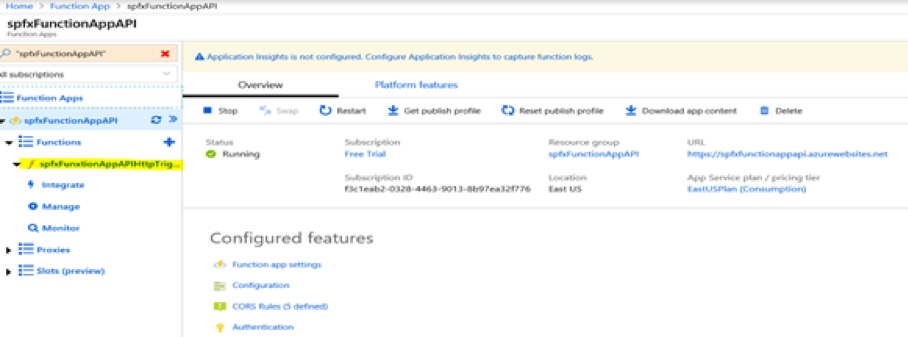
Figure: New Azure function is created
2. Create a HttpTrigger & add C# code to return the list of orders
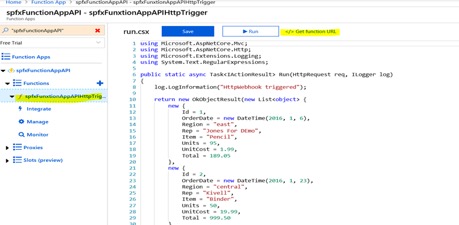
Figure: C# Azure Function code to return the list of orders
DOWNLOAD THE AZURE FUNCTION CODE HERE
3. Secure the azure function by enabling the authentication/authorization via Azure Active Directory (AAD) and create an app in AAD. Verify azure function works when called from the browser.

Figure: Configure authentication/authorization for the Azure function
4. Enable ‘App Service Authentication’
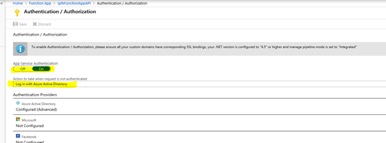
Figure: Selection Azure Active Directory for authentication/authorization
5. Active Directory authentication is set up & the API is secured in an Azure AD
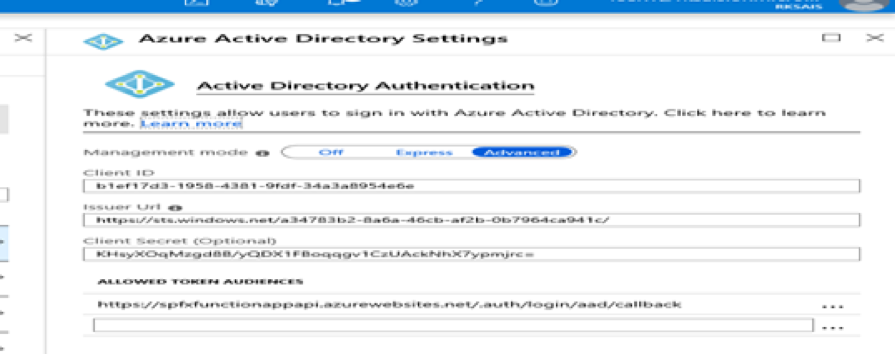
Fig: Registered Azure function in Azure AD
6. Enable CORS (Cross-Origin Resource Sharing). Even though Azure & SharePoint Online are in the same tenant, they are in different domains.
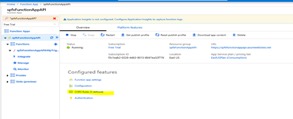
Figure: Configure CORS
7. Add the SharePoint tenant URL.
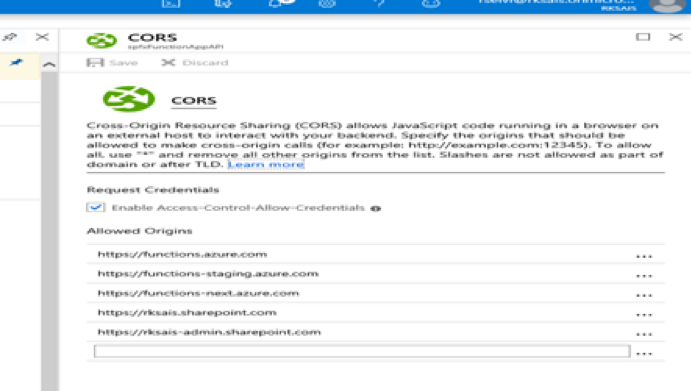
Figure: Add the SharePoint for CORS to authenticate the SharePoint site in Azure
8. Azure function API is secured in Azure AD & the application ID will be used in the SPFx web part.

Figure: Azure function is registered in the Azure AD as an Enterprise application
9. SharePoint online tenant/admin center in O365.
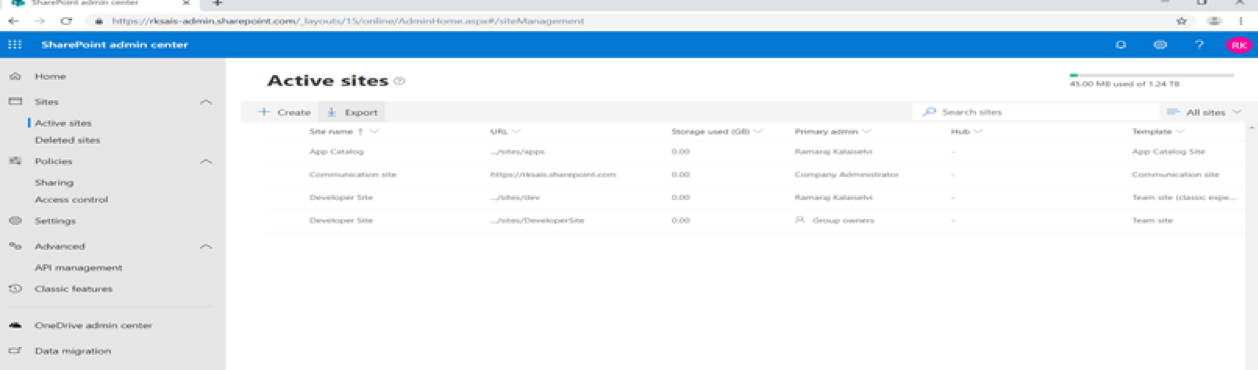
Figure: Available sites in the SharePoint admin center
10. Create an SPFx web part project to render the data by connecting to API secured in Azure AAD. Use Yeomen to generate a web part. Use this link for more information on generating web parts.
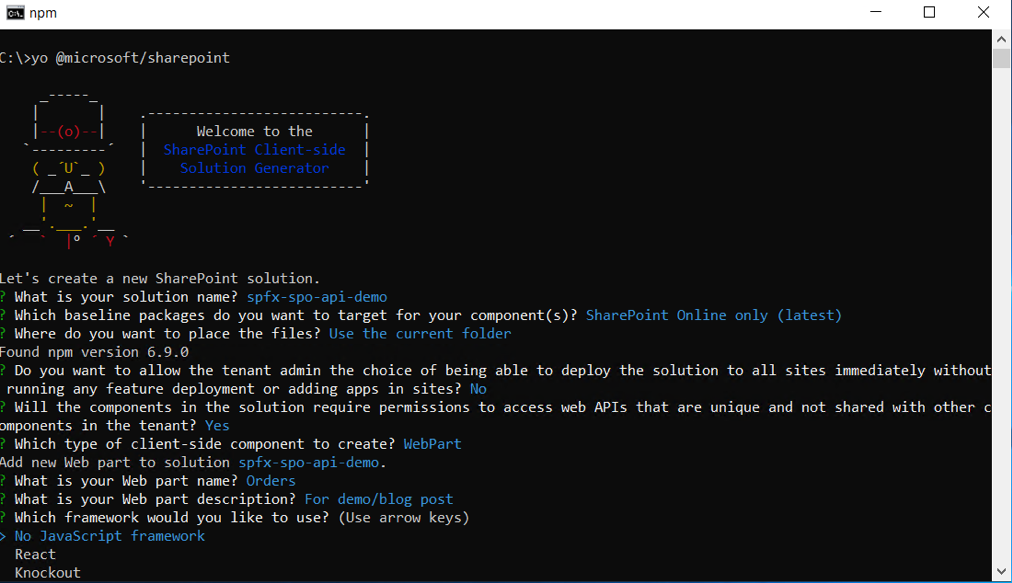
Figure: Yeoman generator to generate SPFx web part
11. Add web API permission requests in config/package-solution.json file.
src\webparts\[webpartname]\config\package-solution.json – add two web api permission requests
“webApiPermissionRequests”: [
{
“resource”: “contoso-api”,
“scope”: “user_impersonation”
},
{
“resource”: “Windows Azure Active Directory”,
“scope”: “User.Read”
},
]
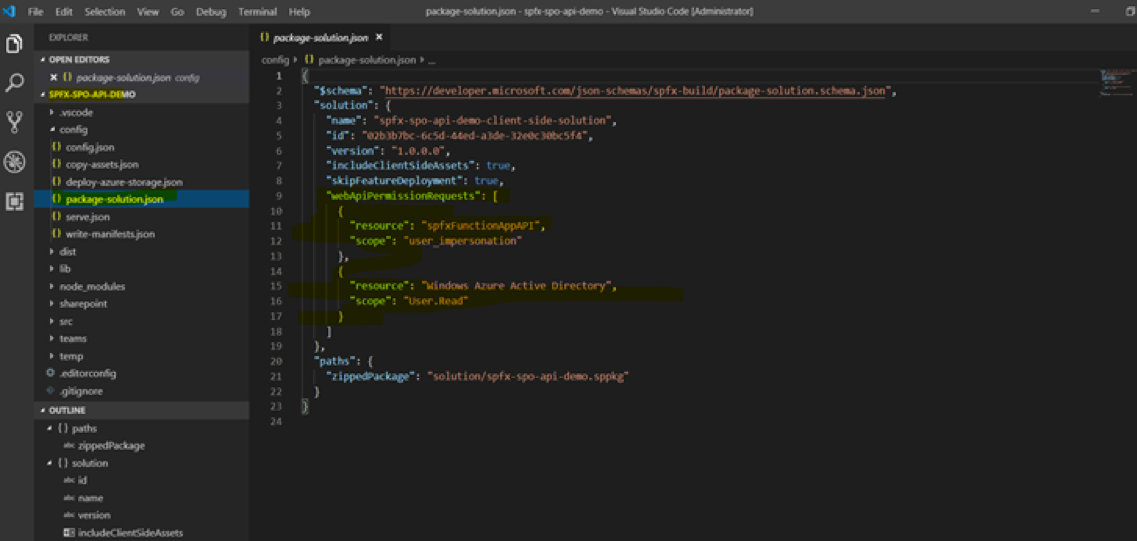
Figure: API permissions in SPFx web part configuration file
12. Import namespaces for enterprise API communication.
import AadHttpClient to connect with API in src\webparts\[webpartname]\[webpartname]WebPart.ts
import { AadHttpClient, HttpClientResponse } from ‘@microsoft/sp-http’;
src\webparts\[webpartname]\[webpartname]WebPart.ts
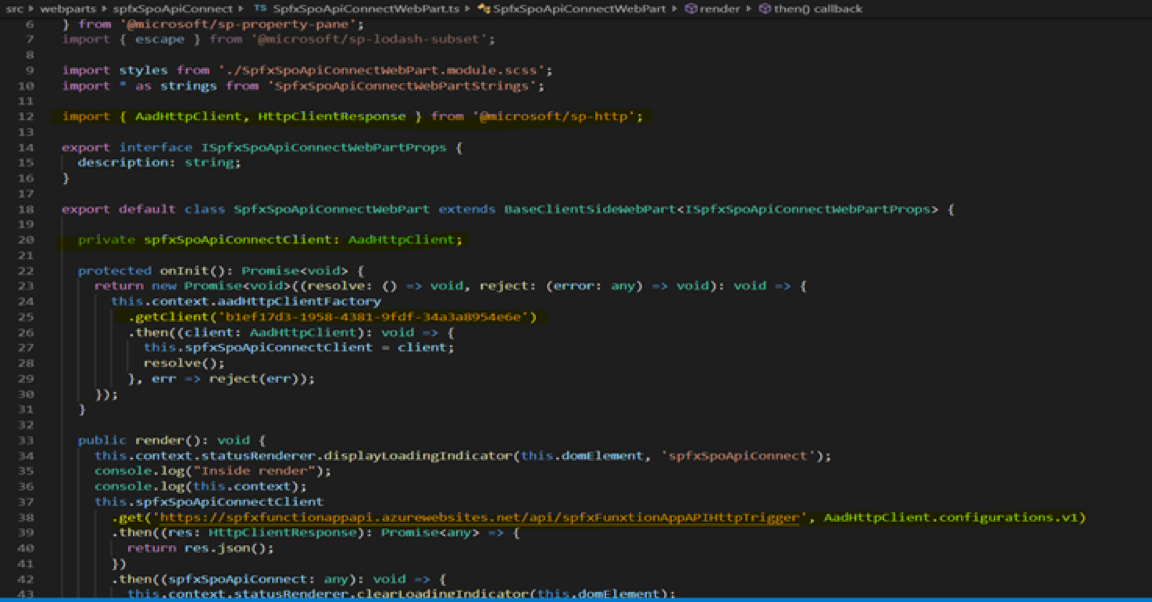
DOWNLOAD THE WEB PART CODE HERE
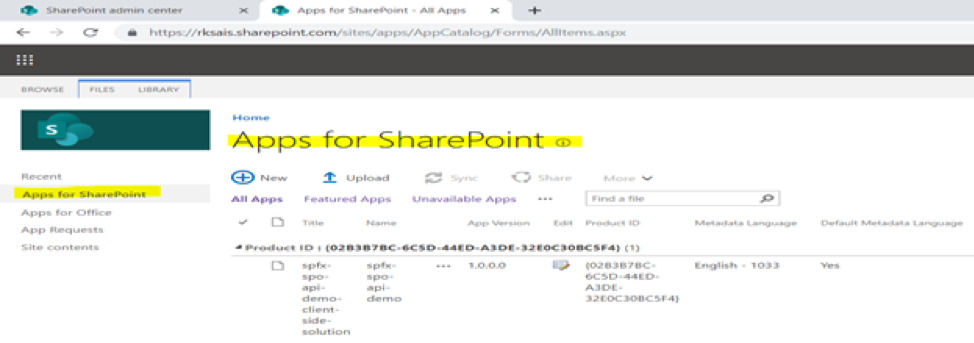
13. Build, package, and upload the package to the SharePoint App Catalog.
gulp bundle –ship && gulp package-solution –ship
gulp clean (for redeploying after updates)
14. Add the SPFx package to the tenant app catalog in your Office 365 tenant. SPFx deploys API related file to the SharePoint admin center.
15. Approve requested API permissions.
From the SharePoint admin center in Office 365/SharePoint, approve the API from API Management page
Once the API is approved, the SPFx web part can be added to the SharePoint site page
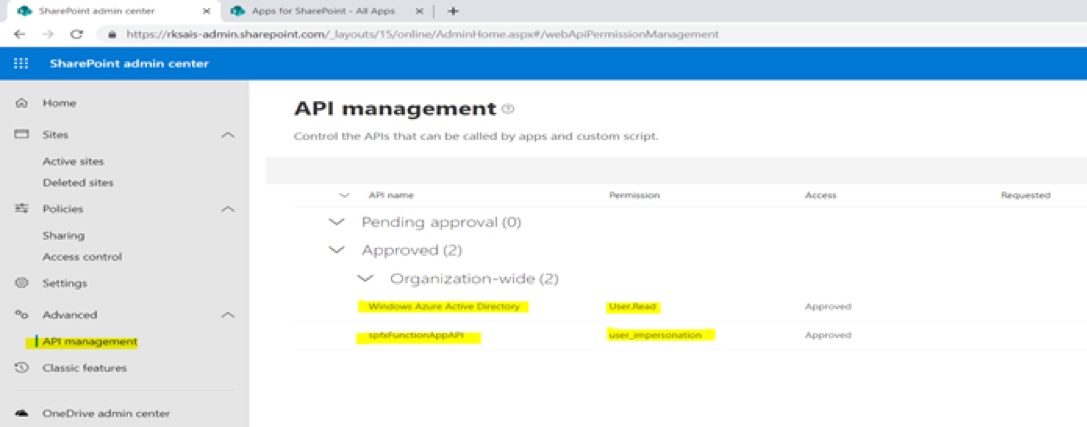
Figure: API permissions are available in SharePoint online admin center
16. Create a new site page from the developers’ site and add the SPFx web part.
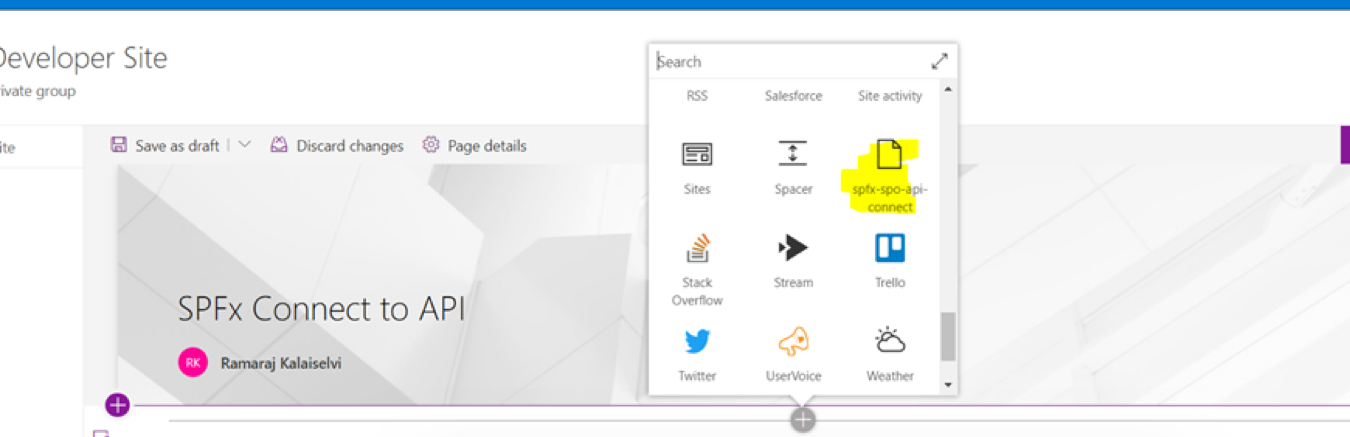
Figure: Add the web part to the SharePoint page
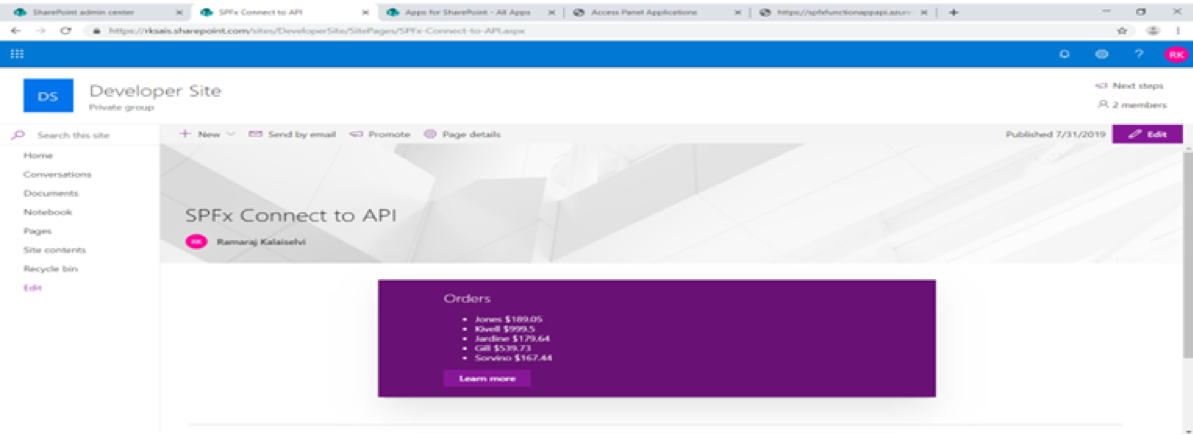
17. If all goes well, your web part will be rendered with data that is served from the API call!
SPFx – Connect to APIs Gotchas
- Connecting to API secured in Azure AD did not work via SPFx AadHttpClient & aadHttpClientFactory in SharePoint 2019 on-premise. The this.context.aadHttpClientFactory did not work. I choose a web part that is part of “SharePoint 2019 and SharePoint Online” when creating the SPFx web part via the Yeomen generator. Choose only ‘SharePoint Online’ to use AadHttpClient & aadHttpClientFactory
- Microsoft example code did not work as it is. The azure function needed a slight tweak. Additional permission must be added “webApiPermissionRequests” in the config\package-solution.json
{
“resource”: “Windows Azure Active Directory”,
“scope”: “User.Read”
}
- Single-tenant vs multiple tenant access
- First, I set up azure function and secure it in AAD API in a personal MSDN subscription tenant and tried to connect from Developer (Free) O365/SharePoint Online SPFx web part. But the API permission in the SharePoint admin center could not get approved. The permission to access API from a different tenant did not work with the way Azure function API is configured in AAD.
- To overcome that issue set up an Azure tenant under developer O365 and with the same credential. The API was able to get approved. More Info…
- To overcome this, need to configure AAD API authentication to multi-tenant. More info…
- gulp clean – important when re-deploying, otherwise new updates will not get updated
- Debugging is quite important for troubleshooting
TRY IT YOURSELF! DOWNLOAD THE CODE TO GET STARTED.