The Dockerfile development workflow is fantastic if you are familiar with the documentation and have spent a lot of time troubleshooting. However, if you are writing your first Dockerfile, it may be challenging to identify and debug certain cases.
During my first foray into the world of containers, I was containerizing a React Application. As I got comfortable copying the correct files into the image and making sure I was running things correctly, I ran the “docker build .” command multiple times. Suddenly, I noticed that my computer was giving me warnings that it was running out of storage! In this article, I will be discussing the concept of a Dangling Container when creating your Dockerfile, and we can finally find out what is taking up so much space on your machine!
What is a Dockerfile?
To quickly recap, a Dockerfile allows you to customize any image to fit your needs. You can add packages, run servers, the possibilities are endless! You start with a base image, i.e. Microsoft Container Registry’s official dotnetcore3.1 image. Then, go through various steps inside of a text document that is parsed by the Docker Engine. Eventually, you have your application running on a container image that has your application. The Docker daemon will read the Dockerfile, and perform whatever tasks you have described in said Dockerfile. Each time a step is run inside a Docker Container – It is a run in an Intermediate Container. Intermediate containers allow Docker to be very efficient in caching, as layers of the intermediate containers make up your final image.
Here is the Dockerfile I will be running, and the application I am using is the simple example found of the reactjs site.
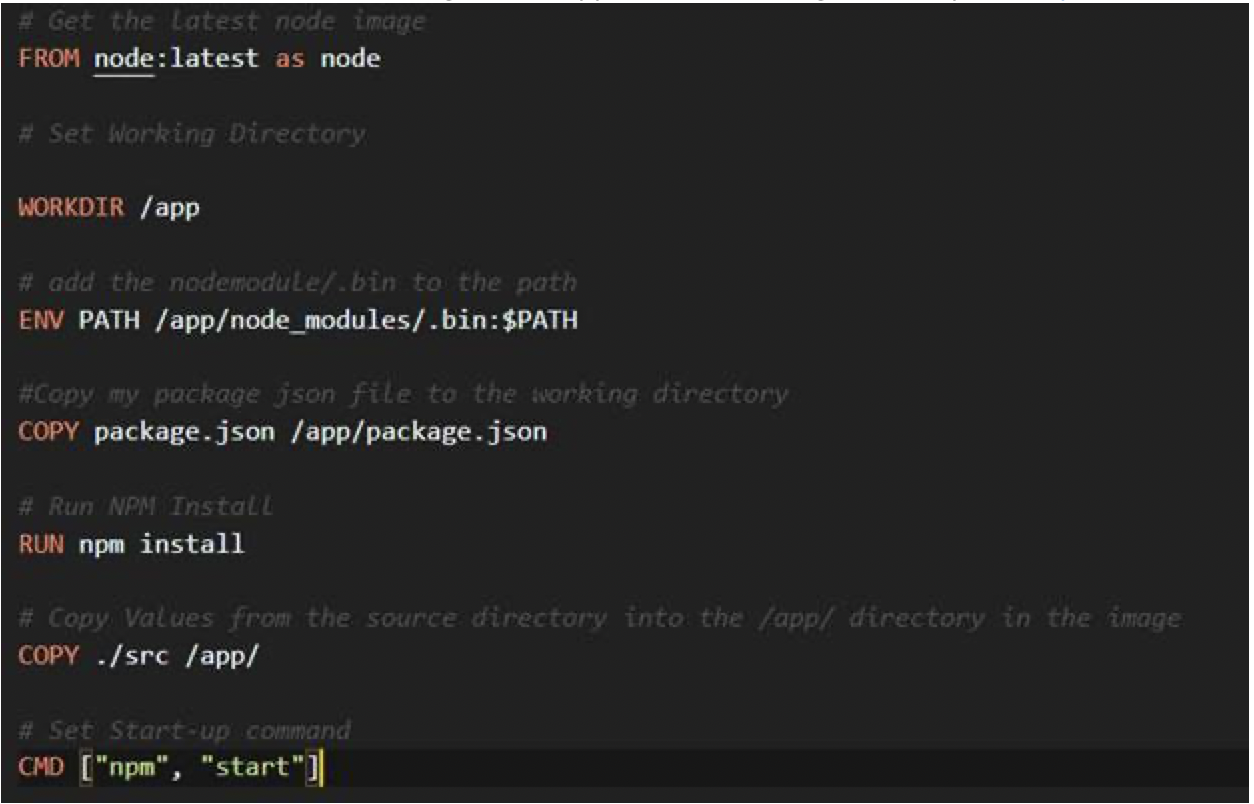
Inside my console, I can run “docker build .” and everything will run completely fine, as shown here:

You will notice that the container I have successfully built is a GUID. I did not provide my Docker build step with a tag, provided with the -t flag after the Docker build command. I ran “docker build .” one more time and I have two images of 1.15GB in size.

However, this isn’t the full story – the intermediate containers are also saved along with your containers themselves. You can see them with the “docker images -a” command.
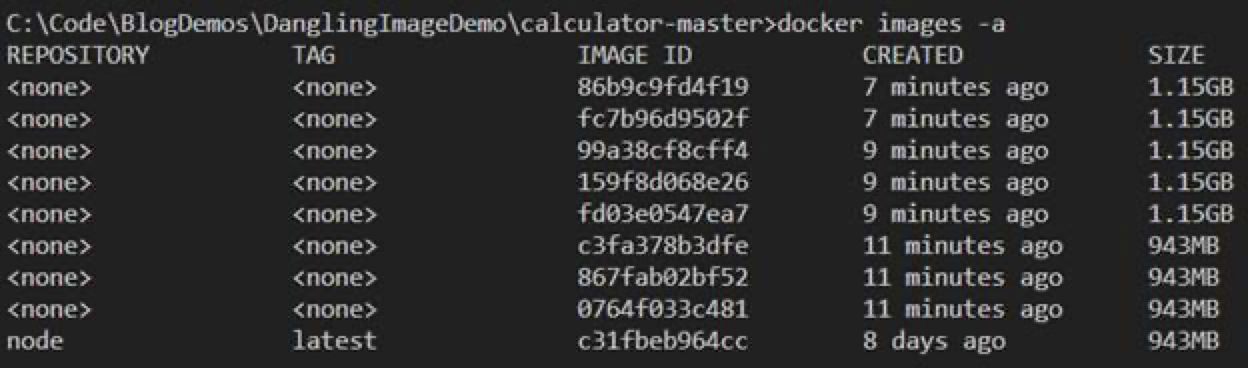
As you can see here, I have occupied roughly ~8 GB of Storage when trying to run these containers within approximately the past fifteen minutes of development. During a long project, a microservices architecture running on containers, for example, it is possible to accumulate a significant amount of storage space. Dangling images themselves can be seen here with this command “docker images -f dangling=true”

In this case, since I missed the -t tag initially, my images are essentially dangling images. They are not associated with a repository.
Finally, to clean up my dangling images, all I need to run is “docker images prune”

Developing with Dockerfiles can be difficult, and it can be daunting to step into the world of containers. Remember to prune often, and make sure you tag your images!