![]() Attachments, Notes, and Annotations
Attachments, Notes, and Annotations
How do you handle document storage and management in CRM? While this is a prominent feature in SharePoint, it is not as obvious or as easy to use in CRM. However, if you have a need to attach and manage documents in CRM, there is a provided option.
CRM offers a Notes field that can be turned on and associated to any entity. This Notes field is actually a reference to an entity called Annotation. The Annotation entity holds your file attachment and a reference ID back to the entity that the attachment belongs to. This feature is turned on by default for some of the default entities, but you need to turn it on yourself for custom entities.
To enable notes for an entity, follow these steps:
- Go to Setting > Customizations > Customize the System. Find the entity that you would like to add notes to and double-click it to bring up the properties window.
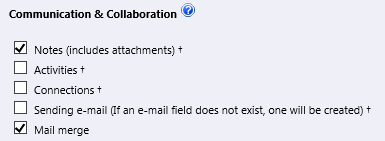
- In the Communications & Collaboration section of the properties page, there is a checkbox titled “Notes (includes attachments).” Check this box, click the save icon at the top of the window, and then click the Publish button that is also at the top of the window.
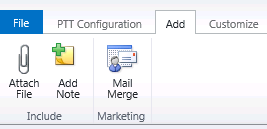
- After the change is published, go and create a new item for the entity that you modified. Once that new item is saved, you can click on the “Add” tab at the top of the page and you will see an enabled Attach File button in the ribbon.
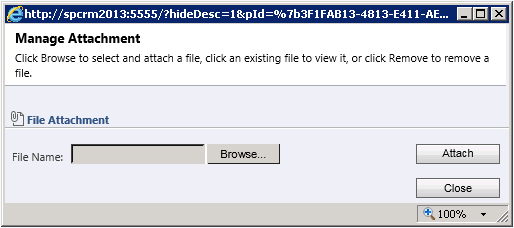
- Clicking on that button will bring up this dialog box which will allow you to upload and attach documents to your entity item.
- If you are creating this entity programmatically, you can just set the HasNotes property to True when using the CreateEntityRequest object to get the same results.
Where did my attachment go?
You can now see the Attach File button in the ribbon, you have uploaded a file and it appears to have worked, but where did it go? How can you retrieve it or delete it? There are two things you can do.
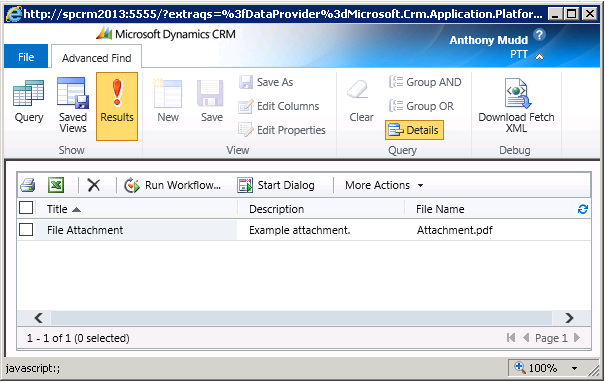
- You can use Advanced Find. In the Look For drop-down in the Advanced Dialog, select the Notes entity and click the Results button in the ribbon. All of the notes in the system that you have permission to view will be returned.
- You can add the notes field to your form by customizing the form. In the entity navigation, go to Customize > Form. In the customize form dialog, click the Insert tab and then the Notes button in the control section.
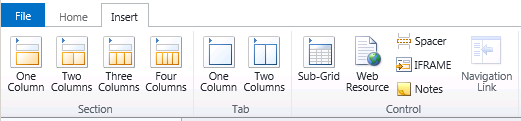
- This will add a Notes field to the form that will allow you to view and manage attachments on an item. It isn’t very pretty to look at, and it takes up far too much real estate in my opinion, but it is free and easy to add to an out-of-box form.
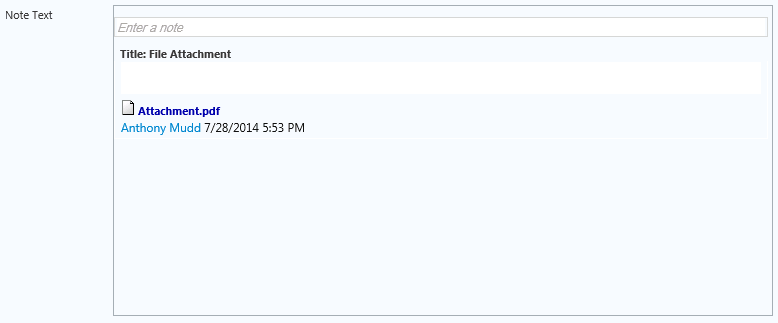
When you click on the attachment from the Notes control, you are given a dialog that allows you to modify the attachment properties, download a copy of the attachment or delete it.
A Customized Approach
Uploading
In my case, the out-of-box solutions that I described above were not acceptable. We needed to create a custom upload form and handle everything programmatically. Since CRM does not allow for code-behind outside of plugins, the first issue was getting an upload to work through the client. Fortunately, HTML 5 has greatly improved the options for client-side file management.
Place a standard HTML control on your web resource form:
<input type="file" id="fileUpload" style="width:500px;" />
When your form is submitted, get the file from the file control using the files collection. Once you have it, you can use the HTML 5 FileReader object to read the contents of the file into a Base64 string which is how CRM stores the file data in the Annotations entity.
var file = (document.getElementById('fileUpload')).files[0];
var reader = new FileReader();
reader.onload = function () {
     SendFile(callbackFunctionName, callingWindow, reader.result);
}
reader.readAsDataURL((document.getElementById('fileUpload')).files[0]);
The readAsDataURL method is called to read the data into a Base64 encoded string. The FileReader object has an onload event handler which fires once the file has been completely encoded. You can then take the encoded file (reader.result in the above example) of the file reader and do whatever you want with it. In my case, the result was then passed in as input on an Ajax request that was then picked up by server side code running in a CRM plugin.
Annotation Entity Creation
Once you have the Base64 encoded file in the plugin, you can then save it as an Annotation. The encoded file is added to the documentbody property of the Annotation entity. Get the ID of the new Annotation that you create so that you can associate it to your intended entity item.
using Microsoft.Xrm.Sdk;
// create new annotation
Entity newAnnotation = new Entity("annotation");
newAnnotation.Attributes["subject"] = "Attachment.pdf";
newAnnotation.Attributes["documentbody"] = Base64EncodedFileStringHere;
newAnnotation.Attributes["mimetype"] = @"text/plain";
newAnnotation.Attributes["notetext"] = " Attachment.pdf";
newAnnotation.Attributes["filename"] = " Attachment.pdf";
Guid annotationID = service.Create(newAnnotation);
Entity Relationships
You can then associate the newly created annotation back to your entity by using this code.
using Microsoft.Xrm.Sdk;
// associate the annotation with the entity
Relationship relationship = new Relationship("yourentityname_Annotations");
EntityReferenceCollection relatedAnnotations = new EntityReferenceCollection();
relatedAnnotations.Add(new EntityReference("annotation", annotationID));
service.Associate("yourentityname", annotationID, relationship, relatedAnnotations);
Permissions
It is important to note that the Annotations entity will need permissions set for existing users and teams if they are not administrators. You can do this by changing the “Note” entity permissions under the Core Records tab of the Security Role window.