


In Dynamics 365, it is common to extend the application’s capabilities to perform specific actions based on complex business logic. The most common way to do this is by utilizing JavaScript Functions in a web resource file.
Let us look at how we can develop custom JavaScript code to navigate between different forms in Dynamics 365 based on certain conditions.
Using JavaScript on Dynamics 365 Forms
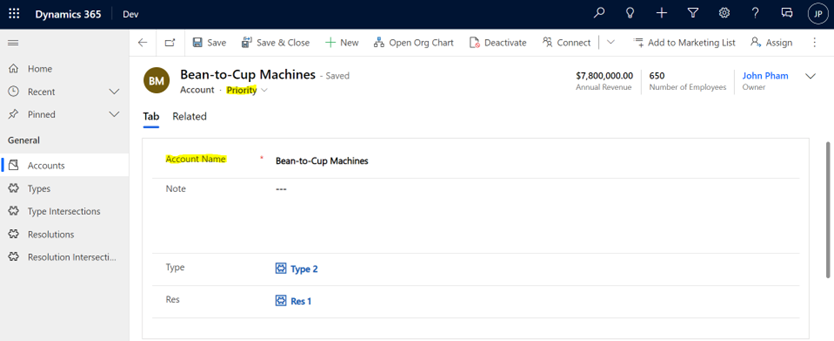
In our scenario, we want Dynamics 365 to display a specific Form based on the Account Name field on the Account Entity. If the Account Name meets our condition, we want to display a specific Form. Otherwise, the Form will display the System Default.
Code Snippet
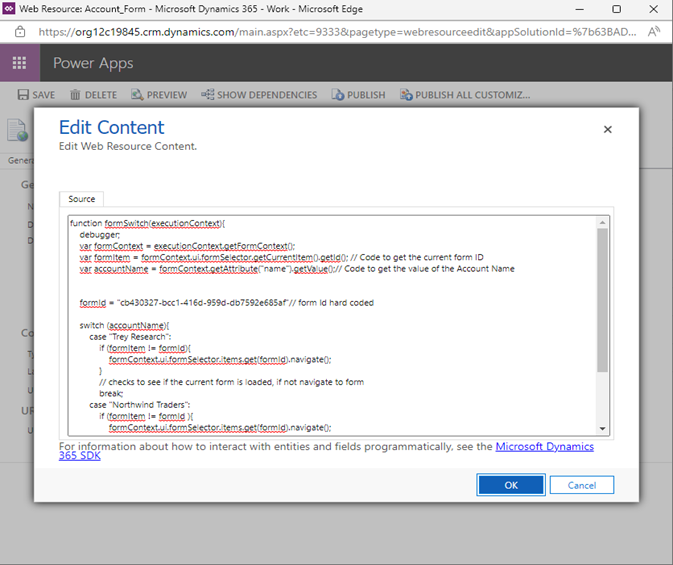
Here we have a JavaScript code snippet on how we can achieve this. Let us break down the code line by line.
Creating a Function
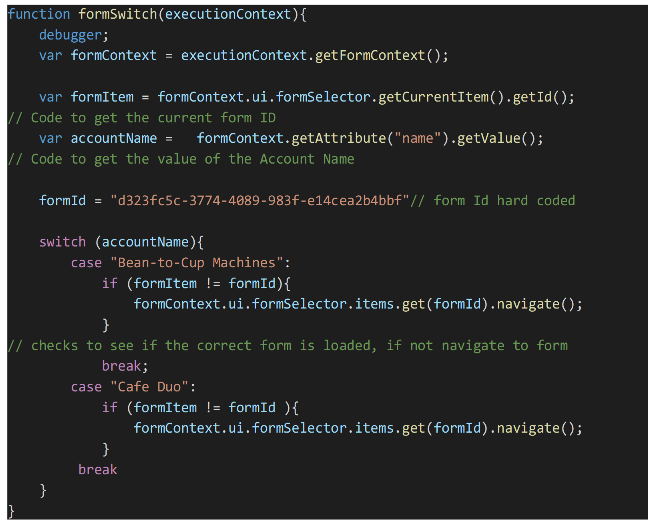
We will first start by looking at the function statement. For this function, we have named it formSwitch, and we are passing the executionContext parameters. The execution context defines the event context in which your code executes. We then define the formContext as a variable. When working with JavaScript on Dynamics 365 forms, this standard code should be used in your JavaScript Function.

Form ID and Attribute Value
After we have added our standard code, we then define a variable to get the current Form Id using the getId method. We also use a line of code to get the attribute value of our variable using the getValue method. In this case we are using the name field attribute.

In this line of code, we associate formId to the Form Id we want our JavaScript function to navigate to.
![]()
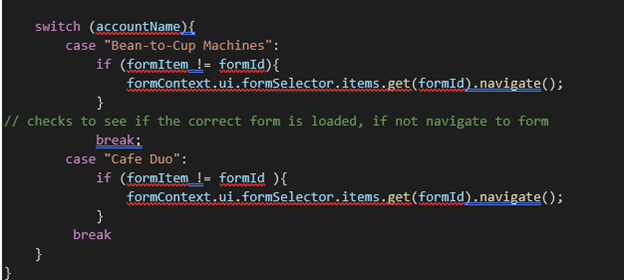
Switch Statement
Once all our variables are defined, we’ll tie everything together in a switch statement using accountName as our expression. In our switch statement, we included an If statement to check and see if our intended Form is loaded. If it is not loaded (formItem != formId), our JavaScript function will navigate to the specific form we have identified (formId) using the navigate method.
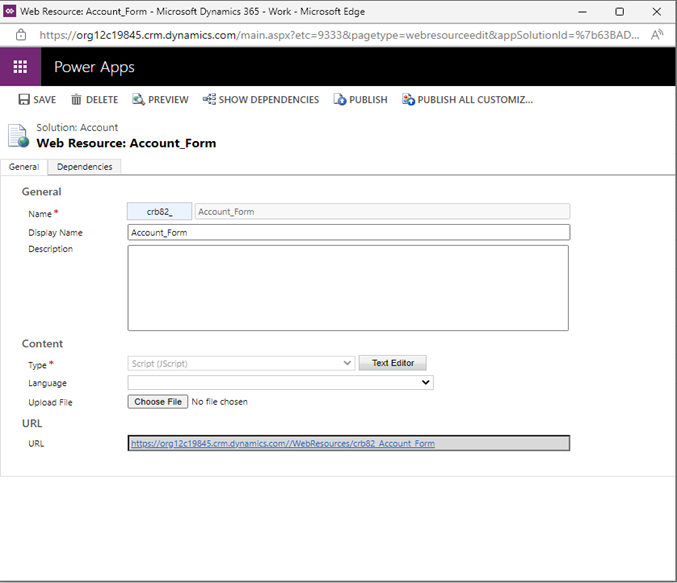
Web Resource and Form Properties
Once code is complete, create a Web Resource file with your code. Select Type as Script(Jscript) and use the Text Editor to paste your code.
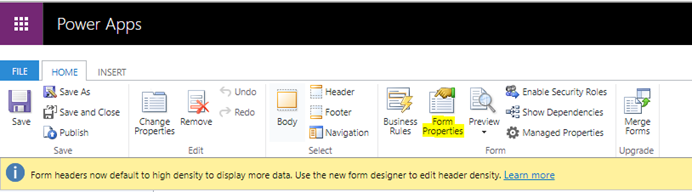
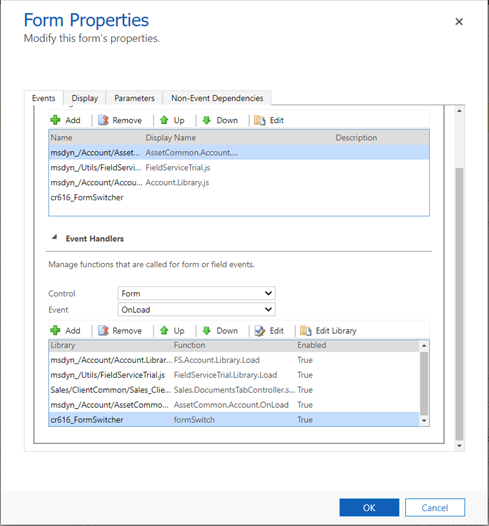
From your form builder, add your Web Resource file to the Form Properties on your Account Form. Once Added to the Form Properties, add your Web Resource file in the Event Handler on an Onload Event. Include your function name, and check both boxes. Be sure to Save and Publish All Customizations.

Additional Resources
Conclusion
This blog explains how to extend Dynamics 365 capabilities with JavaScript Functions to navigate to different Forms based on an attribute value. The code snippet is broken down line by line with an explanation on what the code is doing and can be scaled up to handle complex scenarios. Lastly, the JavaScript Function and Dynamics 365 are tied together by deploying the code into a Web Resource on an OnLoad event. In a real-world scenario, it is a common business requirement for organizations to use different forms for capturing important information, whether it be based of Line of Business, Account Types, or even Types of Users. This guide can be tailored to accommodate any business needs.

