


Getting started with Power Apps Portals is simple; knowing how to customize the portal to your needs and requirements will require more guidance. This guide will take you through important links, tips, tricks, gotchas, and other information you will need to level up on your Power Apps Portals.
Getting Started
Here is the simple part I was talking about in the introduction. You will need a trial environment or your own environment with access to portals to follow these steps.
- Navigate to https://make.powerapps.com
- Click Create
- Select Portal from Blank
Reference: https://docs.microsoft.com/en-us/powerapps/maker/portals/create-portal
Portal Designer and Portal Management App
Two types of applications are created when Portal from Blank is selected; the portal and the portal management app, a model-driven app. To better customize your portal, since the designer is limiting, I have included resources such as the XrmToolBox for code editing and Liquid Language for access to server-side code.
Portal Designer
This is the WYSIWYG portion of the portal. Some of its capabilities include:
- Creating webpages and deleting a component
- Customizing page layout, templates, sections, colors
- Configuring forms, lists, iframe, image, text, breadcrumb
- Viewing the live site
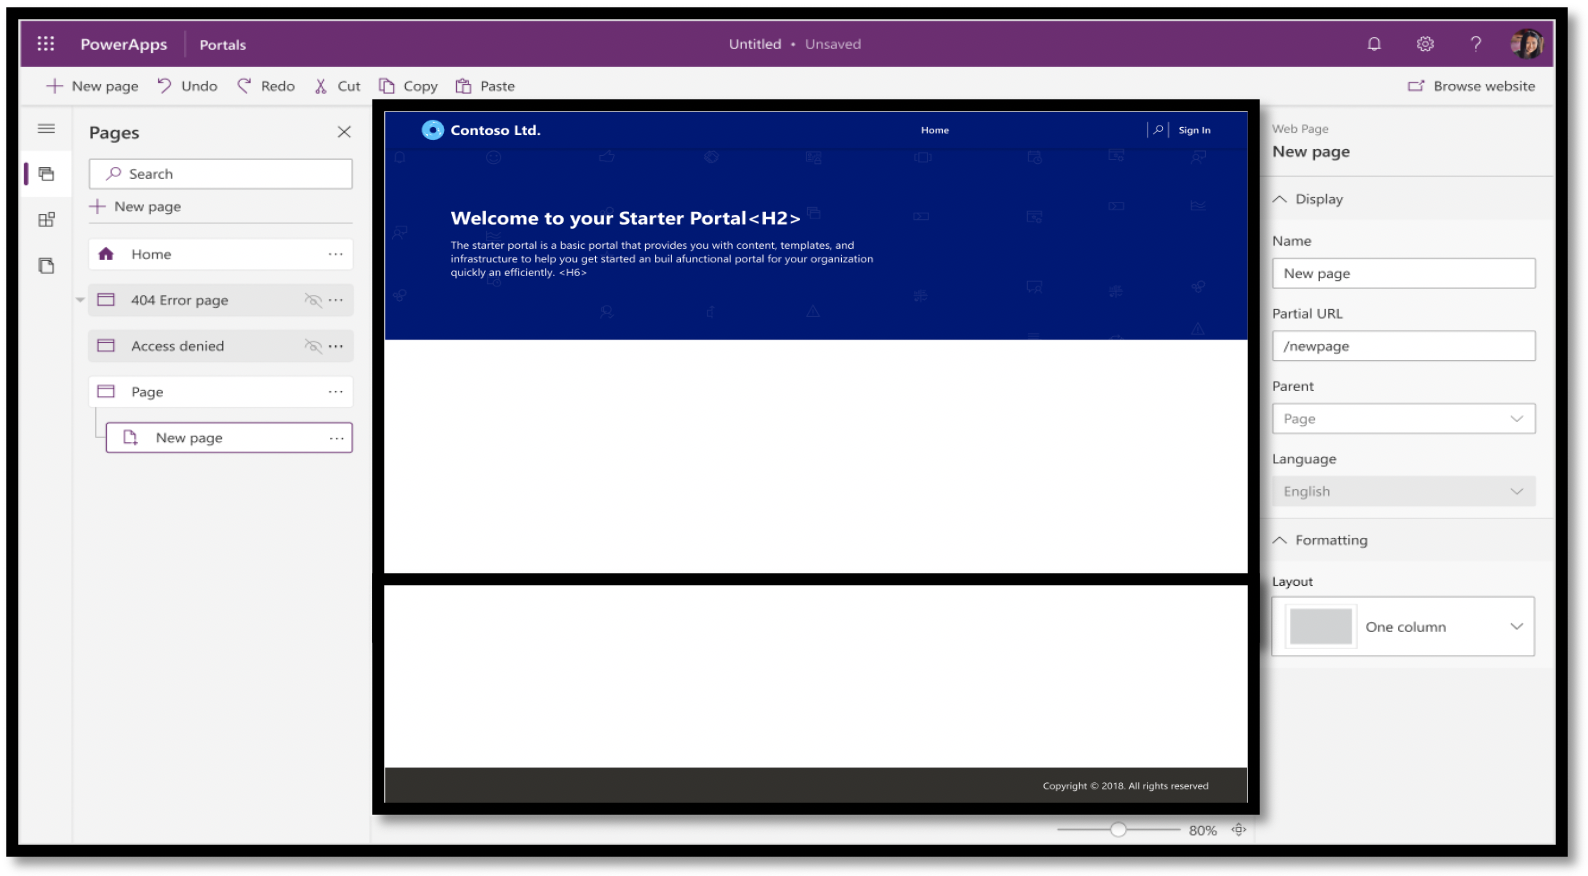
Reference: https://docs.microsoft.com/en-us/powerapps/maker/portals/compose-page
XrmToolBox
The portal designer is limiting your ability to fully customize your site. XrmToolBox has a plugin that will allow you to edit code attributes to your portal.
Download XrmToolBox https://www.xrmtoolbox.com/ to get started.
Plugin: Portal Code Editor
- Go into edit mode in the portal
- Select a webpage
- Select the Portal Code Editor plugin in XrmToolBox
- Connect your portal using the URL
- Select the webpage from the left column
- Make a code change
- Hit CTL+S to save
- Hit CTL+U to update the portal page
- Go back to the Portal
- Click Browse Website to see the changes
Liquid Language
Liquid is an open-source template language that can be used to add dynamic content to portals without needing direct access to the server-side code. Liquid can write scripts that take data from databases and create html on a webpage. Liquid can be categorized into objects, tags, and filters.
Below is an example of how to load a Power Apps entity by ID. If the entity exists, an entity object will be returned. If an entity with the given ID is not found, null will be returned.
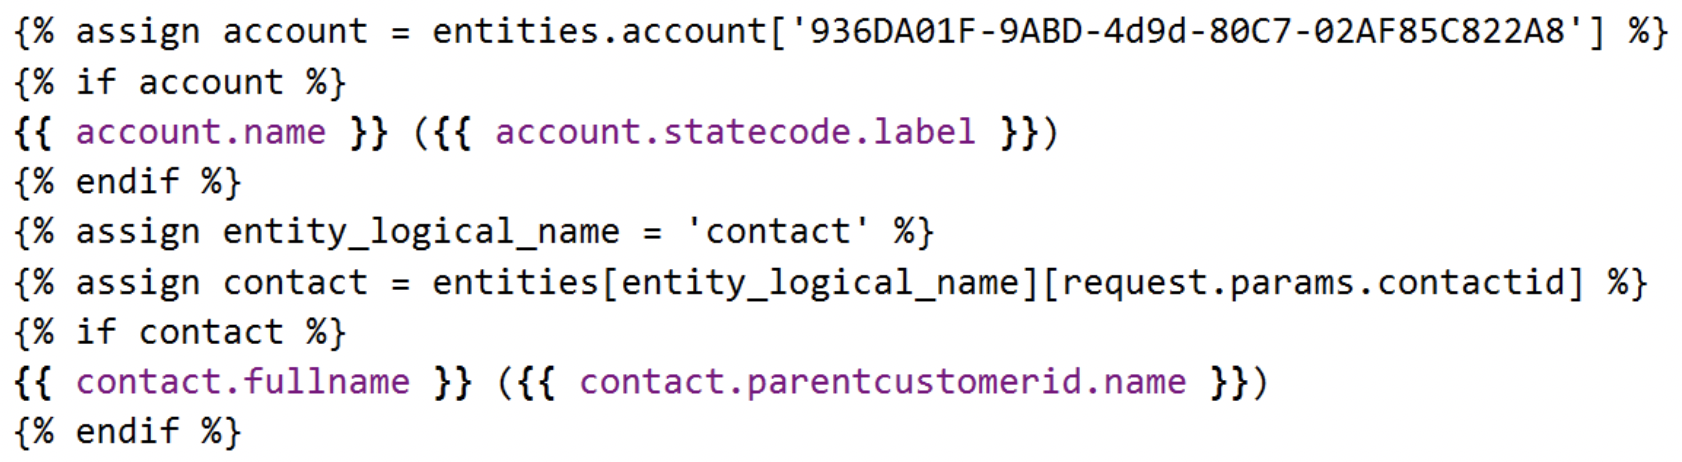
Reference: https://docs.microsoft.com/en-us/powerapps/maker/portals/liquid/liquid-objects
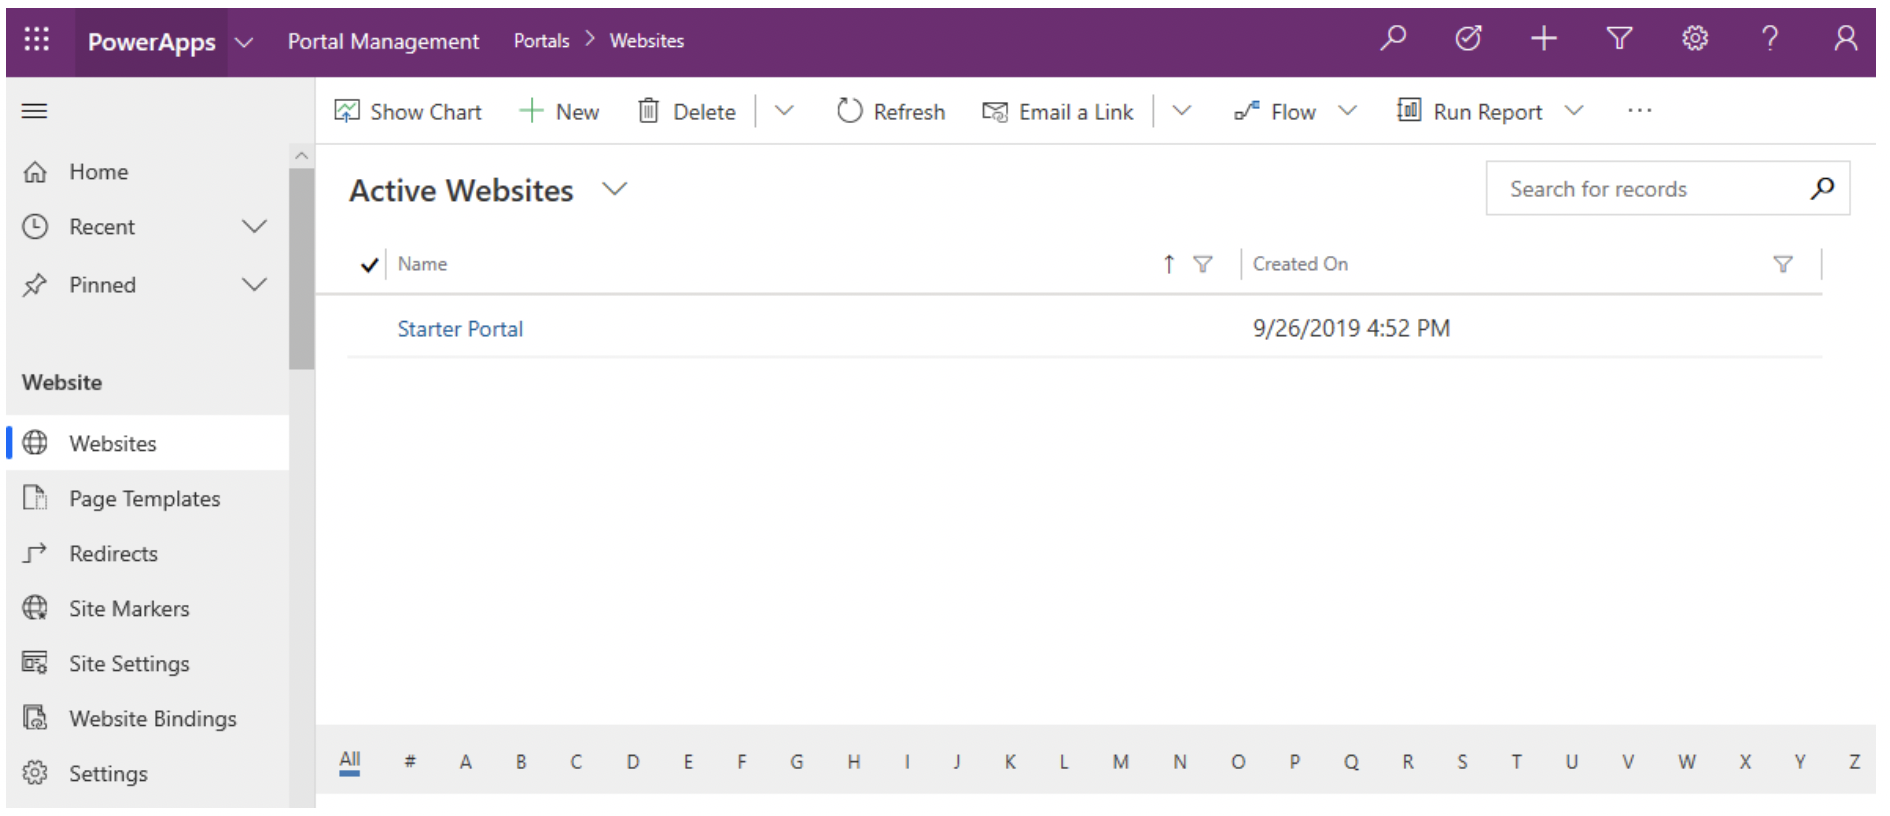
Portal Management App
The portal management app that is built alongside the portal app is your advanced configuration. This model-driven app will give you access to the below entities for portal configuration.
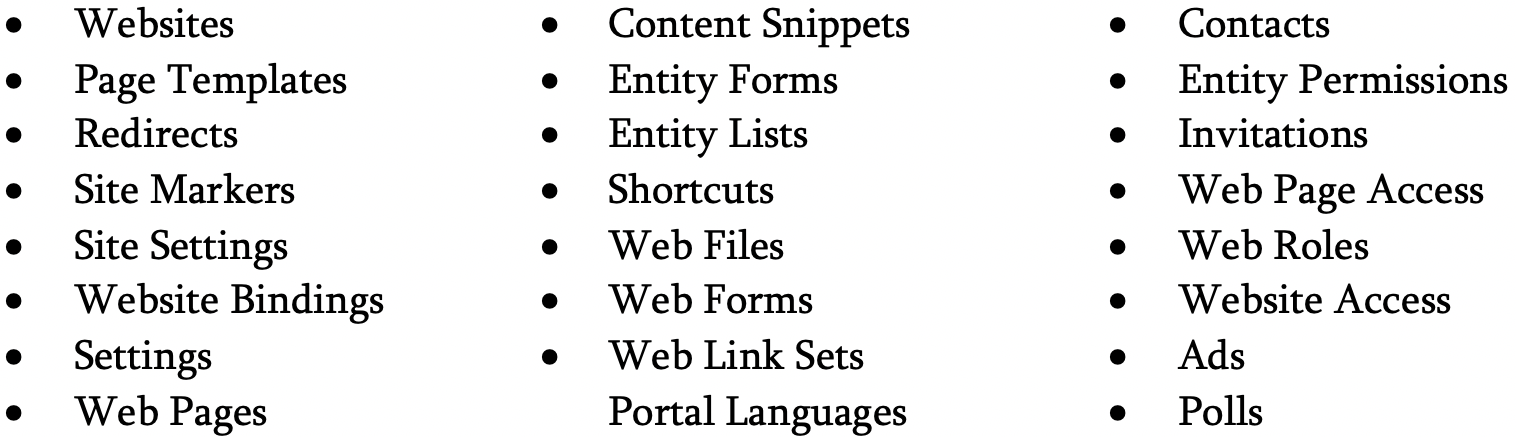
Reference: https://docs.microsoft.com/en-us/powerapps/maker/portals/configure/configure-portal
Authentication
There are several options to configure authentication for your portal. Local authentication will store users inside the contact record of the Common Data Service. External authentication will be handled by a third-party provider such as Yahoo! and Google. OAuth 2.0 can be configured to use Twitter, Facebook, LinkedIn, and Microsoft.
Reference: https://docs.microsoft.com/en-us/powerapps/maker/portals/configure/configure-portal-authentication
Configuration
There are two options to export your portal configuration data and migrate the configuration elsewhere. You can use the XrmToolBox Plugin called Portal Records Mover or you can download the Configuration Migration tool and following these instructions: https://docs.microsoft.com/en-us/powerapps/maker/portals/admin/migrate-portal-configuration
A few things to note if using the Configuration Migration tool:
- You’ll be able to import your existing configuration once you create a new portal app manually, this tool will not create a new one automatically.
- When this new portal is hosted, it is configured with all the web pages visible by default and requires manual removal of the unwanted pages.
- Code added separately is not exported and needs to be configured again.
- The export creates a reference in the configuration for forms and lists, but the entity is not imported directly. The related entities need to be imported into the environment before starting this process.
Admin Center
To access your portal’s admin center, find your portal under apps, click on the ellipses for your portal, click Settings, click Administration. This will give you access to your portal’s name, the type, changing your base URL, adding a custom domain name using an SSL certificate, ability to download a public key for Live Assist, diagnostic logging, enable maintenance mode, and even resetting your portal.
Reference: https://docs.microsoft.com/en-us/powerapps/maker/portals/admin/admin-overview
Other Notes:
- Once you have selected a form to be displayed on your portal page, the quick view form might appear on your live site instead.
- When writing HTML code in Edit mode, the code is saved but deleted the id from the HTML elements. This works fine when completed in play mode as an administrator.
- When a reference is created on the entity form directly from the Edit mode, it throws an error. When the Create New mode is selected to attach the form, the newly created form must be selected again under the already existing tab.
- Sometimes the portal reloads the code editor when in Edit mode, this removes the changes that have not yet been saved.
Licensing
- External users (authenticated) will be $200 for 100 logins/month.
- External users (anonymous) will be $100 for 100,000 web page views/month.
- Internal users can access portals using a PowerApps per app or per user plan as per above.

