


Assumptions
This write up is executed in sequence in that if you jump to a section, it assumes you have completed the parts before it. This write-up assumes the following;
- You have a Power Apps tenant with administrative privileges.
- For the source control and CI/CD sections;
- An Azure DevOps project configured with the Power Apps Build Tools Extension.
- 3 Power Apps environments; development, staging/build, and production.
Executive Summary
This write-up is for anyone looking to learn how to automate the deployment of their Power Apps or Dynamics solution customizations. It starts out walking the reader through setting up a new environment since, for this exercise, you’ll need three of them. It also takes some time to demonstrate setting up a proper Power Apps solution, making sure to include a unique publisher prefix and only what components and subcomponents we need to satisfy our requirements. In other words, our solution stays clean and manageable. If you have already done these things, and have three environments ready, feel free to proceed to the section “Getting our Solution into Source Control.”
Create the New Environment
-
- Create a new environment.
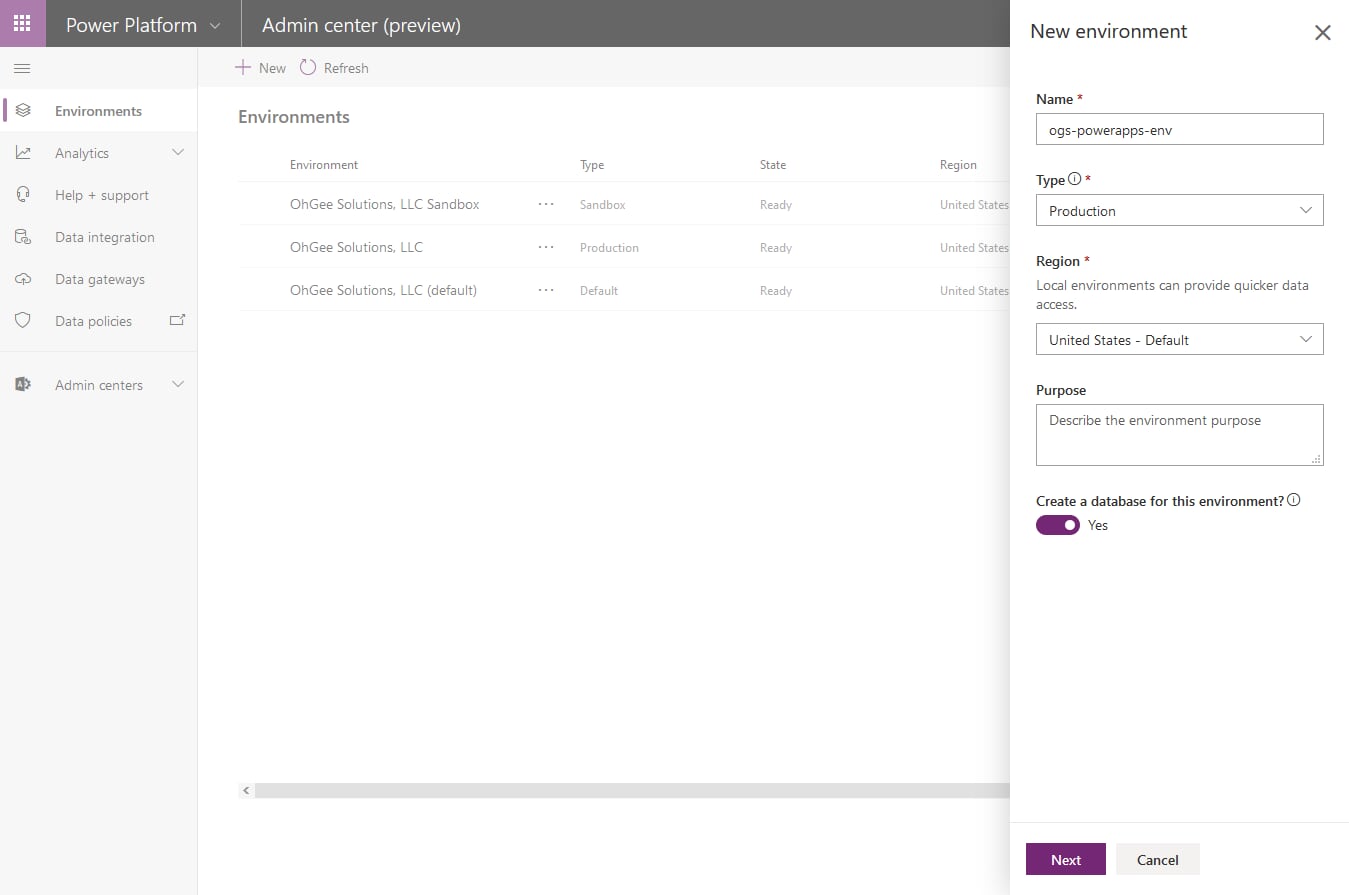
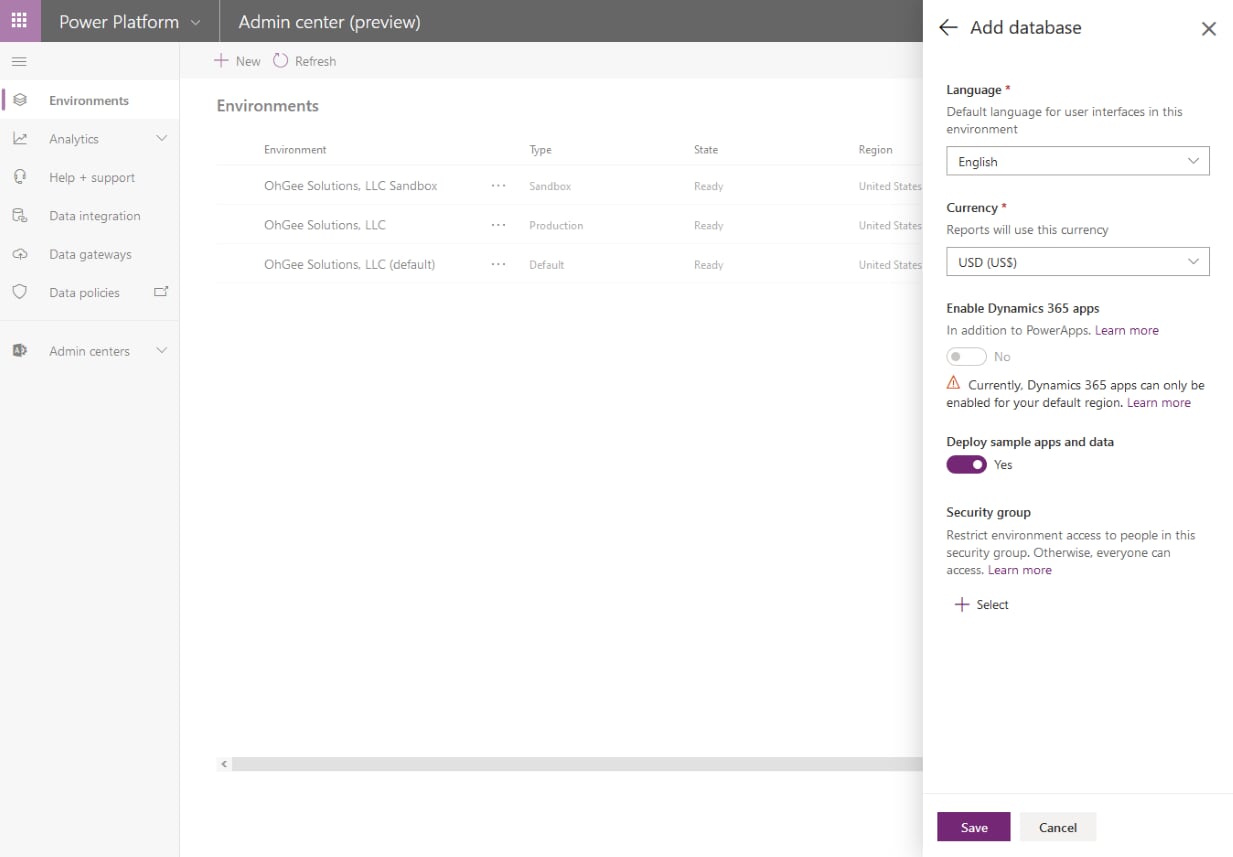
- Create a new database in the process. Notice I checked the “Deploy sample apps and data” for this new environment:
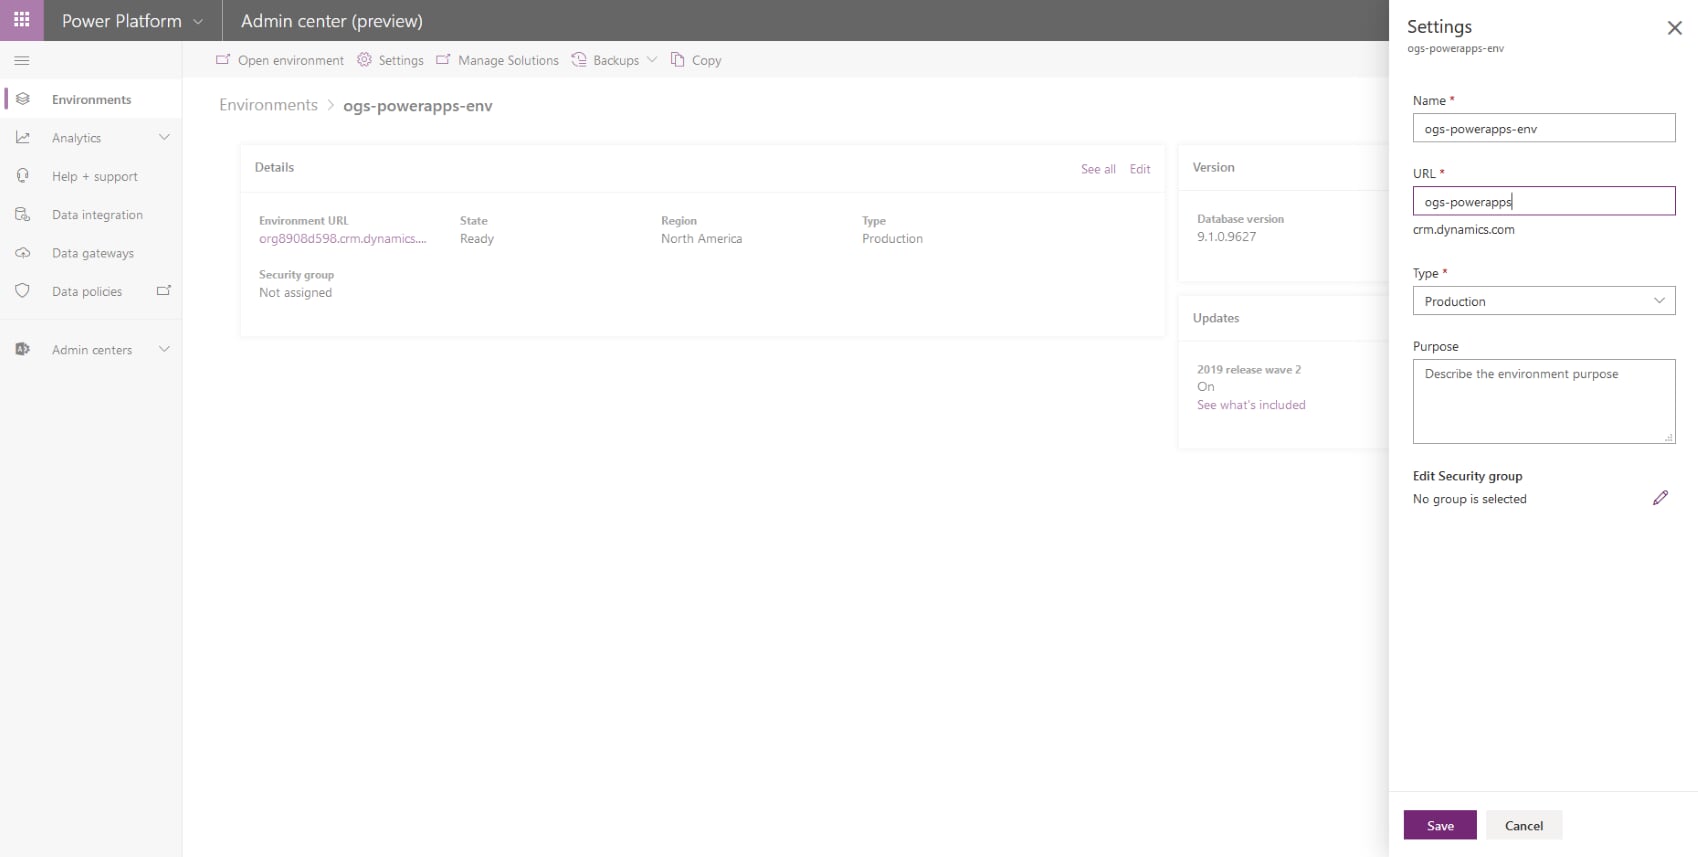
- Let’s change the Environment URL now to something that looks a little nicer than the organization’s internal name that was set up automatically by the system. Click on the new environment from the list, and you should be taken to a page where you can edit the URL:
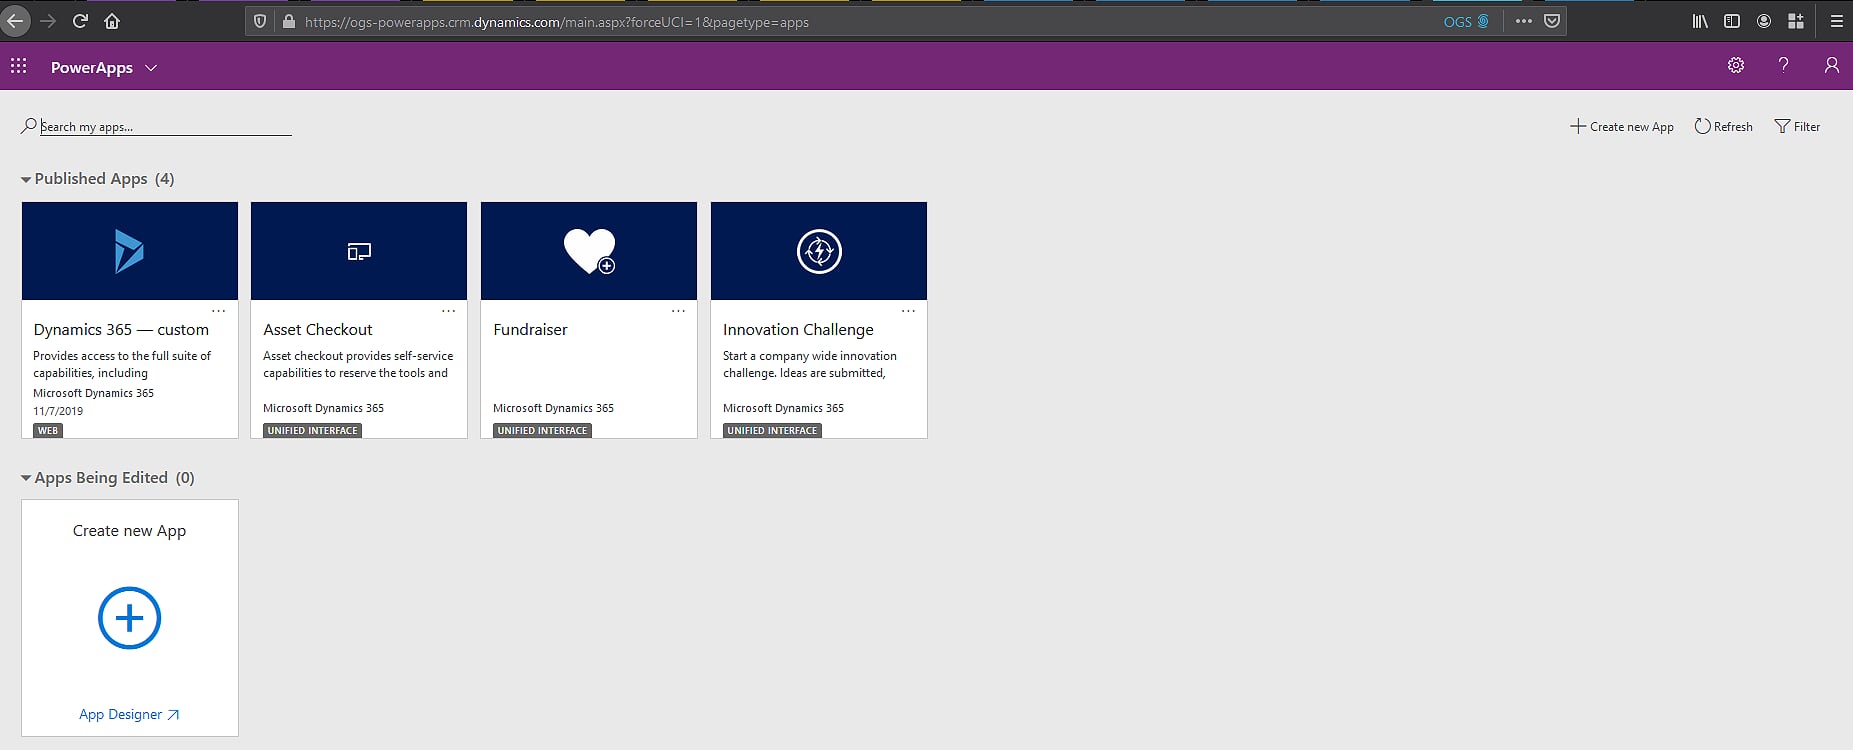
- Click on the link for the environment, and you will be taken to the Power Apps landing page for that environment. It should look something like this, except you may or may not have the sample apps installed:
- Head over to make.powerapps.com, and let’s look at what we have there. You can get here by using the menu in the top-left corner next to the word Power Apps.
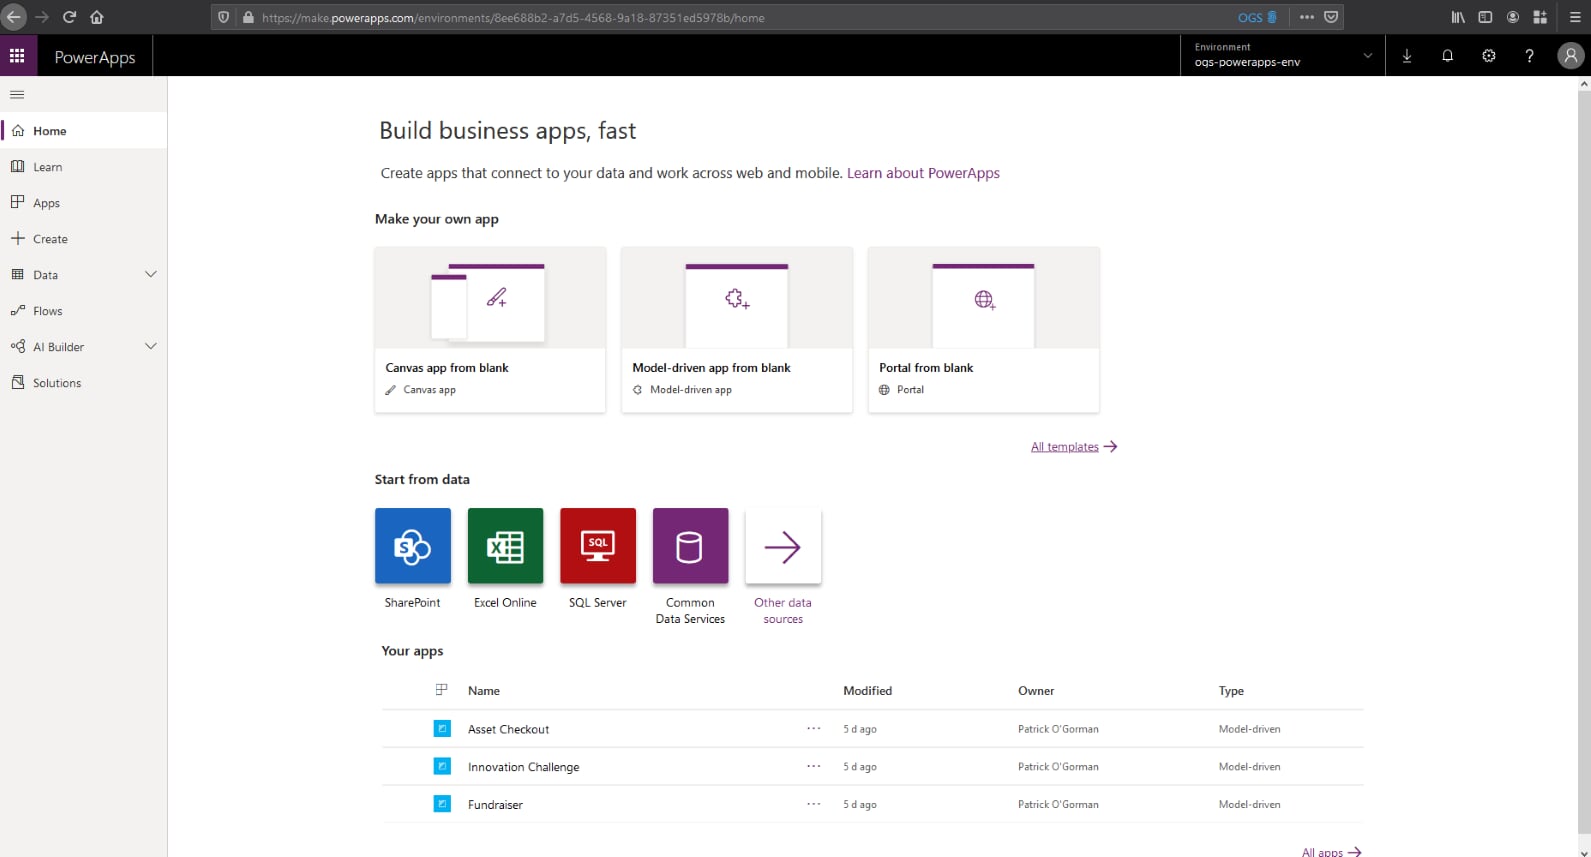
Create a New Publisher
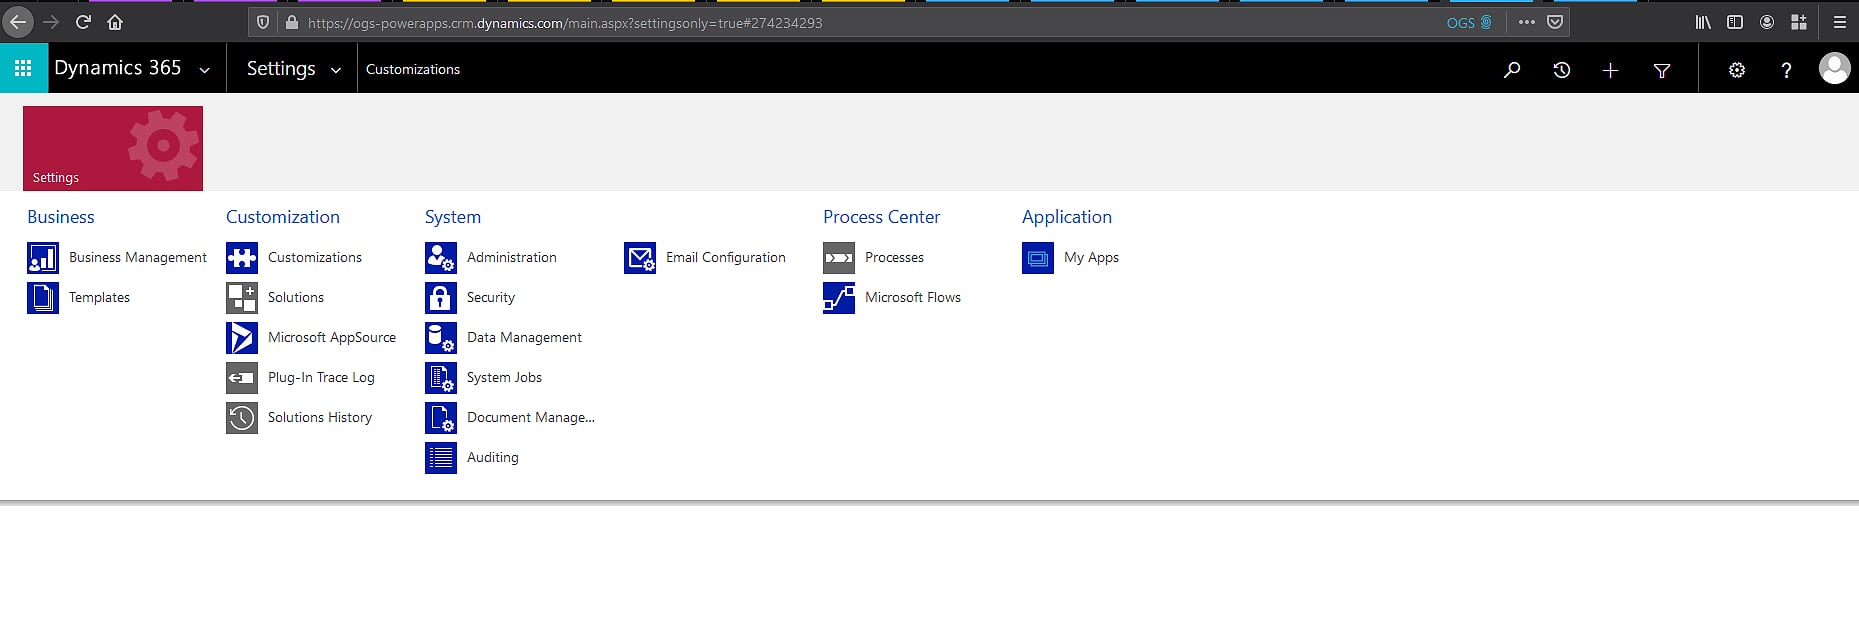
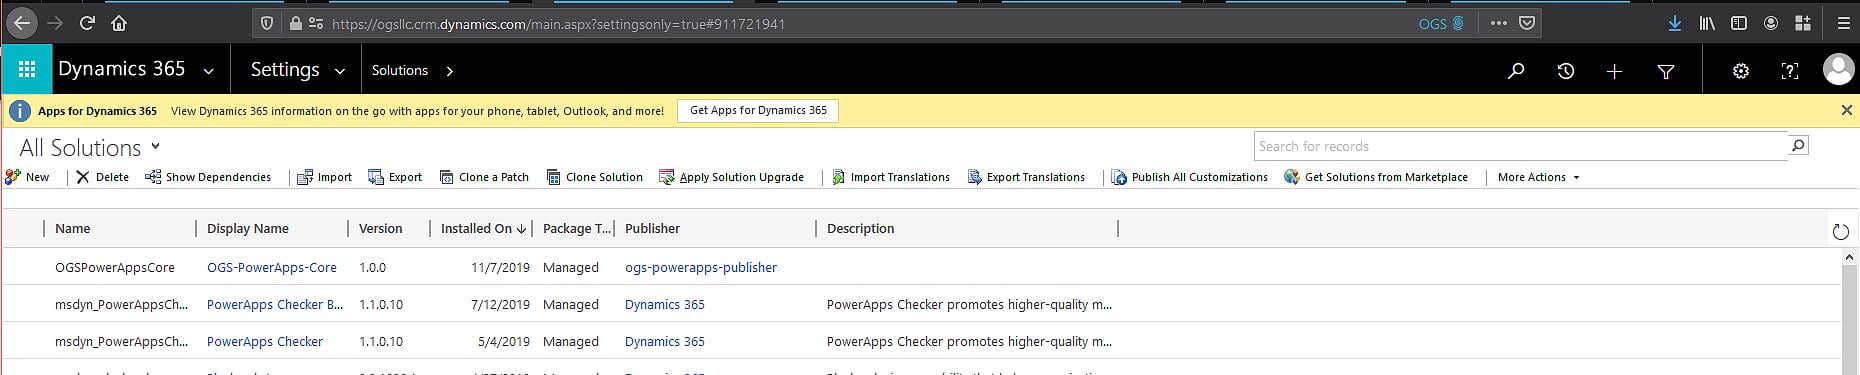
- The first thing we want to do is build our own solution…and as many of you know, you’ll want your own custom prefix on your solution items. As far as I know at this time of this writing (11/7/19) Microsoft has not added a new user interface for adding publishers so that we can customize our prefix. That said, use the cog in the top right to open the Advanced settings window. You should see a window like this:

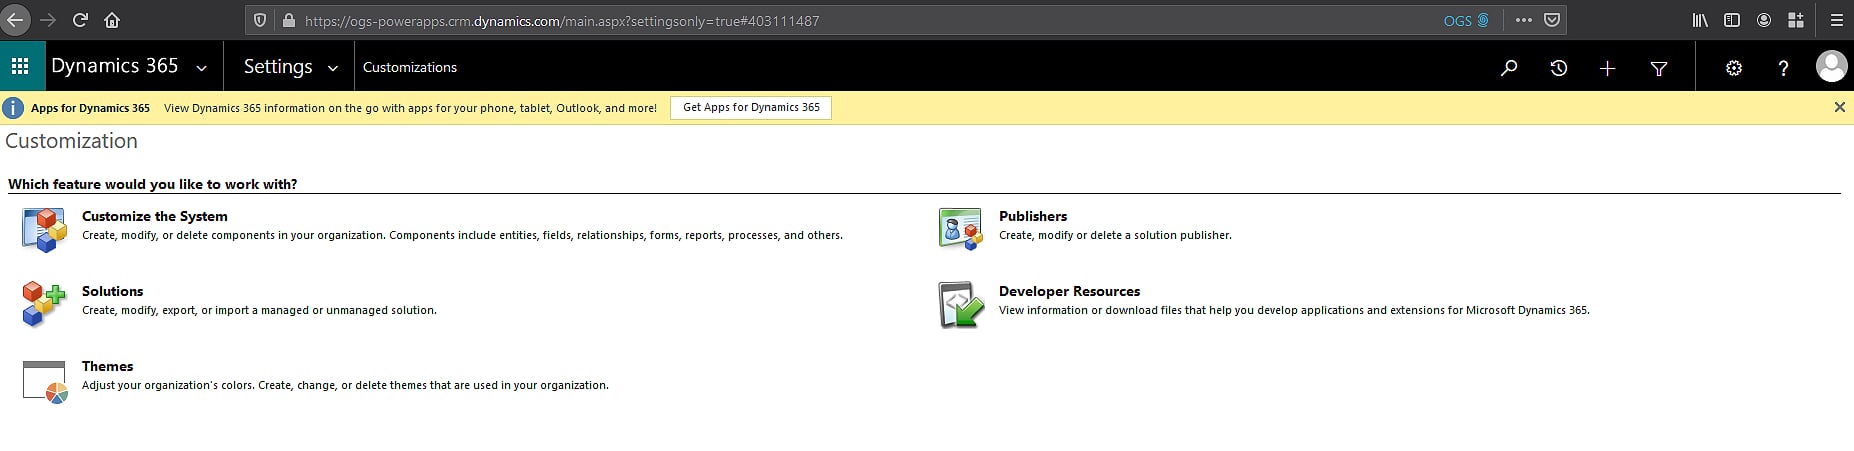
- Using the Settings dropdown, select the Customizations menu item.
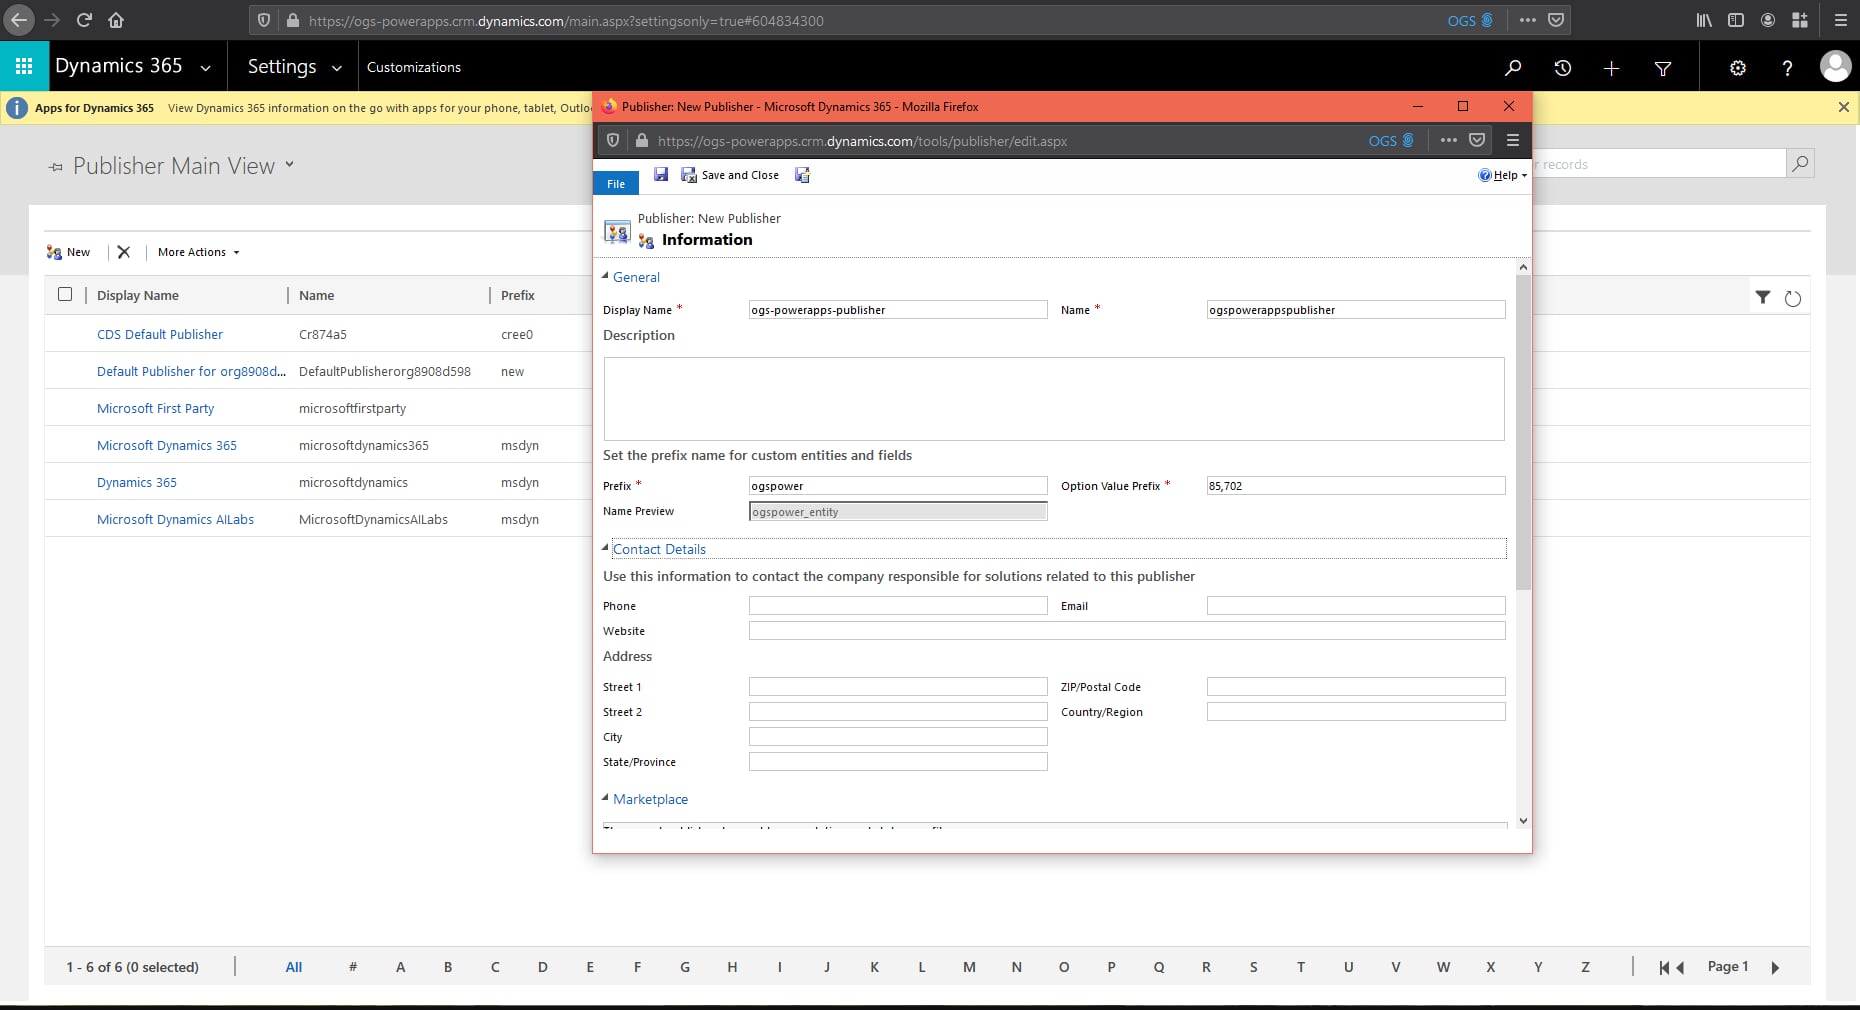
- Select Publishers on the Customizations page
- Click New on the Publisher page and fill out the Display Name and Prefix on the new Publisher dialog. The Name field should auto-populate based on what you put in the Display Name. Click Save and Close to take you back to the Publisher page.
Create a New Solution
- Back to our make.powerapps.com page, let’s select the Solutions menu item on the left.
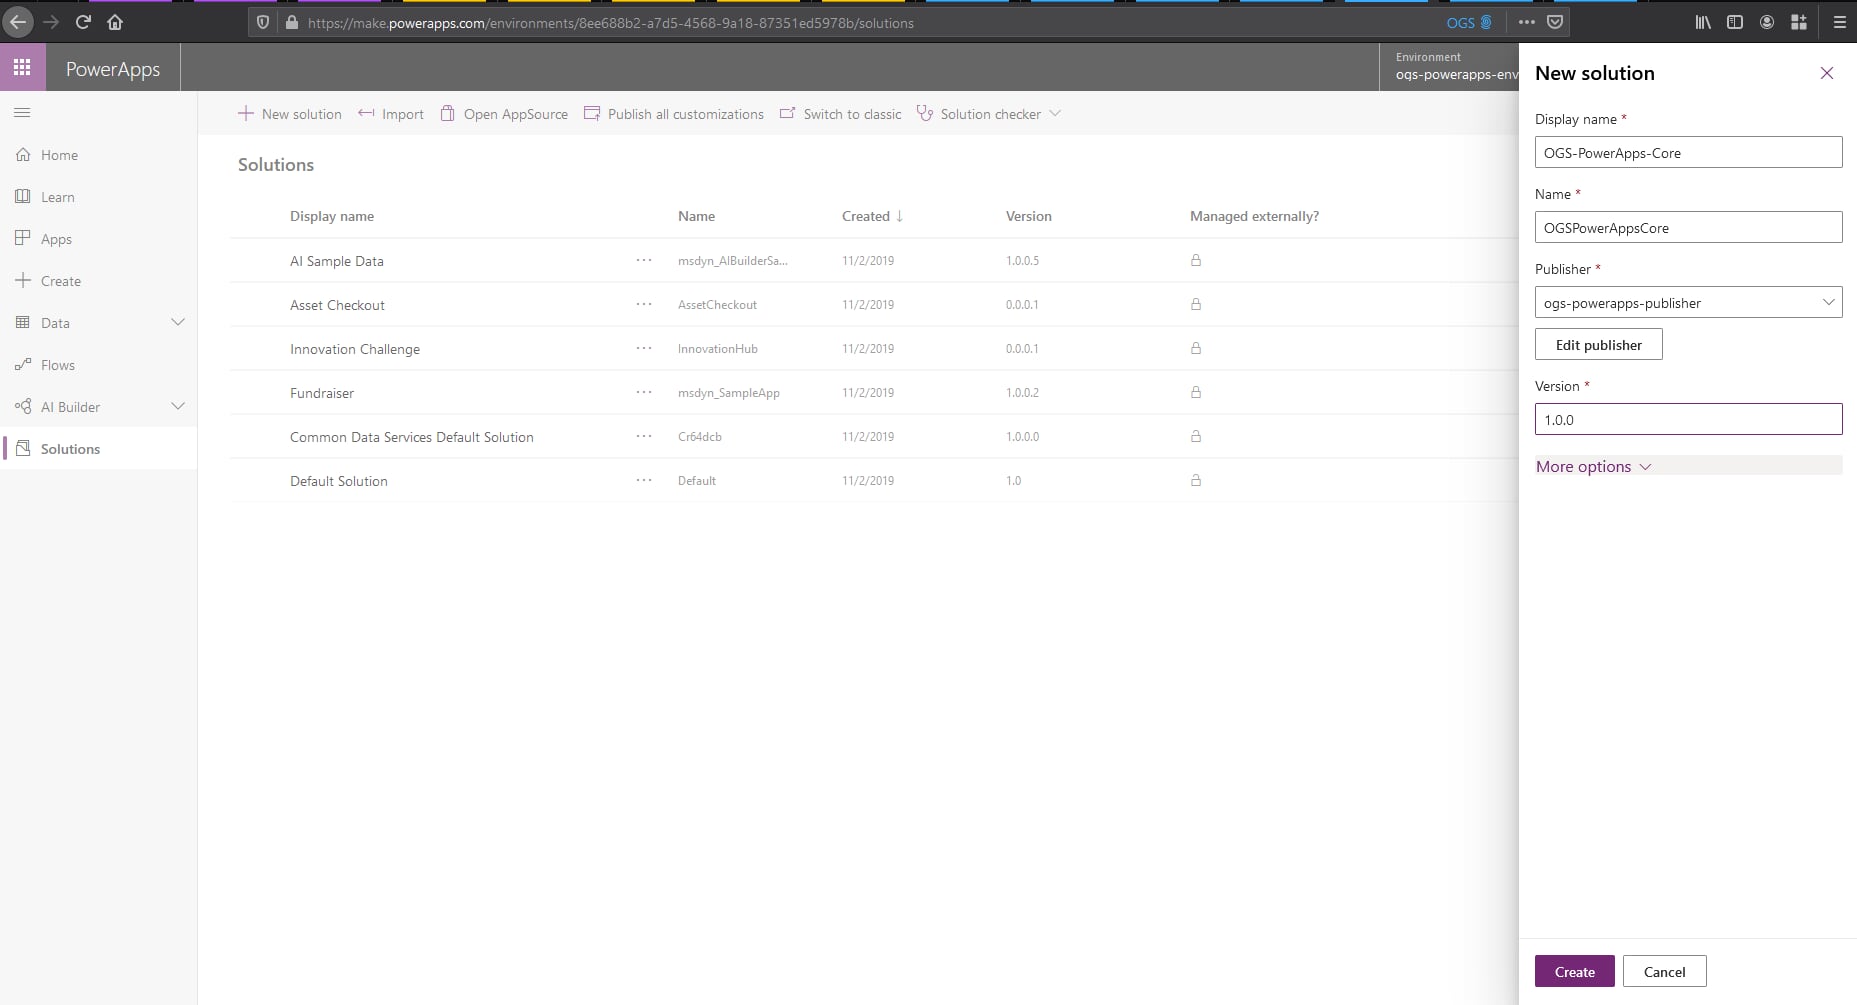
- On the Solutions page, click the New solution button and provide a Display Name and Version for the new solution. Select the new Publisher we just set up in previous steps. Once again, the Name should auto-populate. Click Create.
- Open the solution by clicking on its Name in the solution list.
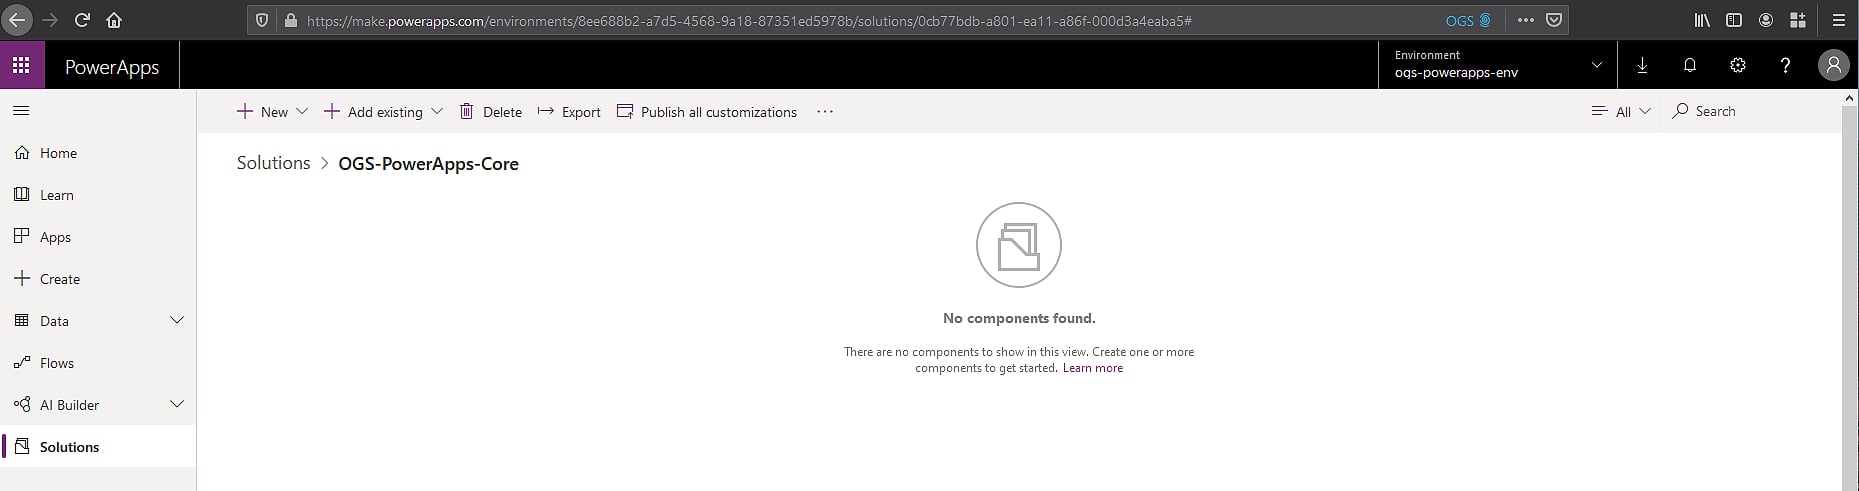
Create a New Custom Entity
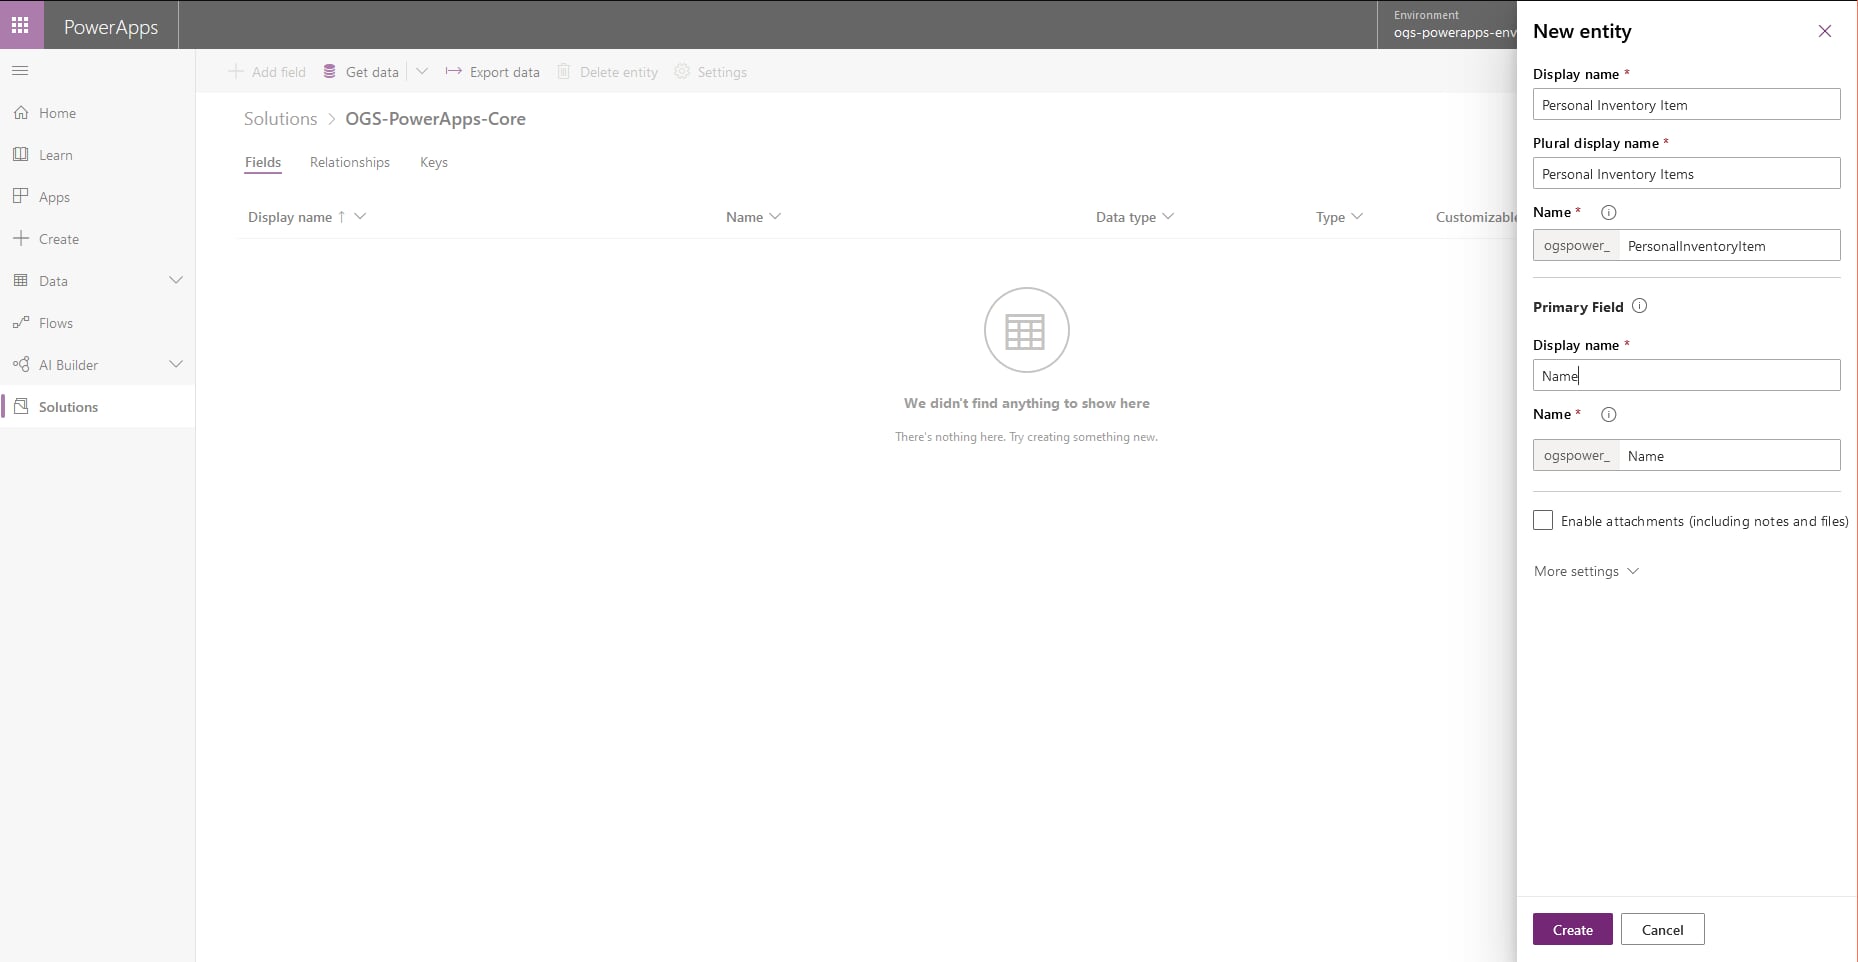
- Since you’ll undoubtedly see an empty solution, let’s start simple and add a custom entity. Click New so that you see the dropdown menu. Then select Entity. Fill out the Display Name and take note of the Publisher prefix.
Add an Out-of-Box Entity to the New Solution
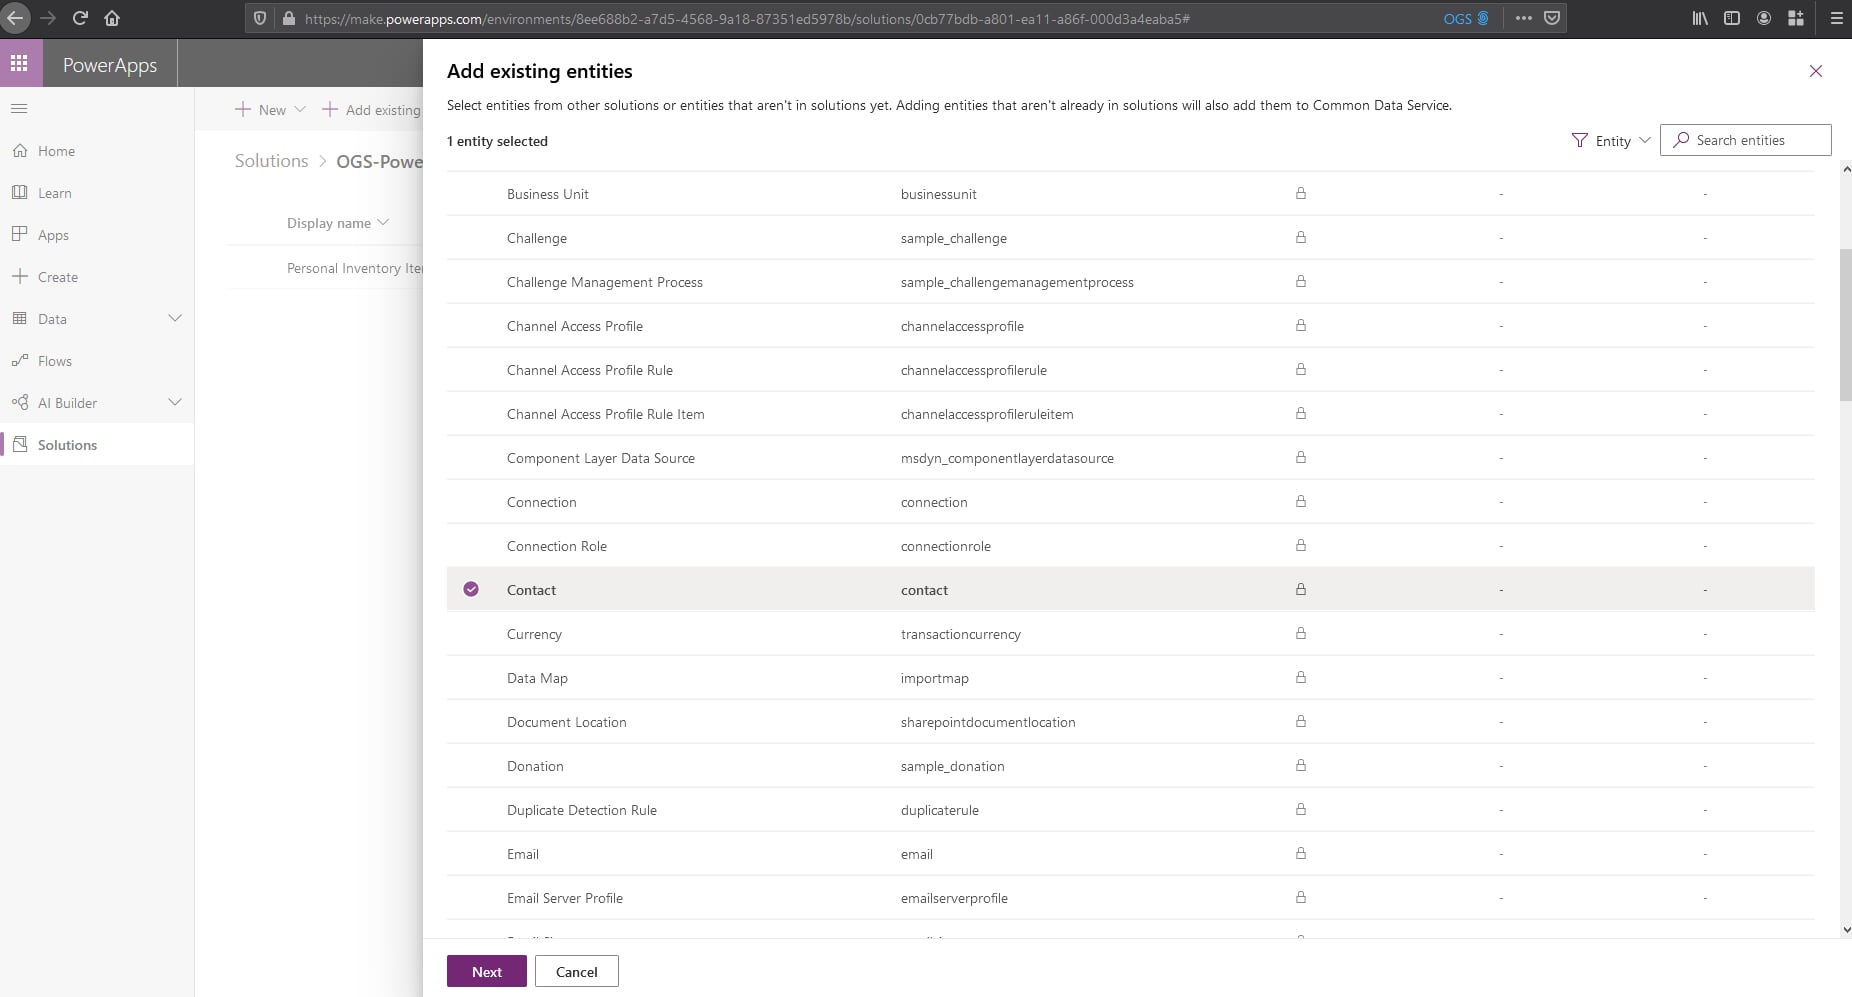
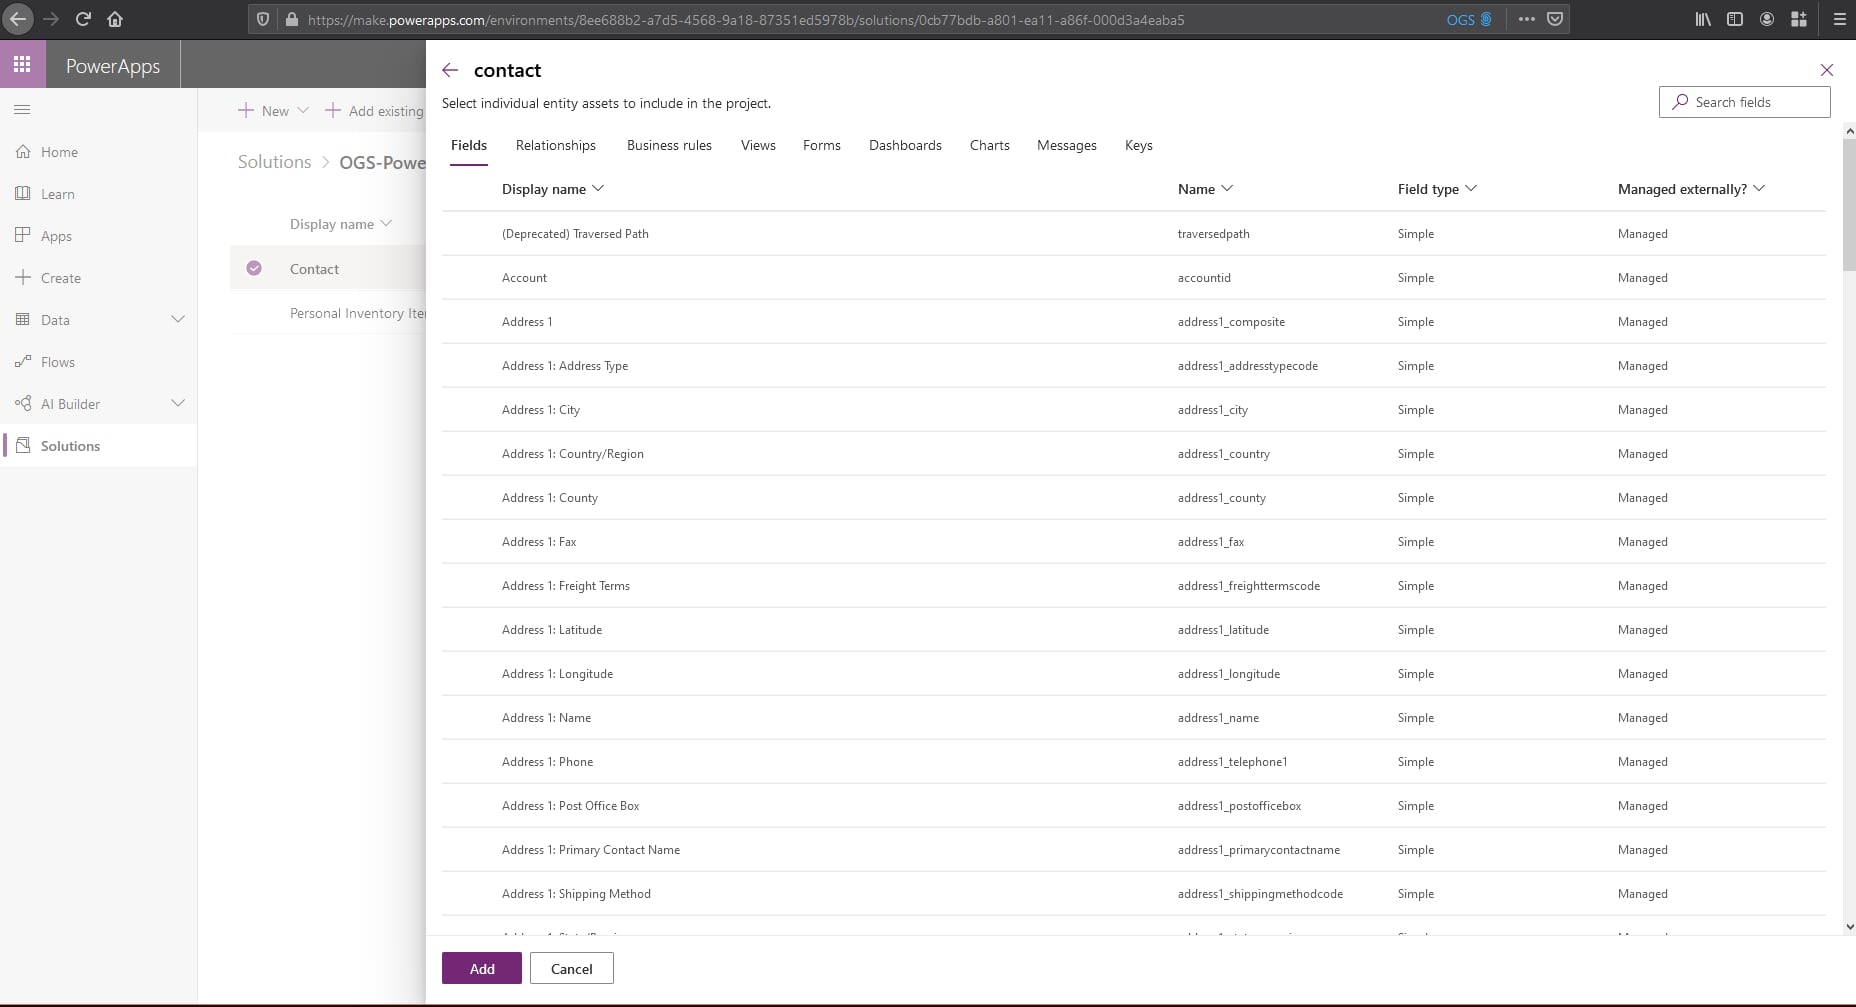
- Once that Entity is created, click on it to open it, and you should see a number of out-of-box fields that were automatically created with your new Entity. Now go back to the solution. Let’s take it a step farther and see what happens when we add an out-of-box entity that is deployed when we create our database. Click Add existing from the solution home page and select Entity. Please scroll down and find Contact, select it, and click Next.
- This next page may get a little confusing. It asks what components you want to include, and if you wish to include the entity metadata. For now, let’s not select any parts and just add the Contact entity. You can always go back and add those components using the Add subcomponents button at the top of the Solution inventory page when you have the entity selected. For now, though, I just want to create a new form for the Contact entity so Cancel out of this.
- Open up your Contact entity in the solution by clicking on it. Then, select the Forms tab. From there, click the Add form menu and select Main Form from the dropdown.

- You should have a window open up with the Contact form designer ready to go.
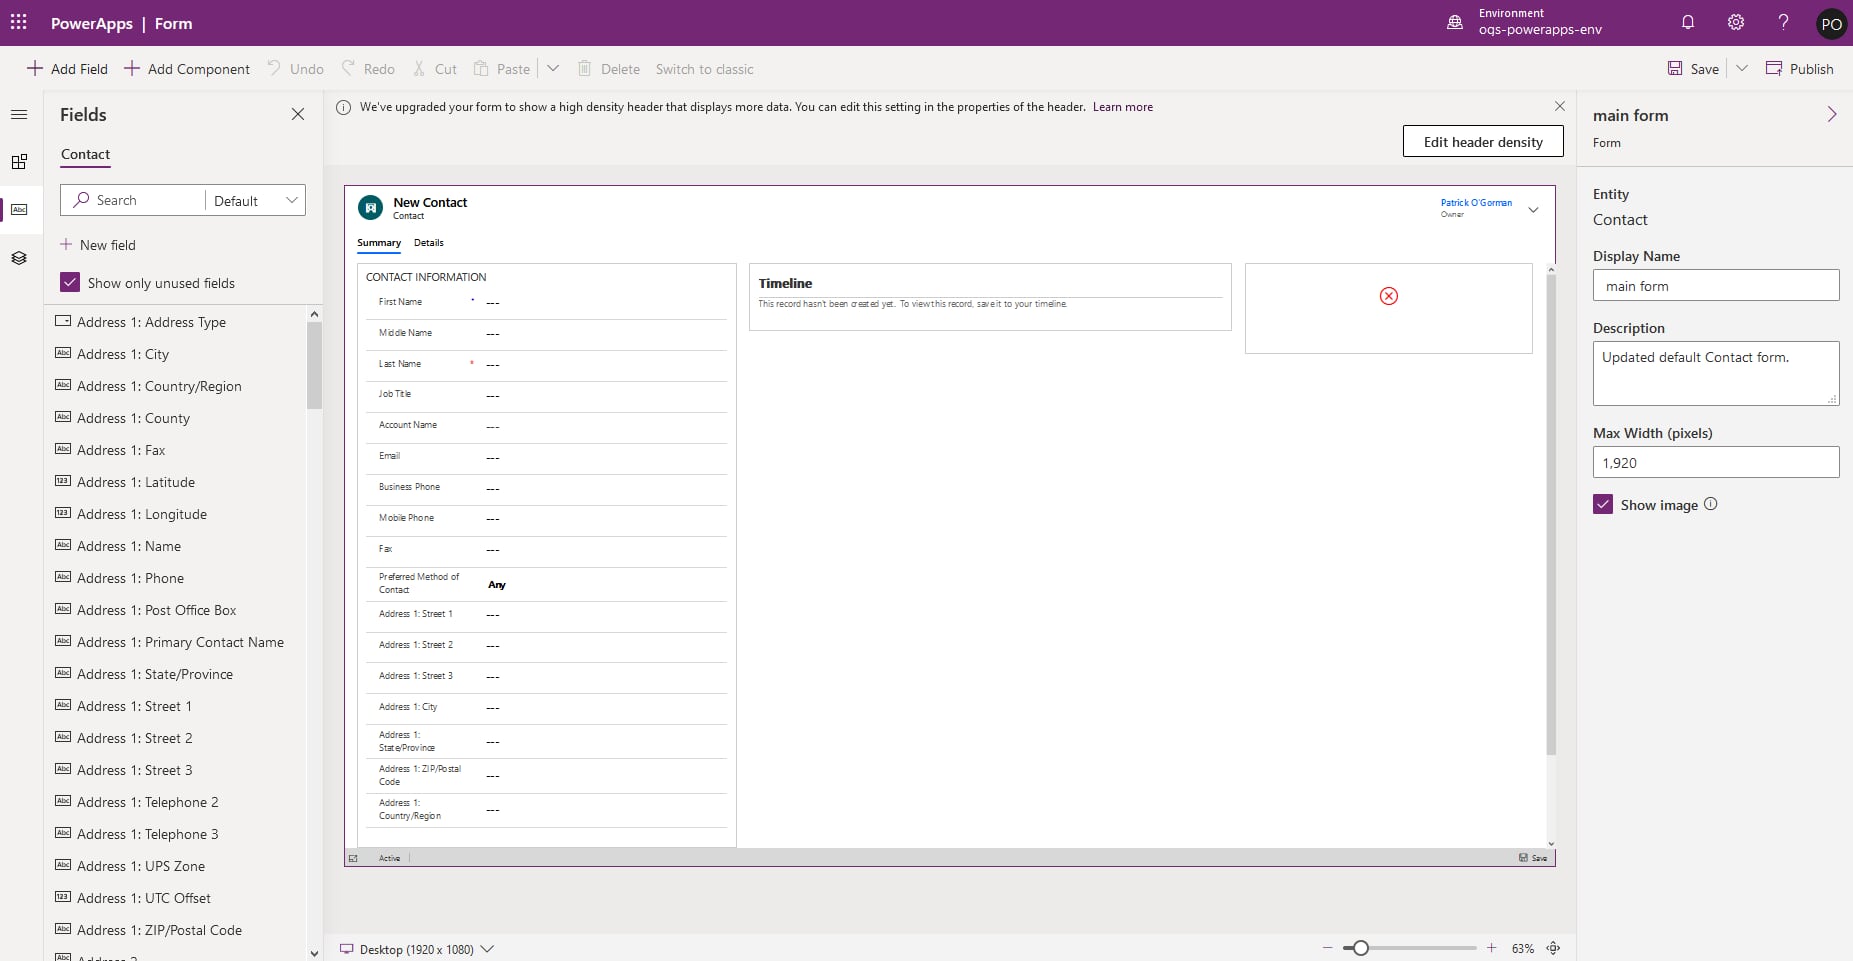
- Make some changes to this form and consider changing the Display Name of the form. Save it.
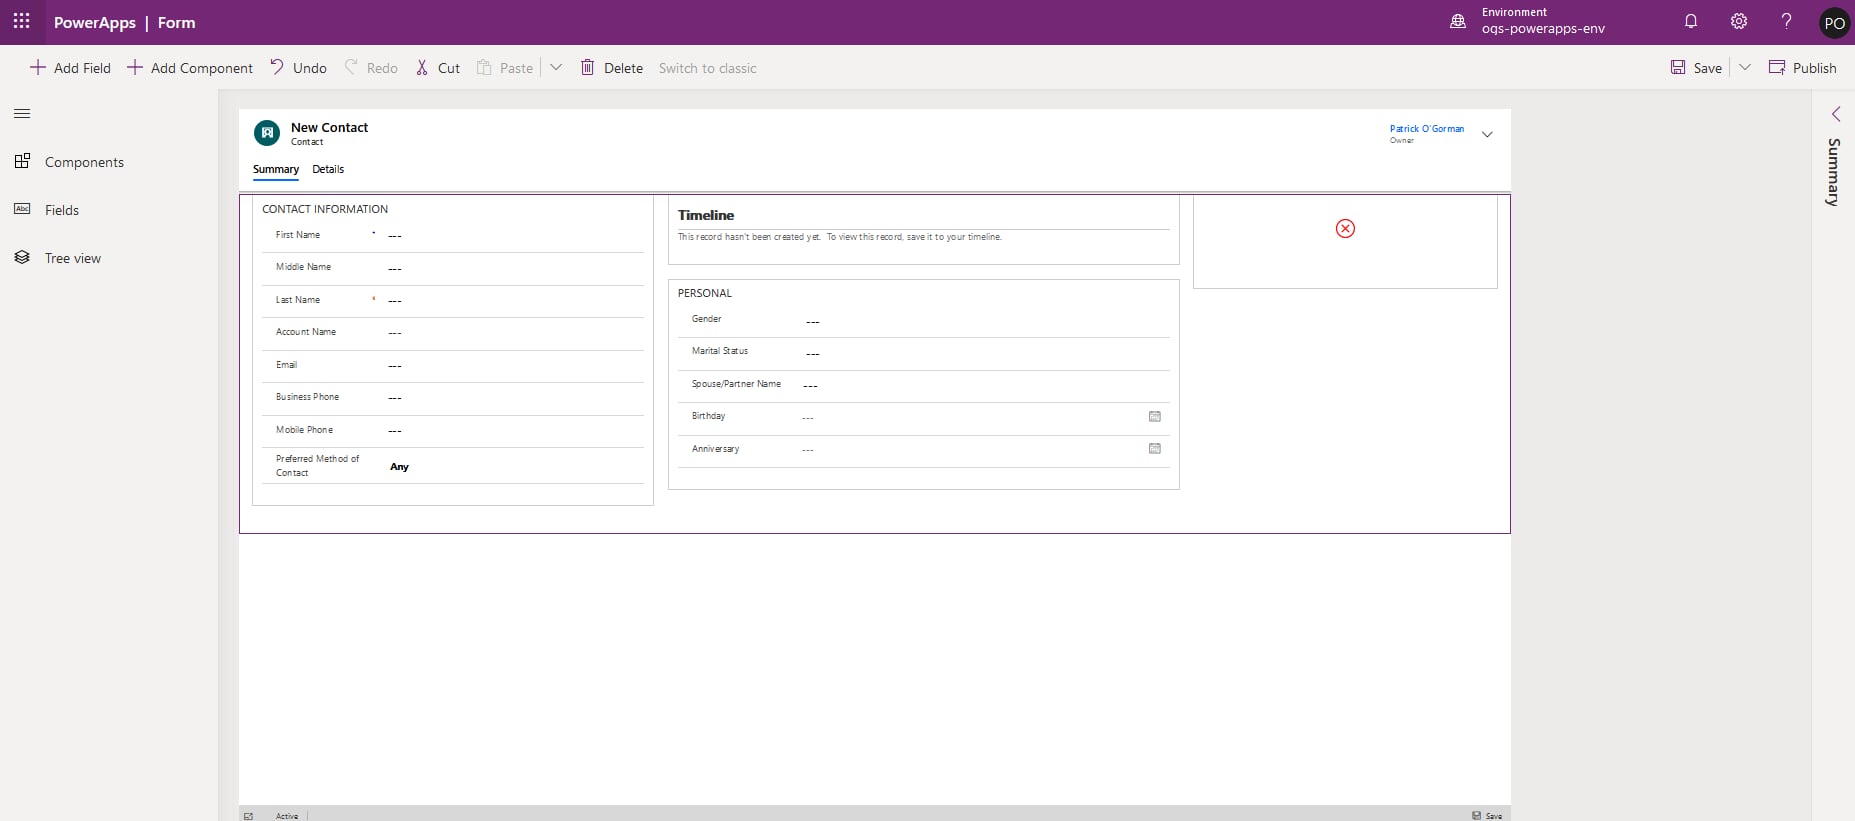
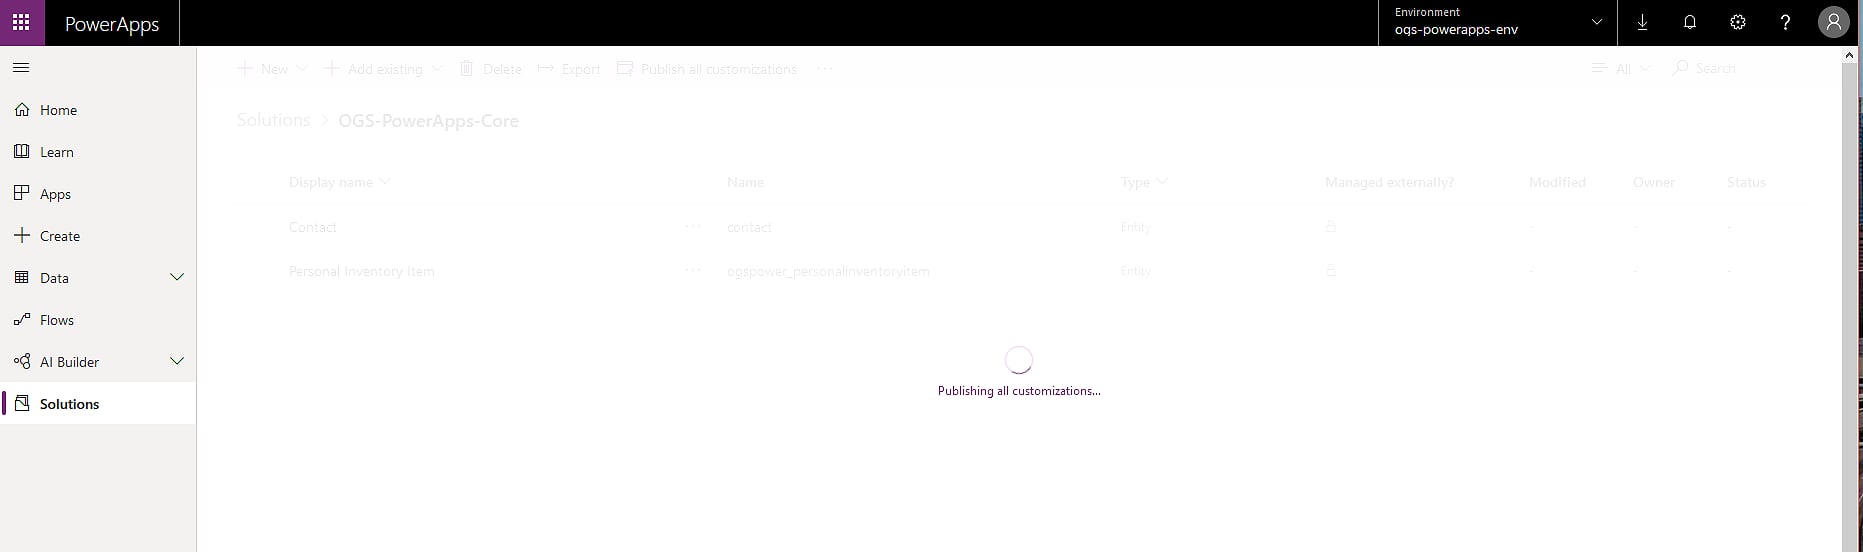
- Go back to the solution view and click Publish all customizations. If all was successful you will see a success message.
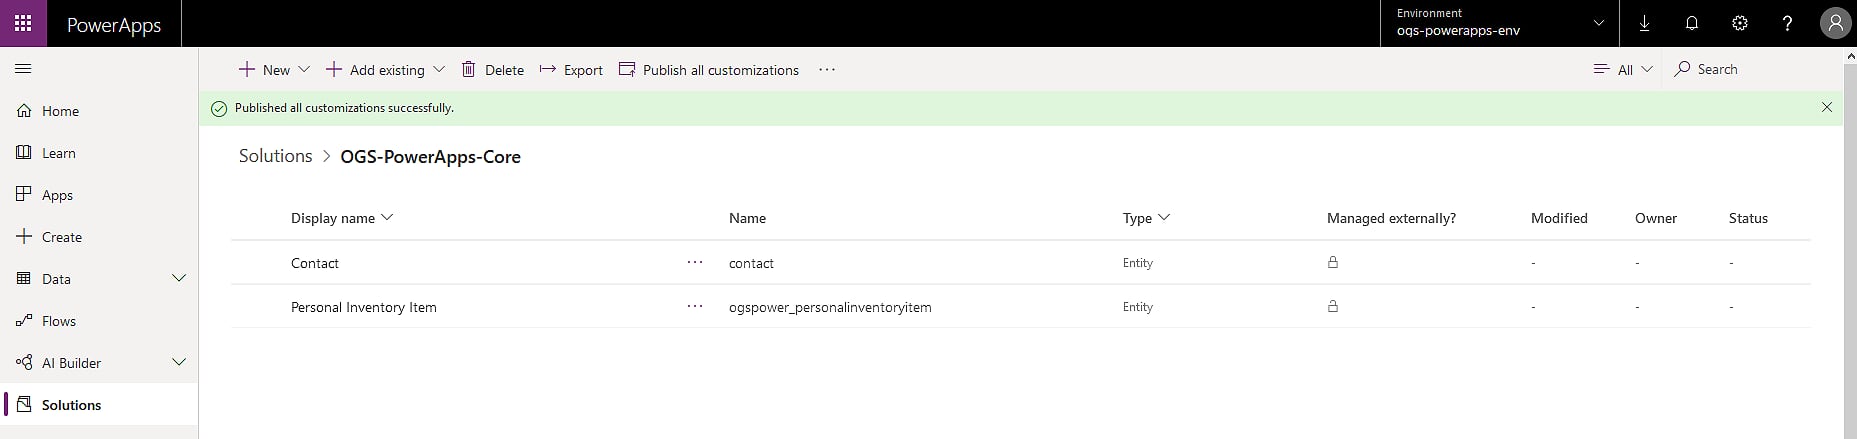
Getting our Solutions into Source Control
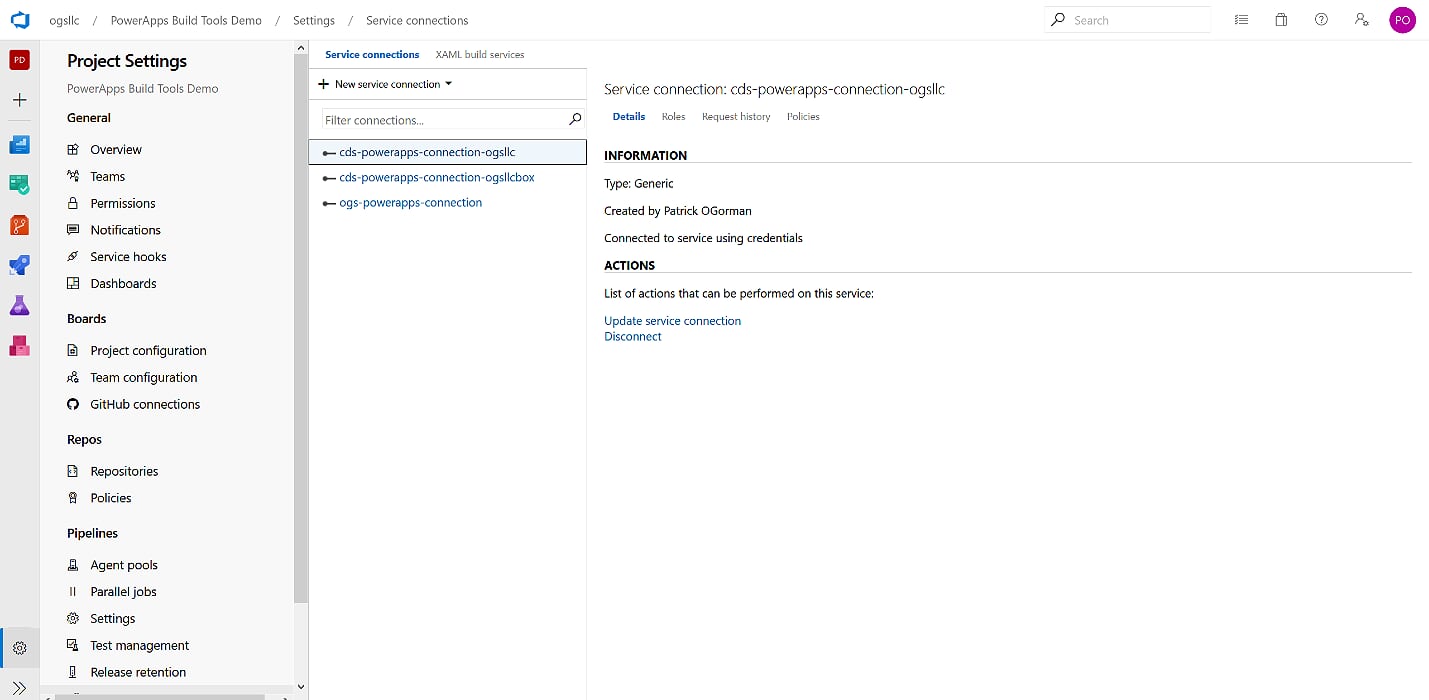
This section will require 3 different service connections, one for each of the environments we’ll be using for our build and release pipeline. I’ll show you how to create these in this section, but if you’re already familiar go ahead and set your 3 service connections up now. For this example, we’ll use the following connections:
– ogs-powerapps-connection – this is our dev environment
– cds-powerapps-connection-ogsllcbox – this is our staging/build environment
– cds-powerapps-connection-ogsllc – this is our production environment
- Navigate to the Azure DevOps project you should already have created with Power Apps Build Tools installed (see Assumptions). Under Pipelines, select Builds and click New, then New Build Pipeline. We will use the classic editor for this write-up.
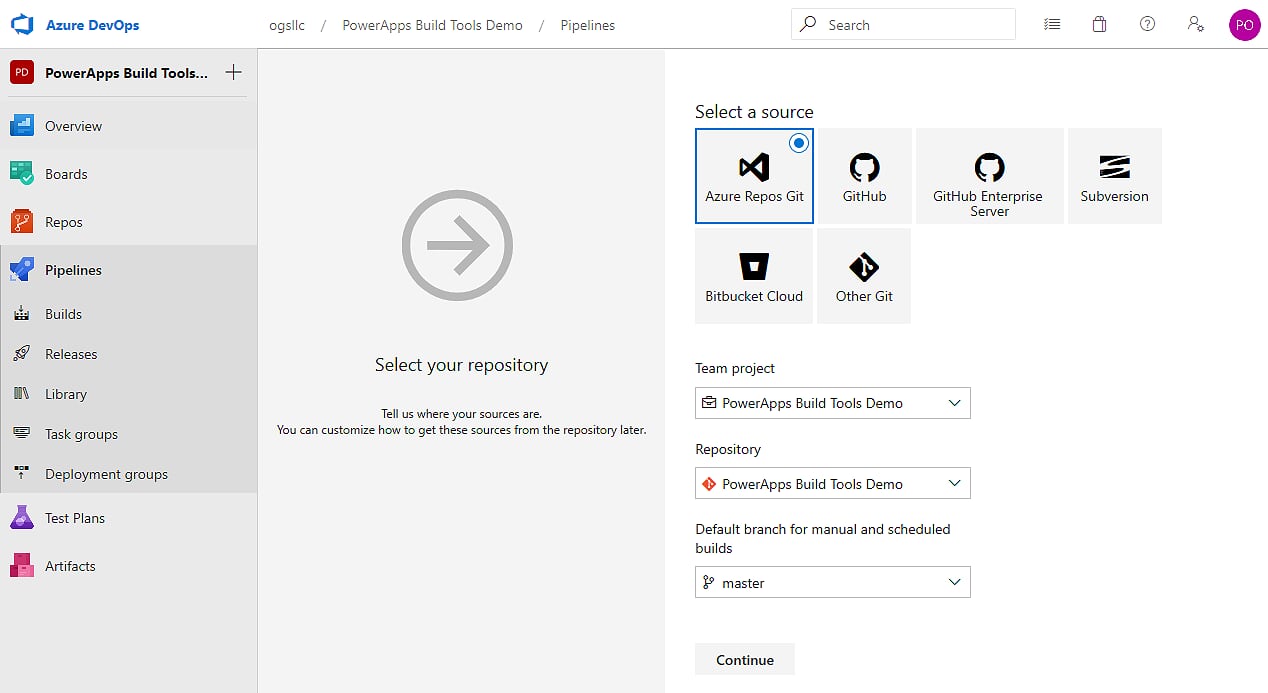
- Click Continue, and then click the link to start with an empty job.
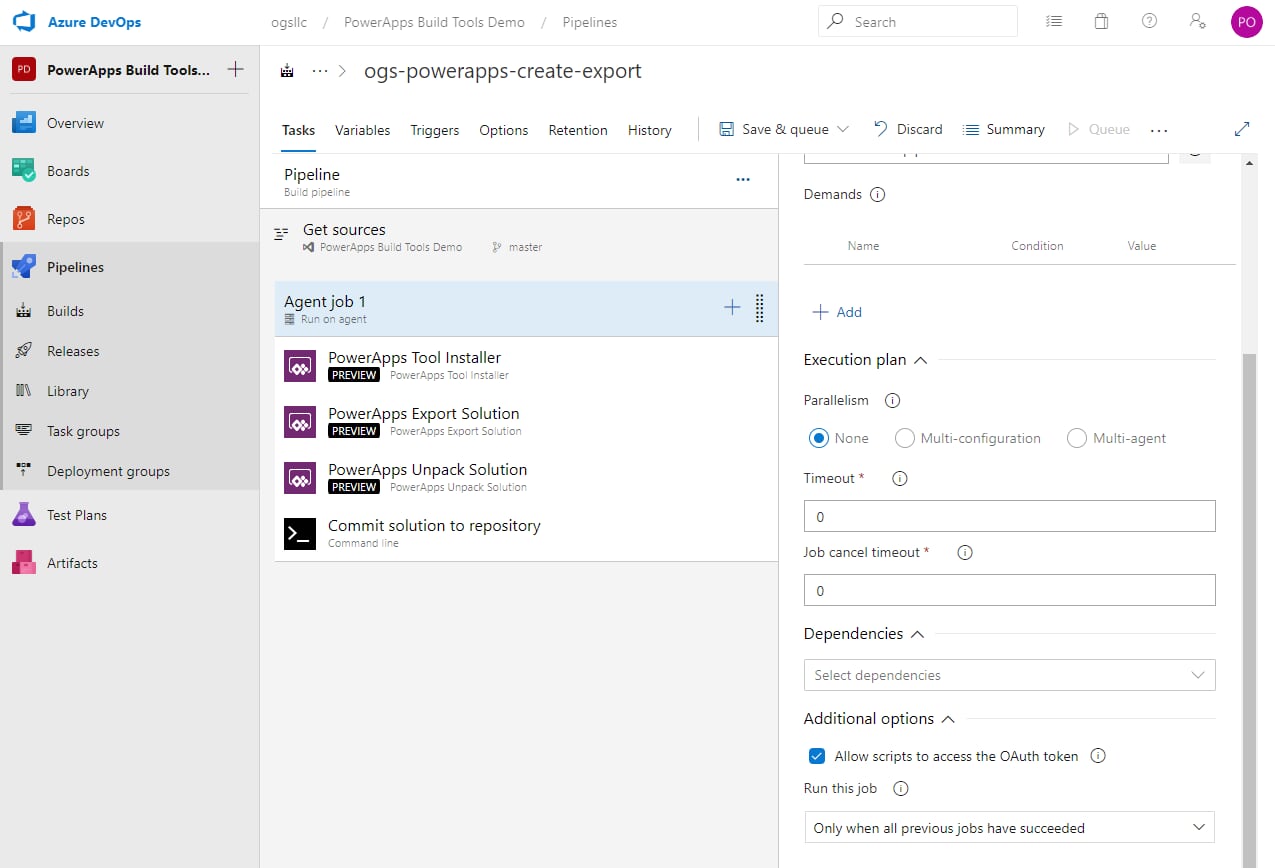
- Give your Pipeline a meaningful name then select the Agent job 1 node. Save the pipeline.
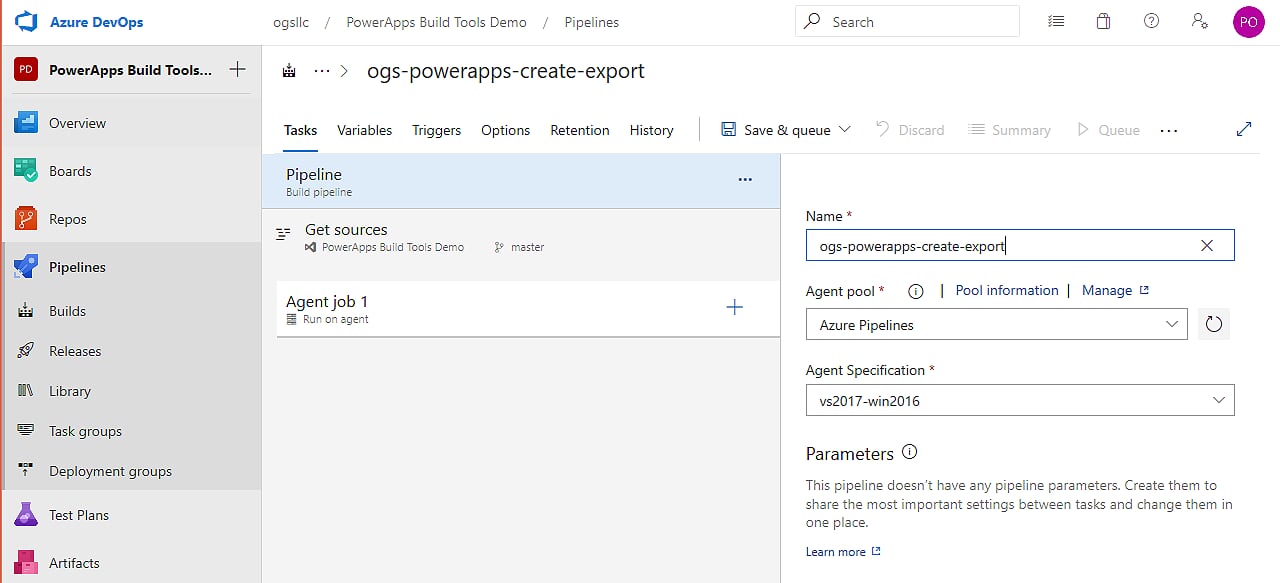
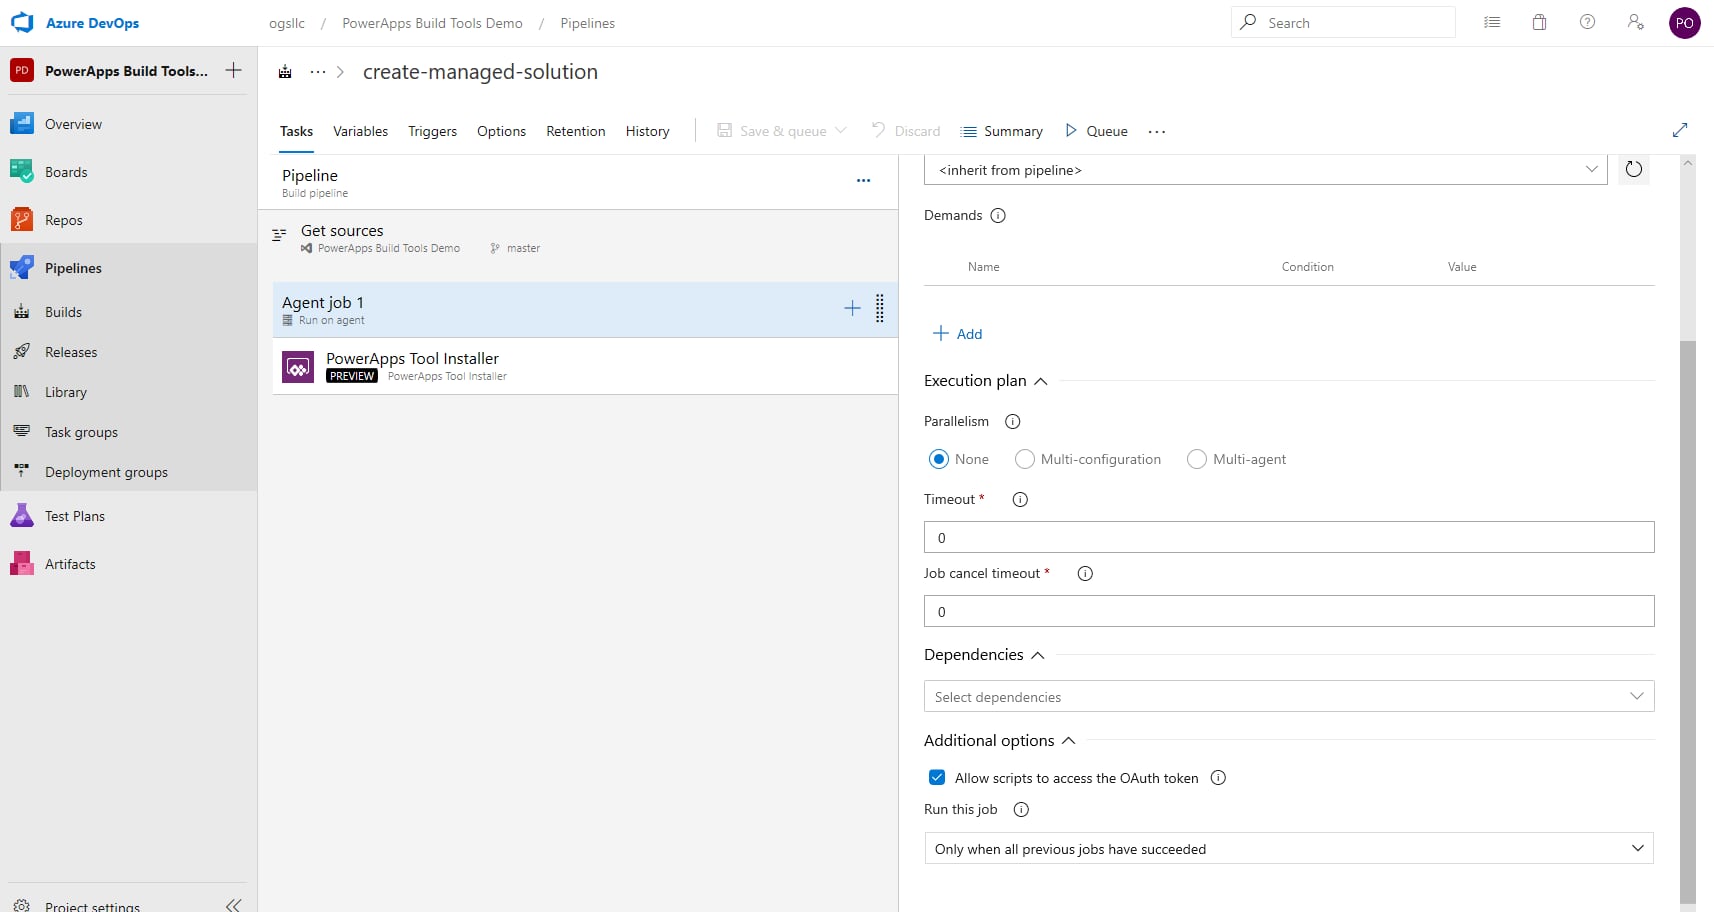
- On the Agent job 1 node, make sure to select the Allow scripts to access OAuth token
- Click the plus (Add task) on Agent job 1. Type in Power Apps Tool into the search box and add the Power Apps Tool Installer to your pipeline.
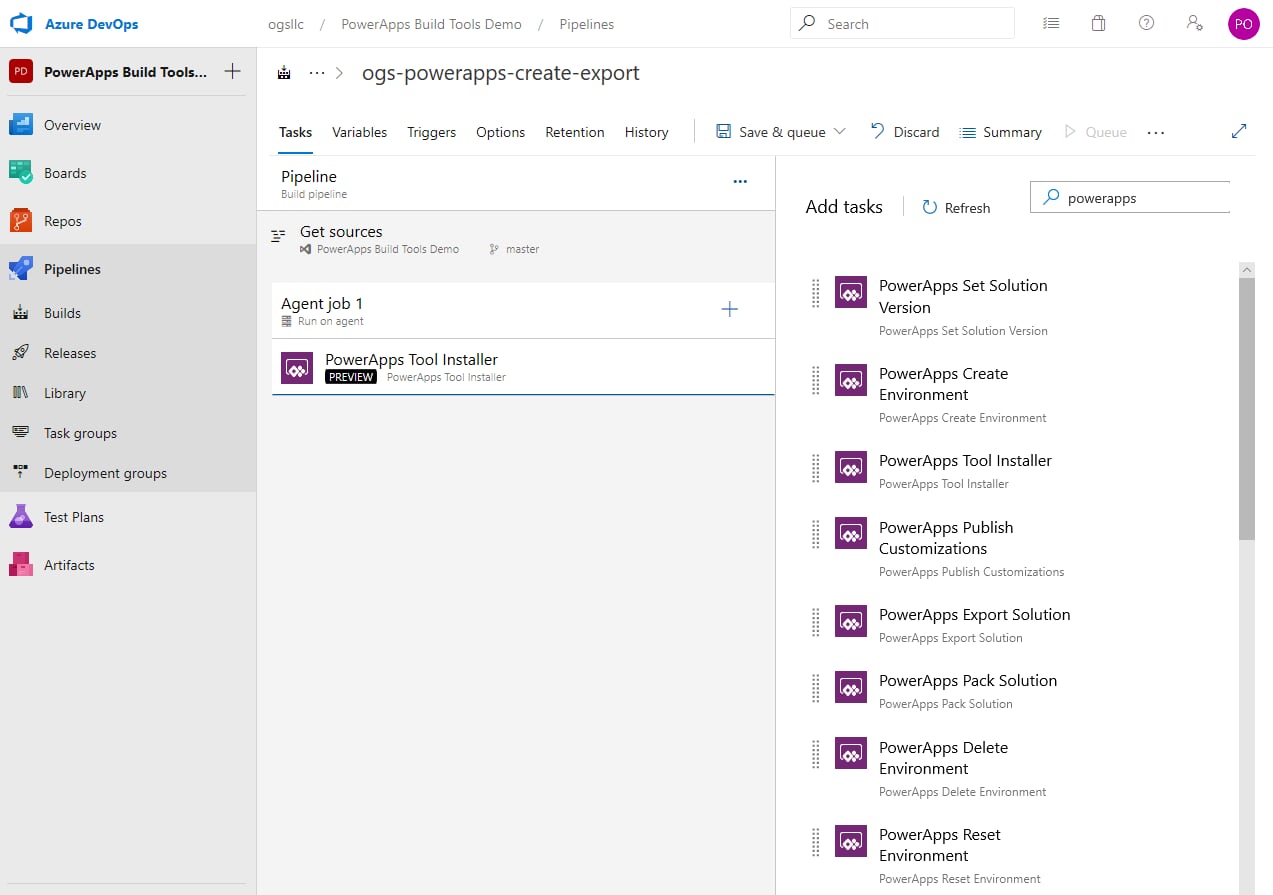
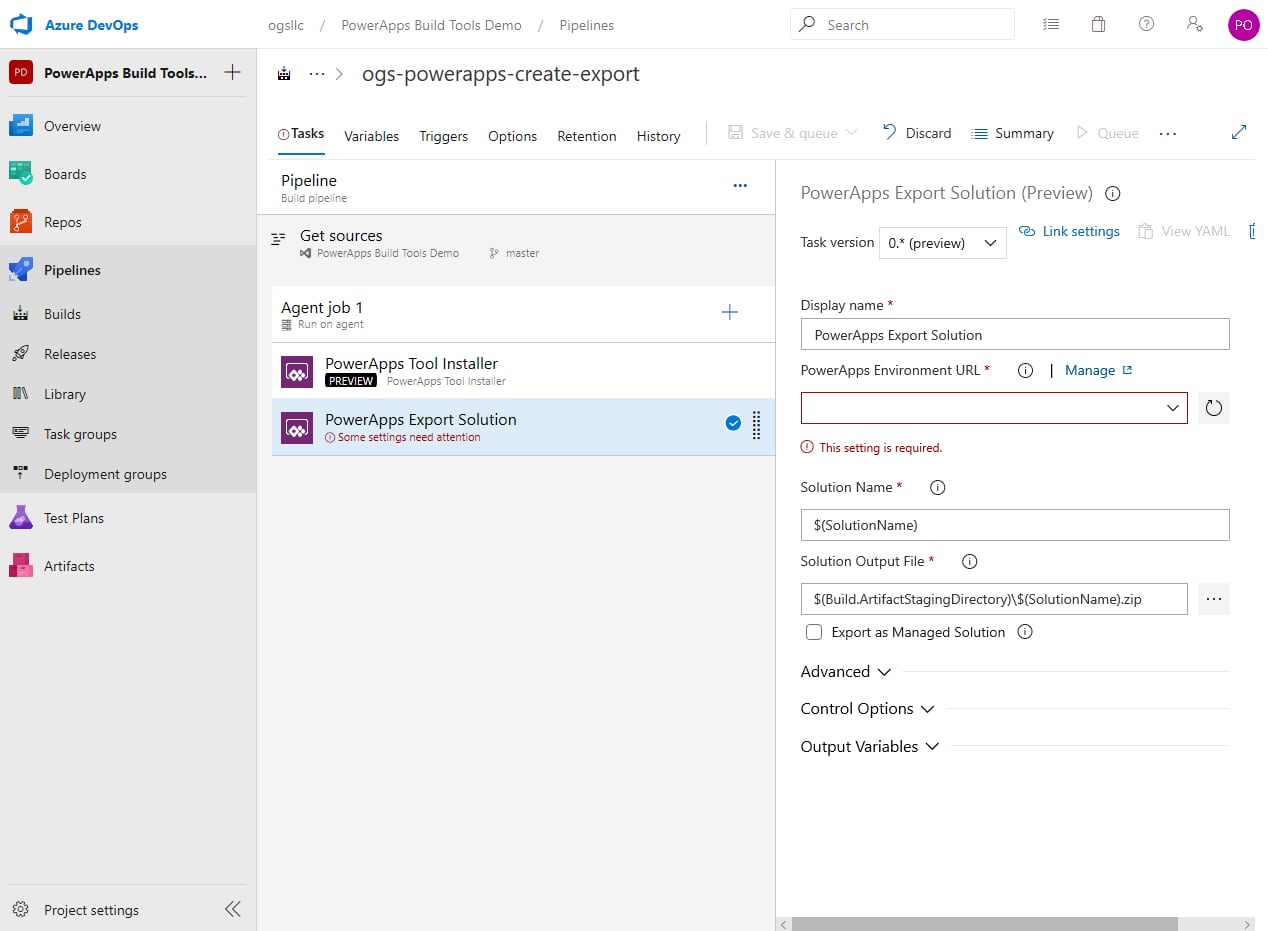
- Add another task to the agent job, this time search on Power Apps Export, and select the Power Apps Export Solution. Select this new task to make the necessary configuration changes. Use $(SolutionName) for the Solution Name field.
We’ll add that variable later. Use $(Build.ArtifactStagingDirectory)\$(SolutionName).zip for the Solution Output File. I need to configure a new service connection, so click Manage next to the Power Apps Environment URL label.
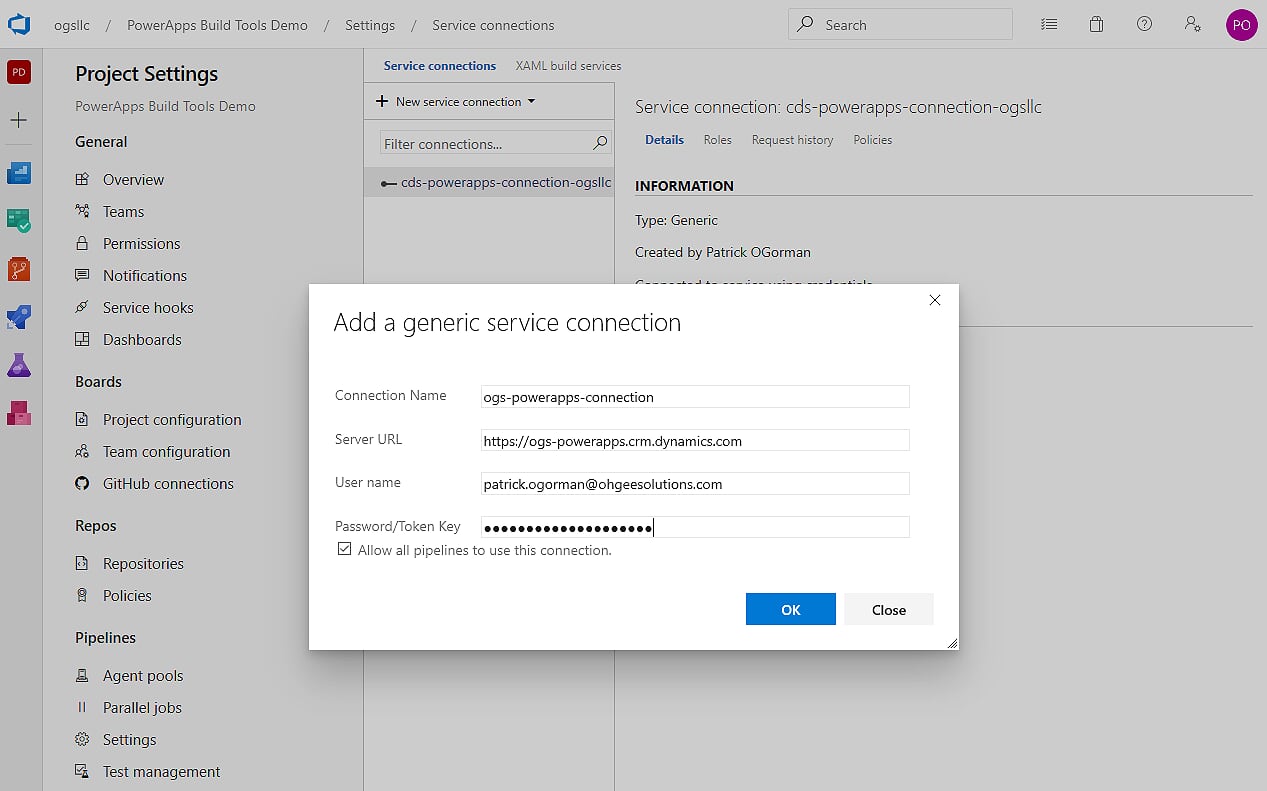
- Configure the new generic service connection
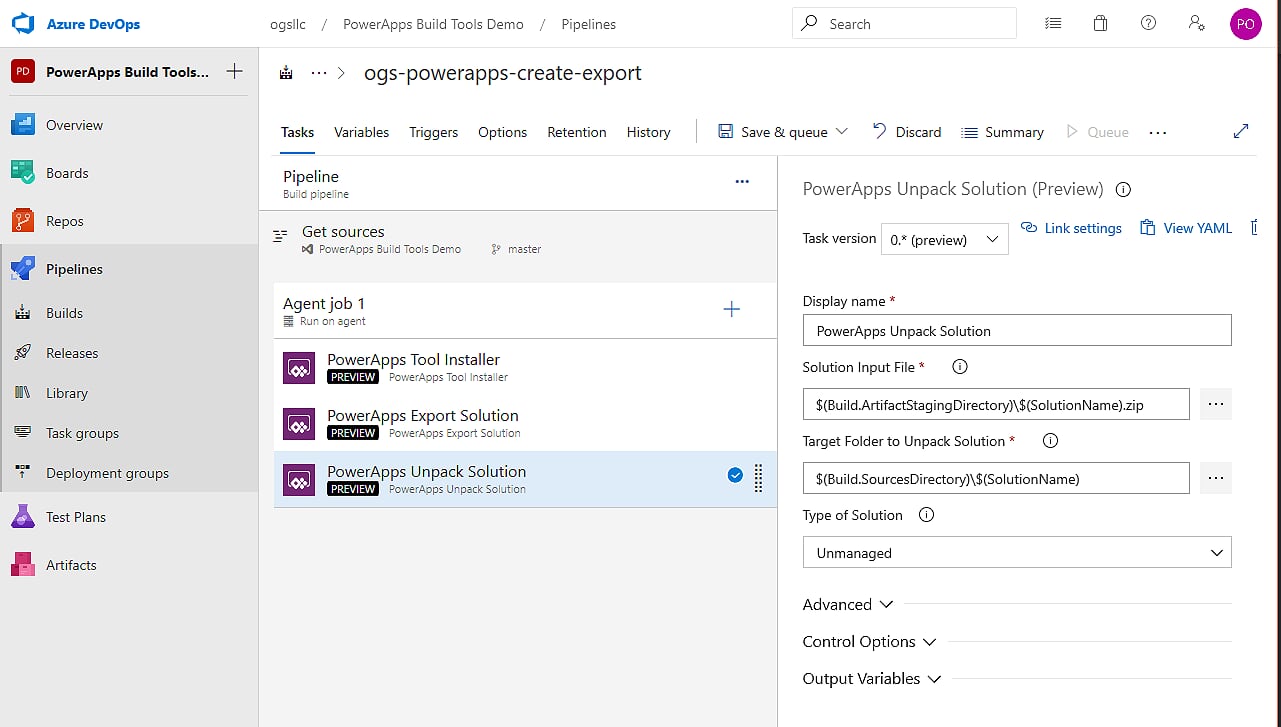
- Add another task to the agent job and search on Power Apps Unpack to locate then select the Power Apps Unpack Solution. Use $(Build.ArtifactStagingDirectory)\$(SolutionName).zip for the Solution Input File. Use $(Build.SourcesDirectory)\$(SolutionName) for the Target Folder to Unpack Solution. Save the pipeline.
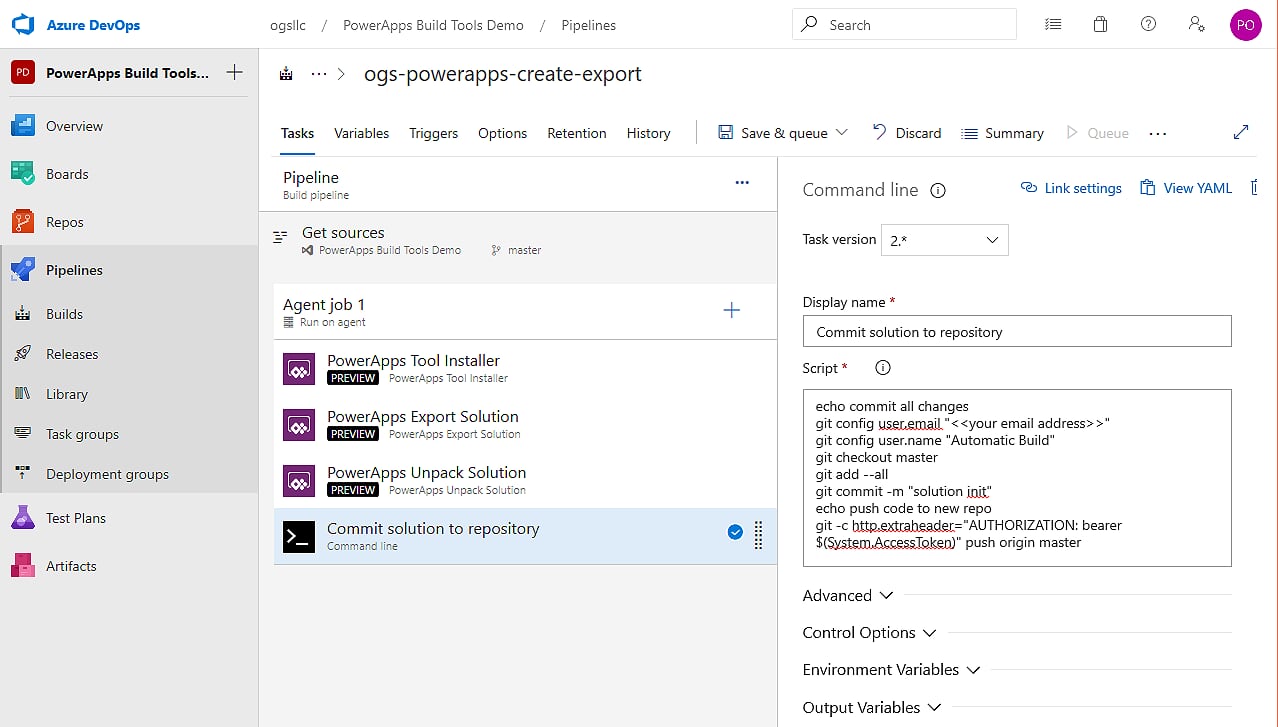
- Add another task to the agent job, this time use the Command line task. Give it a meaningful name and use the following script to commit the code to the appropriate repository. In this case, we are using ‘master’.
echo commit all changes

git config user.email "<>"

git config user.name "Automatic Build"

git checkout master

git add --all

git commit -m "solution init"

echo push code to new repo

git -c http.extraheader="AUTHORIZATION: bearer $(System.AccessToken)" push origin master
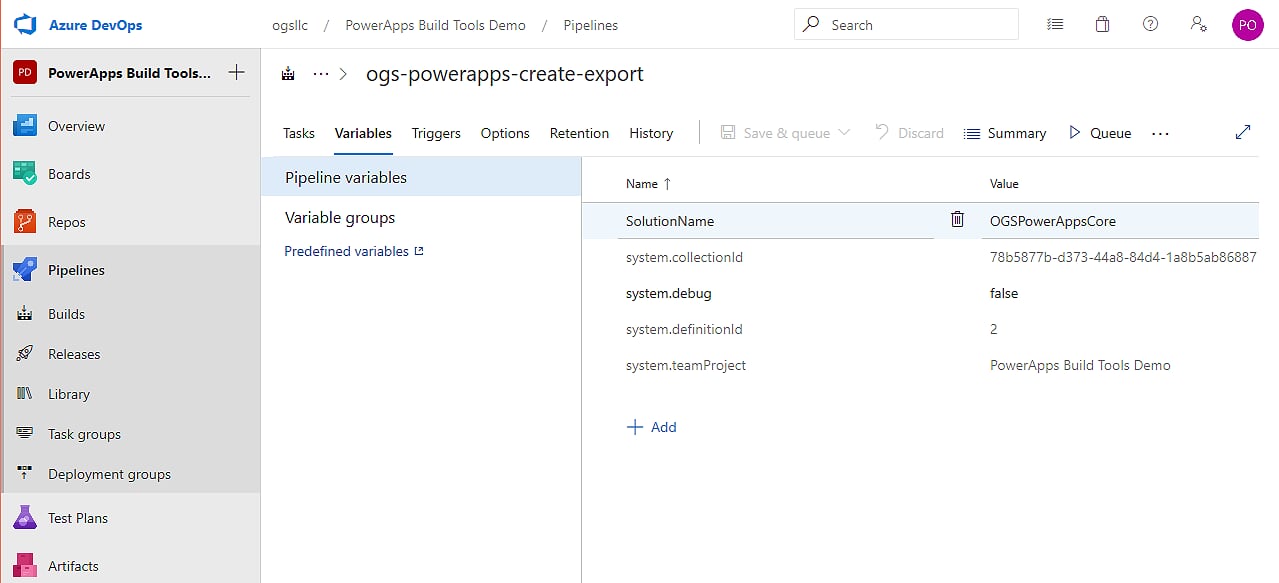
- Click on the Variables tab above the Pipeline designer area and add a variable for SolutionName. Save the pipeline. At this point, you can actually use the Save and Queue, or just queue the pipeline and cross your fingers.
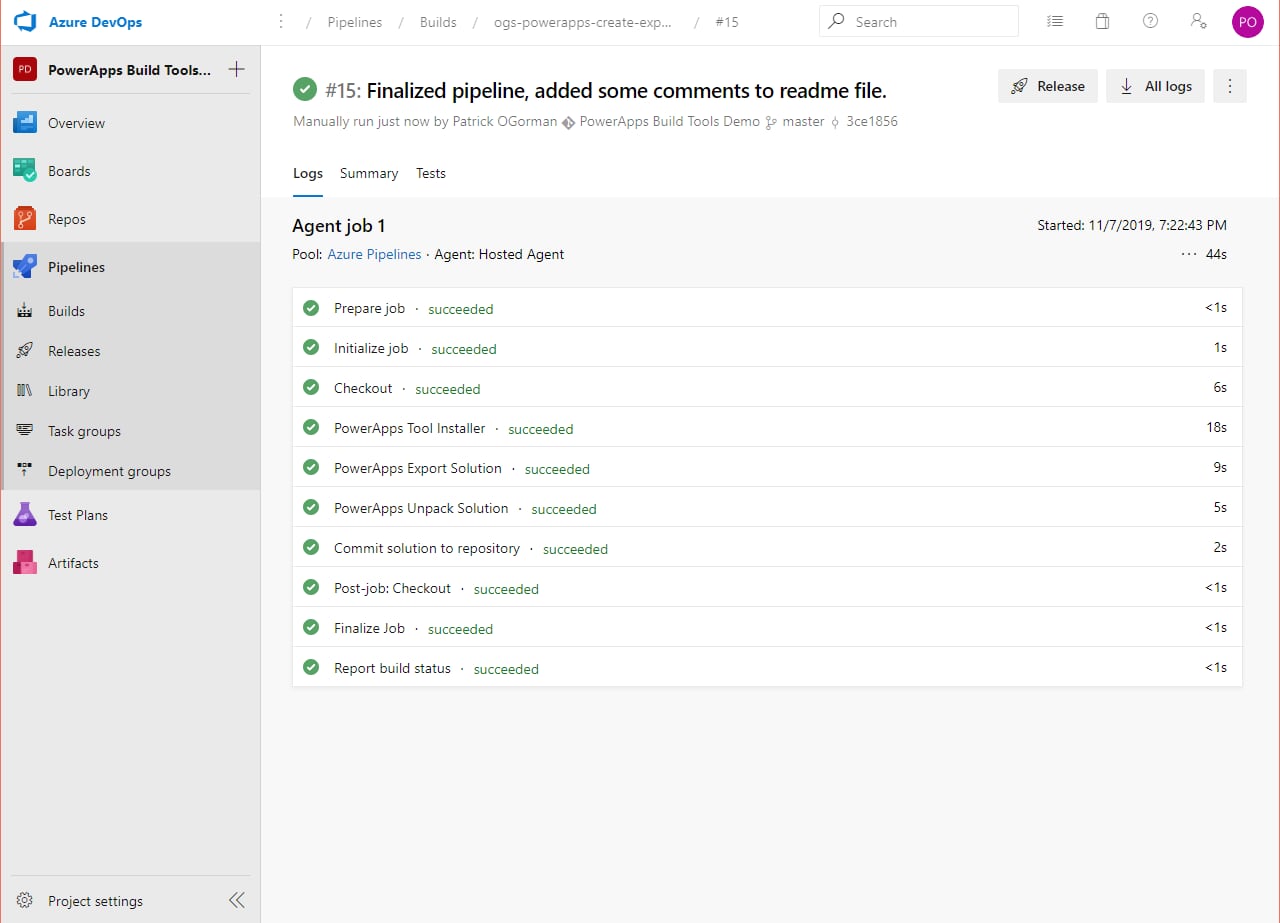
 Hopefully, all is successful.
- Go over to your repor now and you should see something like this:
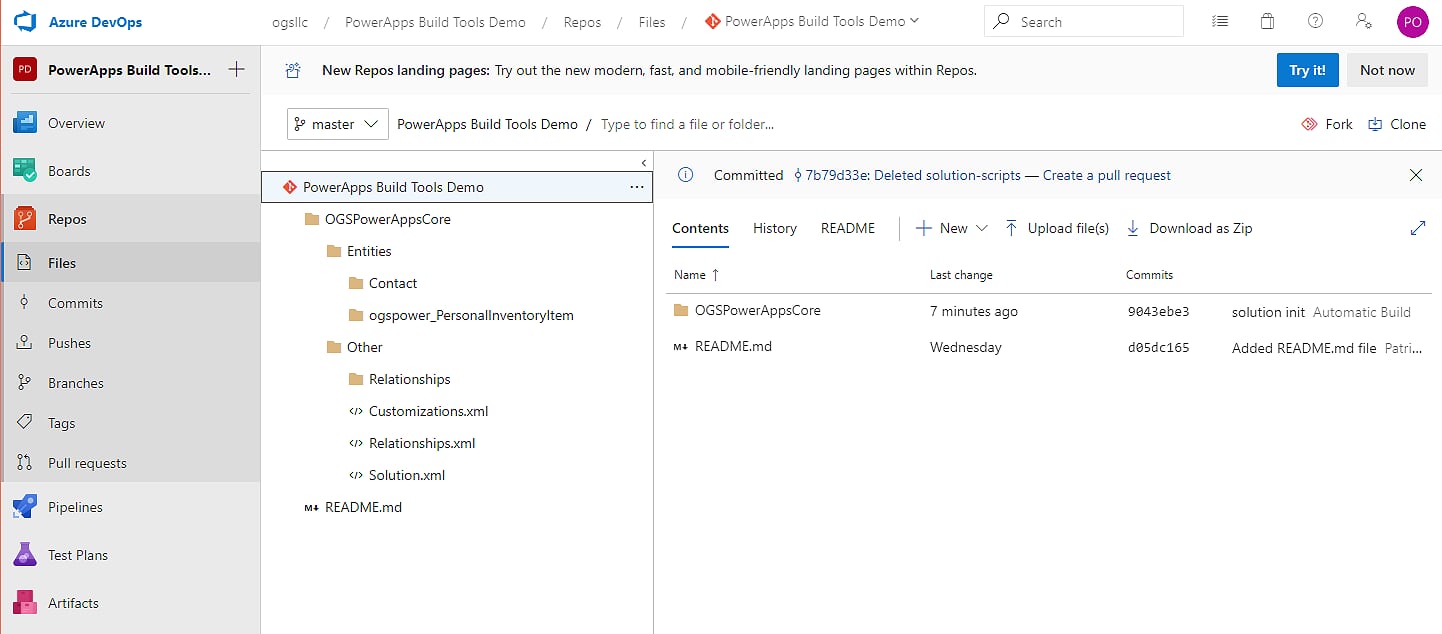
Deploying Solution as a Managed Solution (to Test, QA, Production)
Creating a Managed Solution
- Now that we have our customizations in source control, we want to create a managed solution for deployment to our production environment. Create a new build pipeline using the classic interface, and empty job, and give it a meaningful name. Once again on the Agent job, make sure to check the box to allow scripts to access the OAuth token. Also add the Power Apps Tool Installer as we did in our first build pipeline. Save your pipeline.
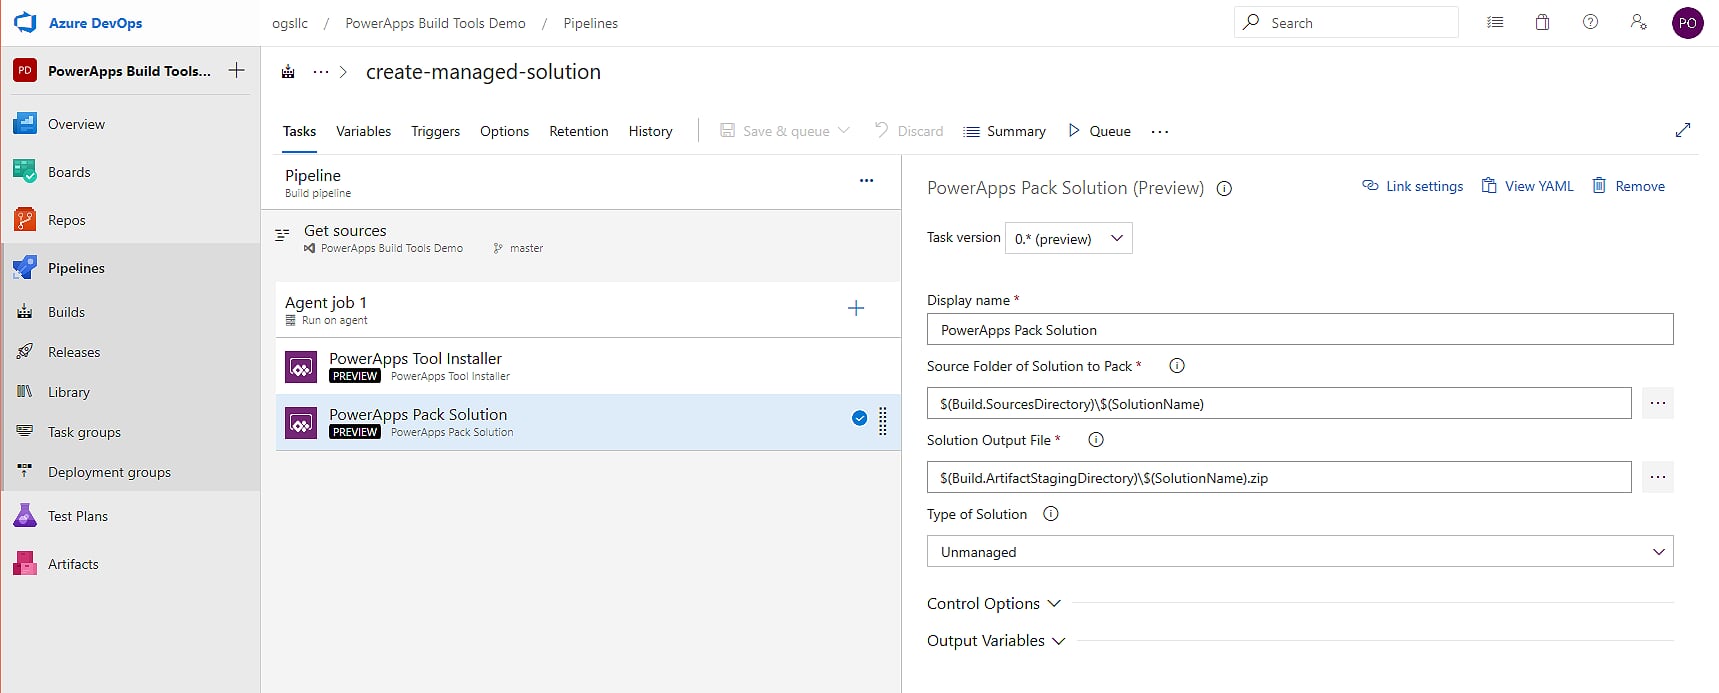
- Now we want to add a Power Apps Pack Solution task. Use $(Build.SourcesDirectory)\$(SolutionName) for the source folder, and $(Build.ArtifactStagingDirectory)\$(SolutionName).zip for the solution output file. Leave the Type of Solution as Unmanaged. Save the pipeline.
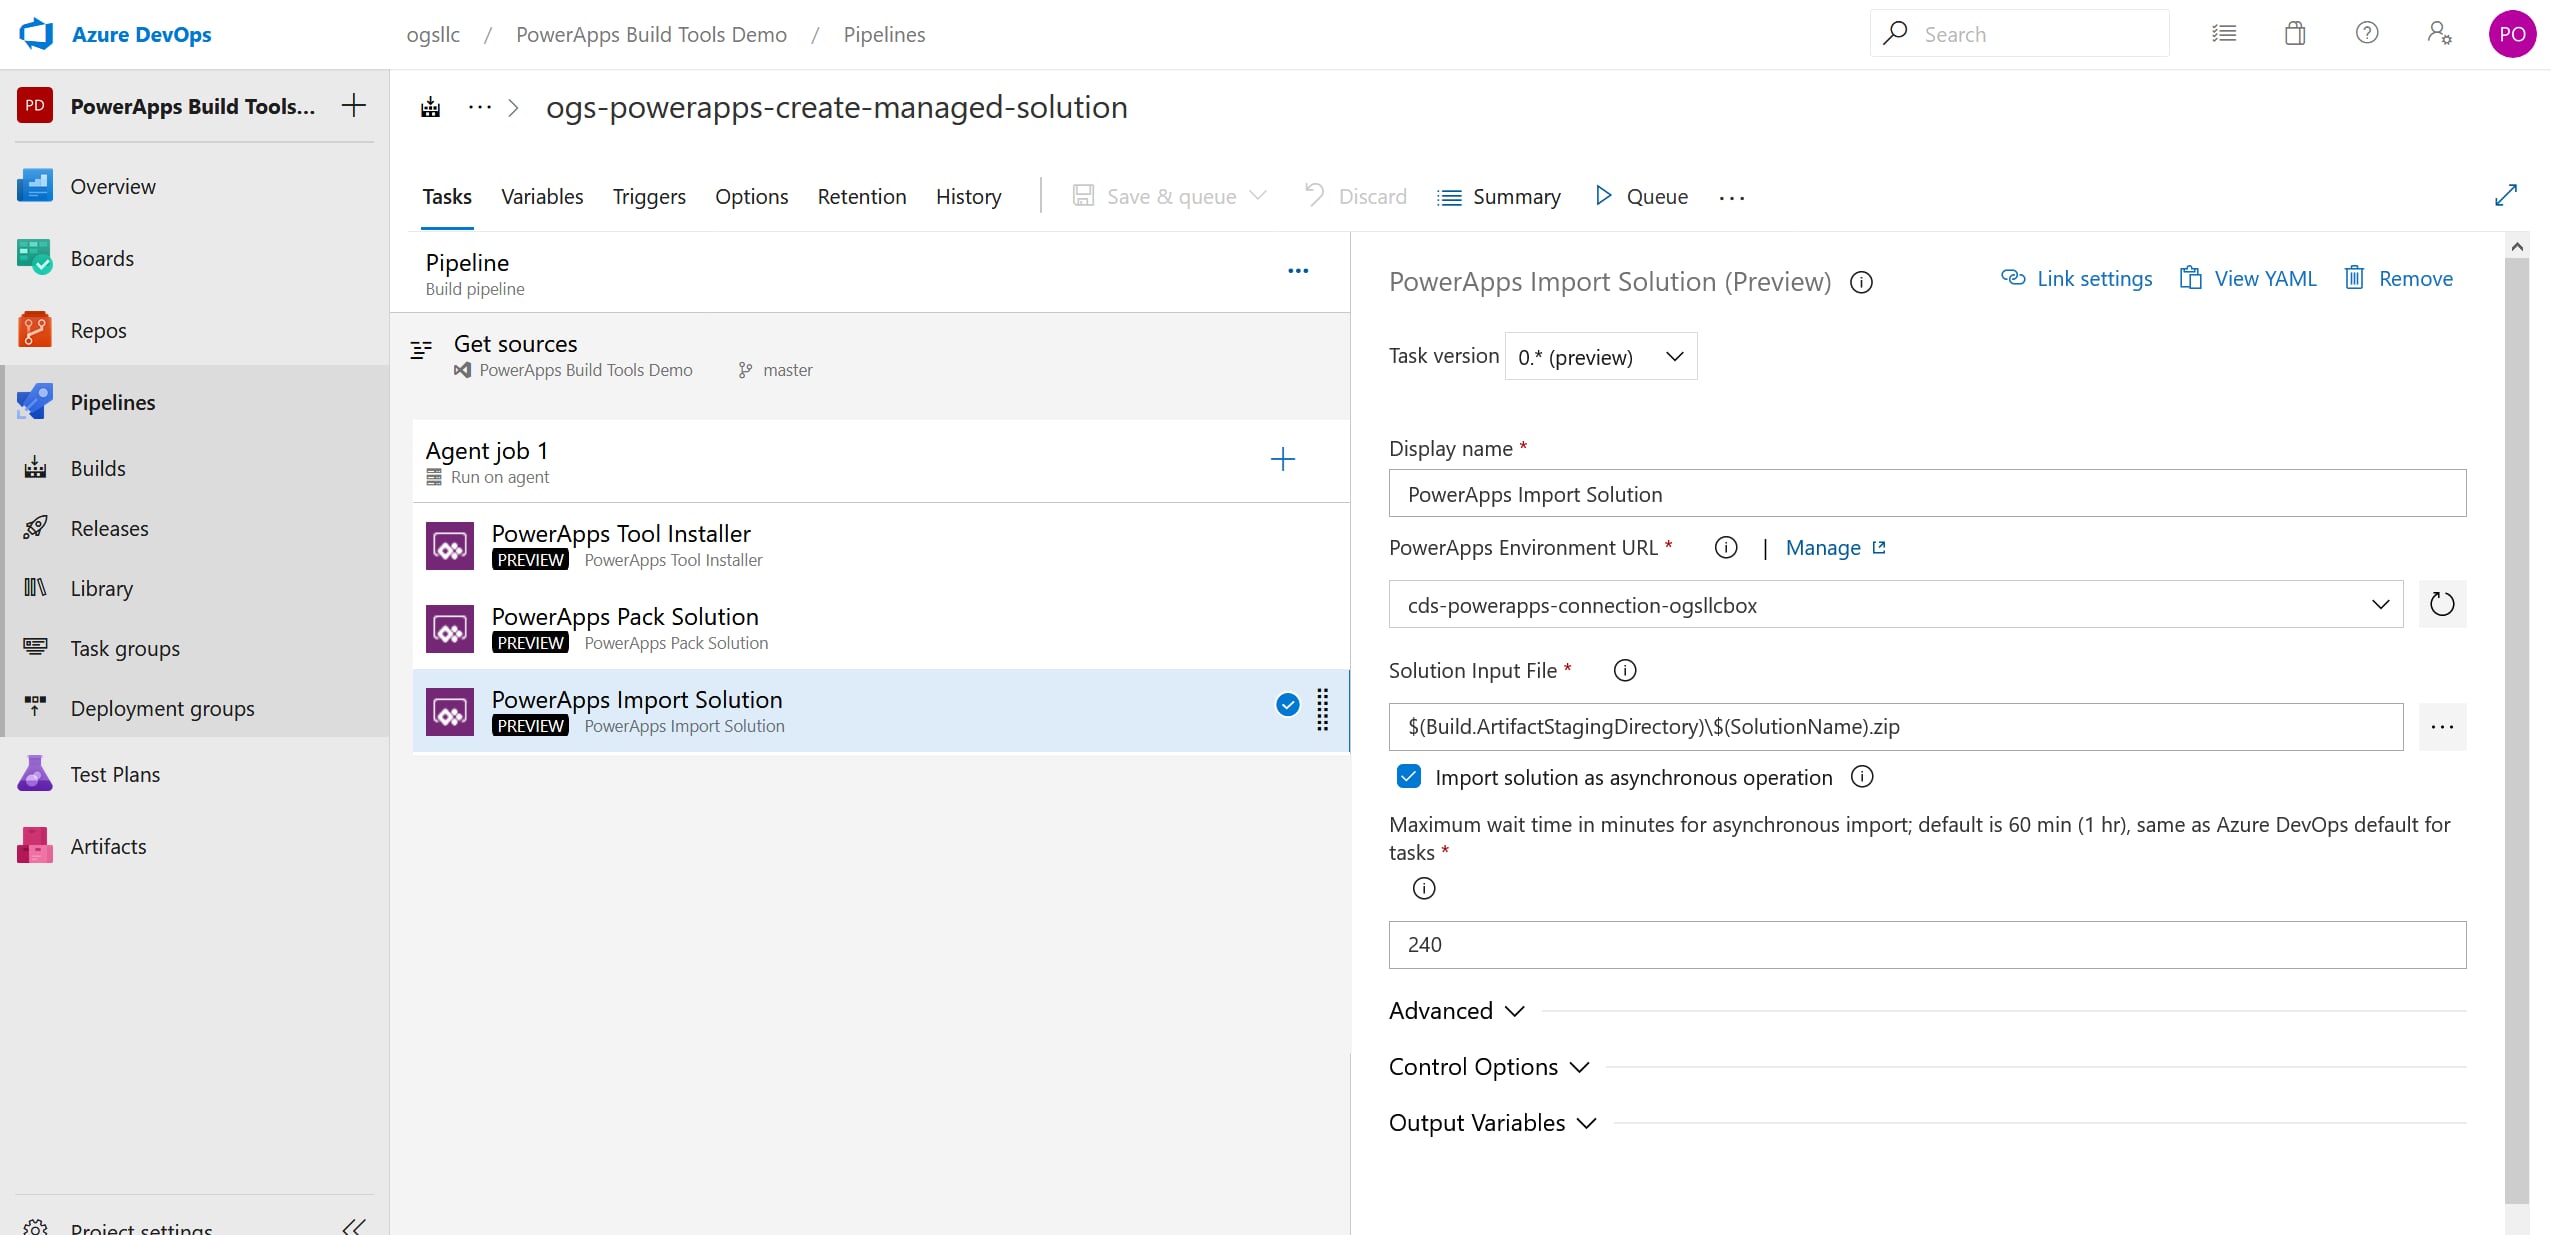
- Add a Power Apps Import Solution task. For the Solution Input file use $(Build.ArtifactStagingDirectory)\$(SolutionName).zip. This is where we want to use our staging/build environment so either select that service connection or create a new service connection and point it to said environment. Save your pipeline.
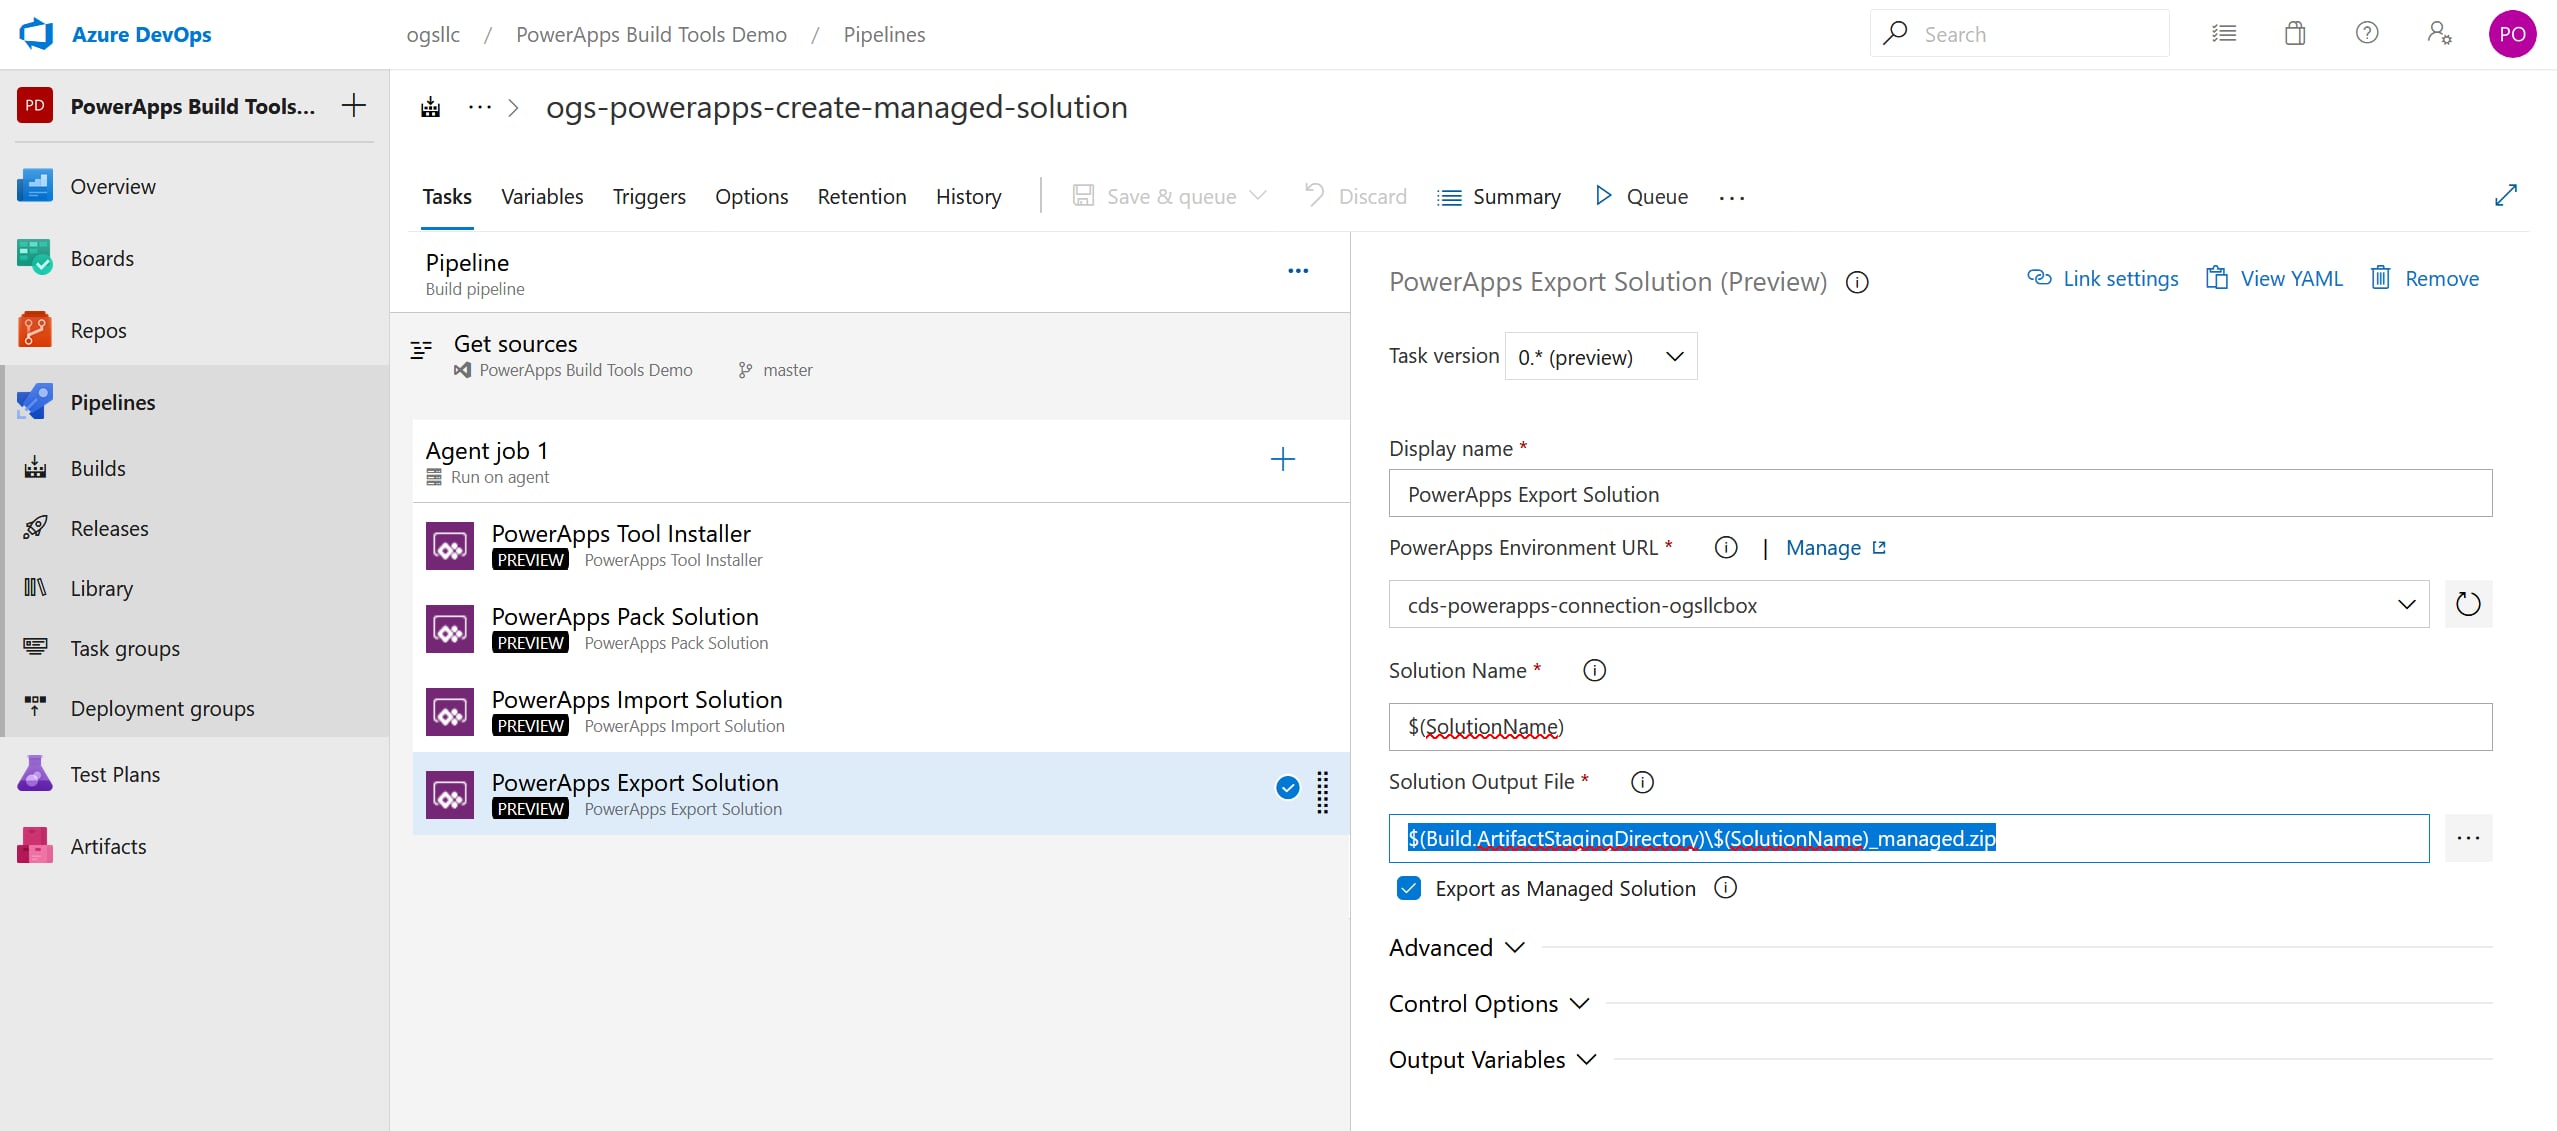
- Add a Power Apps Export Solution task. Use $(SolutionName) for the Solution Name, and $(Build.ArtifactStagingDirectory)\$(SolutionName)_managed.zip for the Solution Output file. Make sure to check the Export as a Managed Solution checkbox. Save the pipeline.
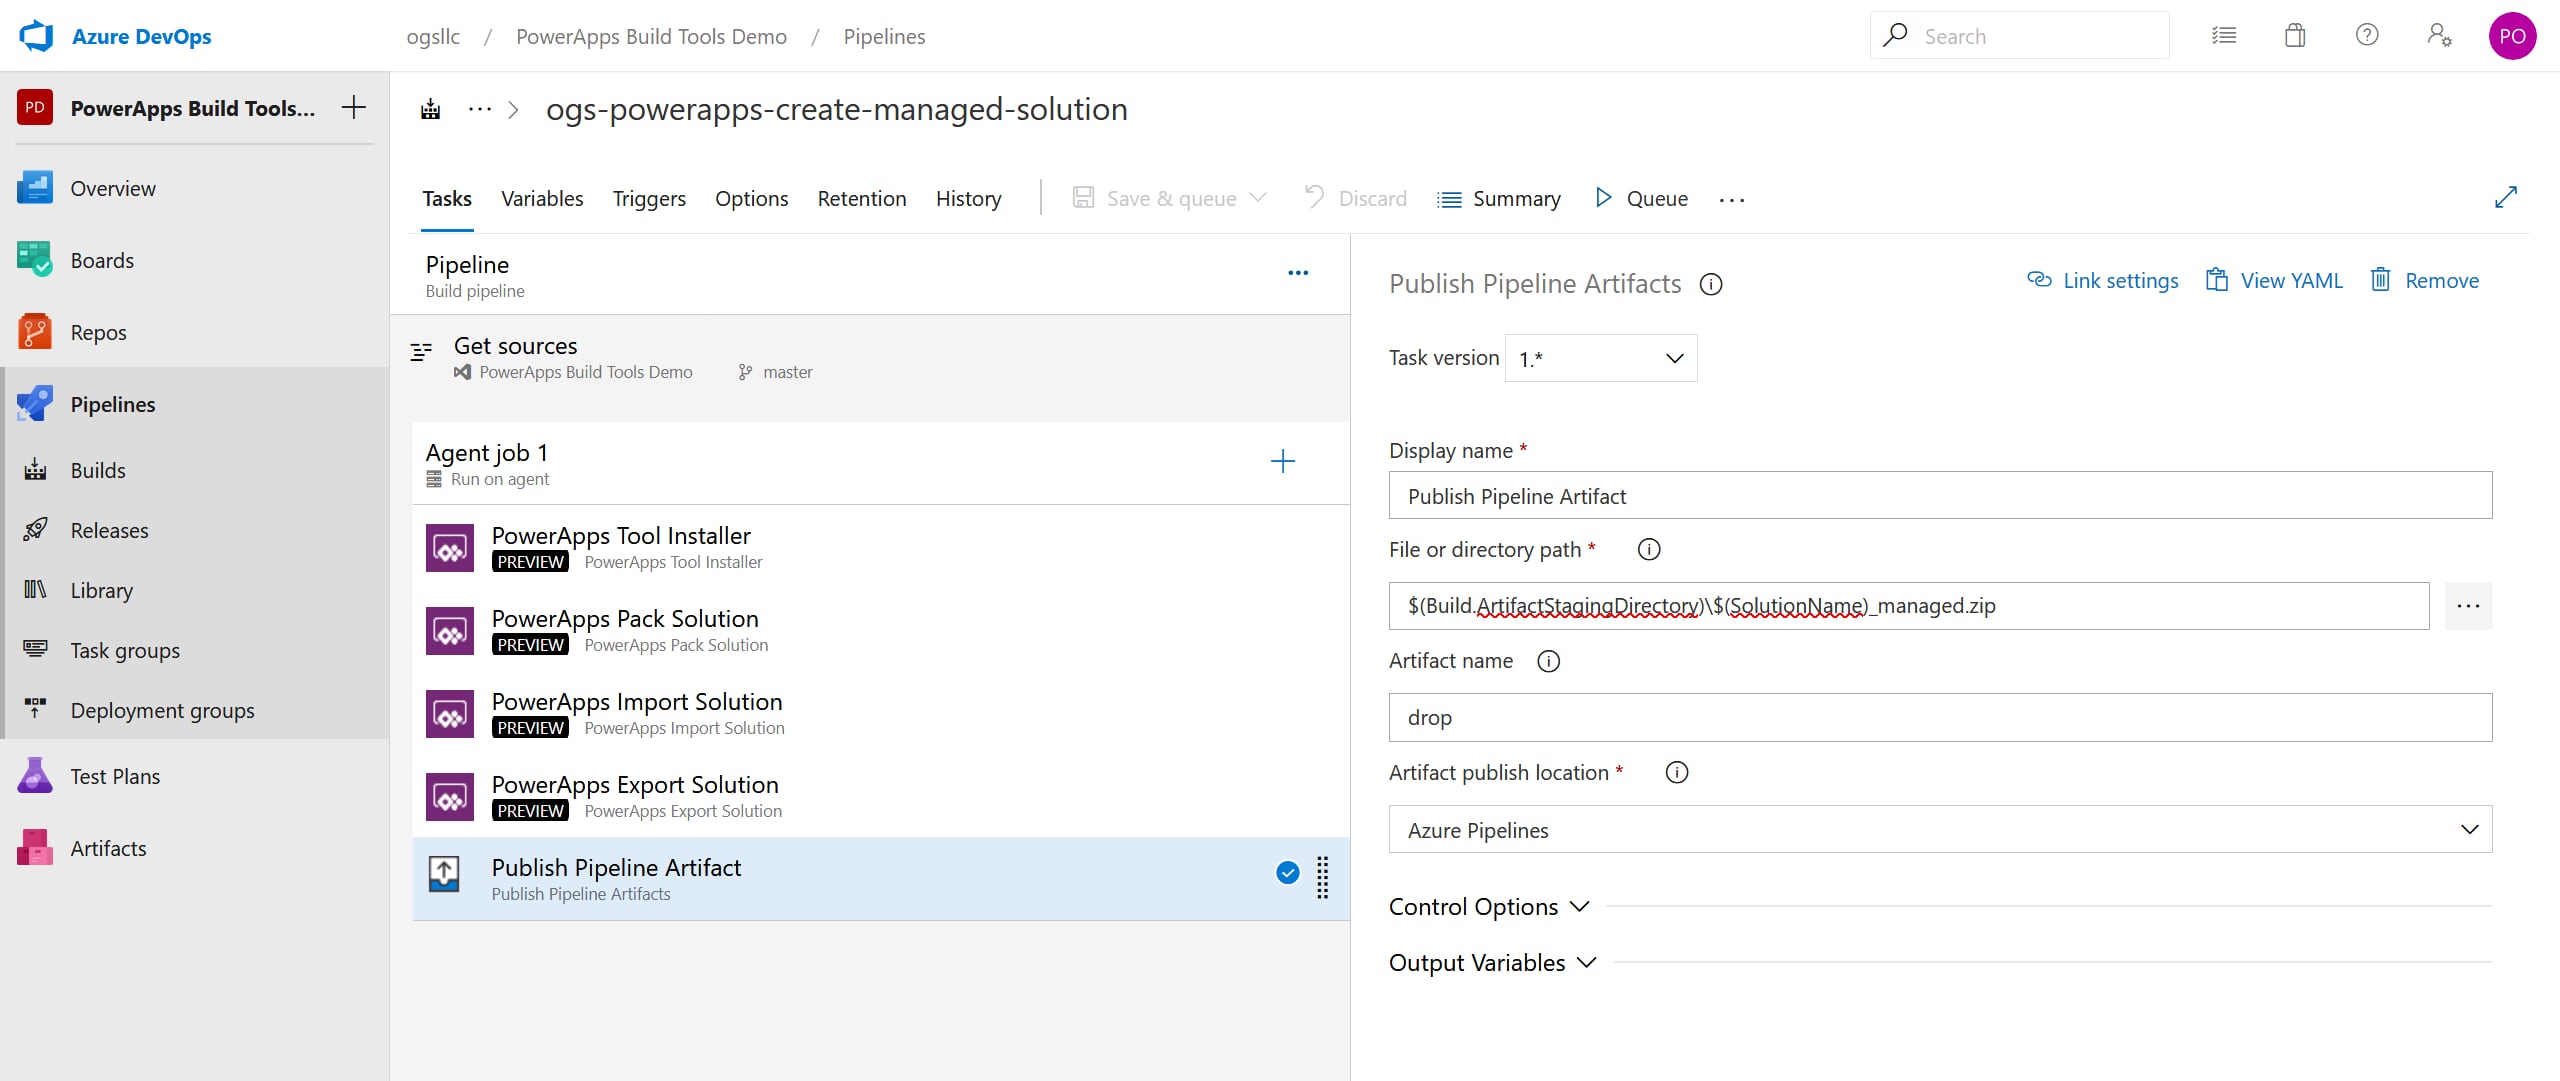
- Add a Publish Pipeline Artifact task and use $(Build.ArtifactStagingDirectory)\$(SolutionName)_managed.zip for the File or directory path. Use drop for the Artifact name. Save the pipeline.
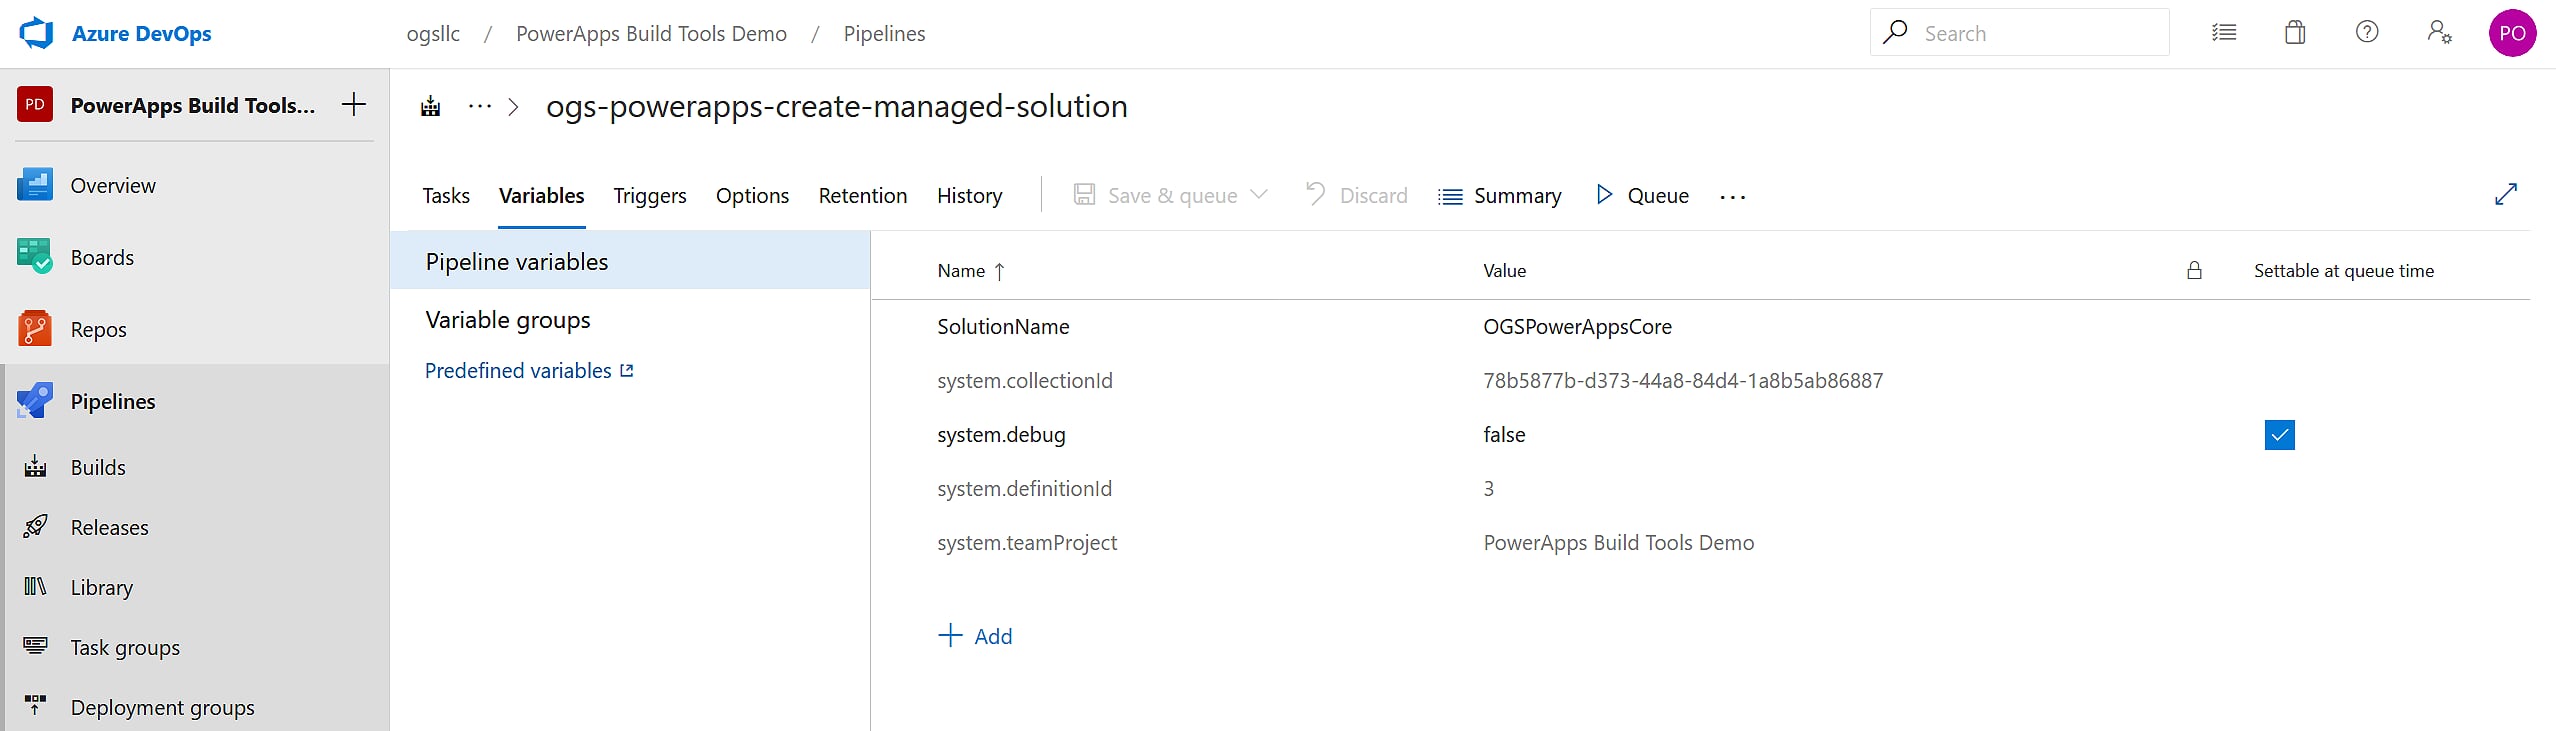
- Click on the Variables tab up top and add your SolutionName variable.
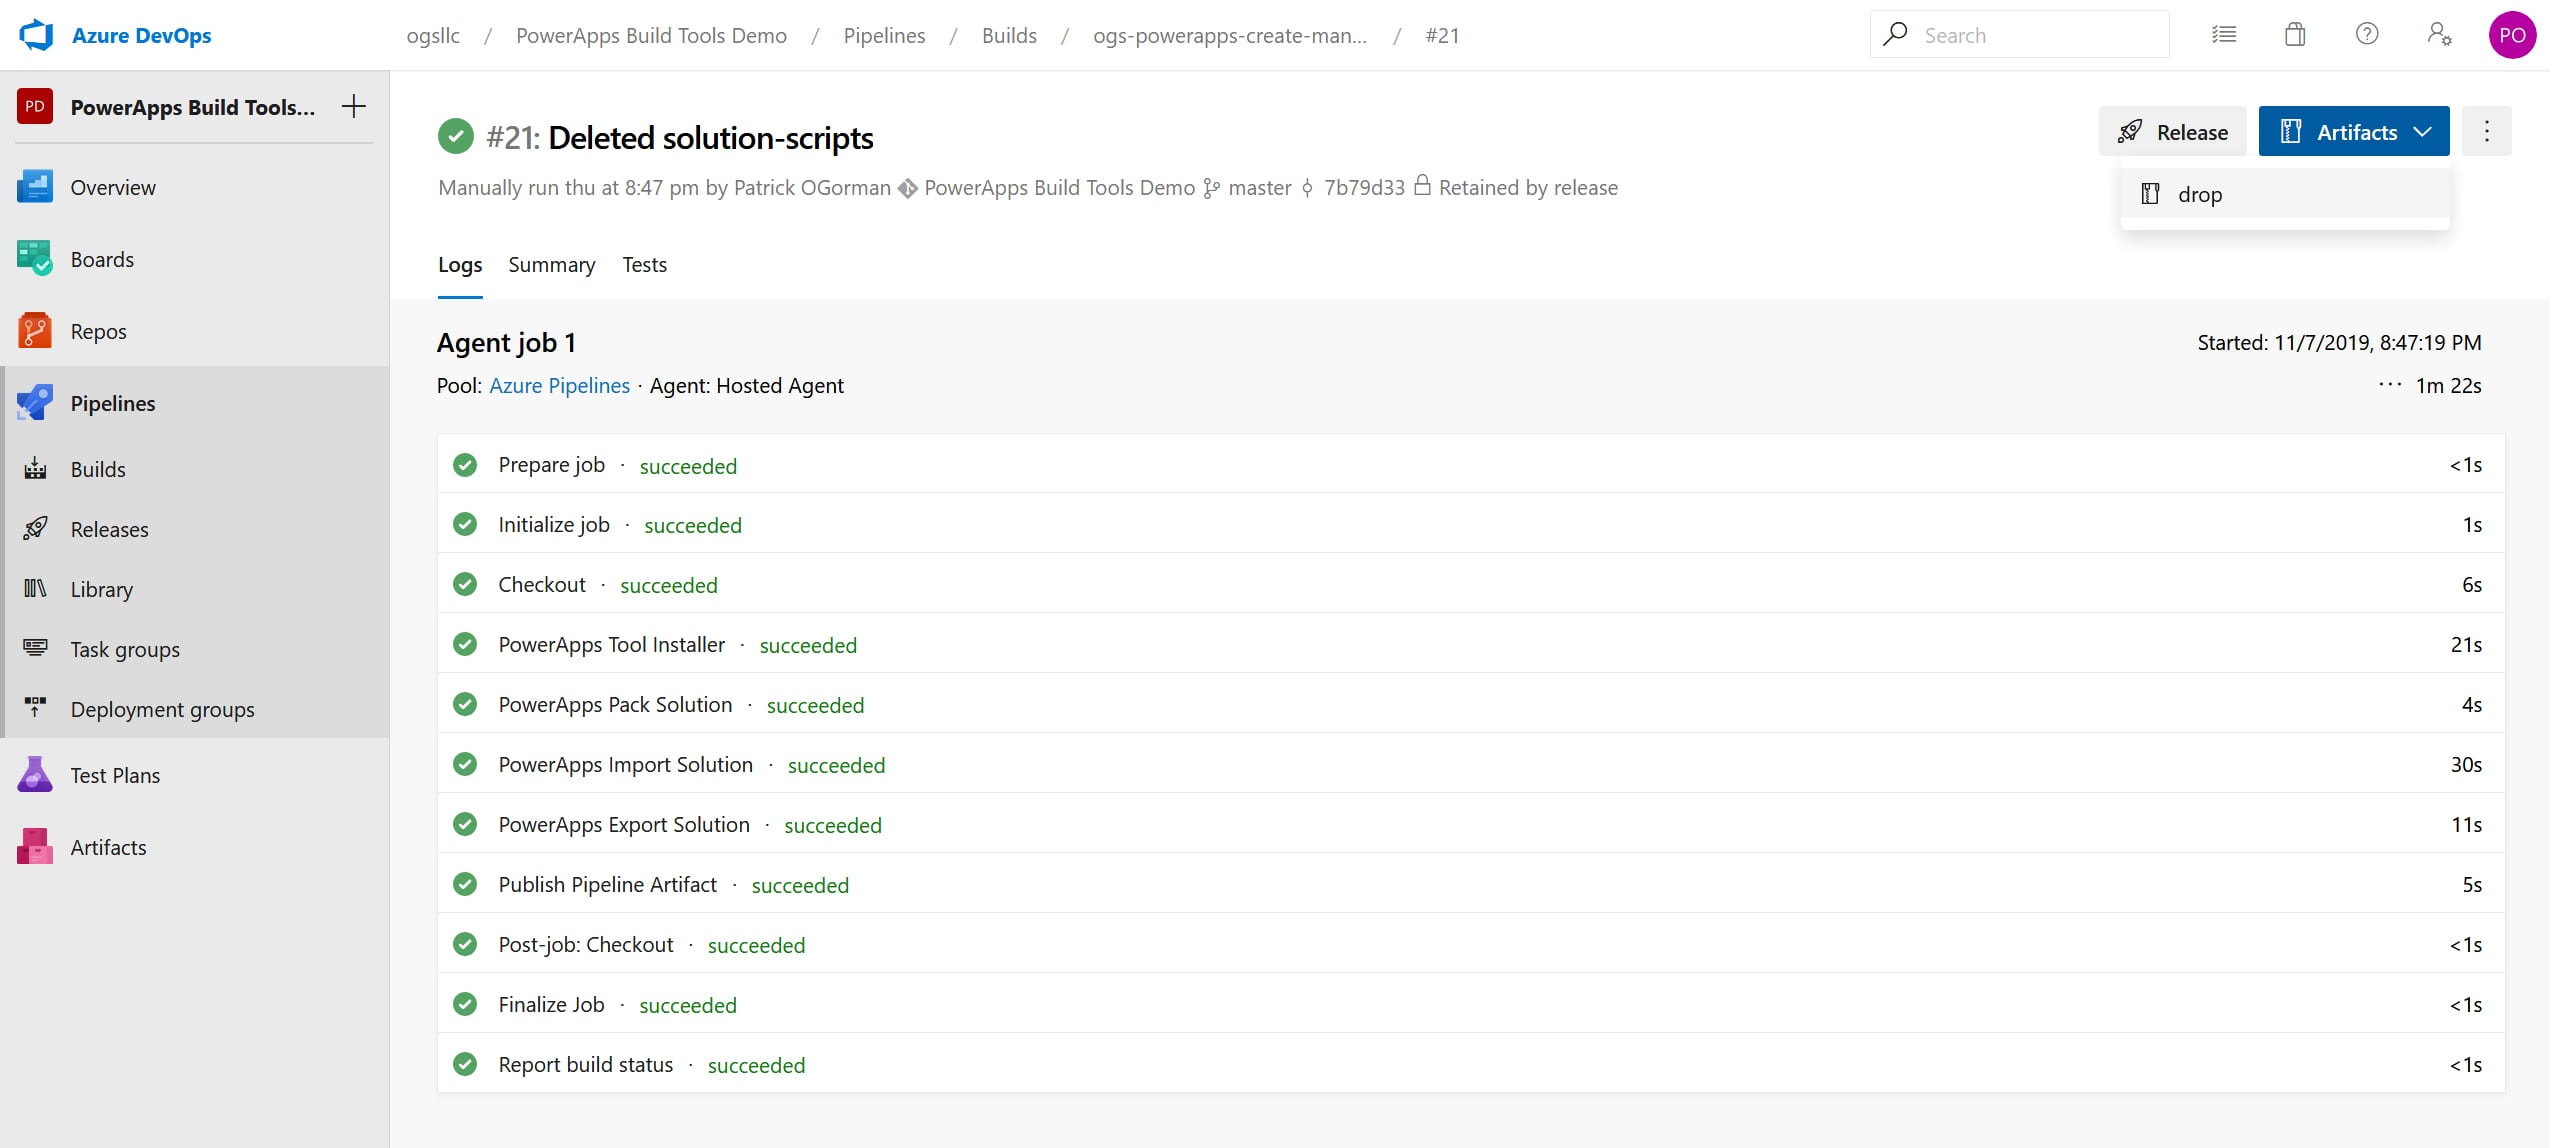
- Run the pipeline. If it was successful you should see a drop artifact in the Artifacts dropdown menu.
Deploying to Production – Creating the Release Pipeline
- Now it’s time to create a Release pipeline. Click on Releases in the left nav, then click New, and then New release pipeline from the dropdown menu. Start with an empty job on the next screen.
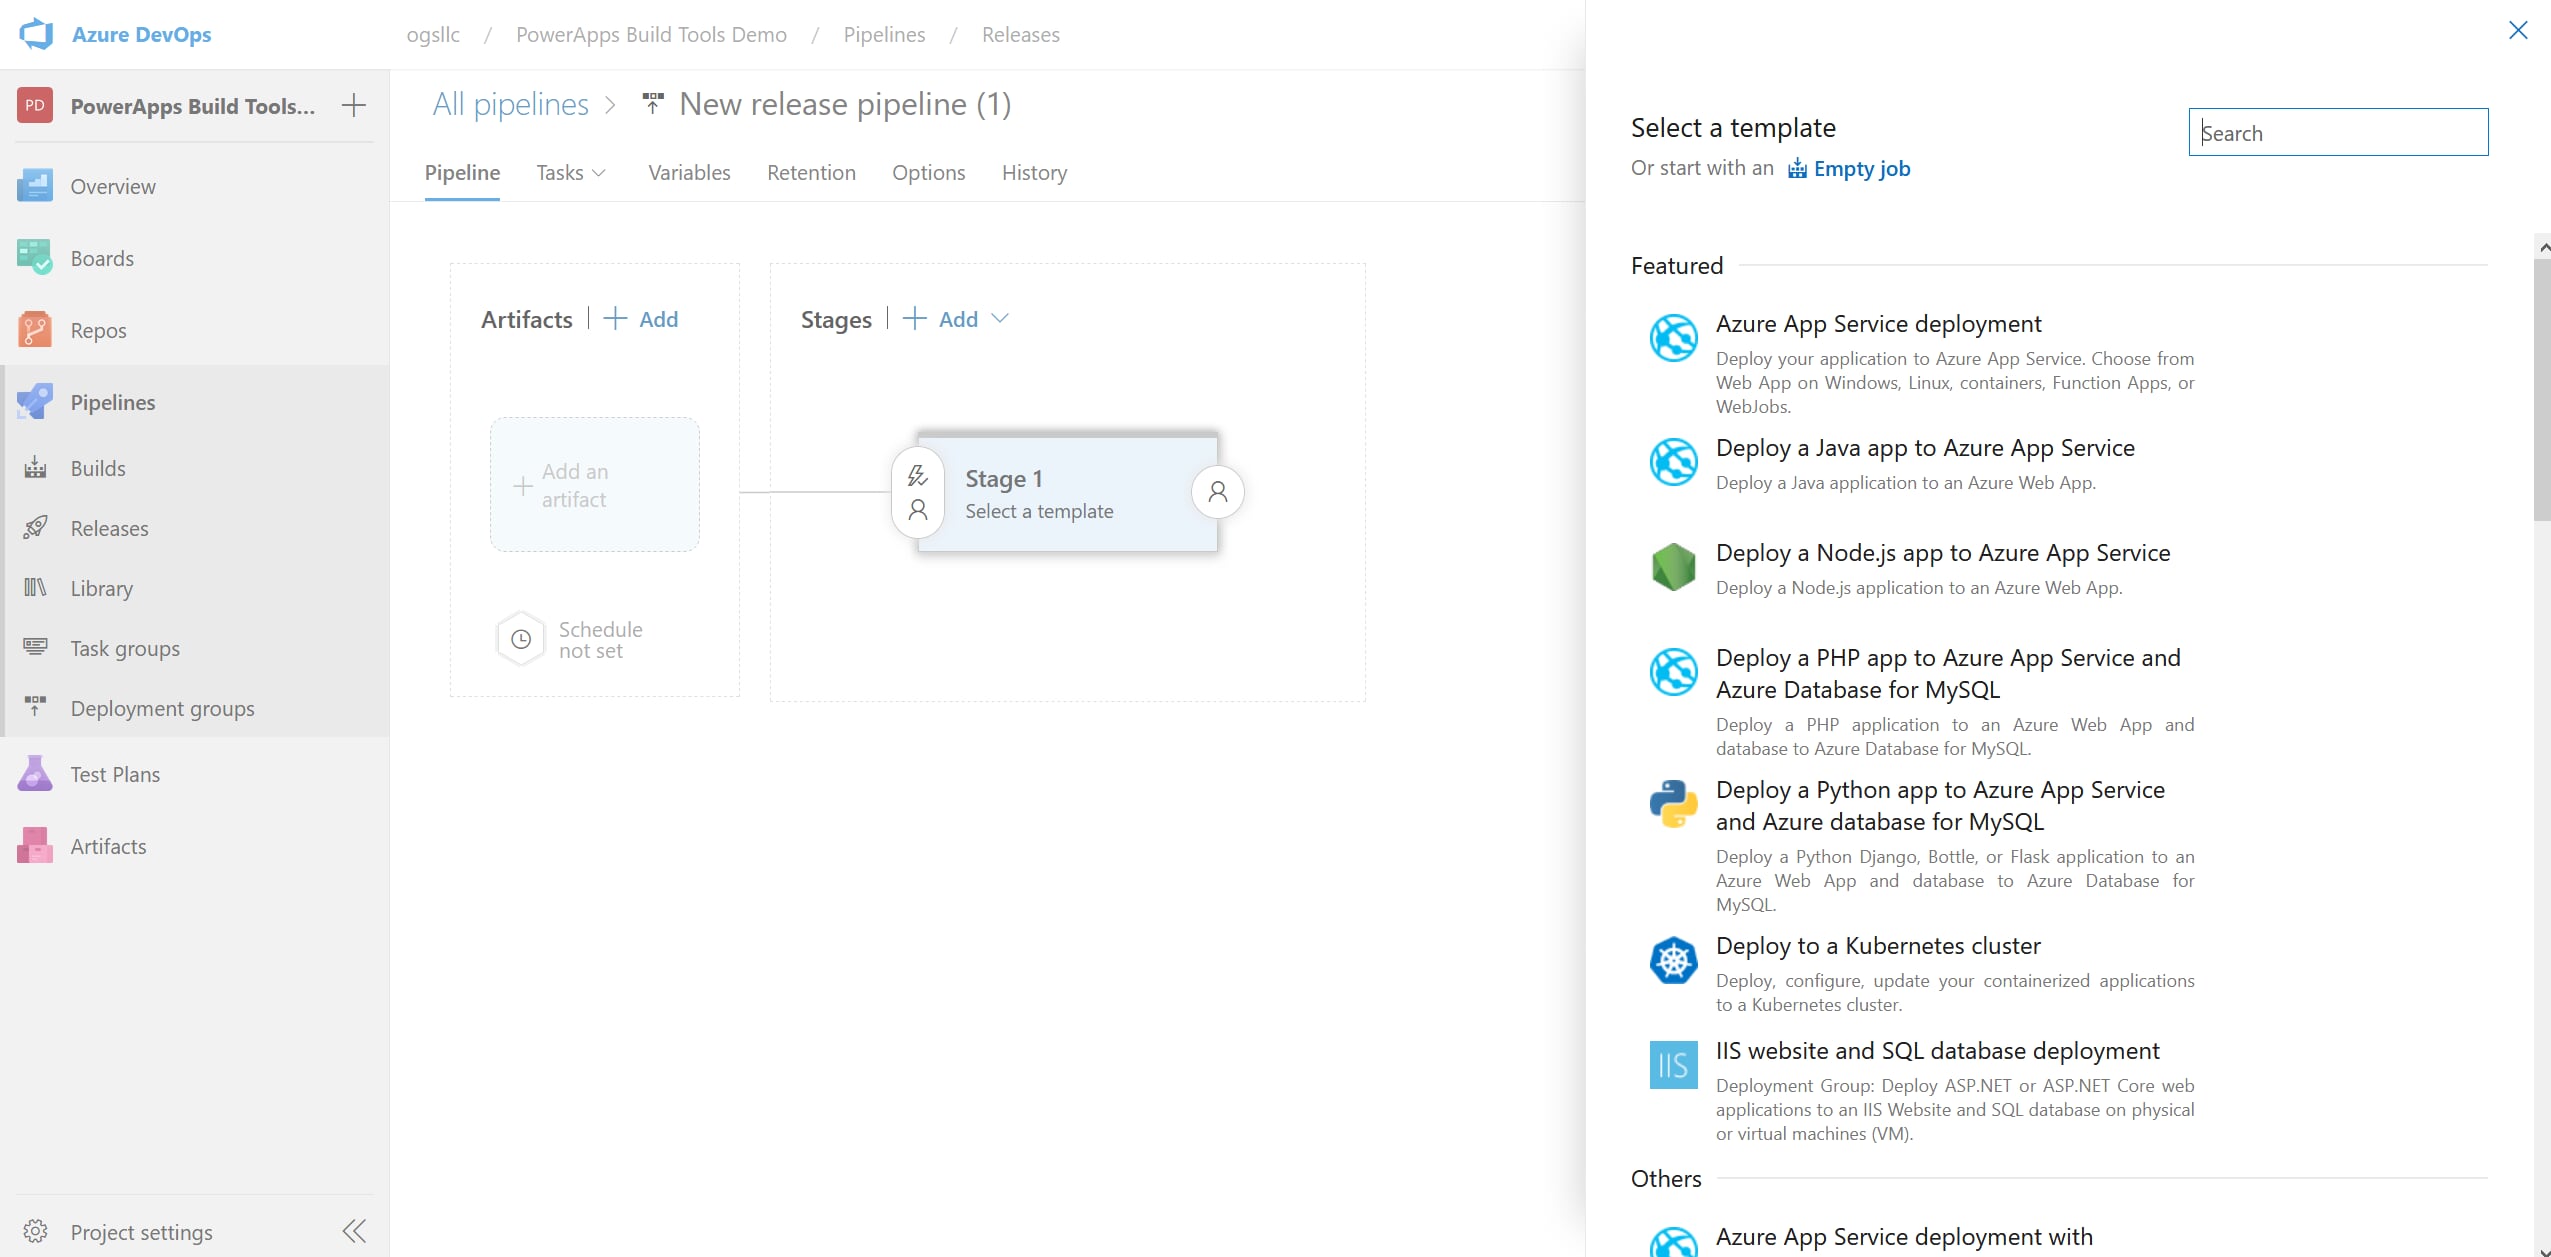
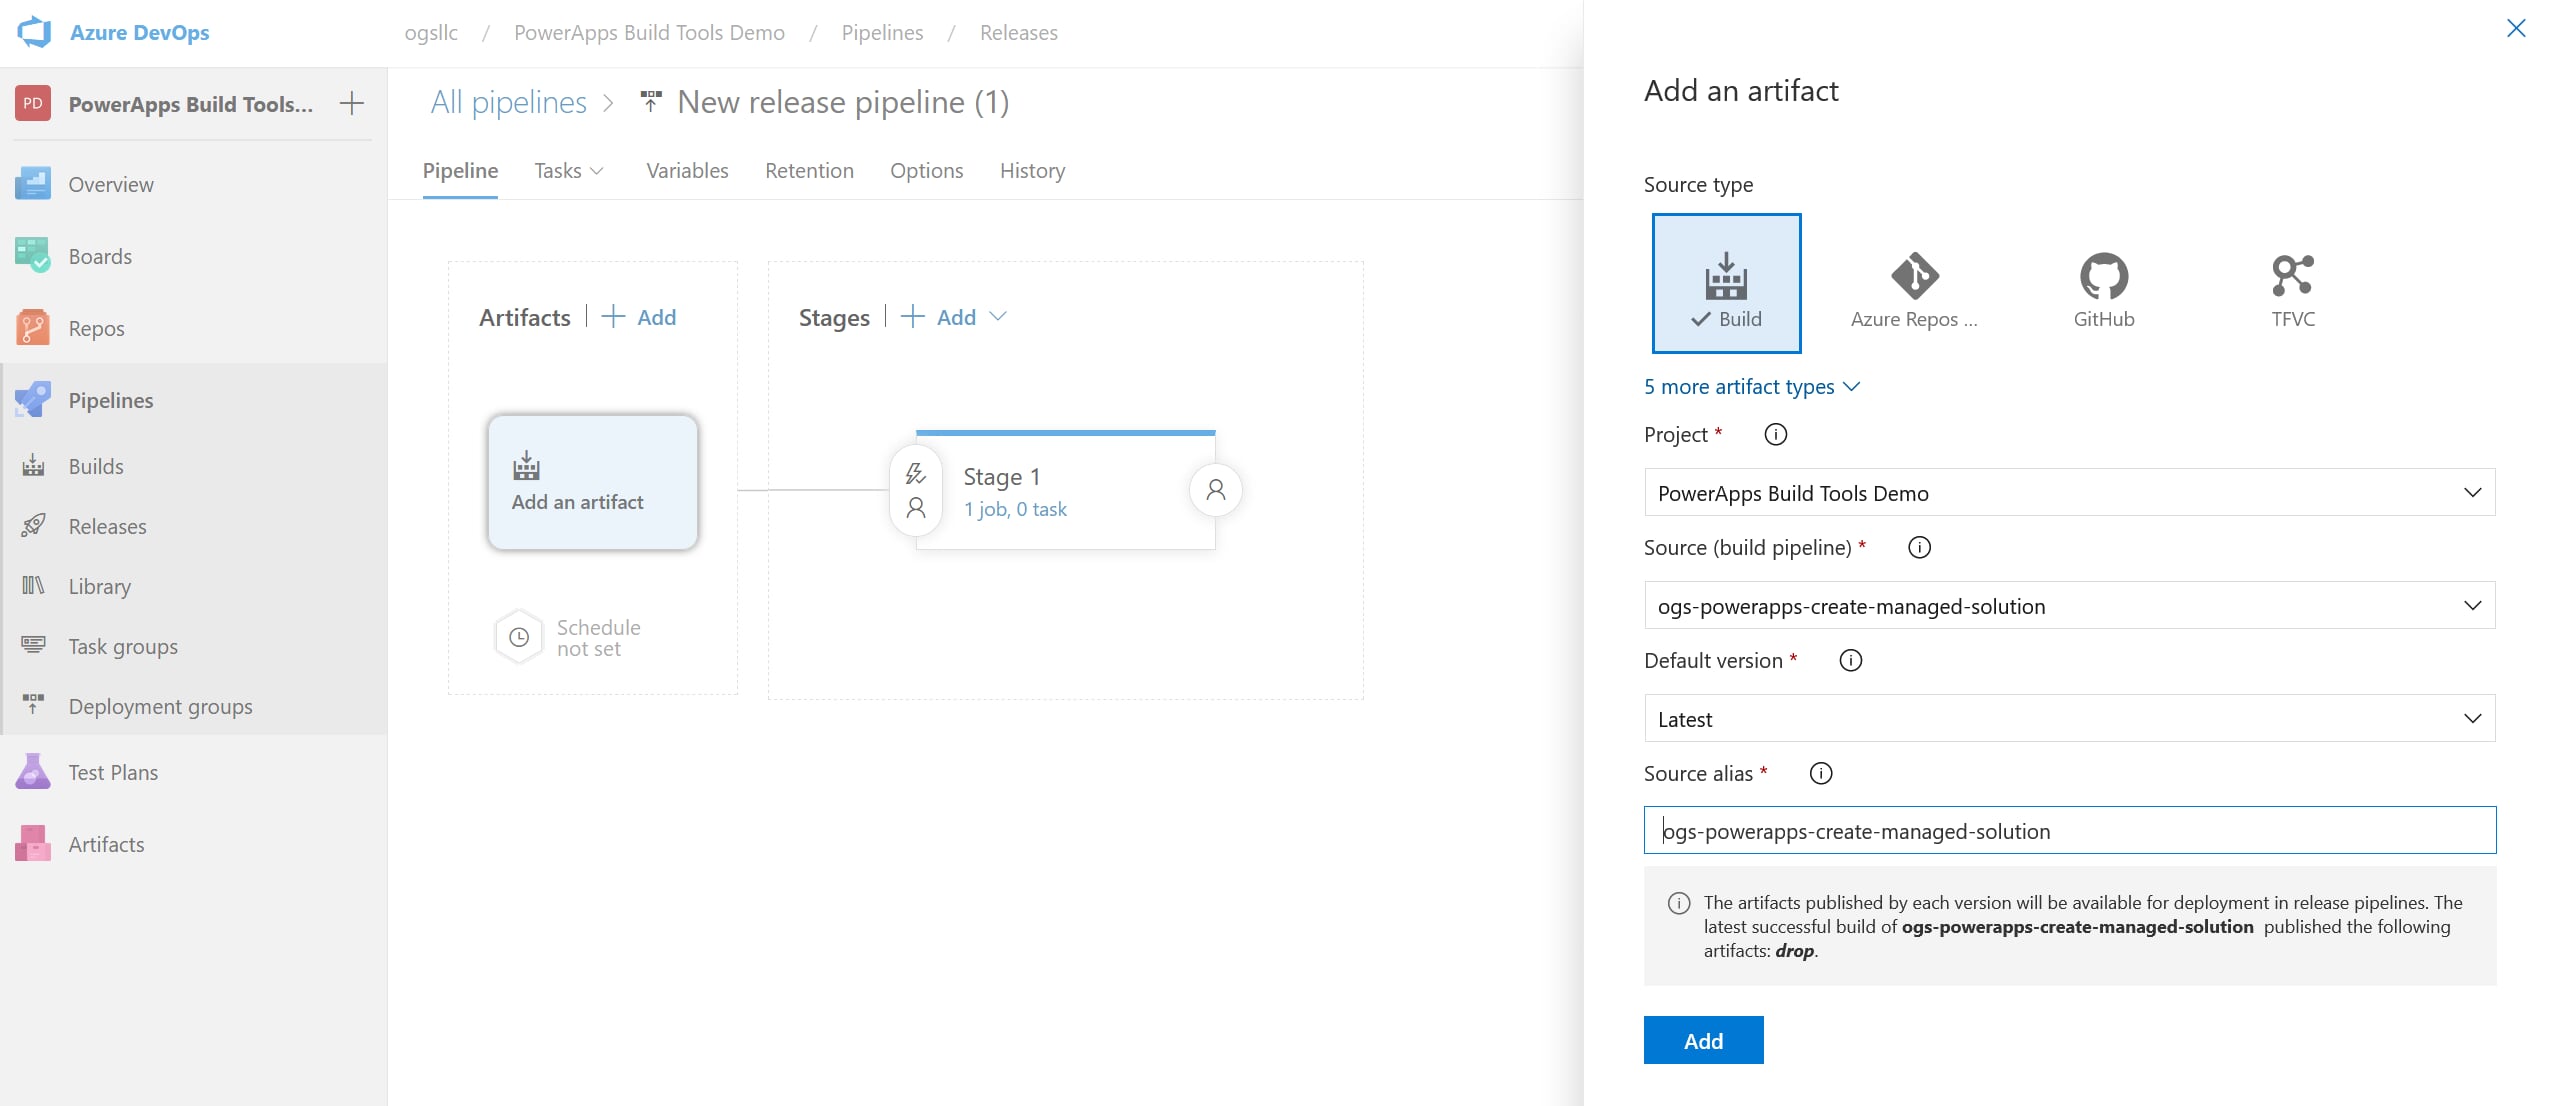
- Select the Add an Artifact block and select the build pipeline that we created to build the managed solution.
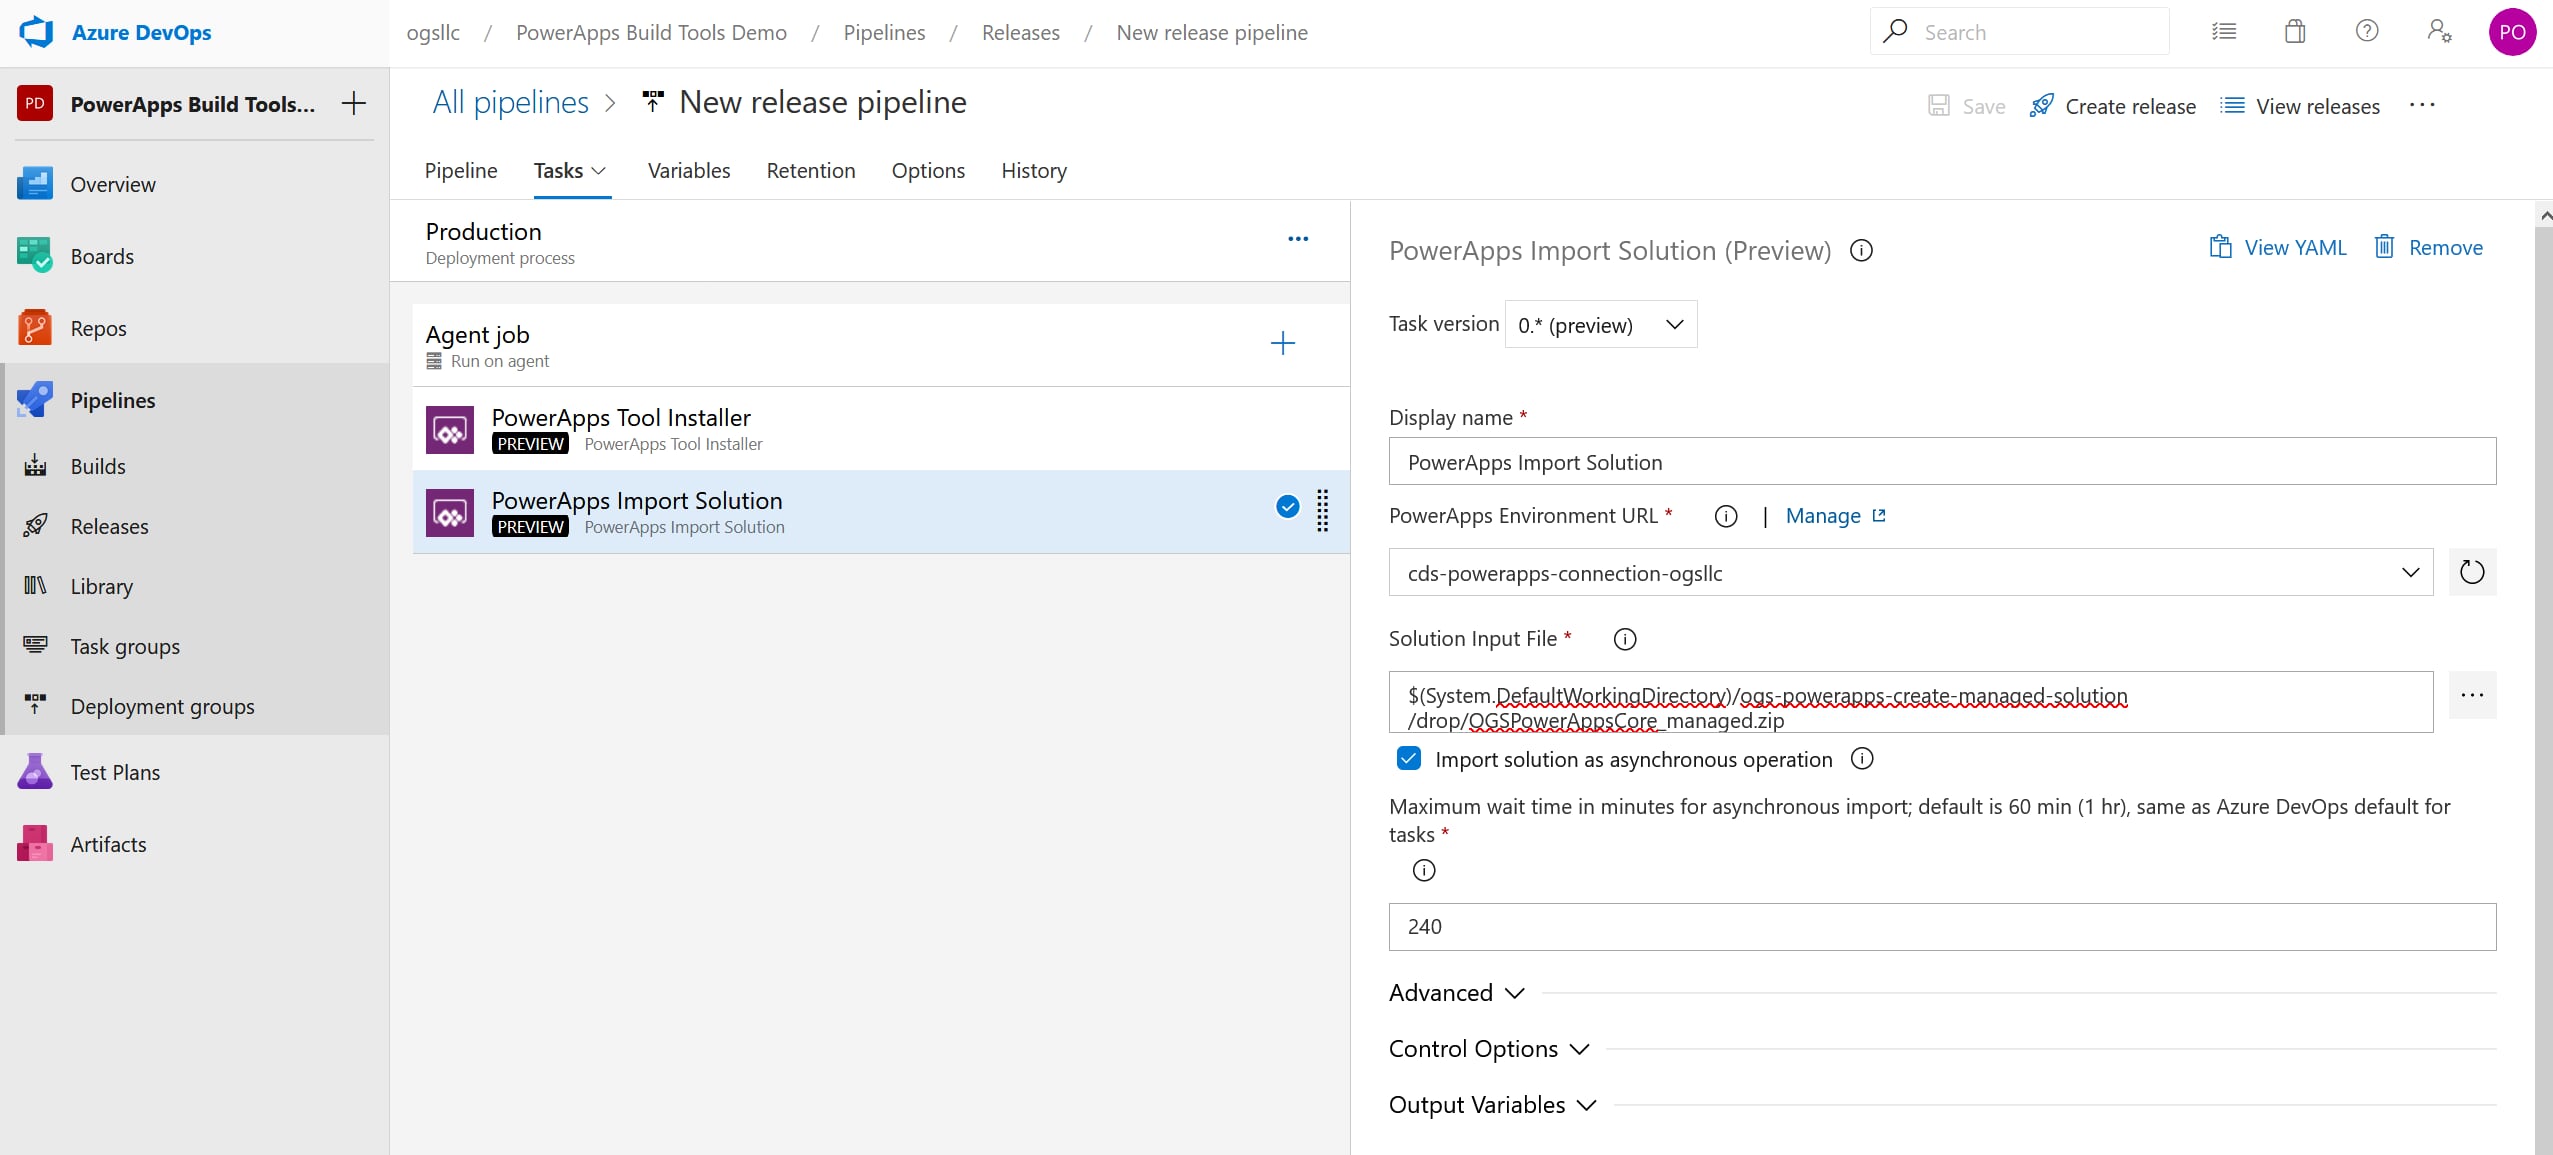
- Click on the 1 job, 0 tasks link in the Stage 1 block. Add the Power Apps Tools task, and a Power Apps Import Solution task.
- Click on the Agent job and scroll to find the Artifact download and select the build pipeline that was built for creating the managed solution.

- Click on the Power Apps Import Solution task. You will use something similar for the Solution Input File. $(System.DefaultWorkingDirectory)/ogs-powerapps-create-managed-solution/drop/OGSPowerAppsCore_managed.zip
- Select the production environment service connection from the Power Apps Environment URL. Save the pipeline.
- Use the Create Release button to test the release pipeline out.
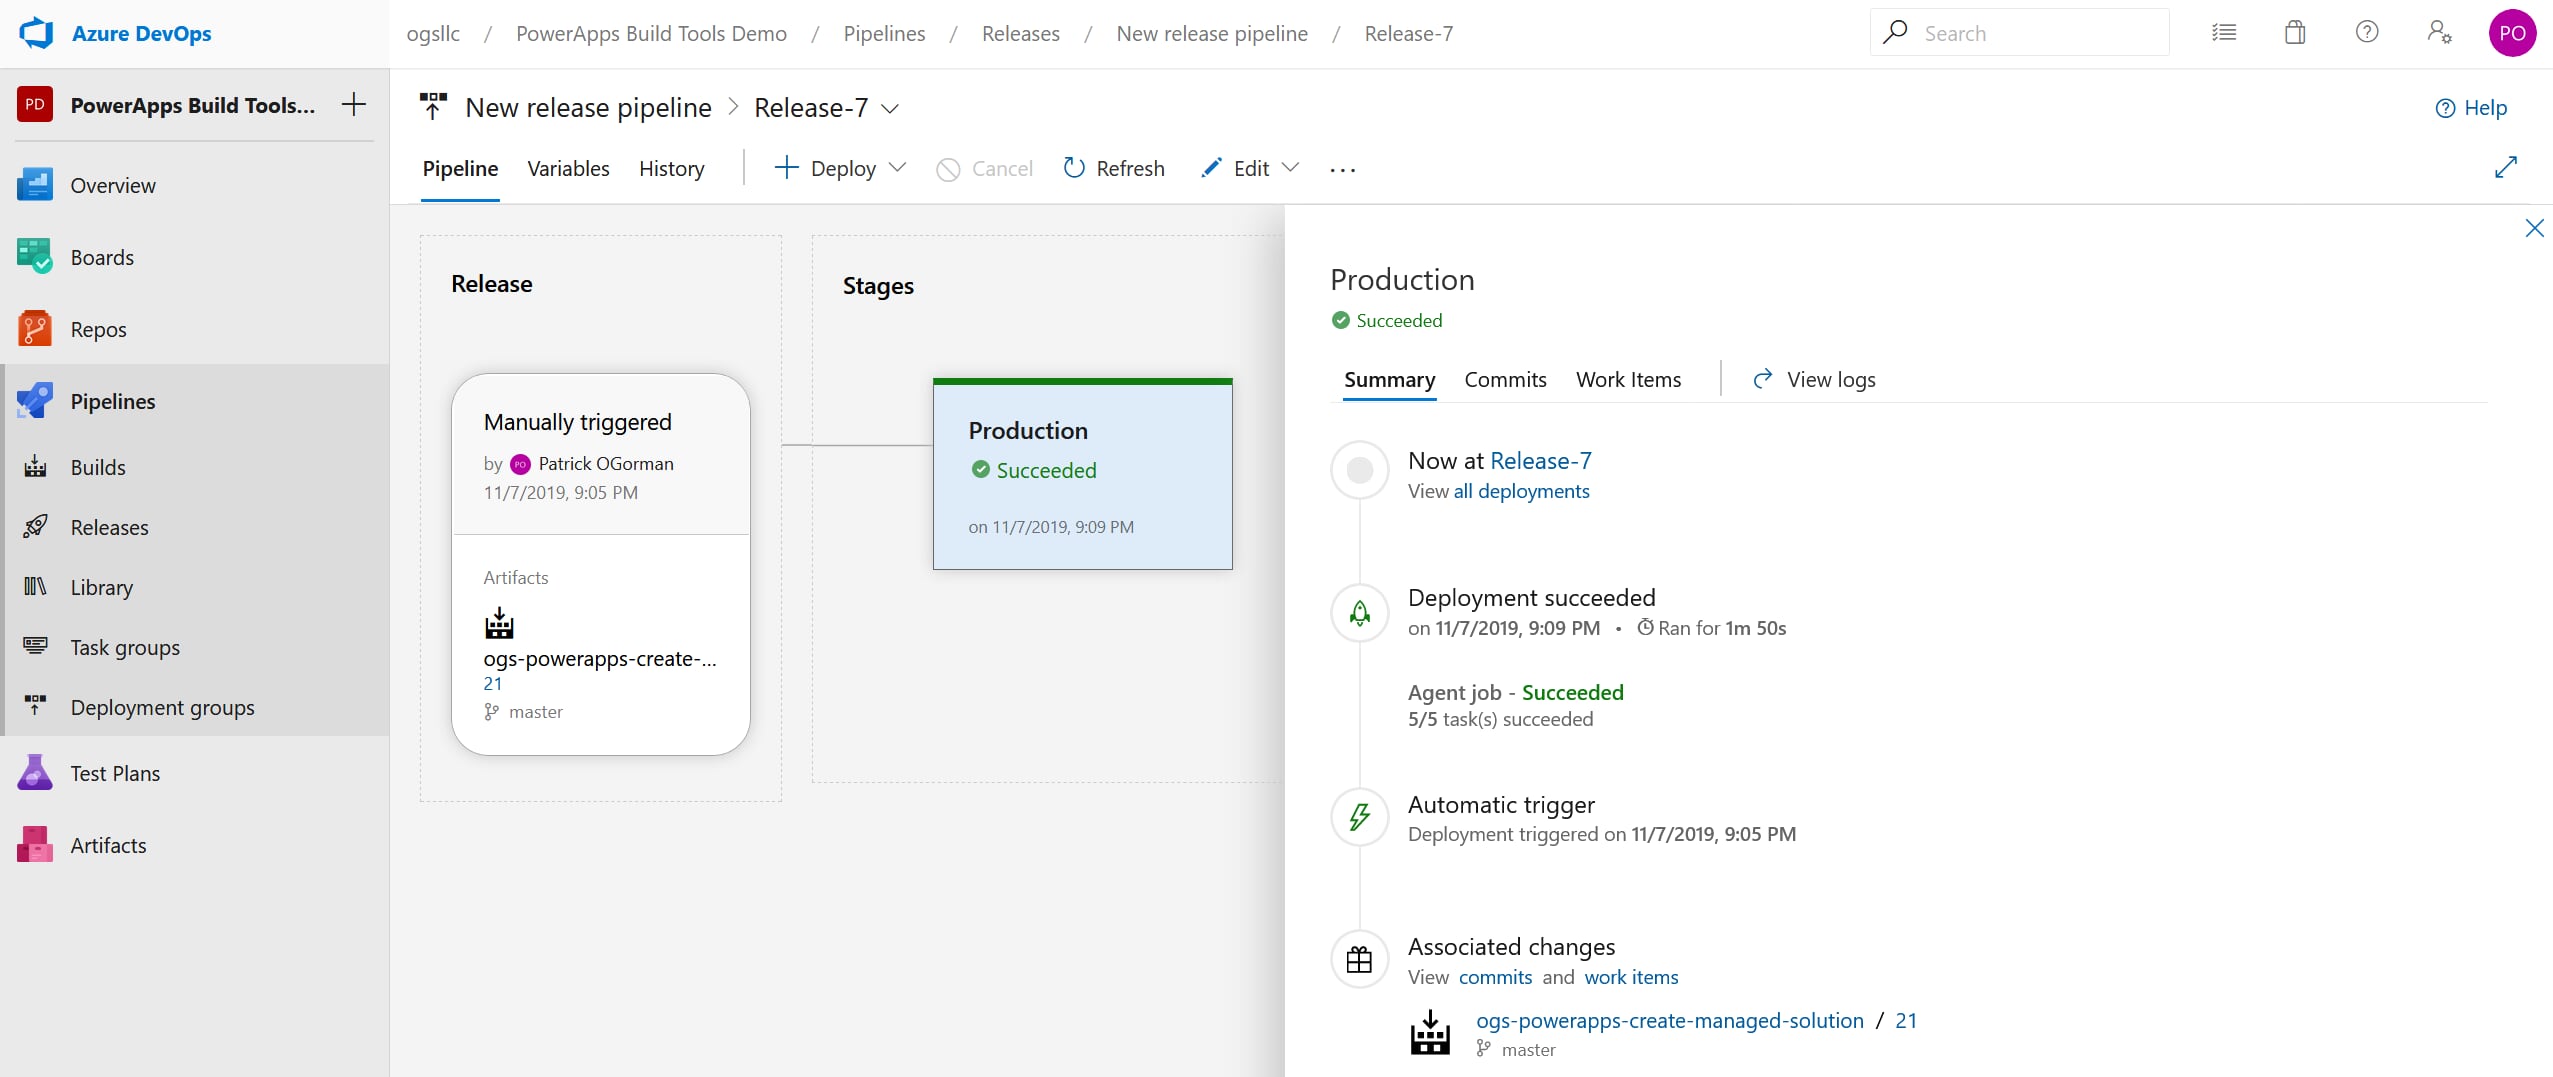
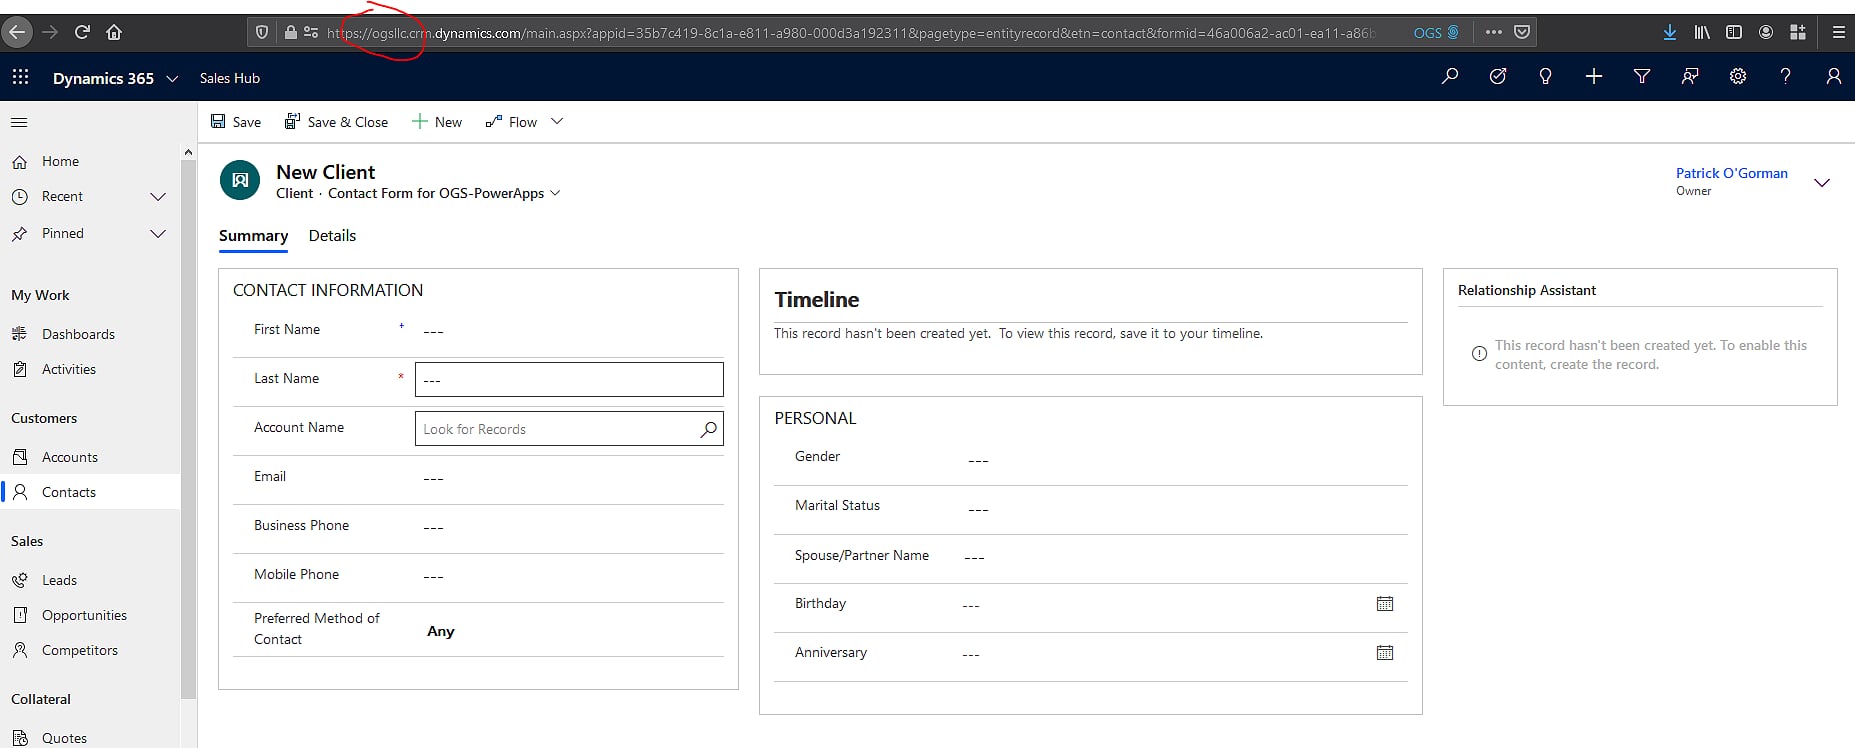
- Now you should be able to go to your production environment and see the solution, plus the changes we made to the contact form.
- Create a new environment.
Conclusion
I hope this helped demonstrate how to use the Power Apps Build Tools to get your solutions into source control and automate the deployment of said solutions across any environments. I hope you were also able to pick up something new about your Power App solutions composition.

