


When it comes to Microsoft, people don’t generally think “Open Source” or “Linux Support”. But in recent years, Microsoft has come a long way. They’ve released many of their most commonly used frameworks under open source licenses, including ASP.NET MVC/Web API/Web Pages and Entity Framework!
Additionally, they’ve given first-class support for many non-Microsoft offerings, especially in Azure. Currently, this includes support in Azure for open source gems like Node.js, PHP, and, yes, even Linux. Heck, they even have an Openness logo:
![]()
In this post, I’ll walk you through setting up the Ubuntu Desktop on an Azure Virtual Machine and configure it so you can connect to it through Windows Remote Desktop. It’s a lot easier than you think!
WARNING: Heavy usage of RDP over Azure could result in lots of out-going bandwidth usage, which could mean a very large bill for your Azure account. Be careful and make sure you check your bandwidth usage!
Part One: Creating The Virtual Machine
Creating a Virtual Machine in Azure is surprisingly simple. You will need an Azure account (sign up for the Free Preview if you don’t have one). Then, you’ll use the “Preview” portal at https://manage.windowsazure.com.
As of this writing, you can create a Virtual Machine in Azure preinstalled with four different flavors of Linux (OpenLogic CentOS 6.2, SUSE Linux Enterprise Server, Ubuntu Server 12.04 LTS and openSUSE 12.1), or upload your own custom VHD. We’ll just use the easy way.
To get started, click “Virtual Machines” on the left side, then select “New” on the bottom bar, followed by “Virtual Machine” and “From Gallery”.
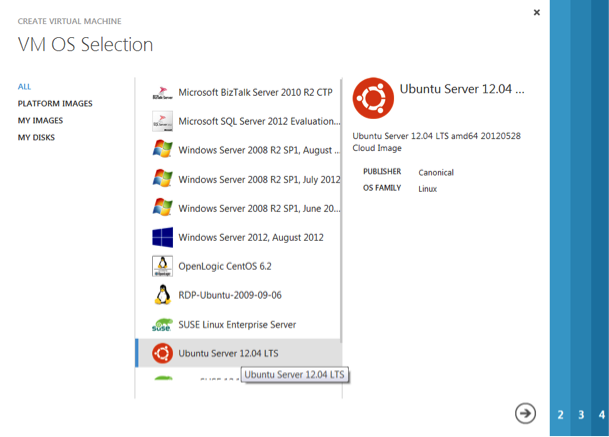
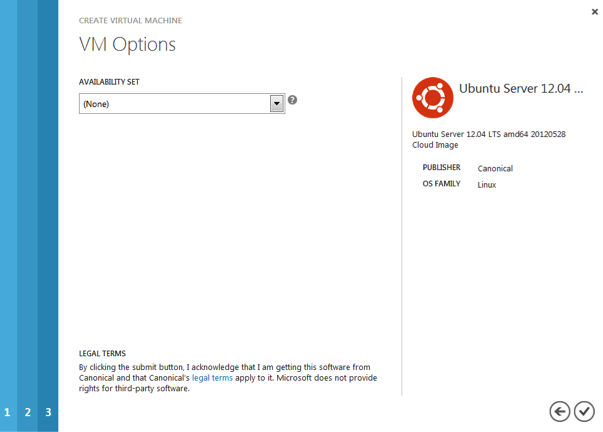
This brings up the “VM OS Selection” dialog. Choose “Ubuntu Server 12.04 LTS” to continue.
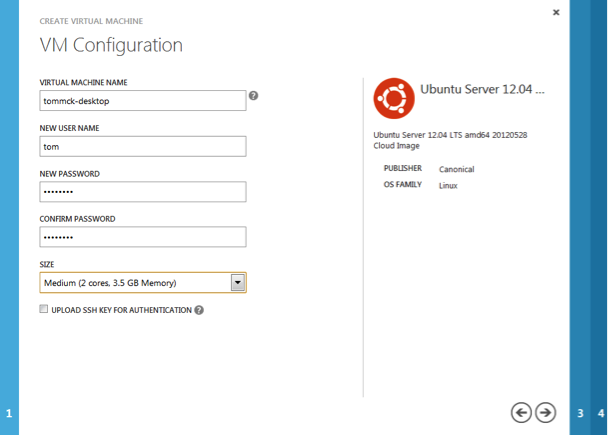
On the next page, name your machine. Note that this is the machine’s internal host name, not the external DNS name, though I tend to use the same name for both to avoid confusion. I called my machine “tommck-desktop”.
You also will enter a username/password combo and a size of the machine instance. I chose a “Medium” instance (dual core, 3.5GB RAM) since the Desktop takes quite a bit more memory than a server installation. A “Small” instance will work fine, but the installation may just take a bit more time. Check out this link for more information on the instance size specs.
Next, you choose the third-level DNS name for your instance. Note: for this purpose, we’re using a “Standalone” machine, since we’re not creating a “server farm.”
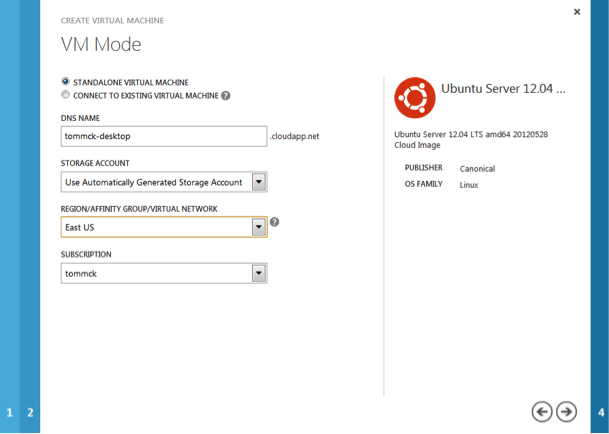
“Availability Sets” are also something used for “server farms.” We’ll just leave this as “(None)” and click the check mark (√) to finish.
Once that is done, you will see the “Virtual Machines” page with your new VM in the “Starting (Provisioning)” state. It should take a total of approximately five minutes for the machine to fully provision.
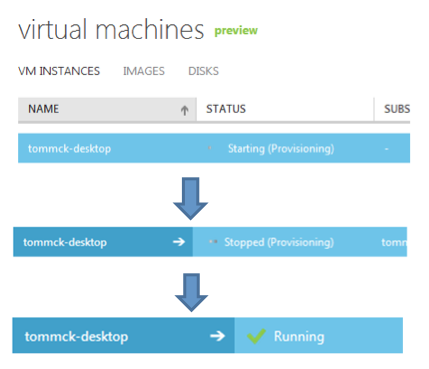
I may be easily impressed, but getting a fully installed Linux VM running in under five minutes is pretty darn cool in my book. Now it’s time to set the rest up.
Part Two: Initial Ubuntu Configuration
A word of caution: this is a PREVIEW! There are definitely a few kinks when working with the Linux VMs, but I’m sure Microsoft is working to fix them. If you run into any problems, consult the “Troubleshooting” section at the end of this post.
SSH
You’ll need an SSH client to connect to your Ubuntu VM. Some options for Windows are:
Bug workaround – IMPORTANT! There seems to be some sort of problem with either Ubuntu, or Azure’s integration with it. The problem manifests after some software updates on the machine (most likely one in particular, but I’m not sure which one). The end result is that you lose your right to run “sudo,” thus removing all ability to access the machine as an administrator.
The only way I know that gets around this is to set a password for “root” (DO THIS NOW):
$ sudo passwd rootThis will allow you to set up a password for the true “superuser” on the box, which is not enabled by default. Thus, when problems running sudo occur, you can login as the “root” user and continue. The good news is that the problem goes away after a reboot if you also run:
$ sudo usermod –G admin [username]This puts your username in the “admin” group in order to make sure you continue to have sudo access after restarting. You will still have problems after the first update.
If, at any time, the system tells you that “username is not in the list of ‘sudoers,’” just use “su –“ and enter the root user’s password to proceed. This will not be necessary after a reboot.
Hopefully this will be fixed by the time you read this so you don’t experience this problem.
Part Three: Installing Desktop and Remote Support (xrdp)
The Desktop
To use a Remote Desktop, we actually need to have a Desktop. So, we’ll install the standard Ubuntu Desktop followed by “xrdp”, which implements the RDP protocol with VNC server software as its backing. This is quite simple to do (just answer yes to any prompts):
$ sudo apt-get install ubuntu-desktop$ sudo apt-get install xrdp
That’s it!
Accessing the Desktop Remotely
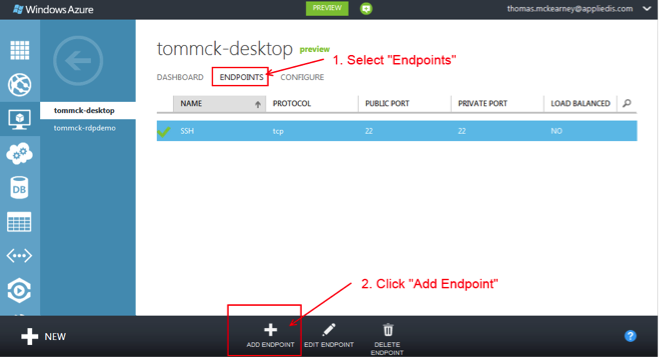
The simplest approach for allowing RDP access is to add an Endpoint to your Virtual Machine from the Portal. To do this, first click “Endpoints” at the top, then “Add Endpoint” on the bottom. Once there, add the Endpoint named “RDP” using TCP protocol and port 3389 (both public and private)
Once that’s done updating, you can go back to the VM screen and click “Connect” on the bottom of your screen:
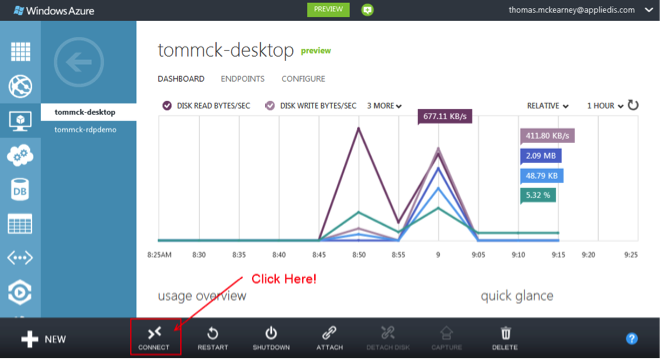
This will download a “.rdp” file which will connect you to your VM.
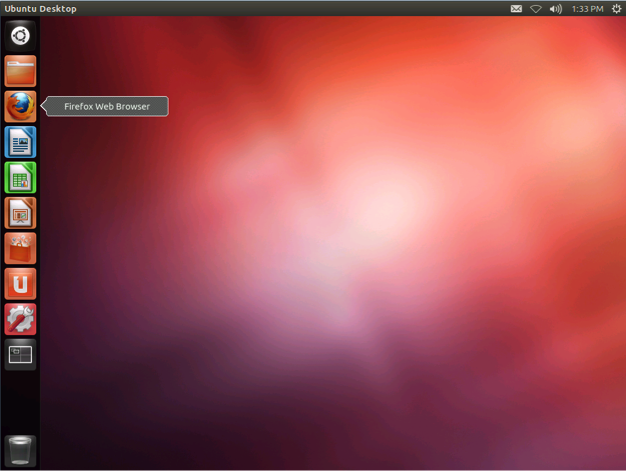
You will be presented with a slightly unusual-looking login screen like this:
Note that you’ll need to change the “username” to your user and enter your password. Once that’s done, you’ll get an Ubuntu Desktop!
I’m sure you’ll notice that it’s not very fast. I highly recommend you use the Remote Desktop client’s Display options to select lower color depth (16-bit or lower) and as small a resolution as you feel comfortable with. This will speed things up considerably.
Part Four: Lock It Down!
For security purposes, most people won’t expose RDP directly to the internet. For this reason, I would strongly recommend using an SSH tunnel to connect your Remote Desktop connection. This way, all the traffic is encrypted locally and decrypted on the server, preventing any interception of the data being transmitted.
First, delete the Endpoint you previously made to enable RDP connectivity then. Next, pick a port greater than 1023 (I chose 5999) to use locally. Now, set up a “tunnel” from your local machine using ssh that proxies local port 5999 to remote port 3389 (the RDP port) like this:
$ ssh –NL 5999:localhost:3389 user@machine.cloudapp.net
Now, assuming there are no errors, start Remote Desktop and connect to “localhost:5999”. This should work just like last time, just much more securely.
Part Five: Troubleshooting
ssh timeouts
I occasionally receive this painful error with ssh:

Unfortunately, they don’t go away easily. The first thing to try is to use the Portal itself to restart the VM. If that doesn’t work, things get a bit hairy from there. Most solutions include deleting the VM (it won’t delete your disk) and then setting up the VM again pointing to the same disk. This is definitely ugly and will hopefully be resolved soon. Contacting Microsoft for help at this point would be highly recommended.
SUDO problems (username is not in the list of ‘sudoers’)
If you run into this problem, use “su –“ and type the root password. You should then have a “#” prompt and be running as “root”. Perform whatever superuser functions you need here, and reboot, which should fix the problems with sudo. If you did not follow the “sudo passwd root” step above, you are pretty much stuck. If you need to get to the disk, you’ll need to mount it within another VM in order to access it and modify it.
I’m not on Windows!
There are Remote Desktop clients for non-Windows Operating Systems. If you prefer not to go that route, you can skip using xrdp and just use VNC directly. There are clients for most every operating system you can imagine. Feel free to ask if you need assistance with alternate connection options.

