In this article, I will show you:
- How to restrict users from accessing certain features in a canvas app, while other users can still see and use features.
- How to use SharePoint action in Power Automate to authenticate a user.
Why Restrict Access?
In any App, there’s always more than one type of user. For example, there will be customers, staff, administrators, and so on in an event management application. An administrator will have access to everything; meanwhile, staff will have limited access. However, a customer can only access his data.
Therefore, we need to make sure that we restrict users from interacting with specific data or features. For example, using Power Automate, we can hide anything in our Canvas App from users so that they do not interact with it. But how do we know who has access to it and who does not? Through a SharePoint group!
We will create a SharePoint group and add the users who have complete access to the app, but before we move ahead, let us understand what SharePoint groups offer:
- There are four types of SharePoint groups: Viewers, Visitors, Members, and Owners.
- Each group has different permission levels like view-only, read, edit and full-access.
- You can assign a permission level to multiple users by simply moving them to a group.
Now that we know the basics let us break this article into pieces:
- Create a SharePoint group
- Create a flow to authenticate users.
- Create a simple canvas app.
- Hide elements in the canvas app using global variables.
- Bonus Tip
One: Create a SharePoint Group
Follow this article to create a SharePoint group.
Apart from group names and descriptions, SharePoint allows you to choose permission levels. You can select any options based on your requirements.
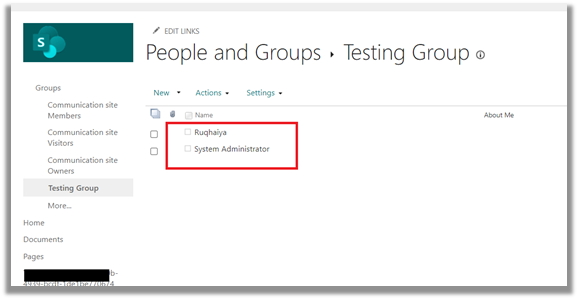
After creating the group, add a user to it.
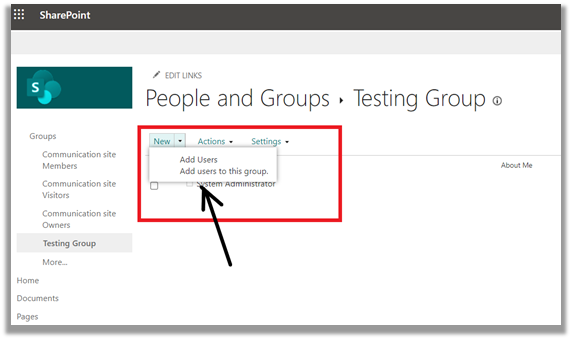
Note: Make sure this user is already present in your environment.
Two: Create a Flow to Authenticate Users
Create an instant flow with PowerApps as a trigger and add three variables.
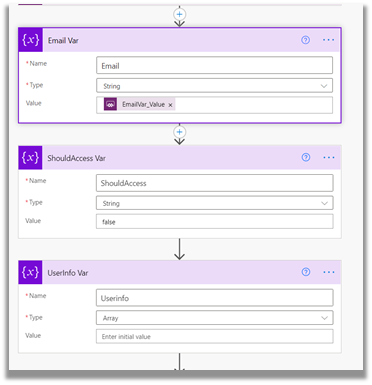
- Email: This will be an input from the canvas app.
- UserInfo – We’ll store user information that SharePoint API will fetch us.
- ShouldAccess – This will initially be false.
Note: You can name these variables however you like.
Now Add the ‘Send HTTP Request to SharePoint’ action.
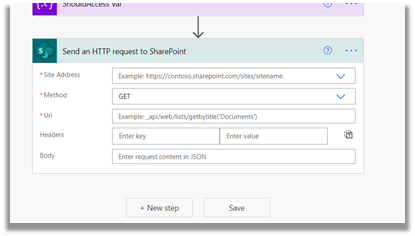
Here we have some fields to fill. These fields are crucial, and we primarily run into errors in this step. So be careful.
Let’s break it down one by one.
- Site Address: Select the site from the dropdown. Select the site where your group is.
- Method: Select the GET method. Since we are requesting SharePoint to provide user data.
- URI: We need to give the URI, which will fetch us data from the SharePoint group’s list.
URI Structure
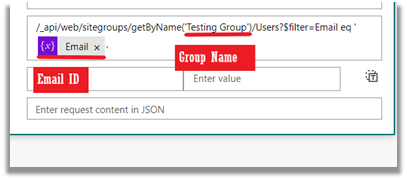
- /api/web/sitegroups – Take you to the site groups of SharePoint.
- GetByName(‘’) – This function will go to a specific group on your site.
- Users – It will take you to the user’s list in the group
- $filter = Email eq ‘’ – This is a filter query that will check for the email id provided by you. It will fetch user details; otherwise, it will send a blank response.
Note: The URI structure could be tested by simply pasting it in your browser. But don’t forget to add the SharePoint, Site Address + Uri.
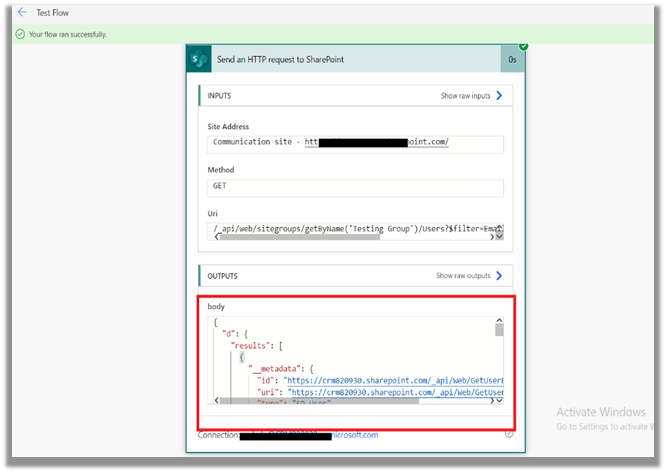
It should return a json structure with user details. If it doesn’t, then your link is broken. Now save and test your flow.
On a successful run, check the http response body. If the user is present, it will return the result like this:
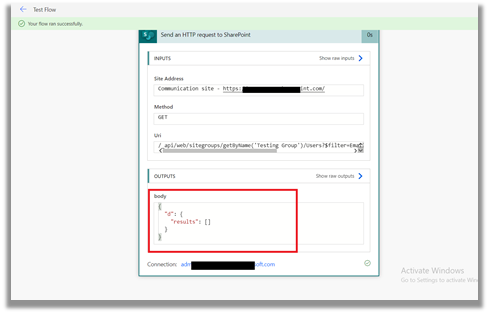
If the user is not present, then you will see an empty array like this:
Now let us add a condition where we will check if the result is empty or if it returns the information about a user.

In the ‘value’ property of the ‘Condition,’ add an expression. This expression will extract the length of the ‘results’ array from the http response.
Expression:
length(body('Send_an_HTTP_request_to_SharePoint')?['d']?['results'])
If the length is 0, the user is not present in the SharePoint group. This is all we need to authenticate a user. Now, if you remember, we already initialized a ‘ShouldAccess’ variable as false. Therefore, we will only update this variable as true when the above condition is false, which means the ‘results’ array is not empty.

So, in the ‘No’ section after the condition. Then, add the ‘Set variable’ action and update the ‘ShouldAccess’ variable as true. We are almost done, but let us send the response to the canvas app using the ‘Respond to PowerApps’ action.

We are simply returning our ‘ShouldAccess’ variable to the canvas app. Canvas will treat this as a signal. Based on the value of this variable, it will decide if the user should be granted access or not.
Three: Create a Simple Canvas App
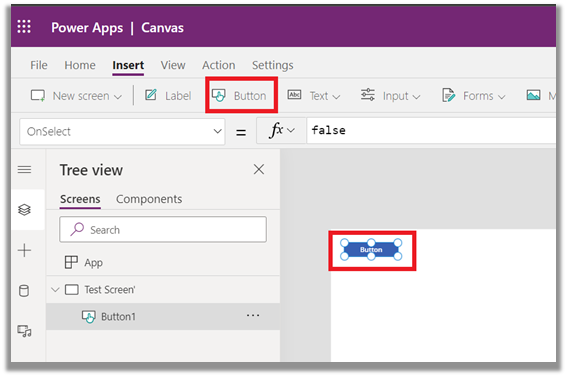
Visit make.powerapps.com and create a blank canvas app. Then, add two buttons on the canvas.
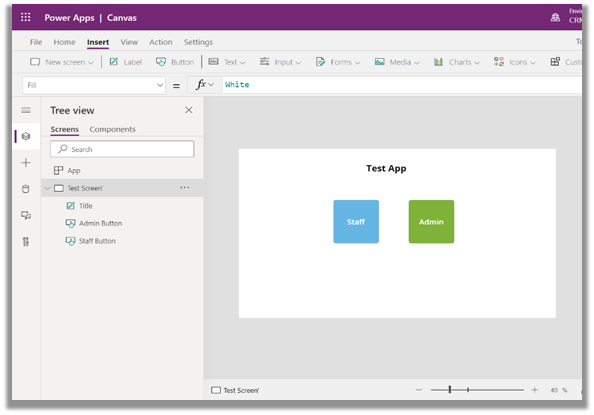
I like playing with colors, hovering colors, and so can you. Now onto the last step!
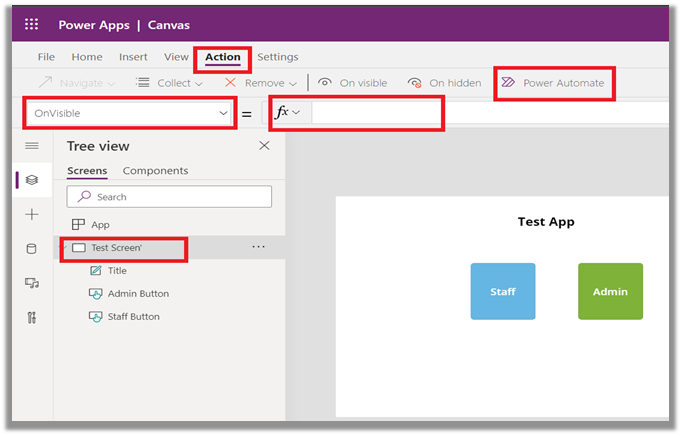
Four: Hide Elements in the Canvas App Using Global Variables
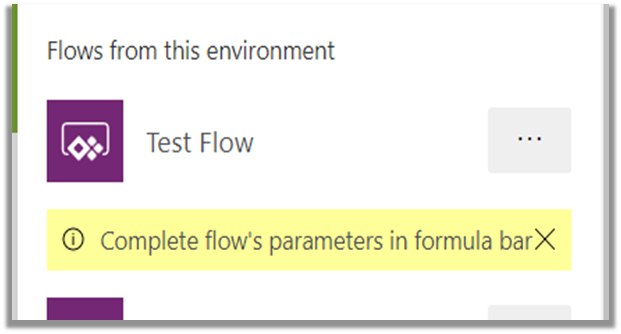
Select your current screen -> On Visible property -> Action -> Power Automate -> Add Test Flow
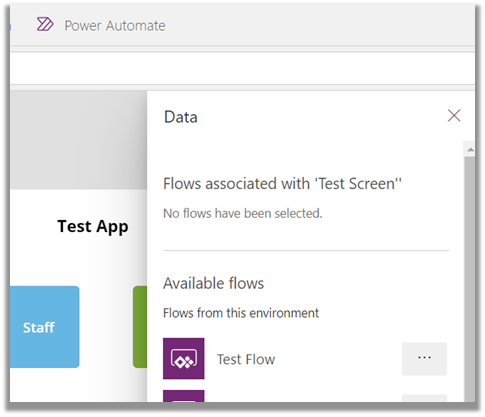
After the flow is being added, you will see this message. This means you are a genius and have made no mistakes so far.
Now in the formula bar of ‘On Visible’ property, add this formula:
Set(CheckUser, TestFlow.Run(User().Email));
Set(
    IsVisible,
    If(
        Lower(CheckUser.shouldaccess) = "true",
        true,
        false
    )
)
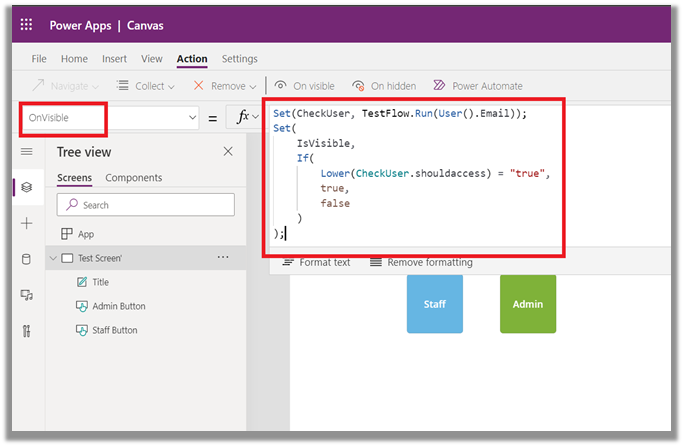
Let’s understand the formula:
Set(CheckUser, TestFlow.Run(User().Email)) – We are storing the response from flow in a variable called CheckUser. User().Email is an input parameter to the flow.
Set(IsVisible) is another global variable we are using to check if the response is true or false. We will use this variable on Admin Button to hide it from staff.
Let’s take a look at how:
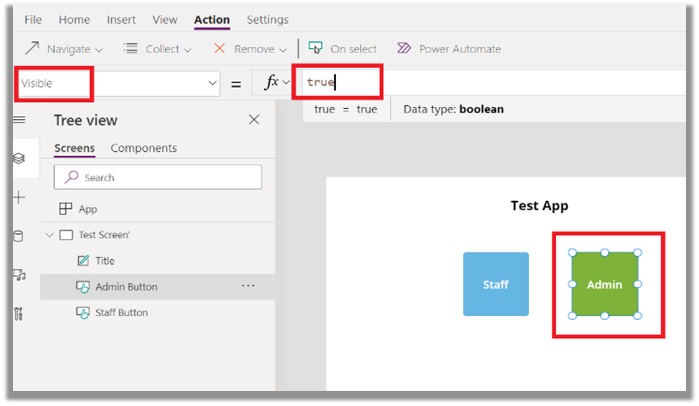
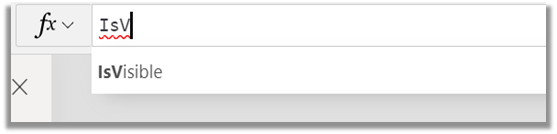
In the formula bar, remove ‘true’ and write the name of our global variable ‘IsVisible.’
As soon as you add this, the Admin Button will become invisible.
Now save the app and reload the page. Upon reloading, it will run the flow, and since you are an admin, the ‘Admin’ button will be visible to you. Test this using different users as well to see the difference.
Step 5: Bonus Round!
There might be a few scenarios where you don’t want to hide the features entirely from the user but also want to restrict them from using them. In such a case, you can use the DisplayMode property of the admin icon.
If(IsVisible, DisplayMode.Edit, DisplayMode.Disabled)
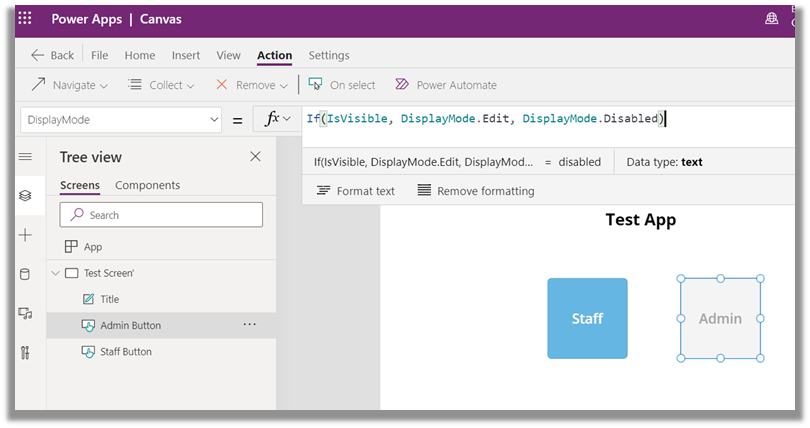
![]()
Look at that! Check out our very own partially visible admin icon.
On that note, I hope I could break down the mind-boggling stuff you may have read before this article.