


In my previous post, I discussed lessons learned about migrating SQL Server databases from on-premise to Azure SQL Databases. This post will share several of my issues and solutions around automating Azure resource provisioning and application code deployment. Before this project, I had never used Azure DevOps or Team Foundation Server for anything except a code repository or task tracking. Most of these applications would use Build and Release pipelines to configure the Azure subscription and deploy the applications. Besides, this was my first foray into the Azure Resource Manager (ARM) templates.
Azure Resource Manager (ARM) Templates
ARM templates provide a declarative method for provisioning and configuring Azure resources. These JSON files use a complex schema that provides deep configuration options for most of the available resources available in Azure. Some of the key benefits of ARM templates are:
- Idempotent: templates can be redeployed many times returning the same result. If the resource exists, changes will be applied, but the resource will not be removed and recreated.
- Intelligent processing: Resource Manager can manage the order of resource deployment, provisioning resources based on dependencies. It will also process resources in parallel whenever possible, improving deployment times.
- Modular templates: JSON can get incredibly hard to maintain when files are large. ARM provides Linked Templates to split resources into separate files to simplify maintenance and readability. This also provides the opportunity to reuse some templates in multiple deployment scenarios.
- Exportable: Resources have an option to export the template in Azure Portal. This is available if you’re creating a new resource at the validation stage or in the resource’s management pane. A Resource Group also provides a method for exporting the template for multiple resources. This was very useful for understanding more advanced configurations.
For the first few projects, I built large templates that deployed several resources. This presented several hurdles to overcome. First, large templates are hard to troubleshoot. Unlike scripting solutions, no debugger allows you to step through the deployment. The portal does provide logging, but some of the error descriptions can be vague or misleading especially in more advanced configuration settings. In situations where there are multiple instances of one type of resource, there may be no identifying information for which instance caused the error. In theory, linked templates would be a way to handle this, but linked templates require a publicly accessible URI. The client’s security rules did not allow this level of exposure. The best solution was to add resources one at a time, testing until successful before adding the next resource.
I also had some minor issues with schema support in Visual Studio Code. The worst of it was false positive warnings on the value of the “apiVersion” property for a resource not being valid despite the schema documentation showing that it is. This didn’t cause any deployment errors, just the yellow “squiggly” line under that property. Another inconvenience to note is when exporting a template from the portal, not all resources will be in the template. This was most noticeable when I was trying to find the right way of adding an SSL certificate to an App Service. The App Service had a certificate applied to it, but the template did not include a resource with the type, Microsoft.Web/certificates.
While templates are supposed to be idempotent, there are some situations where this isn’t the case. I found this out with Virtual Machines and Managed Disks. I had a template that was creating the disks and attaching them to the VM but found out later that the disk space was too small. Changing the “diskSizeGB” property and re-deploying fails because attached disks are prohibited from resizing. Since this isn’t likely to happen when we get out of the lab environment, I changed the sizes in the portal by deallocating the VM and changing the size.
Azure & TFS Pipelines
Azure Pipelines, part of the Azure DevOps Services/Server offering, provides the capability to automate building, testing, and deploying applications or resources. Team Foundation Server (TFS) is the predecessor to Azure DevOps also offers pipeline functionality. These projects use both solutions. Since there is no US Government instance of Azure DevOps Services, we use TFS 2017 deployed to a virtual machine in their environments, but we use Azure DevOps Services for our lab environment since it’s less expensive than standing up a VM. While the products are very similar, there are some differences between the two systems.
First, TFS does not support YAML. YAML allows using and managing a configuration in the source code as it becomes part of the repository making it more integrated into Git Flow (versioning, branching, etc). Also, YAML is just text. Editing text is much quicker than having to click through tasks to change textbox values.
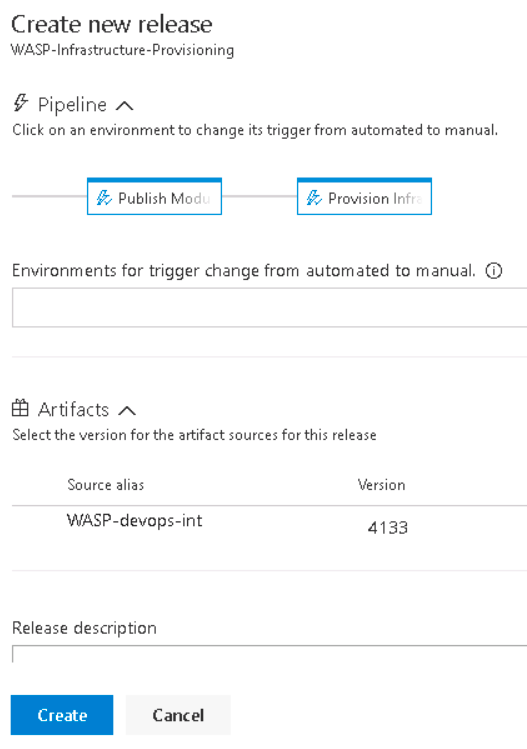
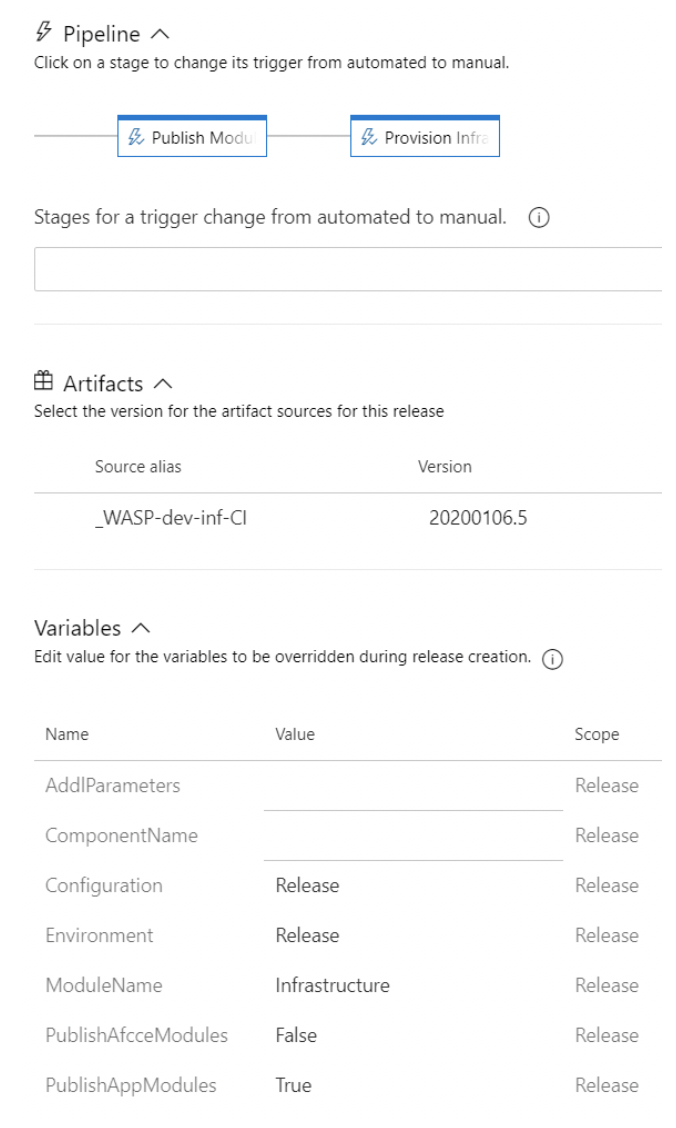
Another difference is being able to change release variables in queue time. Azure DevOps release variables can be flagged “Settable at release time.” This is very useful as we typically have at least two, if not three, instances of an application running in a lab environment. A variable for the environment can be added and set at release time making a single pipeline usable for all the environments instead of having to either edit the pipeline and change the value or create multiple pipelines that do essentially the same thing.
There were some positive lessons learned while working with both services. Pipelines could be exported and imported between the two with only minor modifications to settings. Since we were using the classic pipeline designer, there are far more mouse clicks to create pipelines. Exporting them generates a JSON file. Once imported into another environment, there were usually one or two changes that had to be made because the JSON schema uses IDs to reference other resources, such as Task Groups, instead of a name. Not only did this save time, but it cut down on human error when configuring the tasks.
Task Groups provide a way to group a set of tasks to be reused across multiple pipelines and can be exported, too. In some projects, we had multiple pipelines that were essentially the same process, but with different settings on the tasks. For example, one client had eight web applications that deploy to a single Azure App Service. One was at the root while the others were in their virtual directories. Also, they each had their development cycle so it wouldn’t make sense to deploy all eight every time one needed updates. We created a build and release pipeline for each application. Creating two Task Groups, one build, and one release, allowed us to add a reference to the appropriate group in each pipeline and just change the parameters passed to it.
Conclusion
Automating resource provisioning and application deployment saves time and creates a reliable, reusable process over a manual alternative. ARM templates provide deep, complex customization even more than Azure PowerShell or the Azure CLI, in some cases. Pipelines then take those templates and consistently provision those resources across environments. It would have made life much easier in several of my past roles. While there were some “gotchas” with the various technologies, Azure has been developed with automation being a top priority.

