Assumptions
- Visual Studio Code is installed
- Dynamics 365 (Try for free) or Power App Model Driven App is available
Overview
One of the challenges I had when learning Dynamics 365 / Power Platform development was how to add custom functionality to the User Interface. The .NET developer in me was frustrated when I wanted to add a button to the page that triggered some server-side code. Eventually, I learned a pattern of adding HTML / JavaScript resources to the page that would create an Annotation (Note). A plugin would intercept the Annotation and get the Regarding object. This would allow me to trigger server-side code from the User Interface, but it was not as graceful as I would have liked. A colleague of mine, Patrick O’Gorman, told me about Power Apps Component Framework (PCF) controls for some time, and I recently decided to start experimenting with them. In this blog post, I will illustrate how I could use a PCF control to trigger a flow in Power Automate.
Creating the PCF Control
Before creating the control, I recommend reviewing both the Microsoft Learning Paths for Power Platform Component Framework and Patrick O’Gorman’s PCF Demo.
I begin by creating a folder to house the project and then follow these steps:
- Open Visual Studio (VS) Code
- In VS Code, Open the folder that was created for the project
- Click View and then TerminalIn the terminal window, I do the following:
- Initialize the project: pac pcf init –namespace PCFControls –name PCFFlowTriggerDemo –template field
- Install TypeScript: npm install typescript
- Build the project: npm run build
- Run the project: npm start
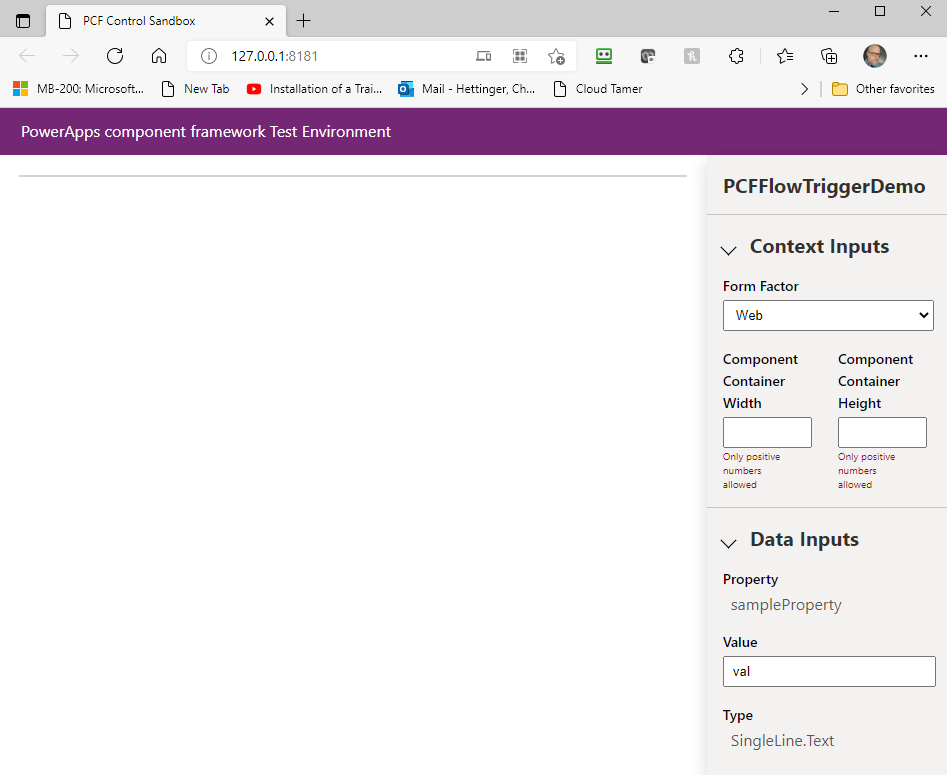
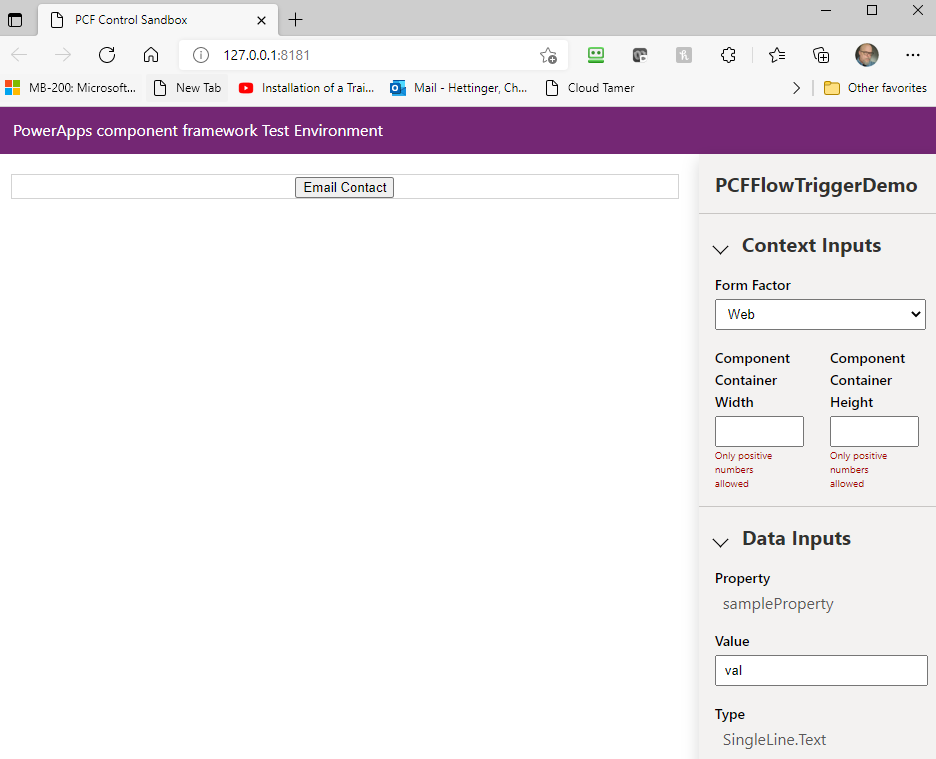
When I run the project, the PCF Control Sandbox opens. It is empty at this point, but not for long.
I close the Sandbox window and use CTRL+C to terminate the Sandbox in the terminal window.
Creating the Power Automate Flow
For this project, I will set the control to the side for now and create the flow because I will want the endpoint created to use in control. For this example, I will create a simple workflow that receives a Contact Id from the PCF Control and then emails the Contact. I realize there are better methods for emailing a client within the Model Driven App, but this is just an example. I create this flow by following these steps:
Configure the Trigger
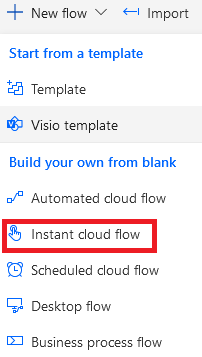
Login to Power Automate
Create New Flow and choose Instant cloud flow
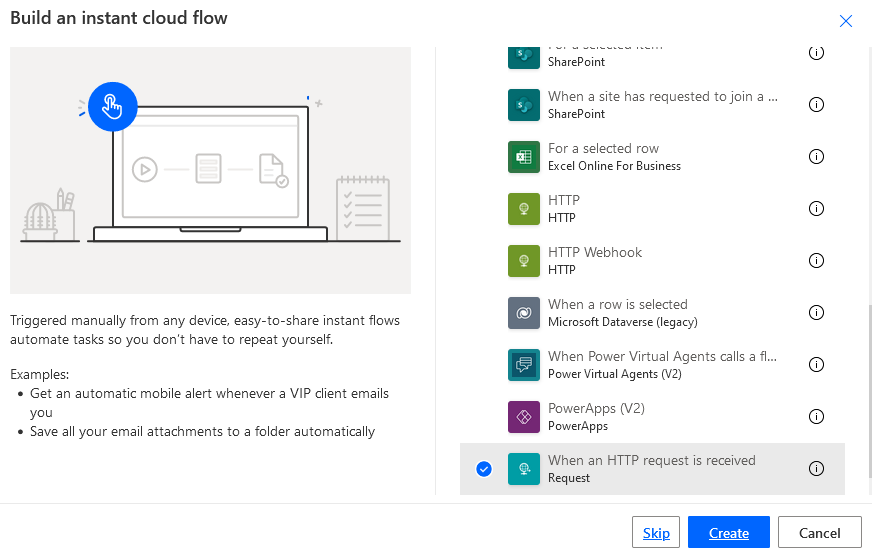
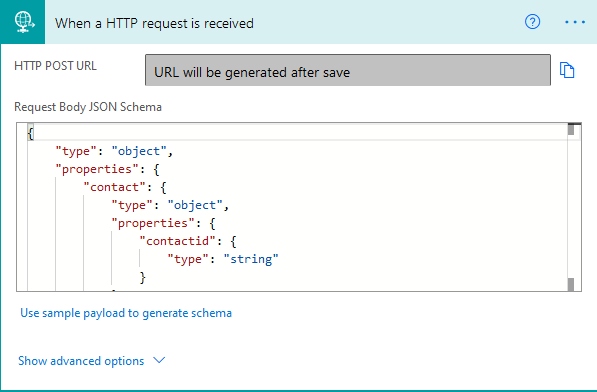
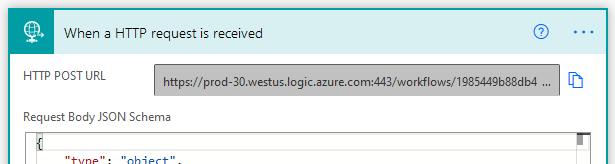
Enter the name of the flow and choose When an HTTP request is received (Request) for the trigger.
When the flow opens, expand the trigger and select Use sample payload to generate schema.
Use the following JavaScript Object Notation (JSON)
{ “contact” : { “contactid”: “00000000-0000-0000-0000-000000000000”} }
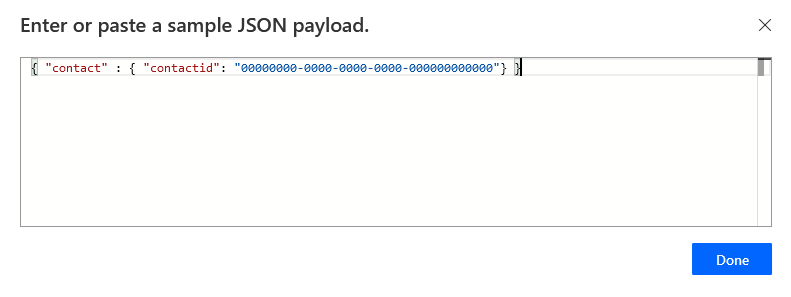
Click Done and the schema generates:
Check the Origin
Next, I verify that the request’s origin is from my Power App. This prevents someone from using PostMan, Fiddler, etc. to build a request and hit the endpoint maliciously.
Click New Step > Control > Condition
Click left-hand Choose a value > Expression and enter the following:
triggerOutputs()[‘headers’][‘origin’]
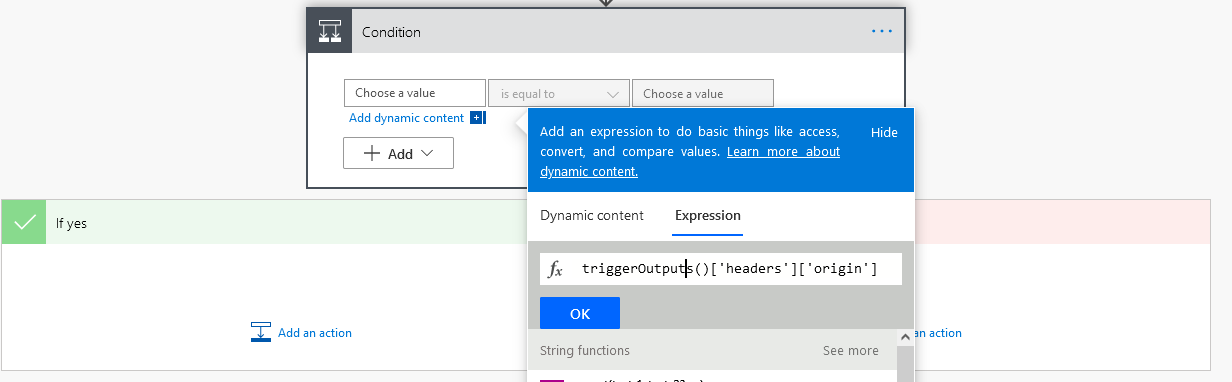
Click left-hand Choose a value and enter the root URL for Power App (ex. https://orgc76a7275.crm.dynamics.com)
Email the Contact
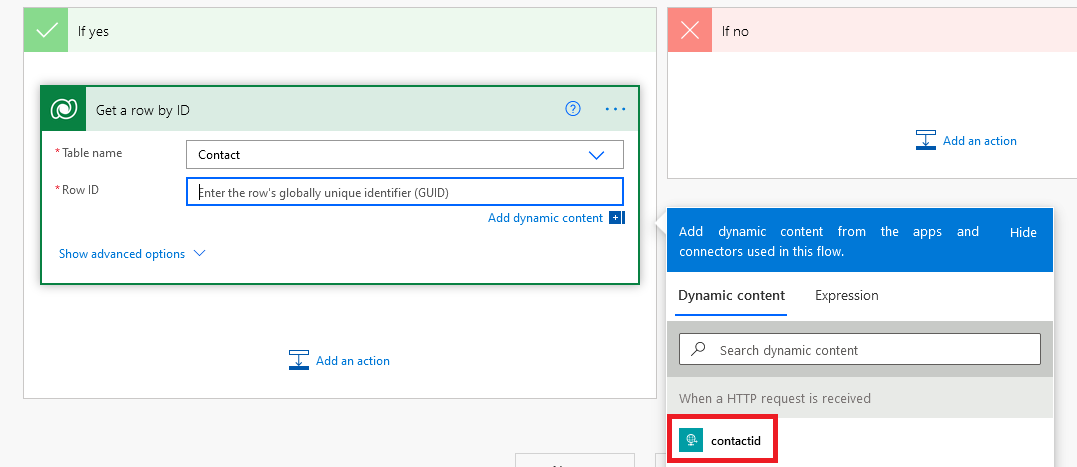
Inside of the Yes condition, click Add an action > choose Microsoft Dataverse as the connector and then Get a row by ID.
Select Contact as the table and select the contacted from Dynamic content in the Row ID field.
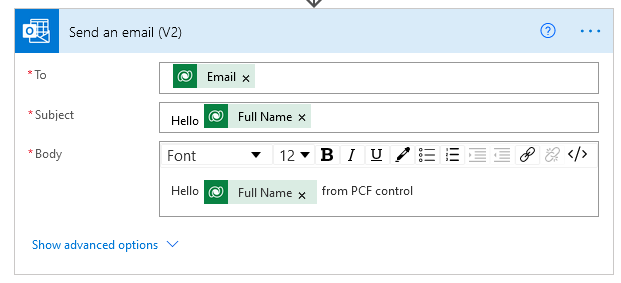
Inside the Yes condition, click Add an action > type Outlook, select Office 365 Outlook as the connector type, and then Send an email.
Click To > Add dynamic content and then select Email.
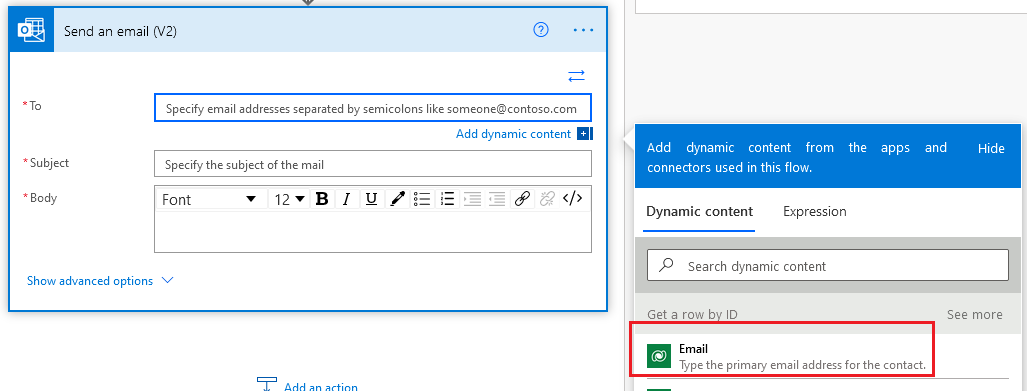
I fill in other required fields to send a test email.
Click Save
Get the POST URL
Now that the flow is complete and we have saved it, the POST URL is made available. I scroll back up to the top of the flow and expand the trigger; I copy the URL and save it later.
Triggering the Flow from the Control
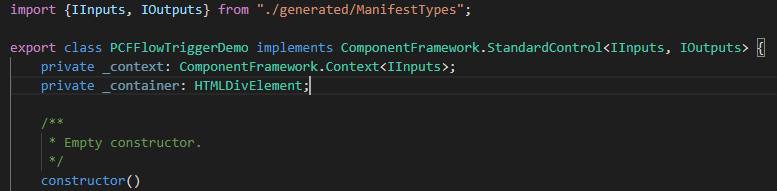
Now that I have the PCF control project in place and the flow complete, I can finish the control. I return to VS Code, open the index.ts, and perform the following steps:
I want to add a variable for the current context and the container that I will be using to build our control. Add the following lines just above the constructor.
               private _context: ComponentFramework.Context<IInputs>;
              private _container: HTMLDivElement;
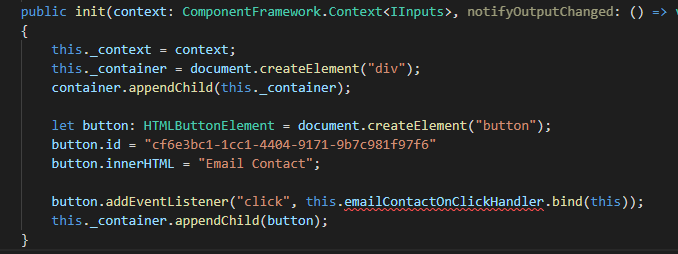
Next, I need to create an HTML Div element, add a button, and add an event listener for the click event. Locate the init method and replace the code inside with the following lines:
                              this._context = context;
                             this._container = document.createElement("div");
               container.appendChild(this._container);

                             let button: HTMLButtonElement = document.createElement("button");
                             button.id = "cf6e3bc1-1cc1-4404-9171-9b7c981f97f6"
                            button.innerHTML = "Email Contact";

               button.addEventListener("click", this.emailContactOnClickHandler.bind(this));
                     this._container.appendChild(button);
Finally, I need to add the click event handler. This code gets the Id of the current Id of the record, builds the JSON payload that I used earlier, posts it to the URL from our flow, and disables the button (to prevent spamming it). Below the destroy method but inside the class, add the following method:
	private emailContactOnClickHandler(event: Event): void {
		var context = this._context;

		var contactId = (<any>context).page.entityId;
		var contactPayload = '{ "contact" : { "contactid": "' + contactId + '"} }';

		var req = new XMLHttpRequest();
		var url = "[URL FROM FLOW]";
		req.open("POST", url, true);
		req.setRequestHeader('Content-Type', 'application/json');
		req.send(contactPayload);

		let button = document.getElementById("cf6e3bc1-1cc1-4404-9171-9b7c981f97f6")
		if (button) {
			(button as HTMLButtonElement).innerHTML = "Email Sent...";
			(button as HTMLButtonElement).disabled = true;
		}
	}
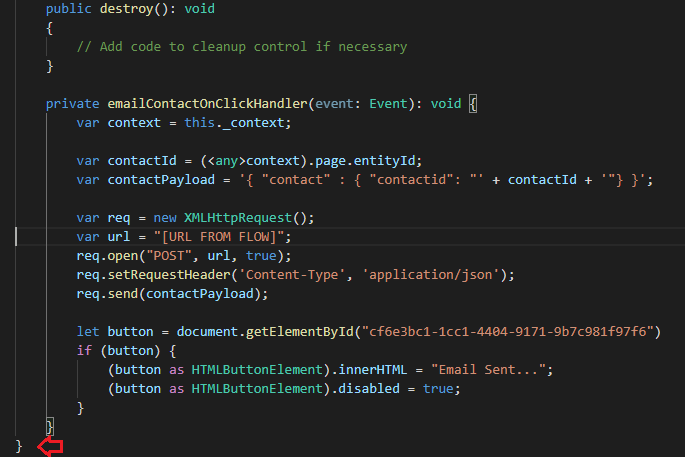
You may have noticed that I am using a GUID for the button; there is nothing special about this GUID, and any can be used. I just needed a unique Id for the button control to retrieve it later. I also left out the URL from the flow; this should be the value created when the flow was saved. Now I can build and run the project:
- Build the project: npm run build
- Run the project: npm start
When I run the project, the PCF Control Sandbox opens, and we can see our button element now.
I close the Sandbox window and use CTRL+C to terminate the Sandbox in the terminal window.
Deploying the PCF Control
Now I am ready to deploy the control of my Model Driven App; in this case, I am using a Dynamics 365 Sales Trial. I deploy the new control by doing the following:
Publishing the Solution
- In the terminal window, I authenticate with my App: pac auth create –url https://orgc76a7275.crm.dynamics.com
- I build the project: npm run build
- When the login window pops up, I enter my credentials
- I deploy the solution: pac pcf push –publisher-prefix ais
Adding the Control to the UI
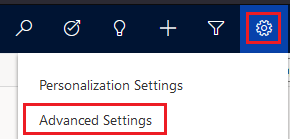
I click on the gear, select Advanced Settings.
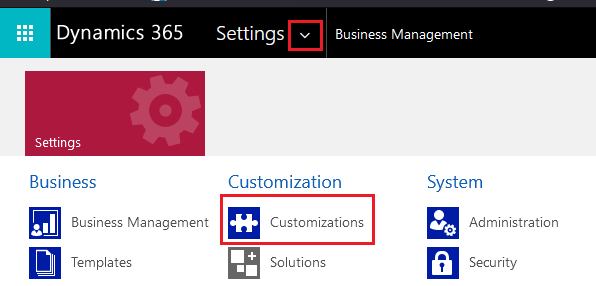
I click the drop-down next to Settings and then click Customizations and then Customize the System.
Note: Normally, I would use a custom solution instead of Customize the System. When I use Customize the System, I am editing the default solution that I am not concerned about for this example.
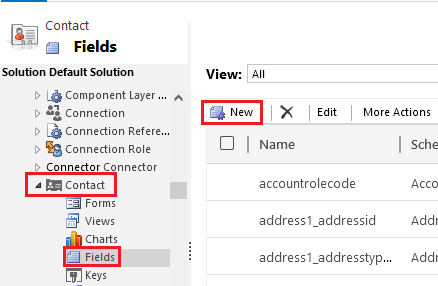
In the Solution window that opens, I expand Entities, locate and expand Contact, select Fields, and then click New.
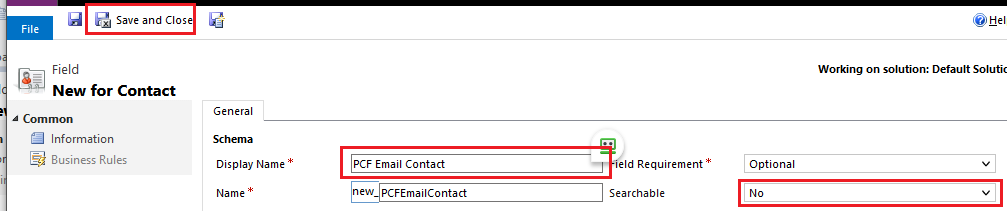
For the Display Name, I use “PCF Email Contact” and change Searchable equal to false; this will prevent the field from appearing as a search as an option. This field will serve as a placeholder for my control. I leave everything else as-is and click Save and Close.
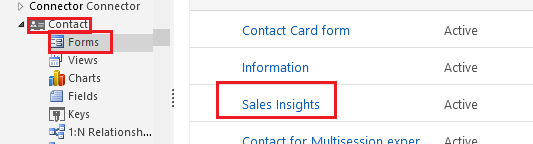
In the Solution, select Forms and then open the form. In my case, the entity is configured to use the Sales Insights by default, so I will edit it.
In the form window that opens, I locate my newly created field and drag it right below the Email field.

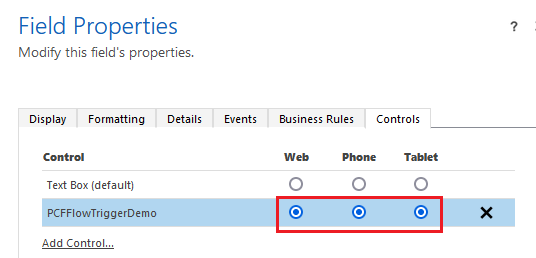
I double-click on the field, uncheck the Display label on the form, and then select the Controls tab.
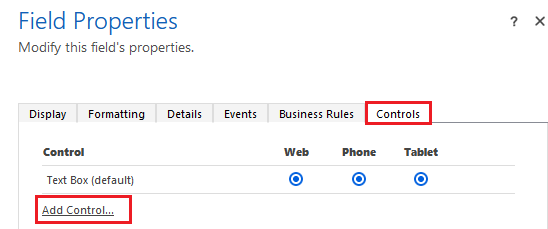
In the window that pops up, I can see my new control.
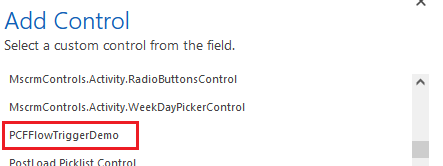
I select it and click Add.
In the Field Properties window, I tick the options Web, Phone, Tablet and click Ok.
In the form window, I click Save and Close.
In the Solutions window, I click Publish All Customizations.
PCF Control in Action
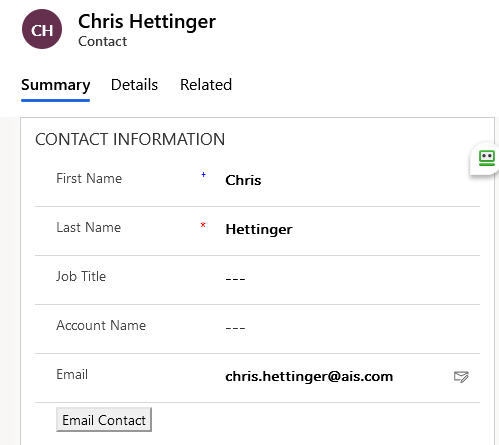
Now that I have the PCF control deployed and the flow waiting for a POST request, I am ready to test. I have created a Contact record with my email address, and now when I edit it, I see the Email Contact button.
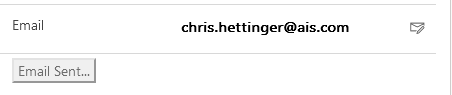
When I click it, it is disabled and changes to Email Sent.
When I navigate to Power Automate I see that my flow has been completed successfully.

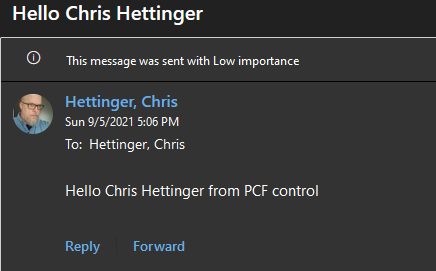
Finally, I check my email and it is correct.
Conclusion
As you can see, wiring up a control to your Power App with server-side logic is easy with Power Platform. Power Automate provides you with fantastic low / no-code solutions, and the Power Apps Component Framework makes it easy to design, publish and connect controls to your user interface.