Building data and formatting features into MS Office applications using Office Add-Ins can be a crucial productivity boost to an organization. Now Microsoft has given us the ability to build Add-Ins faster and easier using the SharePoint Framework (SPFx).
What are Office Add-ins?
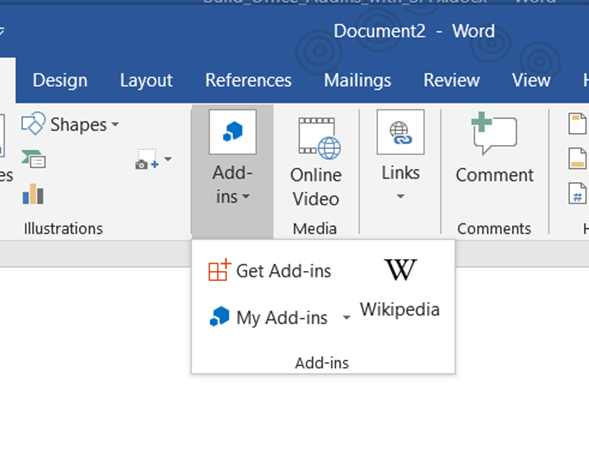
You will find them in the ribbon of Office apps. Below is the Add-ins pane found in the ribbon in Word. The default installation of Word includes the Wikipedia Add-in, a great example of an add-in, that you can see in your client installed Word:
The history of building extensions to Office apps is long, extending back to leveraging Visual Studio Tools for Office: the venerable VSTO. With VSTO the only option has been to build and deploy server-side code with its attendant risk and longer deployment lead times. Also, it works only on Windows. The great advantage of building Add-Ins in the newer JavaScript and HTML model is that the Add-Ins work on all platforms and Office Online. Deployment is a fraction of the effort it once was.
Initially building MS Word Add-Ins using the Yeoman generator and the modern toolchain was not a part of the SharePoint Framework, but to any developer who has looked at both, they bear a striking resemblance to each other in many ways. To merge these dev workflows seems natural, efficient, and pleasing.
Already Integrated to SharePoint
What do Add-Ins gain from being integrated into the SharePoint Framework? Mainly, the data connection to SharePoint. If your Add-In does not need a SharePoint connection, you can stick with using the standard Office generator in the Yeoman generator. But the connection to data in SharePoint is valuable. But wait, there’s more! SharePoint is a hosting platform as well with authentication built-in, so you can host your Add-In from SharePoint. With the introduction of building Add-Ins in SPFx, the step of hosting, and connection to SharePoint are now built into the Yeoman Generator!
Walk Through
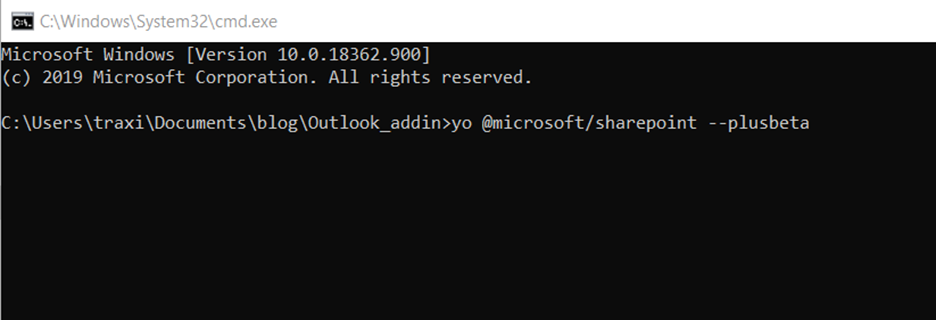
Let’s build one. It is still a work in progress, a beta version. The Yeoman Generator will currently only build an Add-In for Outlook, and it is only available in the preview version of the generator, so we will invoke the beta version using “- – plusbeta” after the yo @microsoft/sharepoint command be sure to add –plusbeta as in the image below.
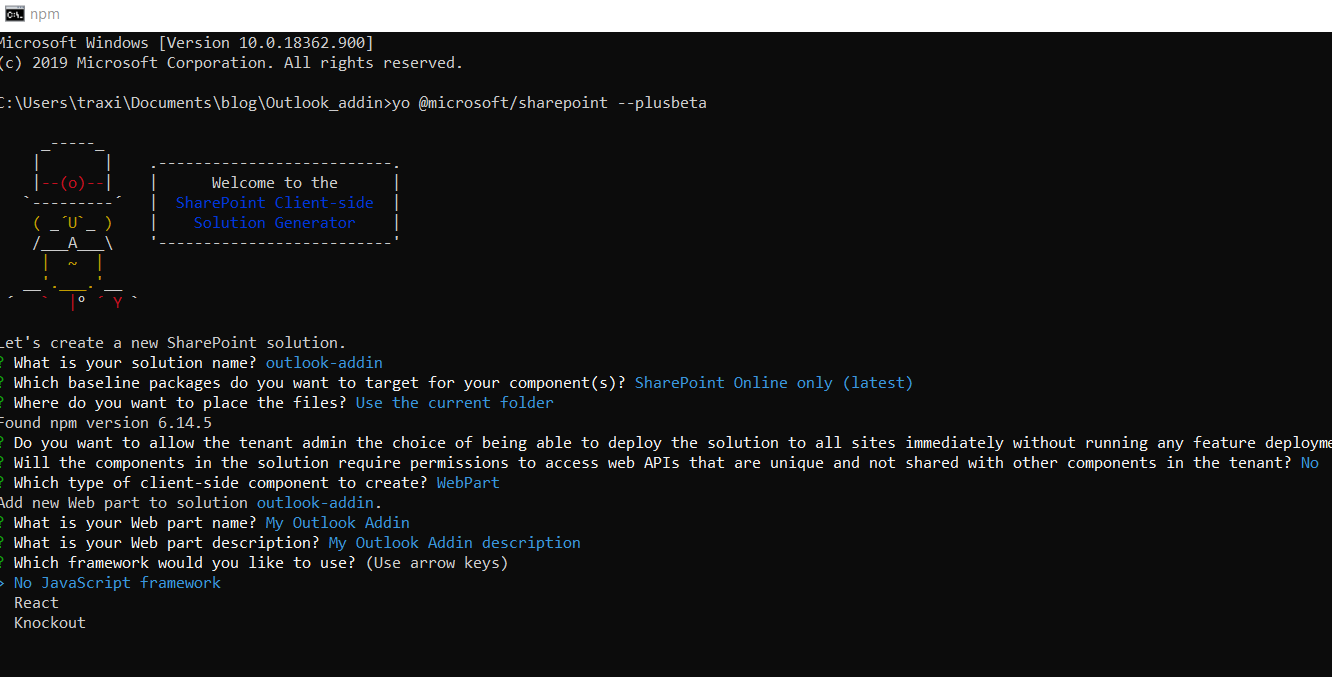
For the following generator steps, provide these answers:
- SharePoint Online only (does not work on on-prem)
- “Yes” to Do you want the allow the tenant admin to be able to deploy to all sites.
- “No” to Will the components in the solution require permissions.
- “WebPart” as the type. It is not strictly a SharePoint webpart, and likely another word will become available. For now, this is the option to choose.
- No JavaScript framework, for the demo
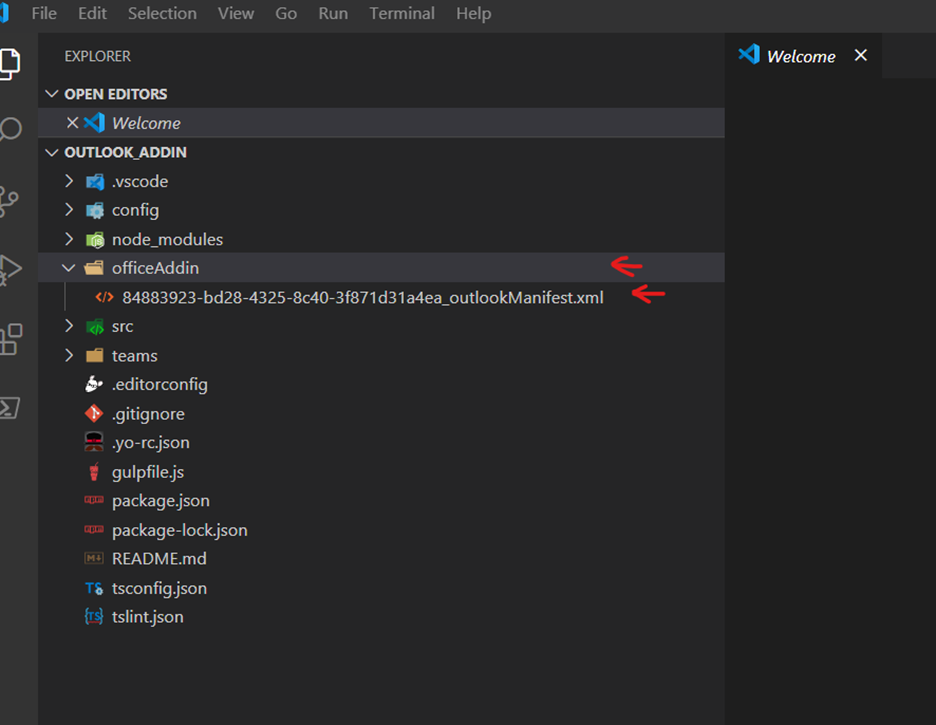
When the project is finished scaffolding, open in VS Code, in the project, files will be a folder named “officeAddin” that usually doesn’t appear in an SPFx WebPart project. This is inserted when “—plusbeta” is added to the initial generator command. In this folder will be the manifest .xml file that is recognized as crucial in “yo office” scaffolded projects. This manifest is the pivotal point of configuration that connects your add-in to the internal operation of Word or Excel or PowerPoint or Outlook.
Add type definitions by running the following:
npm install @types/office-js –save-dev
The webpart render code is still that which is generated for the default SharePoint webpart, so we will add some code to check for the Office context. Edit the webpart .ts file in the webparts folder. Add the following after the public render(): line:
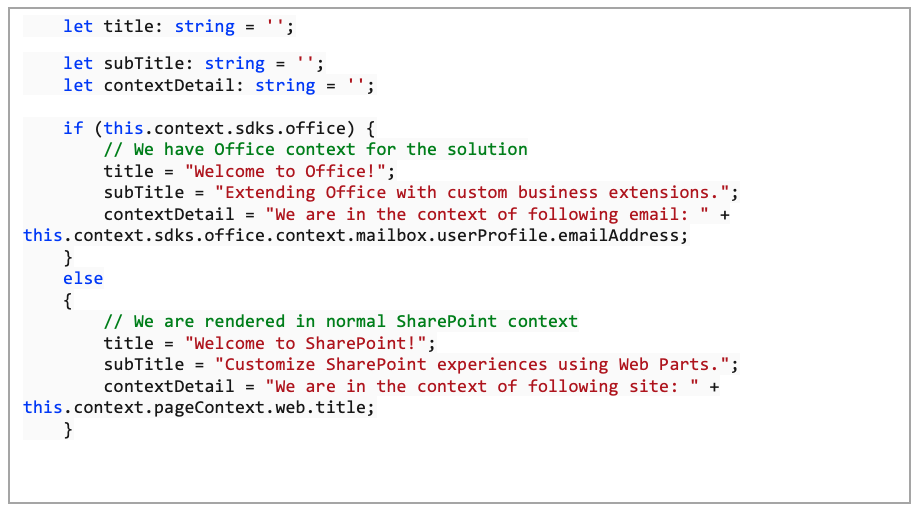
Edit the title, subtitle and description lines to have placeholders for the output so that an Outlook message will display if our Add-in displays successfully in Outlook:

Deployment
At this point, deploying to SharePoint is a significant departure from the current Office Add-in deployment model. It is as easy as bundling and uploading to the app catalog in the same manner as deploying an SPFx webpart. Run gulp bundle –ship and gulp package-solution –ship, and then locate the .sppkg file in the SharePoint folder of your project.
Deploy the .sppkg file to the App Catalog in SharePoint. In the “Do you trust” dialog that appears, check the box to “make this solution available to all sites in the organization” to enable access to the Add-In from Office online applications (in this case, Outlook).
Manifest
The manifest file, whether generated in this SPFx workflow or from using the Office scaffolded project, is the critical piece that tells the Office application about your Add-In; where to find the code to render and what permissions it will have within your Office application. It can also be modified for what name will appear for your Add-in and what icon to display. For the client installed Office apps, the manifest must be given special Trust status within the application. The SPFx-to-Office-online version of this is more accessible: you upload the manifest file.
Add-Ins Goal
The vision for add-ins is to achieve:
- Speed repetitive document tasks and creation
- Have a native and intuitive feel
- Use the same UI as Office (Fluent UI)
Researching for this post, I hoped that the story for Word add-ins was as far along as it is for Outlook and that SPFx would also provide for building Add-Ins for on-premises SharePoint. See the first video link below to see a demo of a Word add-in built with SPFx over a year ago; I think this capability is imminent. Stay tuned!