Executive Summary
This blog post is for Power Apps developers with basic experience with Microsoft Excel and .NET development. It begins by defining a real-world example for data migration. Next, it describes the steps necessary to use Excel to generate repetitious code within a provided Visual Studio Console Application. Finally, it demonstrates the solution being used and the result data in a Power App.
The Scenario
In part one of this two-part series, we covered the basics techniques of how Excel could be used to generate code and improve efficiency. In this blog post, we continue by showing how these techniques could be used to design a data loader for Microsoft Power Apps and Dynamics.
For this scenario, let’s imagine that a client is looking to migrate to Microsoft Power Apps. The solution has been designed in Power Apps and you are ready to migrate the client’s data to the new system. The client provides you with an Excel workbook with all of their data. You open the workbook and see that the client has included four spreadsheets: Clients, Accounts, Products, and Invoices.
The Solution
Download and review the solution. The code within it is outside of the scope of this demonstration; however, let’s review a few key parts:
- The Enums folder contains all of the enumerations used in the project. I like using enums for self-documenting code and they are especially useful when mapping column indexes. This is one place you will be placing Excel-generated code.
- The Models folder contains all of the models that are populated from the Excel file and ultimately used to populate CRM entities. This is another place you will be placing Excel-generated code.
- The Main method in the Program.cs is the starting point of the application.
- The GetClients, GetAccounts, GetProducts, and GetInvoices methods will be used to get data from the Excel sheets.
- Each method is the same; it creates an instance of an Excel Application, opens the workbook, opens the sheet, gets the rows, iterates over them populating the model, closes the workbook, and exits the Excel Application.
- Each method has an area comment //ADD MAPPNG HERE. This is where you will be adding Excel-generated code later.
- The MigrateClients, MigrateAccounts, MigrateProducts, and MigrateInvoices methods are used to create records within the Power App.
- Each method is the same; it gets the records from the Excel sheet, builds an Entity record from it, and saves it to the Power App instance.
- Each method has an area comment //ADD MAPPNG HERE. This is where you will be adding an Excel-generated code later.
- Earlybound Entities folder contains the classes that are generated from the Power App entities. The entities used in this example are all out-of-the-box and were generated using the Xrm Toolbox Early Bound Generator tool.
- The app.config contains the properties used by the console application; you will need to update some of these settings prior to running the project:
- CrmConnectionOrgName – your organization name (ex. org1a234567)
- CrmConenctionRegion – your region (ex. North America)
- CrmConnectionUsername – your username
- CrmConnectionPassword – your password
- DataMigrationConnectionString – the path to the mock data Excel file
- DryRunMode – when “true”, nothing will be written to Power App
- MigrateClients, MigrateAccounts, MigrateProducts, MigrateInvoices – use this to bypass migration
- ClientIdNumStart , AccountIdNumStart, ProductIdNumStart, ProductIdNumStart – use this to start migration as a particular record (helpful if an error occurred during migration)
Creating the Models
- Create a new Excel workbook named Mapping.xlsx and rename the first sheet to Models
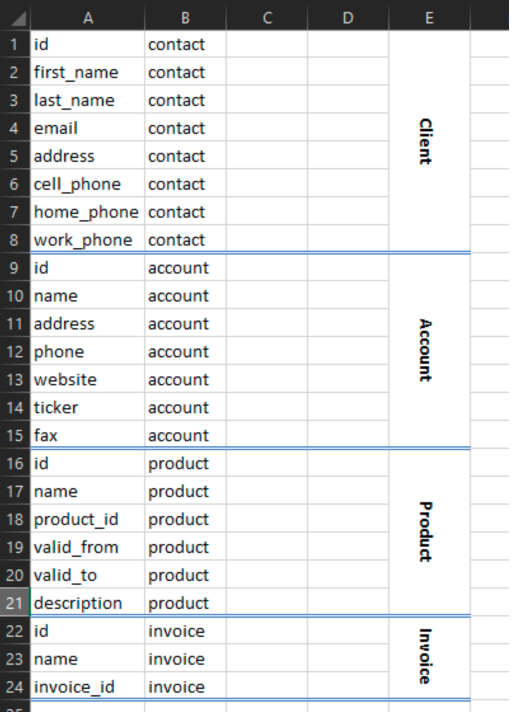
- Open the MOCK_DATA.xlsx and select the headers for the Clients sheet and copy (CTRL+C)

- Return to the Models sheet, select cell A1
- Select the drop-down under the Paste and select Transpose
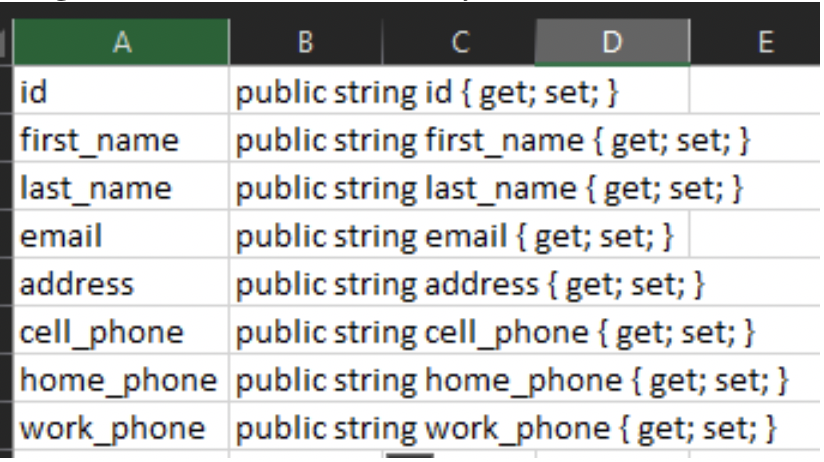
- Select cell B1 and enter the formula: =”public string “&A1 & ” { get; set; }”
- Drag the formula down to B8; your sheet should look like this:
- Select cells B1:B8 and copy/paste into the client model in the Models folder
- Repeat these steps for the Account, Product, and Invoice models (NOTE: you can paste the values in step 5 below the previous model and drag the formula you already created)
Creating the Column Enums
- In the Mapping.xlsx create a new sheet named Enums
- Select cell A1, press “=”, select Models tab, select cell A1 and press Enter
- Cell A1 on Enums sheet should now have the same value as Models sheet
- Drag the formula down far enough to include all values on the Models sheet
- Select B1 and enter the number 1
- Select B2 and enter the number 2
- Select cells B1:B2 and drag down to the last Client Value
- Repeat steps 5-7 for other models
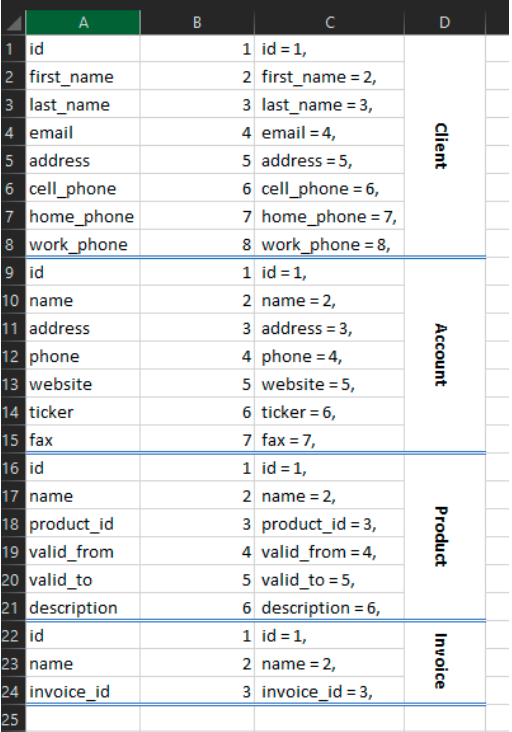
- Select cell C1 and enter the formula: =” ” & A1 & ” = ” & B1 & “,”
- Drag the formula down to include all of the values in column A; your sheet should look like this:
- Select the corresponding cells for each model and paste into its column enum
Completing the Record Loaders
- In the Mapping.xlsx create a new sheet named Loaders
- Select cell A1, press “=”, select Models tab, select cell A1 and press Enter
- Cell A1 on Loaders sheet should now have the same value as Models sheet
- Drag the formula down far enough to include all values on the Models sheet
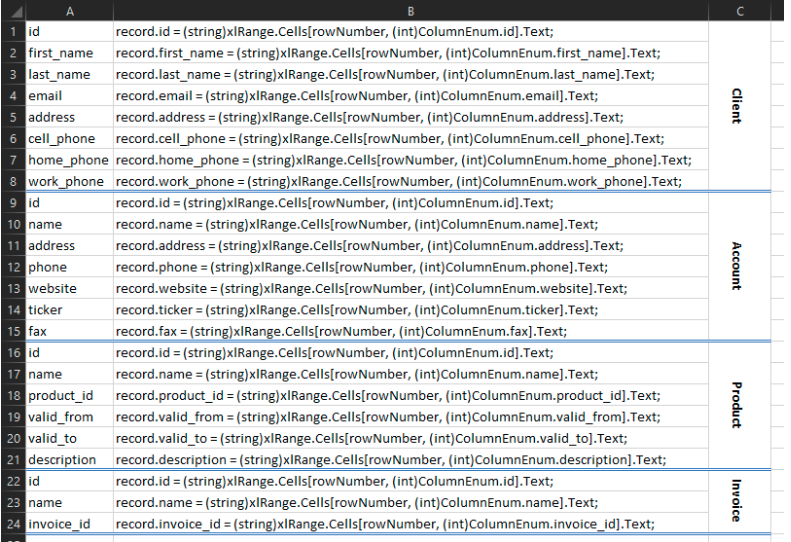
- Select cell B1 and enter the formula: =”record.”&A1&” = (string)xlRange.Cells[rowNumber, (int)ColumnEnum.”&A1&”].Text;”
- Drag the formula down to include all of the values in column A; your sheet should look like this:
- Select the applicable cells for each model and paste over the comment //ADD MAPPNG HERE in each Get method (ex. GetClients)
- Replace ColumnEnum with appropriate Enum (Note: you could fix this in the formula ahead of time as well of you prefer)
Completing the Migrators
- In the Mapping.xlsx create a new sheet named Migrators
- Select cell A1, press “=”, select Models tab, select cell A1 and press Enter
- Cell A1 on Migrators sheet should now have the same value as Models sheet
- Drag the formula down far enough to include all values on the Models sheet
- Click cell B1 and type “contact”
- Drag down to the end of the Contact values
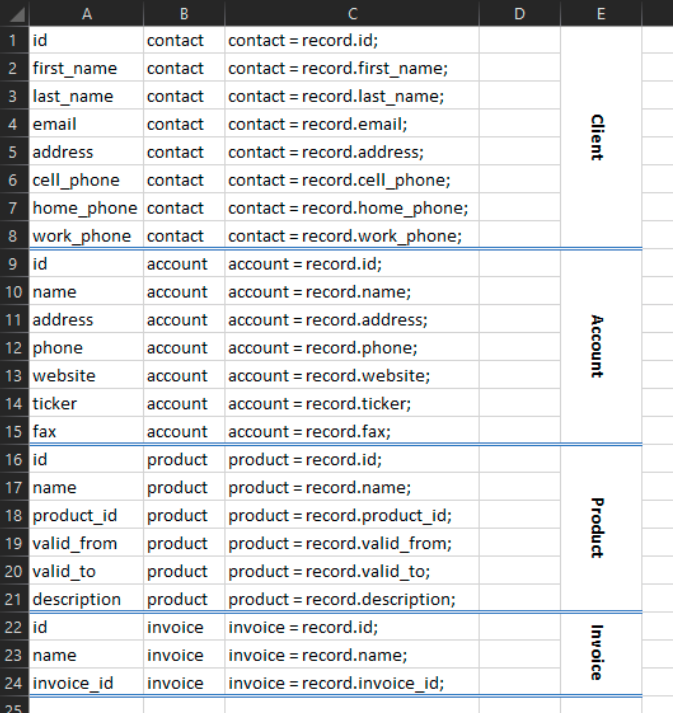
- Repeat for “account”, “product”, and “invoice”; your sheet should look like this:
- Select C1 and enter the following formula: = B1 & ” = record.” & A1 & “;”
- Drag the formula down to include all of the values in column A; your sheet should look like this:
- Select the applicable cells for each model and paste over the comment //ADD MAPPNG HERE in each of the Migrate methods. NOTE: there will be warning in the code
- In the code, go through each of the errors and select the Power App field that maps to record the field. In some cases, you will need to use Guid.Parse, DateTime.Parse, etc. to map the fields.
Here is my mapping for the Contact:
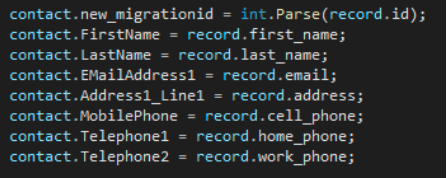
NOTE: new_migrationid is a custom Whole number field that I have added to the Contact entity to keep track of the corresponding record in the spreadsheet. I do this for the following reasons:
- Keeping track of which record the code is on in case an error occurs.
- Deleting records that were created by the migration
Running the Migration
Once the code is completed, make sure that the DryRunMode is true in the app.config and that you do not have the MOCK_DATA.xlsx file open. When you run the project, it will open the Excel workbook, get the records, and map them to an Entity. Nothing will be saved at this time. The output should look something like this:
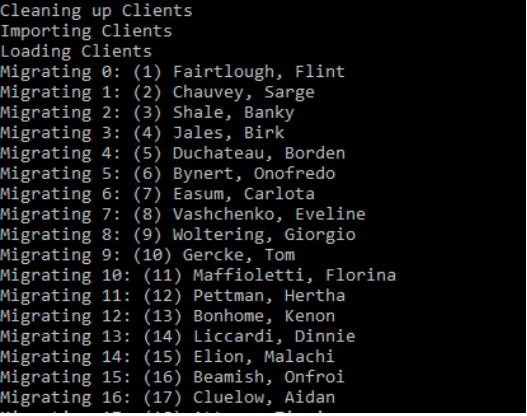
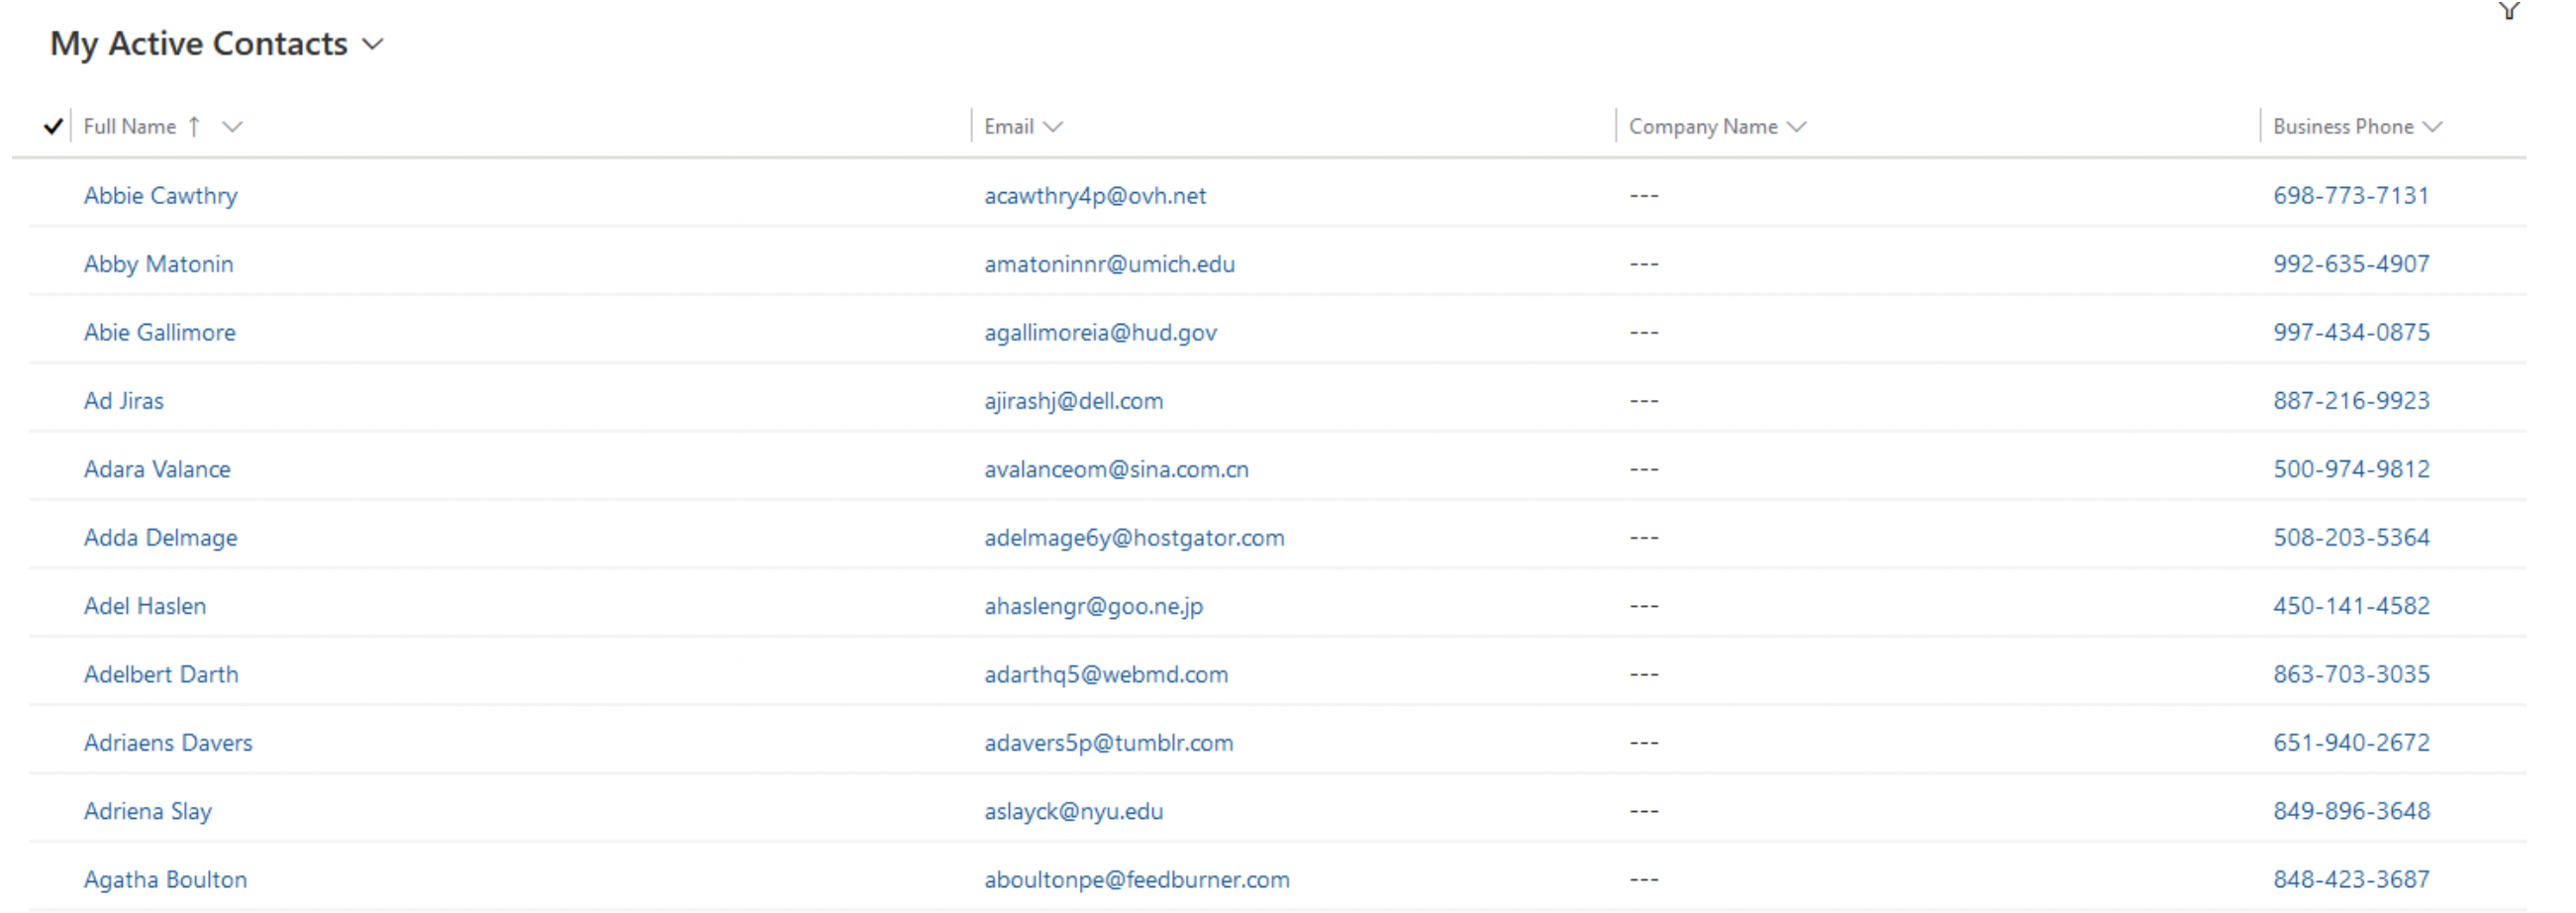
Review the output for errors and fix them as needed. Once there are no errors, switch the DryRunMode back to false and run the loader again. Once it is complete, navigate to your Power App instance, and now your newly migrated data will be available!
Conclusion
This has been only one example of how you can leverage Excel to aid with generating repetitious code. Additionally, the data loader included in this project can be reused for your custom Power App; simply use the techniques we have covered to create Models, Column Enums, Loaders, and Migrators.
The example solution used in this walkthrough can be downloaded here.
The completed solution with the steps in this blog post complete can be downloaded here.