When migrating existing business services to Azure PaaS as part of an App Modernization project, you may find yourself seriously considering serverless computing using Azure Functions, especially if your target architecture includes MicroServices.
Azure Functions let you focus on what counts — your requirements, your time and your code — and less about boilerplate code, infrastructure and processes.
When creating new APIs in any technology, one thing is very important: Documenting those APIs so that others can use them. This is especially important in large enterprises or situations where you are exposing these APIs to the public.
This blog series guides you through creating a C# Function App, creating self-documenting APIs, ensuring the quality of that generated documentation, and separating documentation based on the audience.
The blog post assumes the following:
- You are familiar with C#
- You have knowledge of software development fundamentals
- You have completed Part One of this series
At AIS, we’ve determined that the one of the best approaches to documenting your APIs is to use OpenAPI (formerly Swagger) to have the APIs (nearly) document themselves. This saves time in the long run and even enables API clients to automatically generate client code to interact with your APIS. This helps with shelf life – if 6 months or a year down the road, we decide a better approach is best.
For these articles, I will walk you through the steps for creating well-documented Azure Functions for our fictitious shopping site called “Bmazon” and its modernization effort.
We Need Better Documentation
In the Previous Post, we got the Azure Functions application to start generating OpenAPI docs for our functions, but the results were somewhat underwhelming:
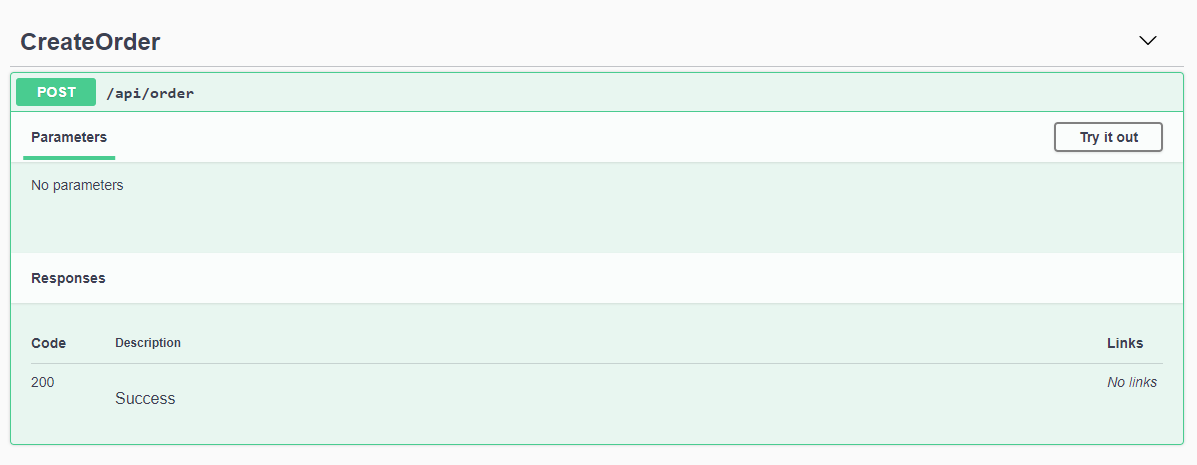
Here you can see that, even though the CreateOrder call takes an Order object in the body of the HTTP Post, there is no documentation describing this. This is because, unlike when writing traditional dotnet core APIs, the order is not a parameter to the function. Swashbuckle only has access to the function signature and anything that can be discovered through reflection.
This output is not very helpful to our clients. They need to know our inputs, potential HTTP Codes to expect (it just assumes that it will return a 200), and other pertinent information like what the method does and what the return data will look like.
For instance, if we add data validation to this method, we may wind up returning a 400 (Bad Request). We could also possibly return a 409 (Conflict) if the order already exists.
Since you’re reading this, you know there is a way to do this. Let’s get to it.
Give Swashbuckle More Info
In order for the OpenAPI documentation to be much better, we need to add a few things that Swashbuckle will be able to use to generate the docs.
As I stated previously, Swashbuckle only has access to things that can be discovered through reflection, which means the definition of your function, its parameters and any attributes decorating it, so the following translates to very little information.
[FunctionName("CreateOrder")]
public async Task<IActionResult> Run(
    [HttpTrigger(AuthorizationLevel.Anonymous, "post", Route = "order")]
    HttpRequestMessage req,
    ILogger log)
This doesn’t even have any information about the Order type that is expected in the body of the method, never mind return codes.
Expected Body Type
To document the type expected in the body of the POST, we need to tell Swashbuckle what to expect. We do this by using the RequestBodyType attribute from the AzureFunctions.Extensions.Swashbuckle.Attribute namespace.
Note that this is an additional attribute on the req parameter on top of the existing HttpTrigger attribute.
[FunctionName("CreateOrder")]
public async Task<IActionResult> Run(
    [HttpTrigger(AuthorizationLevel.Anonymous, "post", Route = "order")]
    [RequestBodyType(typeof(Order), "The Order To Create")] // Describes the Body
    HttpRequestMessage req,
    ILogger log)
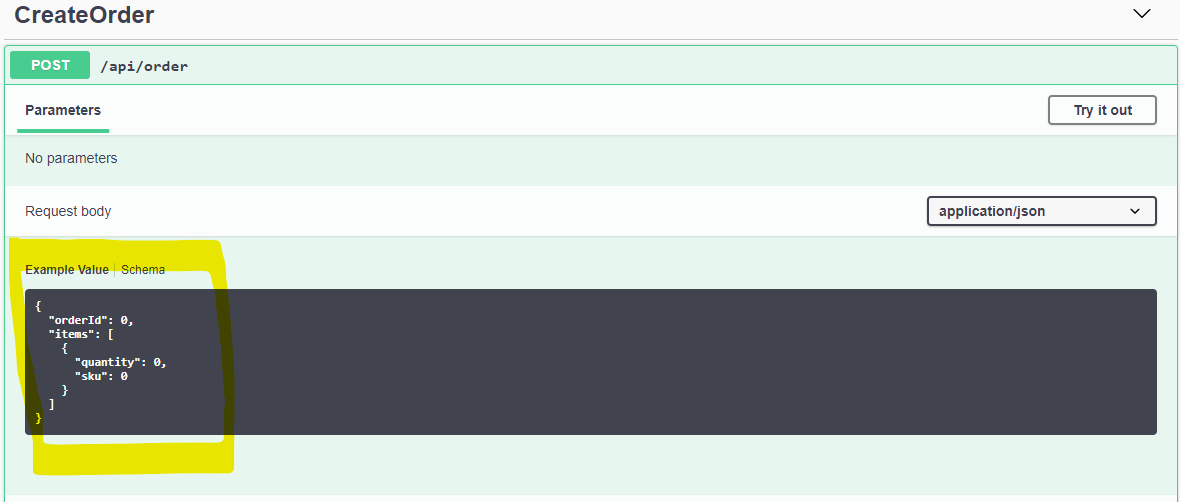
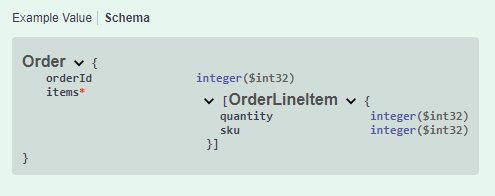
With this in place, Swashbuckle knows what type the body contains and we now see that the body type is present in the UI:
If you click on the “Schema” link, you will even see the data type names being used:
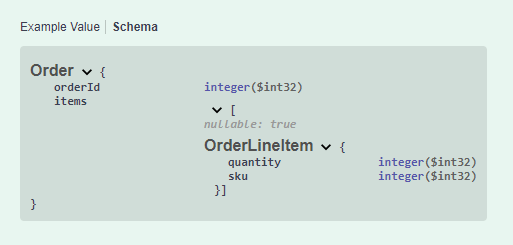
Note that the Items array is marked nullable: true which is not desirable. We will address that below in the Data Annotations section.
The bottom of the page also shows you all the current objects in the Schema that are known:
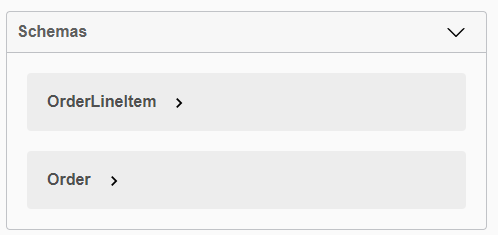
This information documents all the details about the DTOs being used in this API. But we need to fix the nullability and other validation-related information.
Add Data Annotations
Above, the Order‘s Items collection was marked as nullable. We want to fix that and other validation information that Swashbuckle can read. To do that, we need to add Data Annotations to the object definitions.
Currently, the Order looks like this:
public class Order
{
  public int OrderId { get; set; }
  public IEnumerable<OrderLineItem> Items { get; set; }
}
In order to tell Swashbuckle (and our clients) that the Items collection is required, we have to mark it [Required] and [NotNull] from the System.Diagnostics.CodeAnalysis namespace.
The NotNull attribute is also needed because OpenAPI, not being language-specific, supports the concept of null along with the lack of presence of the variable. JavaScript developers will relate to this concept with undefined and null keywords.
So, in order to tell clients that fields MUST have a value, you need to add both attributes to the Items property.
  public class Order
  {
    public int OrderId { get; set; }

    [Required, NotNull]
    public IEnumerable<OrderLineItem> Items { get; set; }
  }
The results:
Note the red "*", meaning required, next to the items collection and the lack of the nullable:true.
To properly annotate the objects, we’ll mark the ID, Quantity and SKU all required as well. Additionally, we’ll put rational [Range] and other appropriate restrictions as well:
public class Order
{
  // if we get to 2 billion orders, we'll all be retired anyway
  [Required, NotNull, Range(1, int.MaxValue)]
  public int OrderId { get; set; }

  [Required, NotNull, MinLength(1)]
  public IEnumerable<OrderLineItem> Items { get; set; }
}

public class OrderLineItem
{
  [Required, NotNull, Range(1, 1000)]
  public int Quantity { get; set; }

  [Required, NotNull, MinLength(1)]
  public string SKU { get; set; }
}
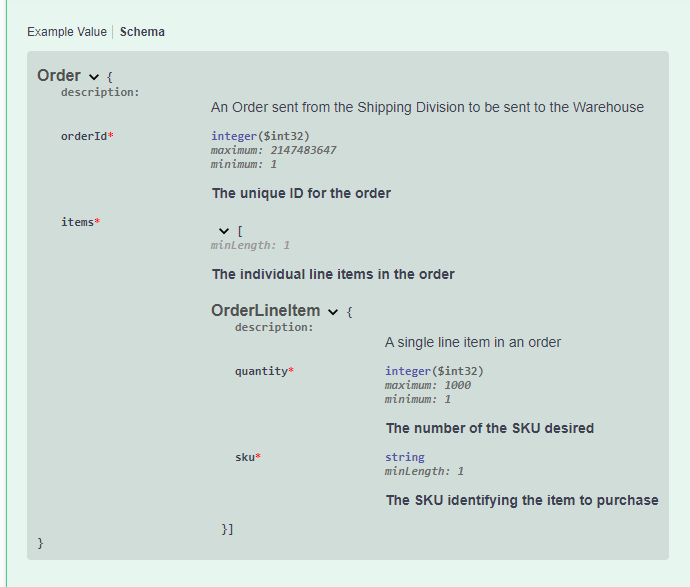
So, the final schema looks like this:
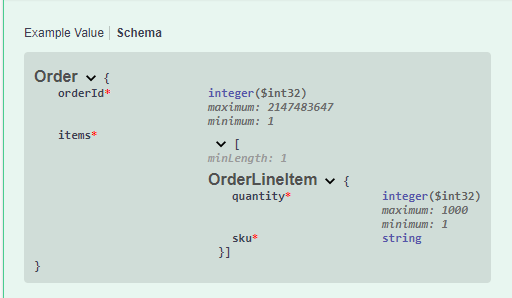
Now your clients know the simple data validations for these objects, but don’t know what the return payloads and HTTP codes are.
Potential Return Types and Codes
By default, Swashbuckle will tell the clients to expect a 200 (Success) HTTP result with no payload.
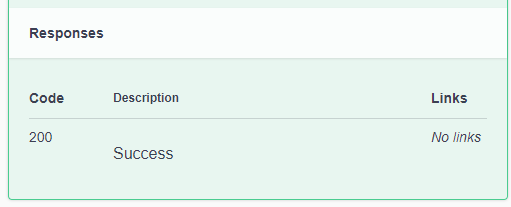
This doesn’t include any information about any payload sent back to the user and is most likely incorrect or at least not the whole story.
If we know our Function is going to return multiple HTTP codes with different payloads, we need to tell Swashbuckle by using the [ProducesResponseType] attribute on the Function itself.
Assuming we return the following:
- 200/Success with a string message payload
- 400/BadRequest with a collection of error messages
We decorate our function like this:
[ProducesResponseType(typeof(string), StatusCodes.Status200OK)]
[ProducesResponseType(typeof(IEnumerable<string>), StatusCodes.Status400BadRequest)]
HttpStatusCode.BadRequest)]
[FunctionName("CreateOrder")]
public async Task<IActionResult> Run(
This results in
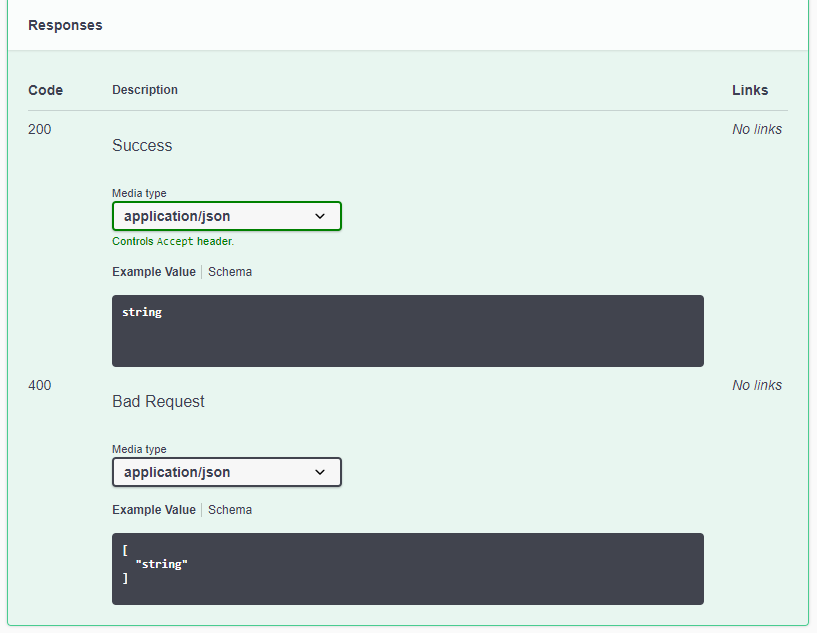
So, we’ve now exposed the input and output types, but we haven’t been able to add any additional information to describe objects or fields to our clients. To do that, we need to add XML comments to the output as well.
To make this information even better, we can comment our code properly. Of course, you were already doing that, right? RIGHT?
Better Comments in the OpenAPI Spec
One thing that you may notice is that, at the top of the function, there is very little information about the method except the name (e.g. “CreateOrder”). We should add a summary about the method.
Now, I need to apologize because I lied to you. Previously, when I said “Swashbuckle only has access to things that can be discovered through reflection”, I was lying (Forgive me!). To give client devs more information about the methods being exposed by an API, we can add C# XML Documentation information to the code and, if configured for it, Swashbuckle will incorporate that too, which can be invaluable.
Add XML Comments
We now add comments like this to our C# code (Functions and DTOs)
/// <summary>
/// Creates an Order that will be shipped to the Warehouse for fulfillment.
/// </summary>
/// <param name="req">the HTTP request</param>
/// <param name="log">the logger</param>
/// <returns>a success message or a collection of error messages</returns>
/// <response code="200">
///   Indicates success and returns a user-friendly message
/// </response>
/// <response code="400">
///   Indicates a data validation issue and will return a list of data validation errors
/// </response>
[ProducesResponseType(typeof(string), StatusCodes.Status200OK)]
[ProducesResponseType(typeof(IEnumerable<string>), StatusCodes.Status400BadRequest)]
HttpStatusCode.BadRequest)]
[FunctionName("CreateOrder")]
public async Task<IActionResult> Run() {
// ...
}

/// <summary>
/// An Order sent from the Shipping Division to be sent to the Warehouse
/// </summary>
public class Order
{
//...
}
The Swagger UI won’t have changed yet. In order for the Swashbuckle library to read this information, you need to tell the C# compiler to generate the documentation in an XML file and tell Swashbuckle about it.
Generate XML Doc file
At the top of the csproj file, add the following line to the first
<DocumentationFile>Bmazon.xml</DocumentationFile>
If you are using Visual Studio, you can access this setting from the
Buildtab on the Project settings
Now tell Swashbuckle about the XML file
Currently, we’re configuring Swashbuckle in the StartUp.cs file with:
builder.AddSwashBuckle(Assembly.GetExecutingAssembly());
Replace this with
builder.AddSwashBuckle(Assembly.GetExecutingAssembly(), opts => {
  opts.XmlPath = "Bmazon.xml";
});
Now, when you rerun the app, the final result will be a page with the new title and the order schema will have much more detail.
The users of your service will thank you for documenting your APIs this thoroughly. Additionally, they won’t have to ask you questions about the details about how to use the APIs. They can even generate client code with various tools as well.
Get the completed code from GitHub
Next Steps
Now that you have really descriptive documentation for your APIs being automatically generated, your security folks may not like you sending all your API documentation to every single client, regardless of need.
In part three of the series, I will show you how to separate the APIs out into separate groupings and keep your clients all in their own lane.
TOP MODERNIZATION APPROACHES
Learn about the top three modernization approaches — rehosting, replatforming, and refactoring — uncovering pros, cons, and process ideas as you go.