


My last post explored How to Build A Teams apps using SharePoint Framework. To continue exploring Teams app development, I will build an app using Power Platform to compare in this post. Many walk-throughs exist; I used this one. My steps appear below, along with my thoughts, to compare the two approaches.
First steps:
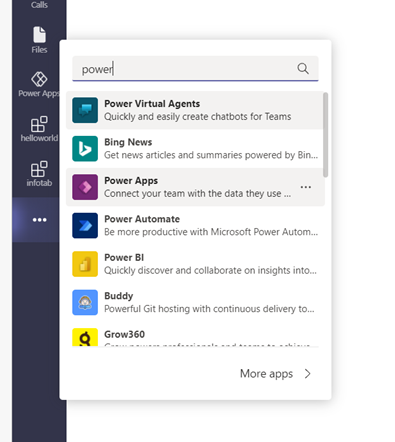
- Install Power Apps in your Teams instance.
- Open MS Teams (either the desktop or the web version) and then click the ellipsis at the bottom of the left column and enter “power” in the search bar to filter results.
- Click the Power Apps item to install it.
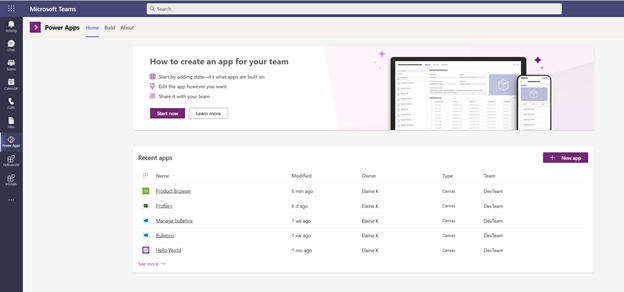
A new icon appears in the left column of Teams: Power Apps. Click on it to open Power Apps. We will start building an app that will appear as a new tab in your chosen team.
Click the button New App.
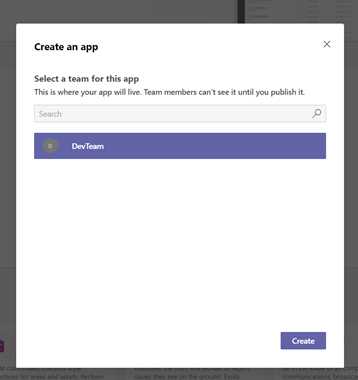
NOTE: If you don’t see the New App button, click the Start now button. The New app button will appear after you have created at least one.
Select the team for your app and then click Create. If you do not have any teams created yet, follow these instructions to add one: Create your first teams and channels – Microsoft Teams | Microsoft Docs.
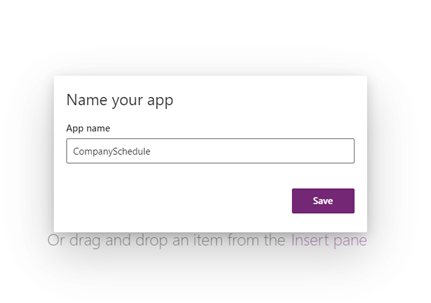
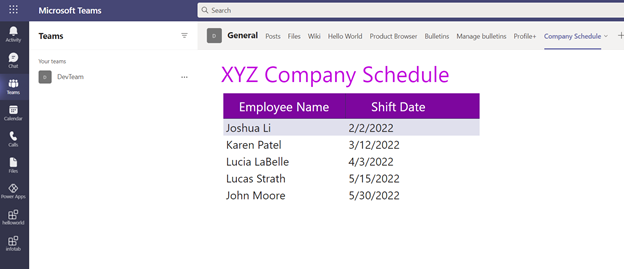
Once your app has been initialized, you will be prompted to name it. For example, to match my earlier SPFx example app, I decided to create a Company Scheduler app, so I called it “CompanySchedule.” (I often create names with no spaces and then edit to add a space for readability.)
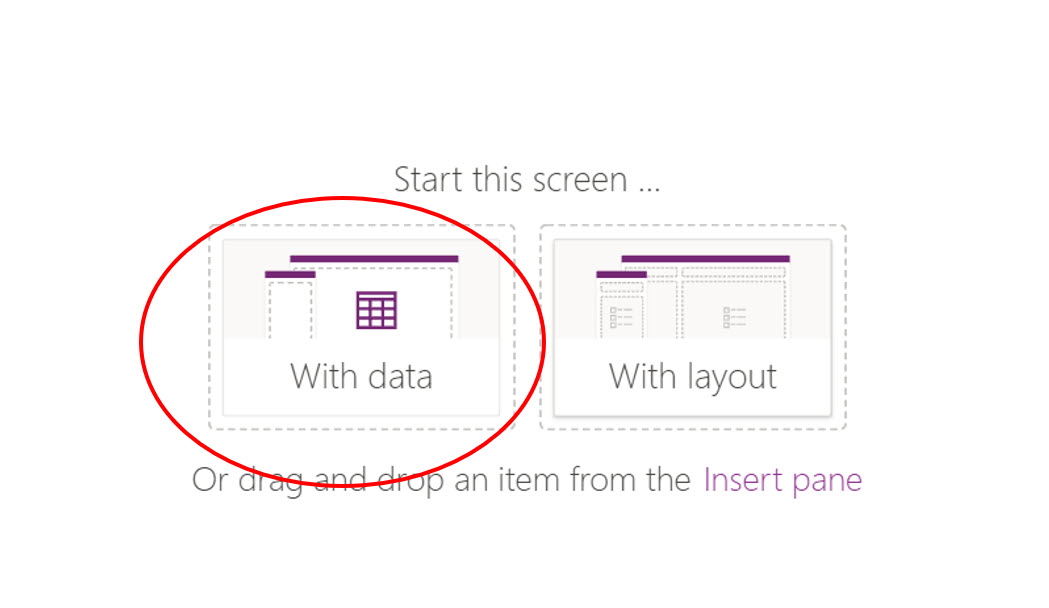
You’ll be asked to choose whether to start with the layout or the data; pick either one because you can follow up with the other later. For today I decided to start with data.
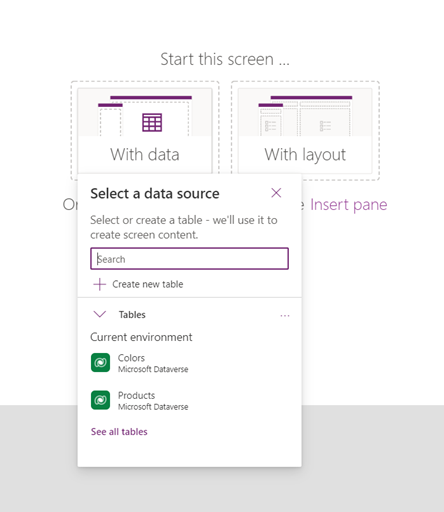
Adding Data
This is an enormous difference from building with SPFx! Adding data to Power Apps for Teams is incredibly easy. Data can be added from numerous sources; SharePoint, spreadsheets, but the option to “Create A Table” is a seamless invitation to use Dataverse. Usually a costly data option in Power Apps in the Teams version, Dataverse is currently free. The implications are significant. For now, let us add our small table to get a sense of how it works.
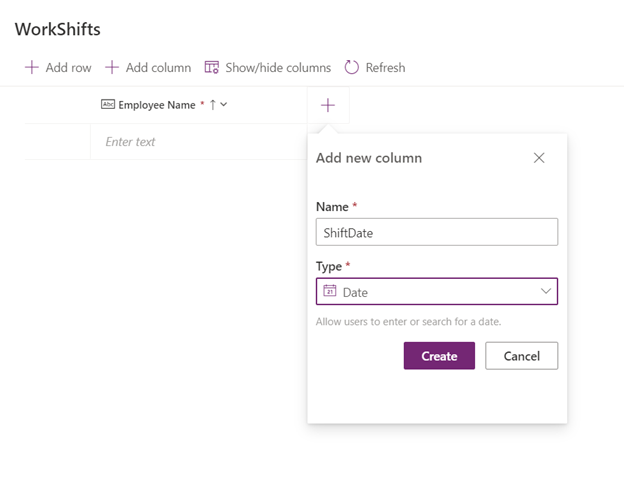
With our WorkShift table created, the screen to configure it appears. Click the plus to add columns. For example, we will add a column for the date of the employee’s shift.
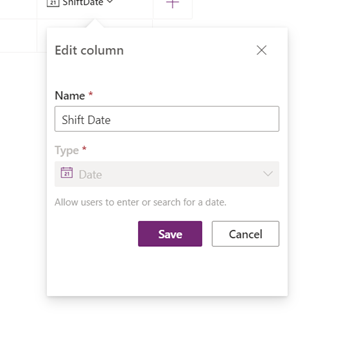
You can rename the columns if you would like; I go back and add spaces for readability. To edit the column name, right-click on the name to see this dialog:
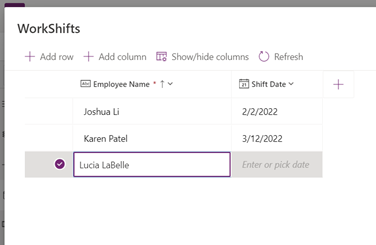
The same view where we edited the column names allows us also immediately enter data.
In the Tree view on the left, “Screens” can be considered pages. The default screen is a convenient data edit view. Let’s add another one for a view-only display of the data for our display. Click New screen:
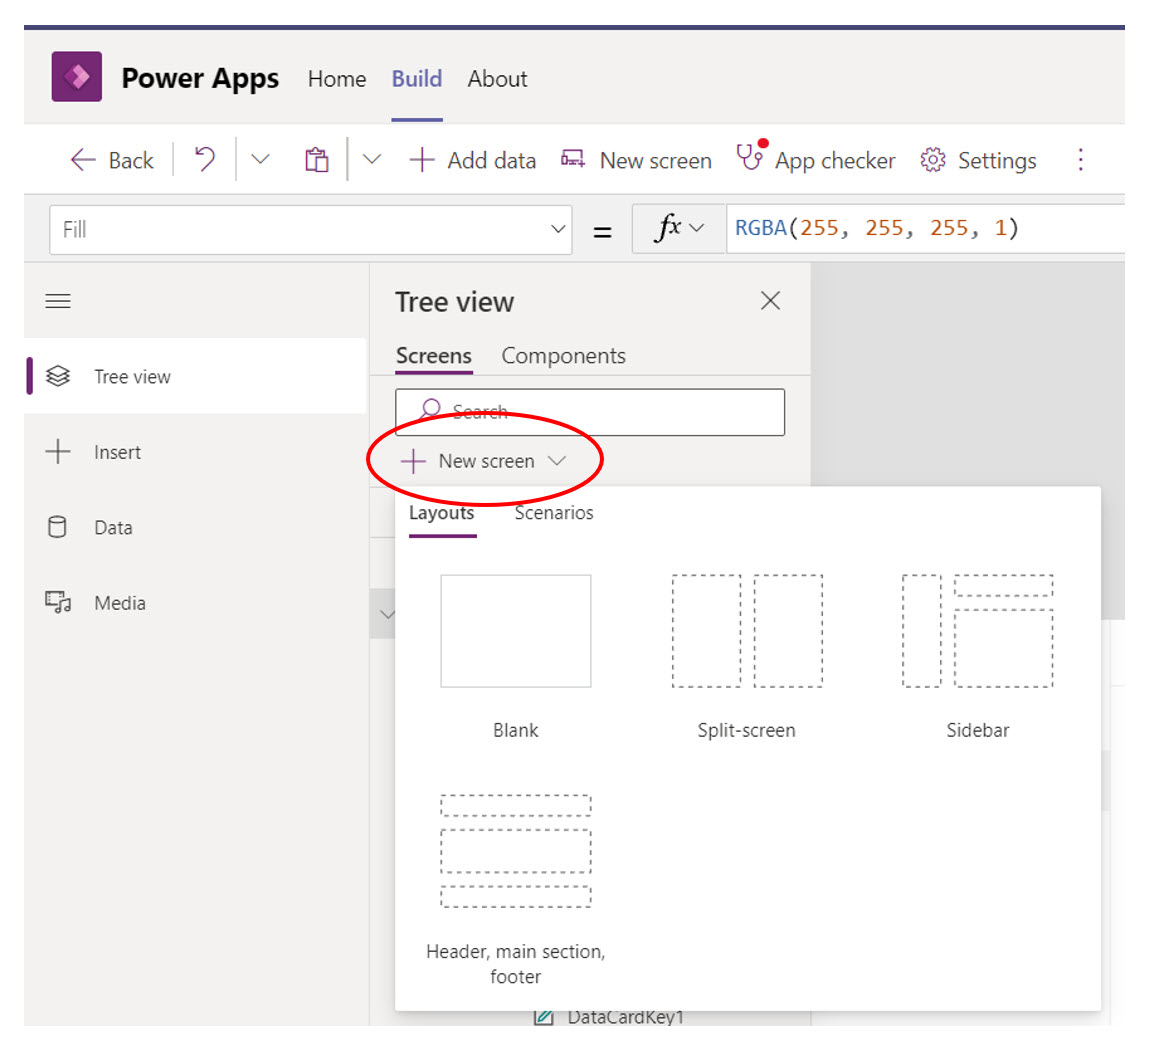
Any layout will work. I chose the “Header, main section, footer” screen.
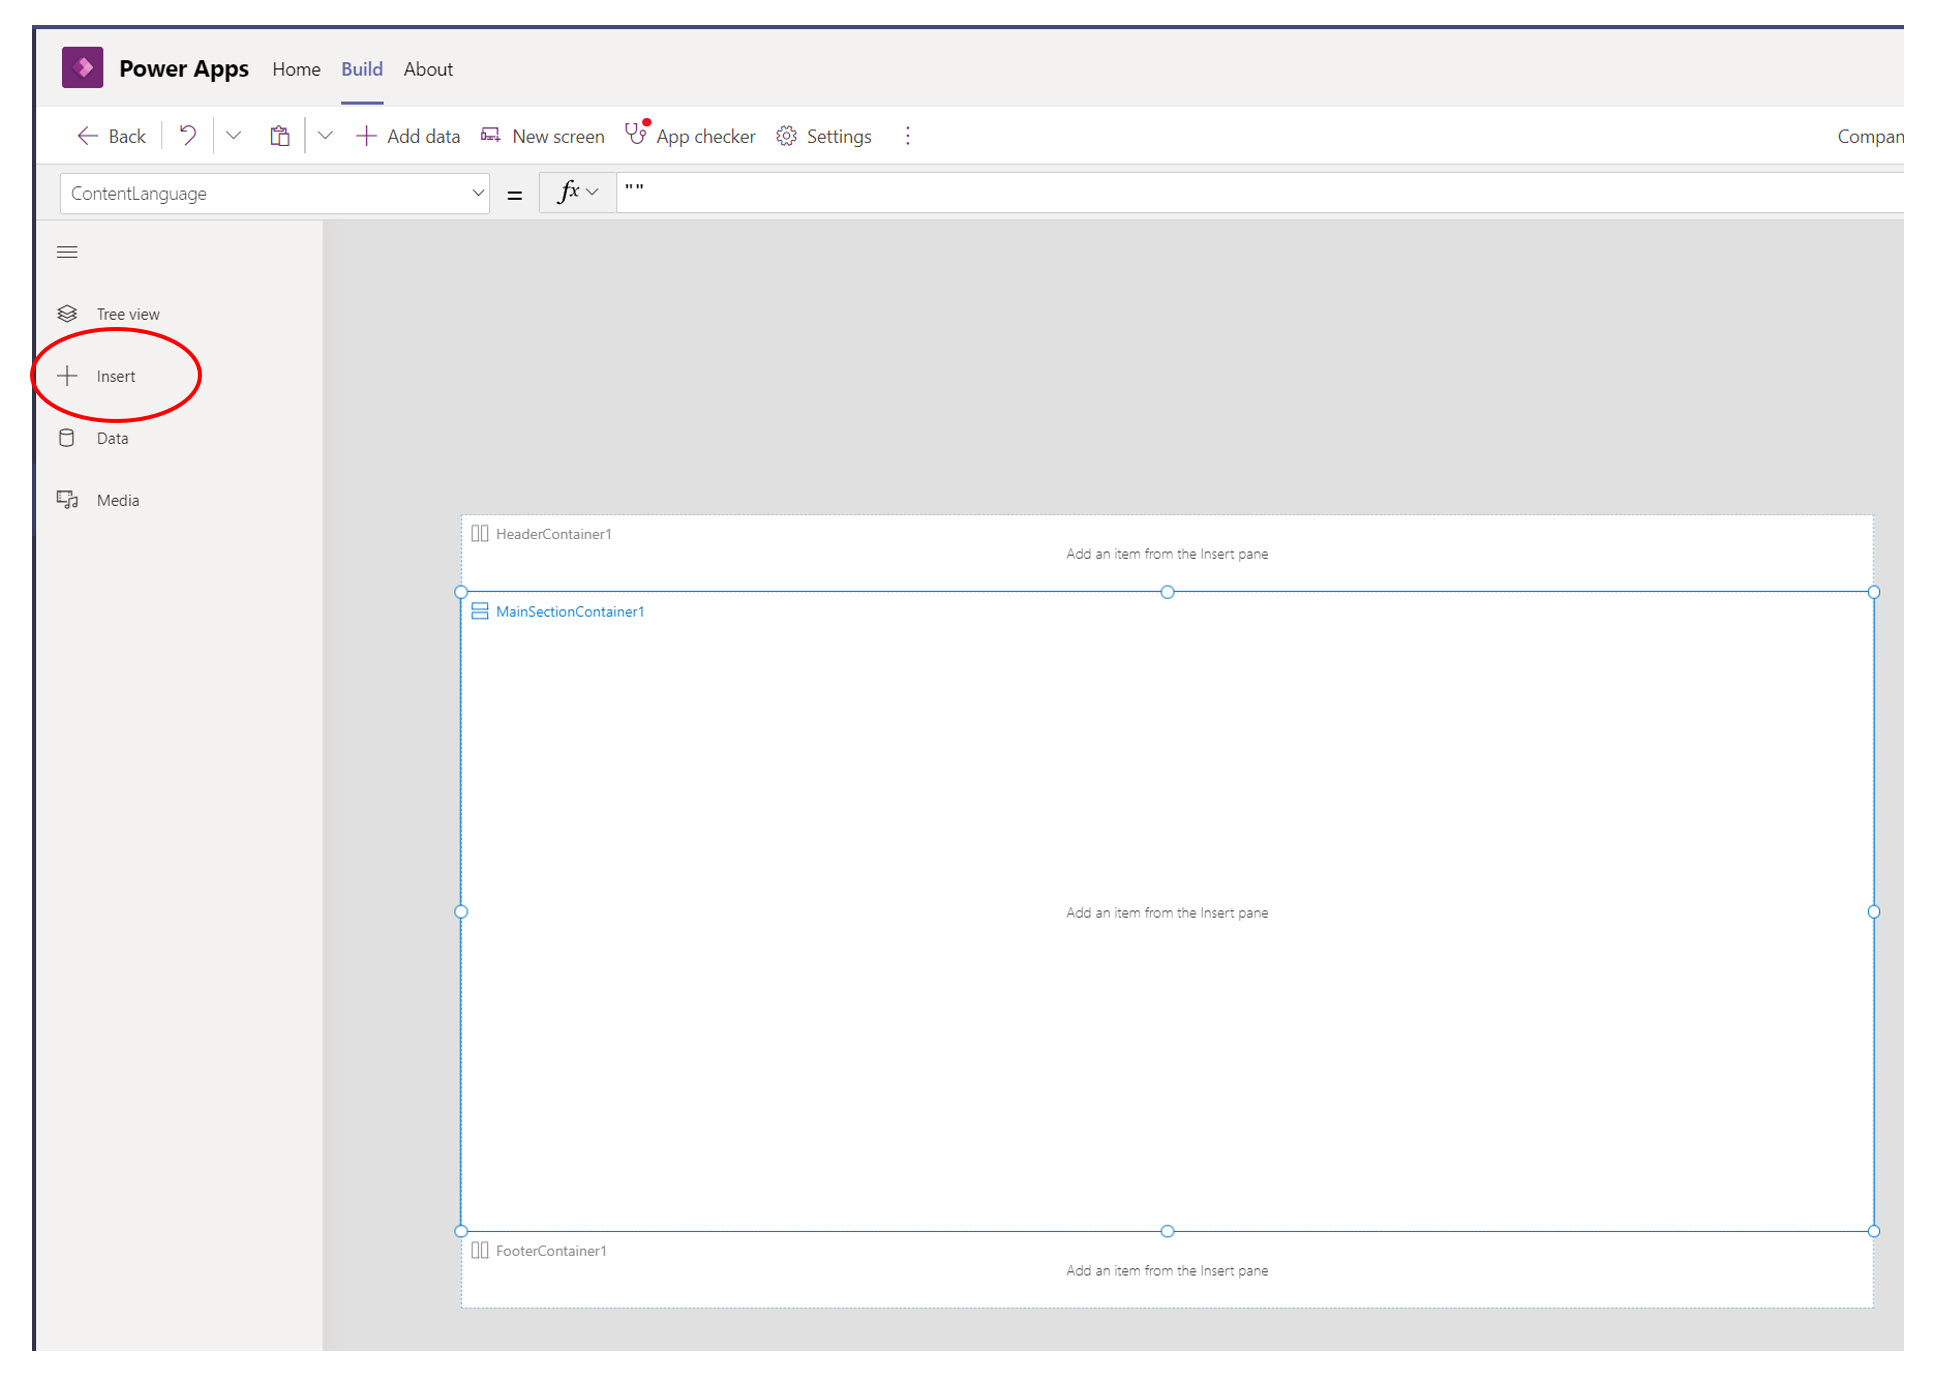
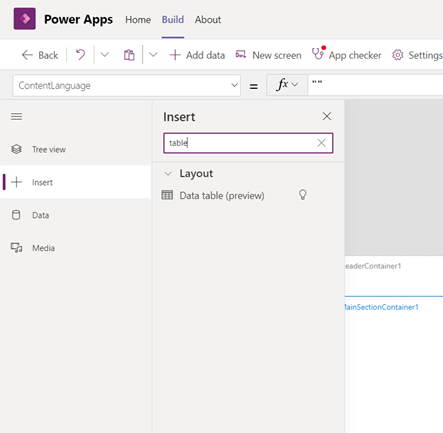
Here is our new screen. First, let us display our schedule table. Choose the Insert beside the plus icon in the left column to do this—type “table” in the search box to filter to the Table control.
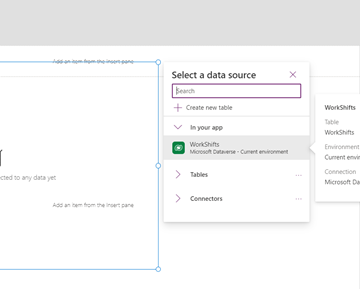
Once you click on the Table control, you are prompted to choose a data source for it. I selected the WorkShifts table, readily displayed in the Select a data source dialog.
The data and column headings appear immediately. Next, we can decorate the screen a little. I chose colors to match my earlier Teams app sample, big purple. Edit the colors and fonts using the properties panel to the left. Next, select each control in the Tree View on the right. Add more controls such as labels or text boxes by selecting Insert in the left column under Tree View.
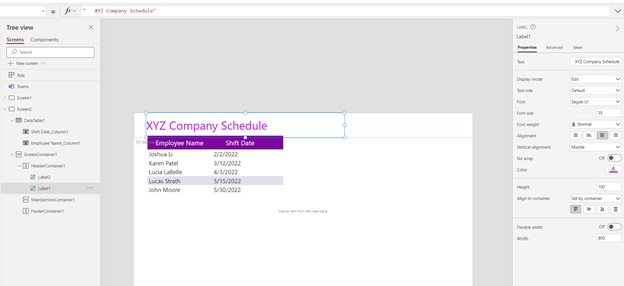
The tree view shows the order that the screens will appear in your team tab. Right-click Screen2 and select to move it above Screen1, so our display table will be the primary view after publishing the app. Time to publish! Click Publish to Teams in the upper right column.

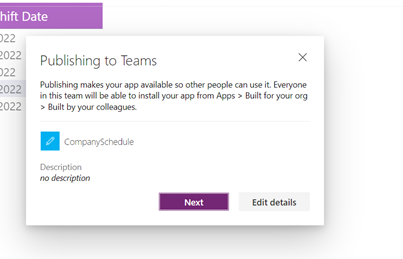
Choose a team to publish to. Highlight the team Channel, and then click the plus beside it to display teams under it. Select the team and then click Save and close.

End Result
Once publish is complete, navigate to the team you chose, and find the tab Company Schedule. It should display your table.
Concluding Thoughts
When understanding when building Teams apps with SPFx or Power Apps, how should we think? Ultimately, one is not immediately better than the other. They are so different; they apply to very different development needs. Below, I’ve outlined a quick summary of limitations and advantages of building using Power Apps:
Limitations
- Using Power Apps, creating an app for one team can only display in a tab for that team. Using SPFx, we created an app that could be installed by the end-user in any team and can appear in the left column as well as in a team tab.
- Using Power Platform, the layout is restricted to predefined layouts and formatting is limited. In SPFx, any html decorated by custom CSS and driven by your favorite JavaScript framework. It can be used to build anything.
- The SPFx demo used only mock data because it’s decidedly more effort to connect to data from the code, and just the work it takes to create the app alone was enough content for a blog post. This is the most valuable advantage of building using Power Apps: the overall effort is lower, including adding data.
Advantages
- Using Power Apps is vastly faster and easier.
- More people can jump in and create business apps without being a developer, using Power Apps.
- In Power Apps, powerful data capability is available incredibly easily.
These are great choices to have an understanding both will help to know which one to choose.


