This blog is part of a series of hands-on labs on leveraging the Power Platform and Microsoft Azure. To break this series up into more manageable chunks, in this installment, we’ll focus on setting up the On-Premises Gateway that will connect to our local SQL Server and the Azure Logic App that will use the new gateway to connect to our local SQL Server 2017 and return customer data using an HTTP request and response.
We’ll wrap it up by using Postman to test our Logic App. If you don’t have Postman installed, you can download it here.
Stay tuned for the next lab in this series, Azure API Management, and Custom Connectors.
Scenario
The company has an on-premises SQL Server database that contains customer data that needs to be available to various apps built on the Common Data Service.
High-Level Steps
- Install and configure an On-Premises Data Gateway to connect to the local SQL Server
- Create an Azure Logic App to connect to the SQL Server through the gateway
On-Premises Data Gateway
As you can imagine, there are already plenty of good write-ups on installing and configuring an On-Premises Data Gateway, including an official version from Microsoft. It is very straight forward, but I’m here to offer you a couple of pro-tips.
Pro Tip #1: Pay attention to the account you use for installing the gateway. This account needs to belong to the same Azure tenant as the account you’ll use for building your Azure Logic Apps that will use this gateway.
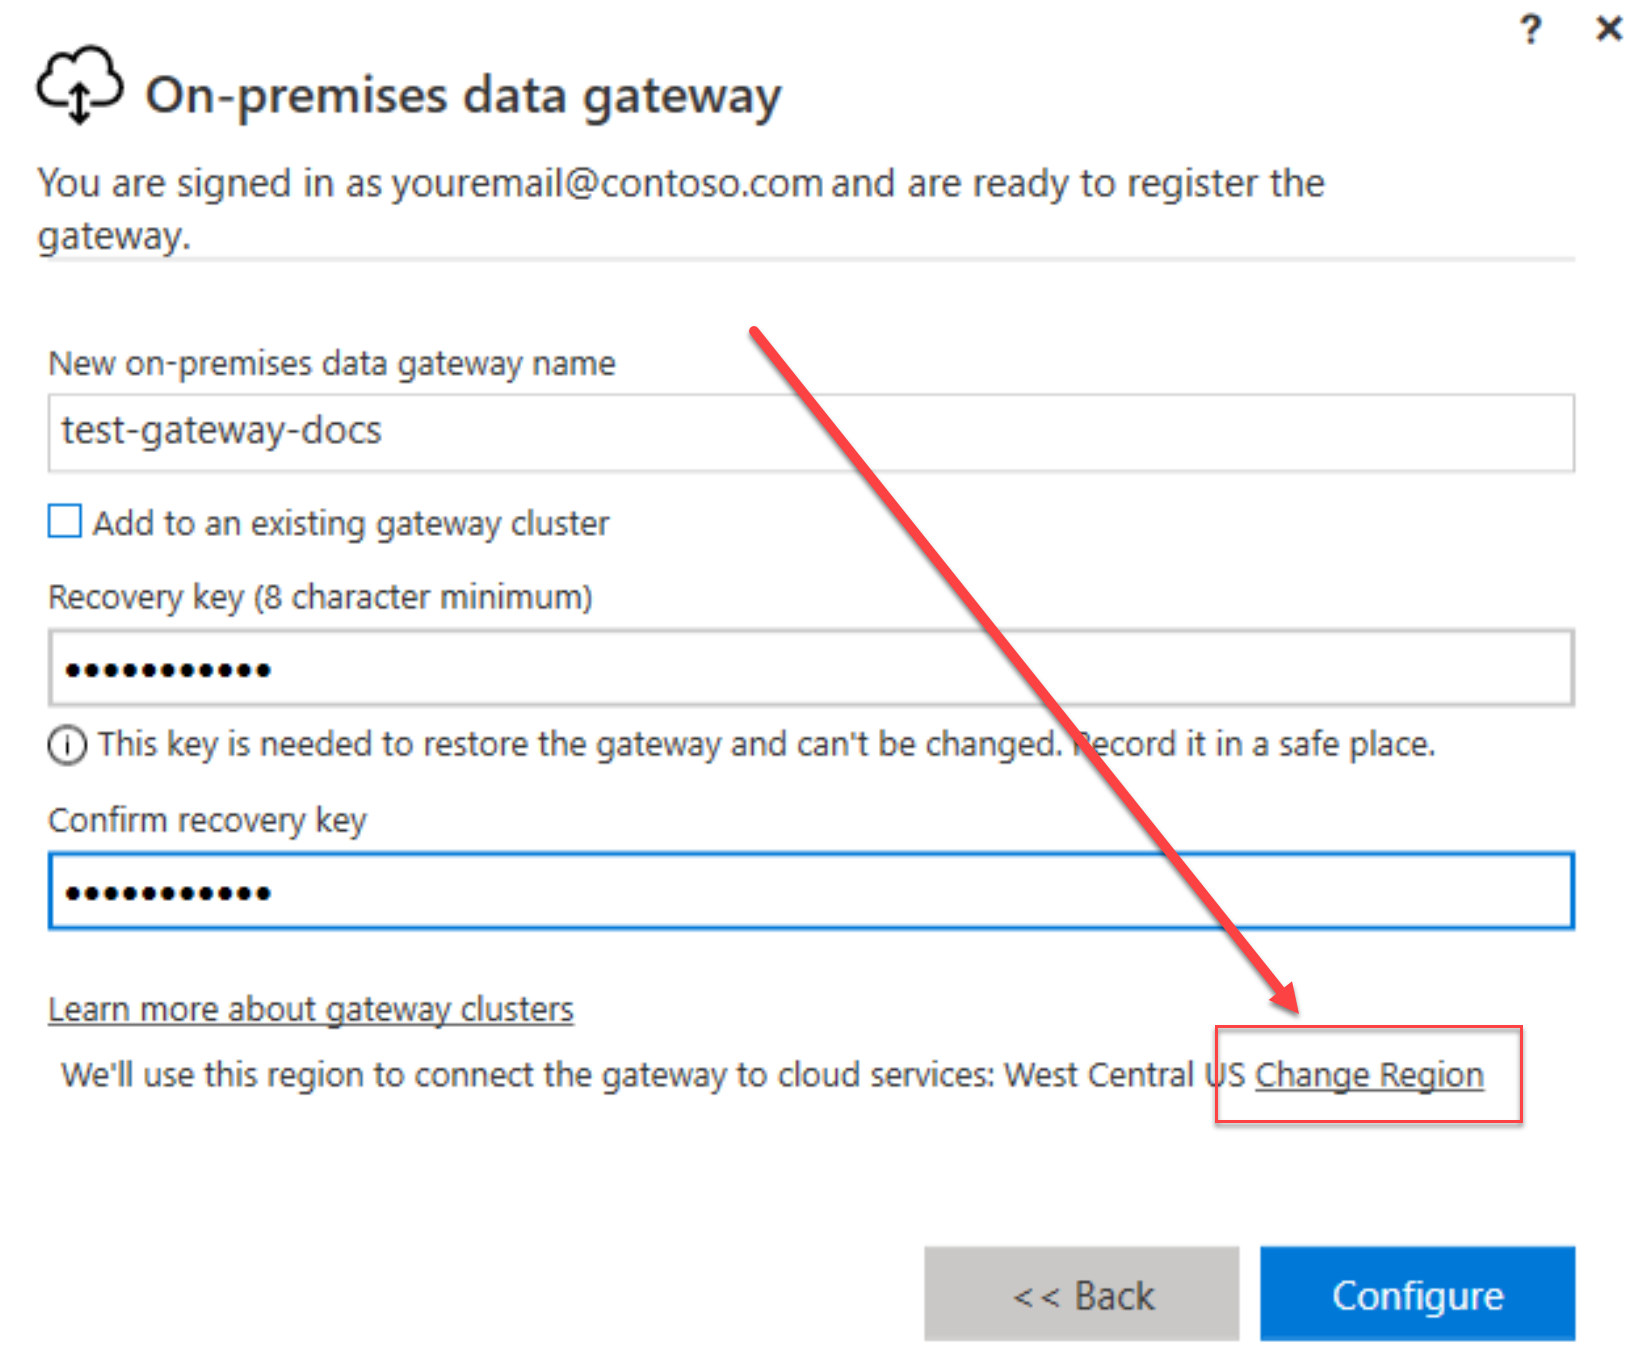
Pro Tip #2: Pay attention to the region that is automatically selected when installing the gateway. For this example, the gateway needs to be installed in the same region as your Azure Logic App.
Azure Logic App
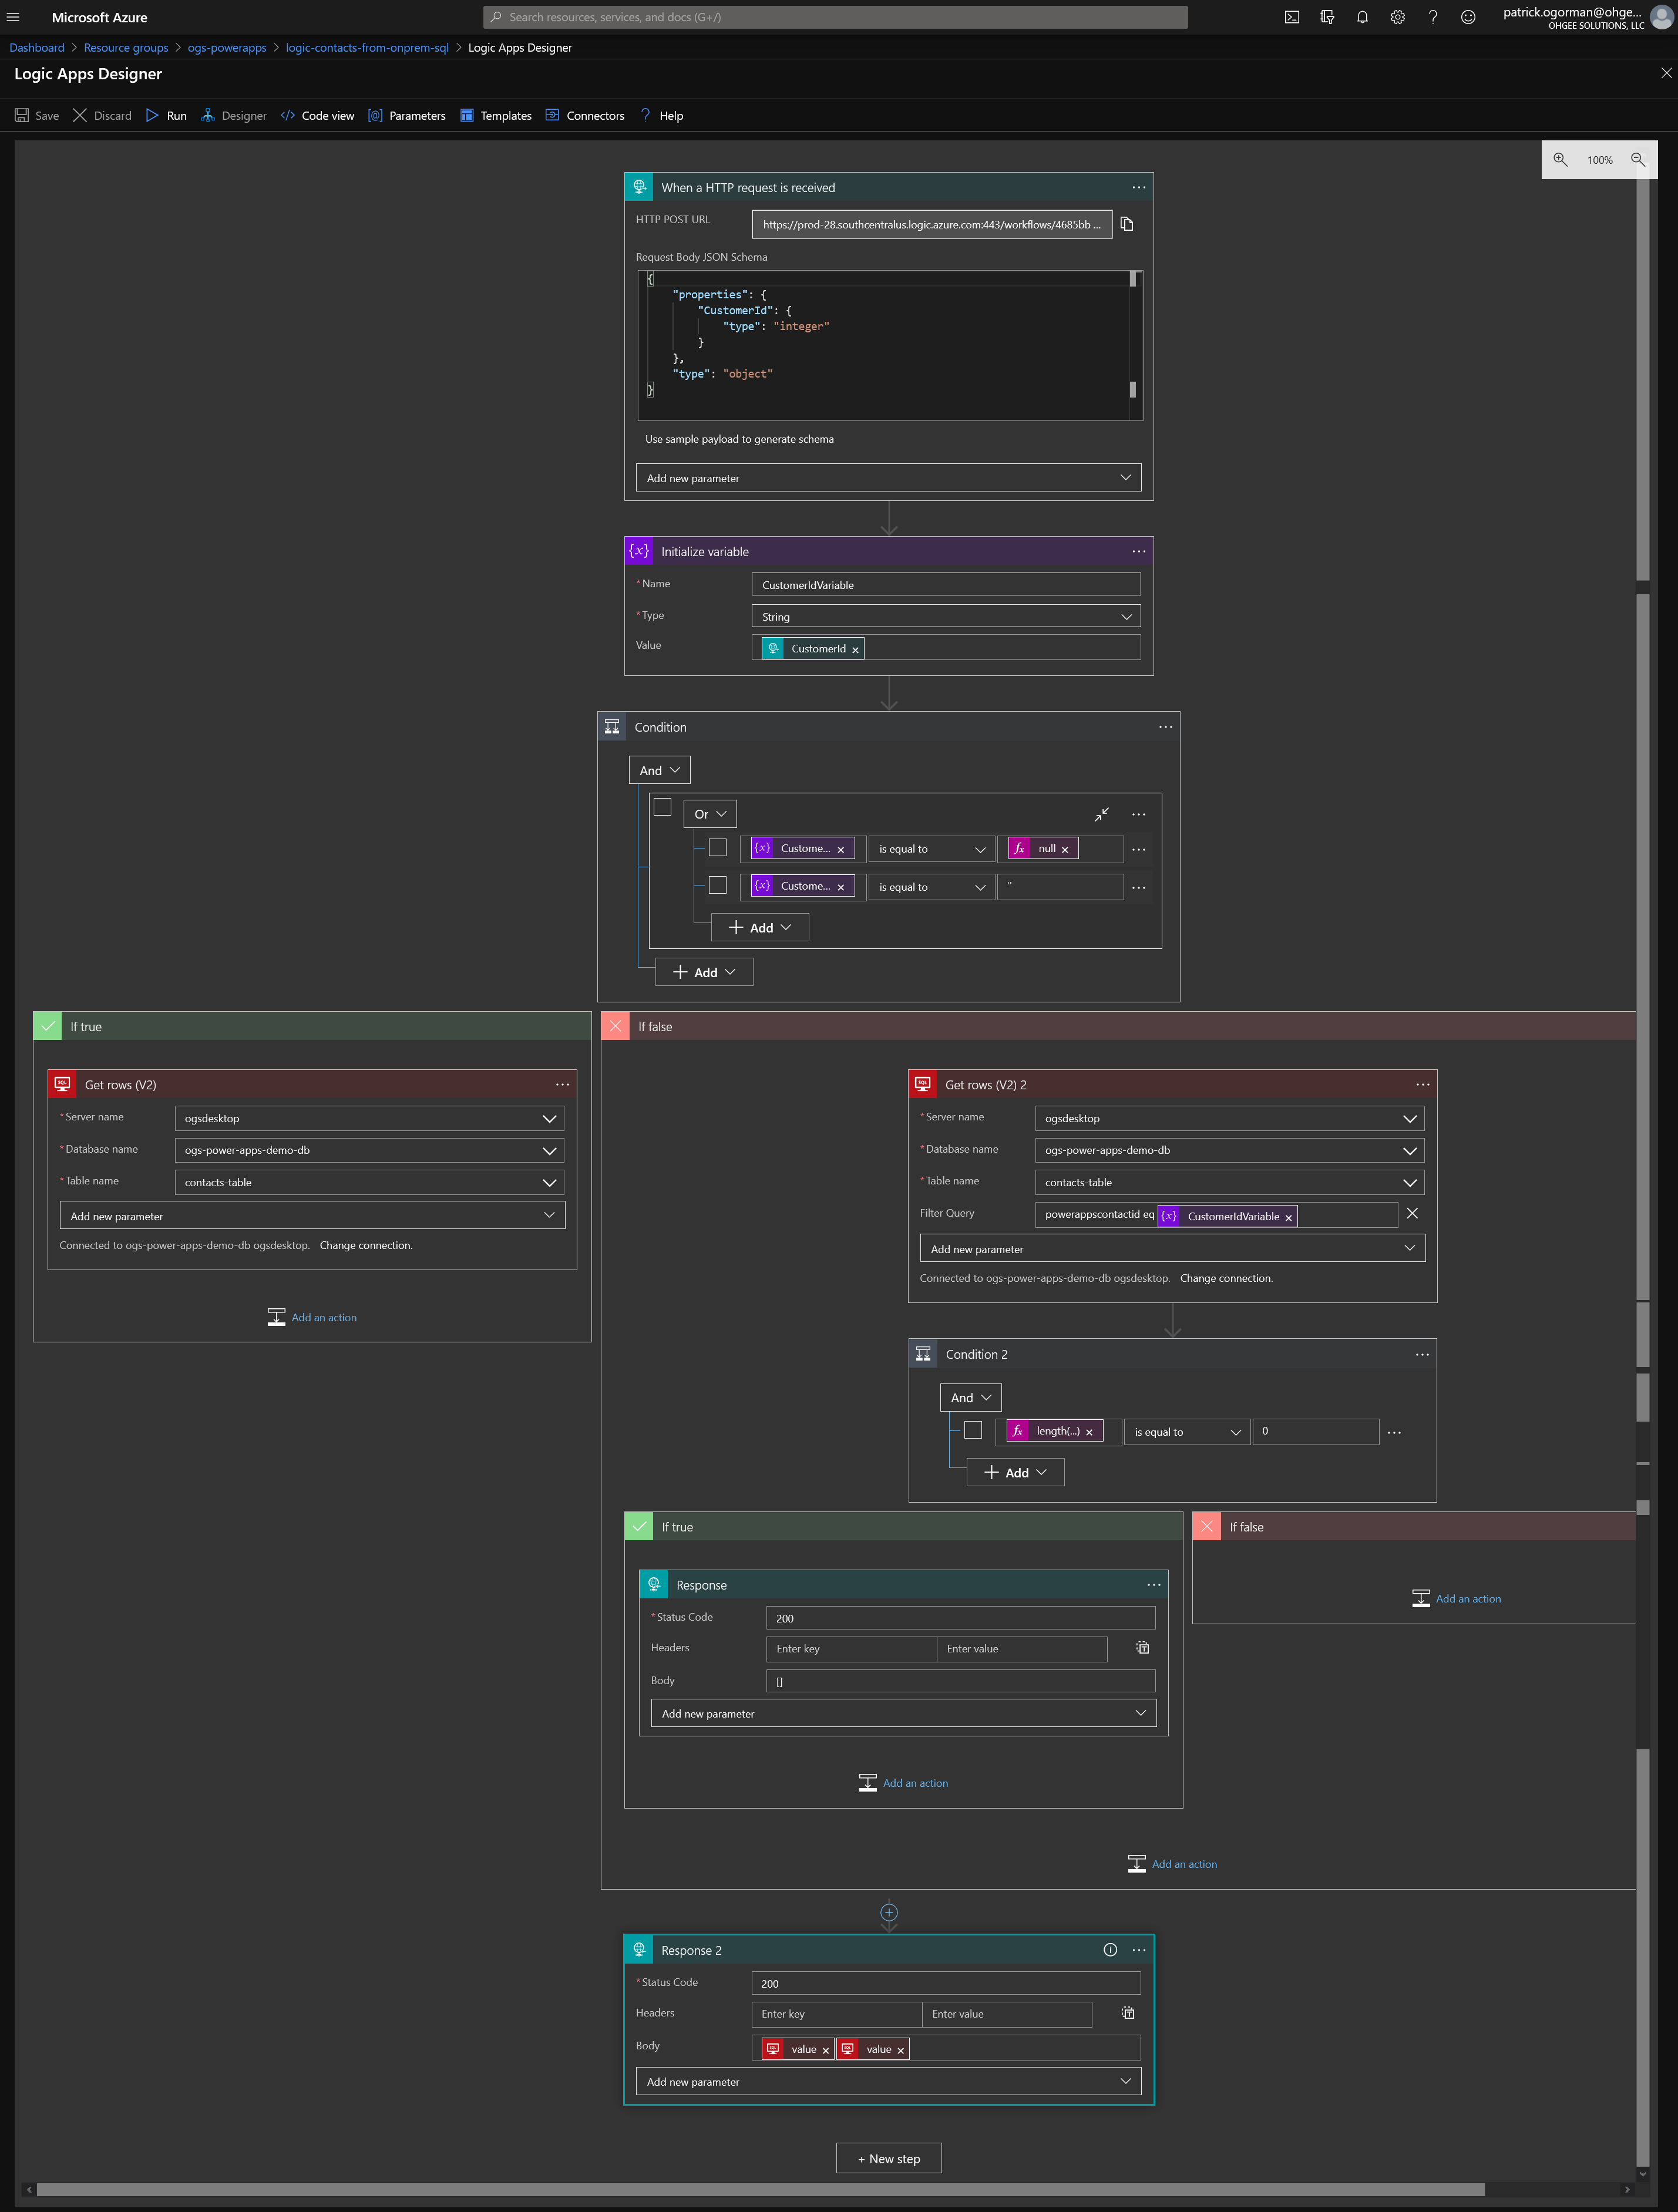
Now I’m going to step you through building an Azure Logic App that can be executed using a simple HTTP Request. The Logic App will accept a single parameter (CustomerId), or no parameter at all. If no id is presented, the Logic App will return all customer rows. Otherwise, it will filter on the passed in CustomerId.
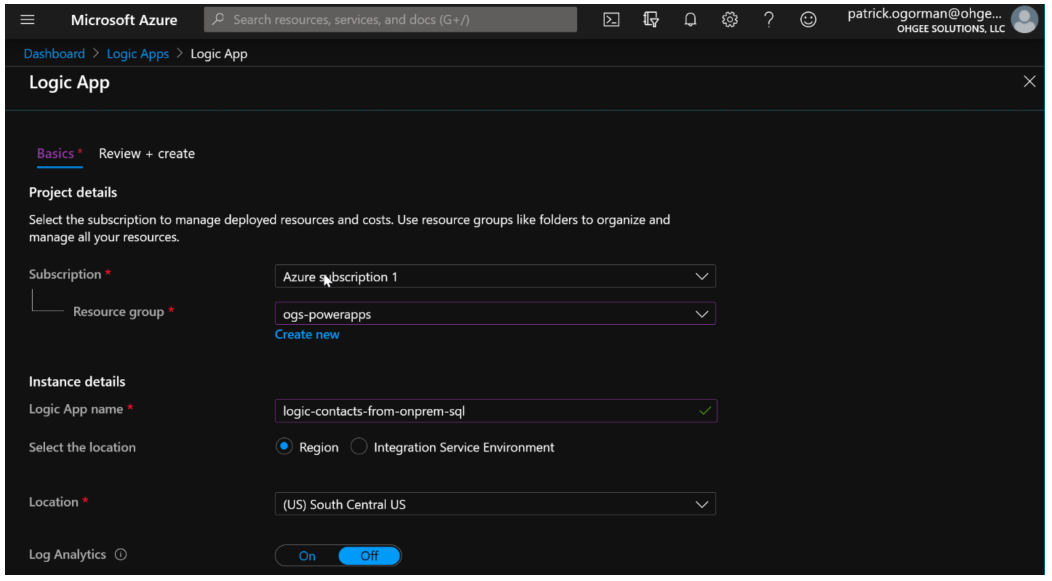
- Create a new Azure Logic App.
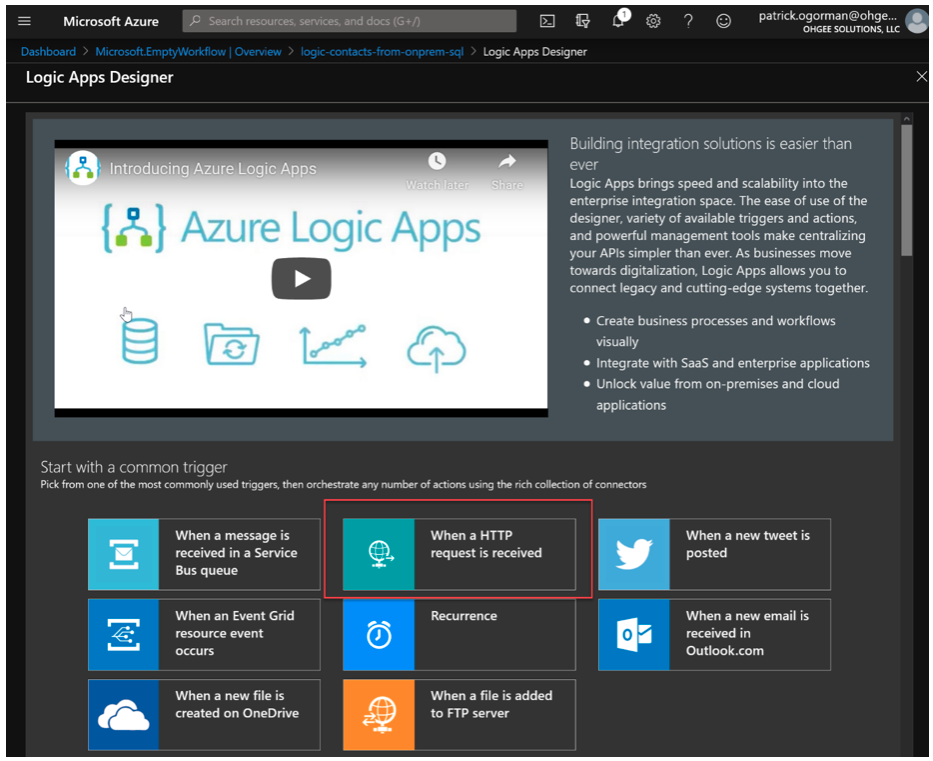
- When the deployment of the Logic App is complete, start with the common trigger “When HTTP request is received”.
- Add the following JSON schema for the Request Body and click Save. Once you save the Logic App you should see the HTTP POST URL field populated automatically.
{
"properties": {
    "CustomerId": {
      "type": "integer"
    }
},
 "type": "object"
}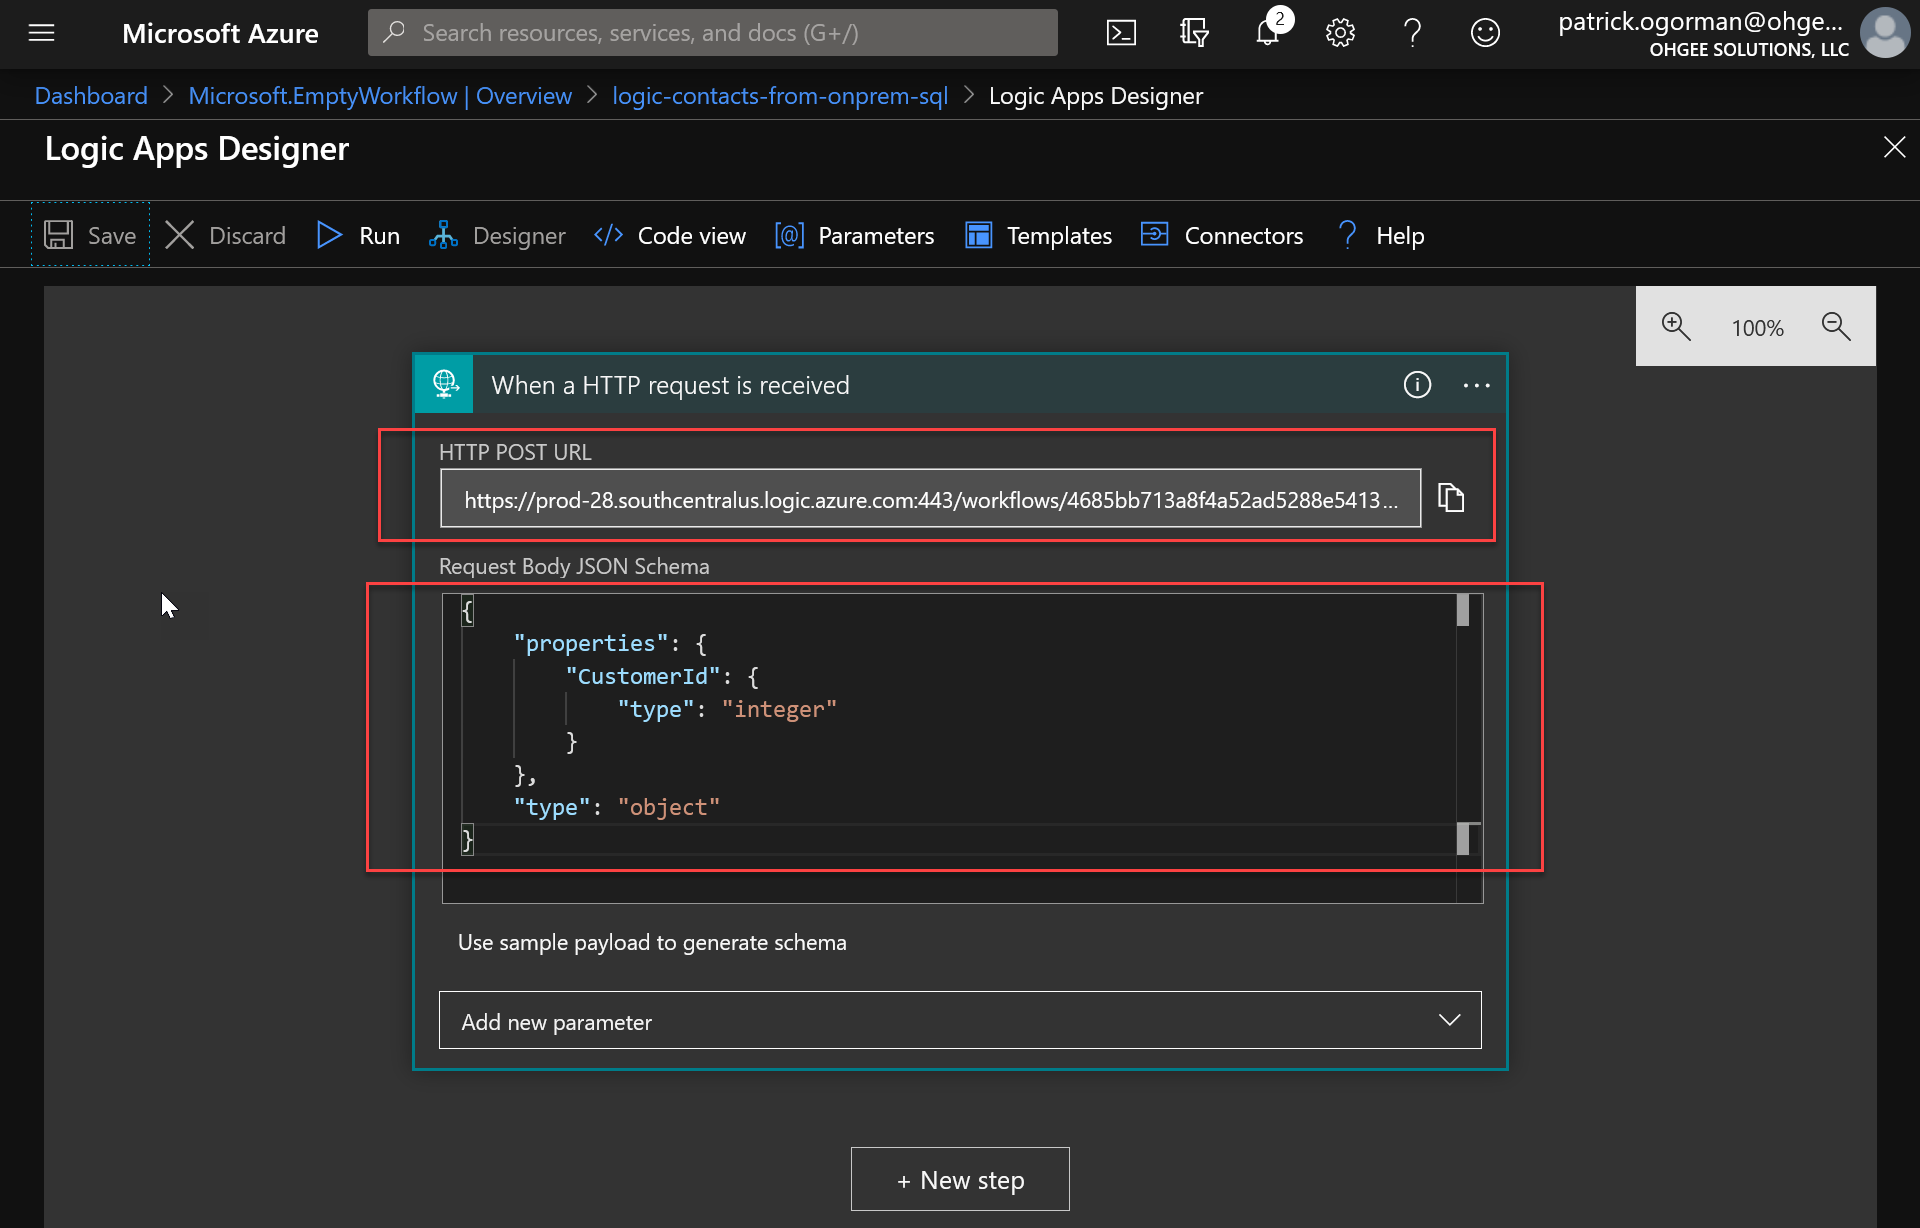
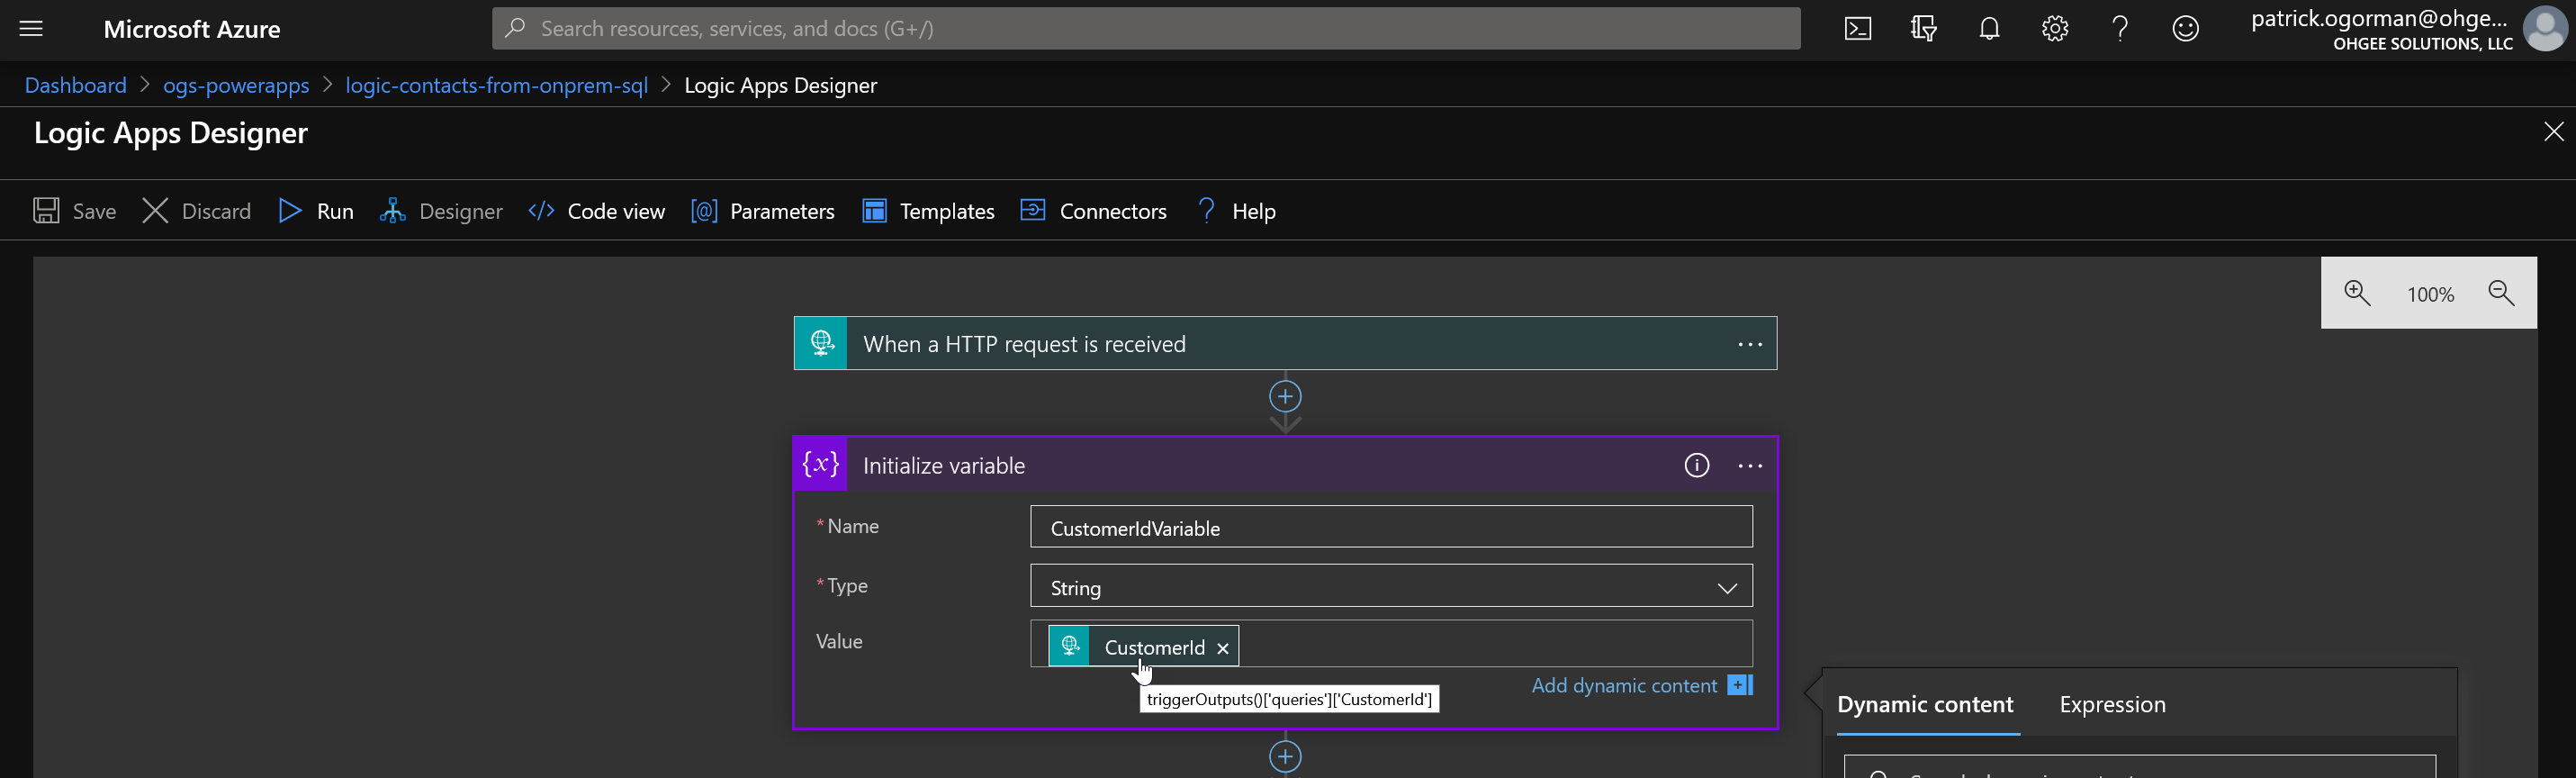
- Add an Initialize variable step named CustomerIdVariable, type string, and set the value to the passed in CustomerId parameter.
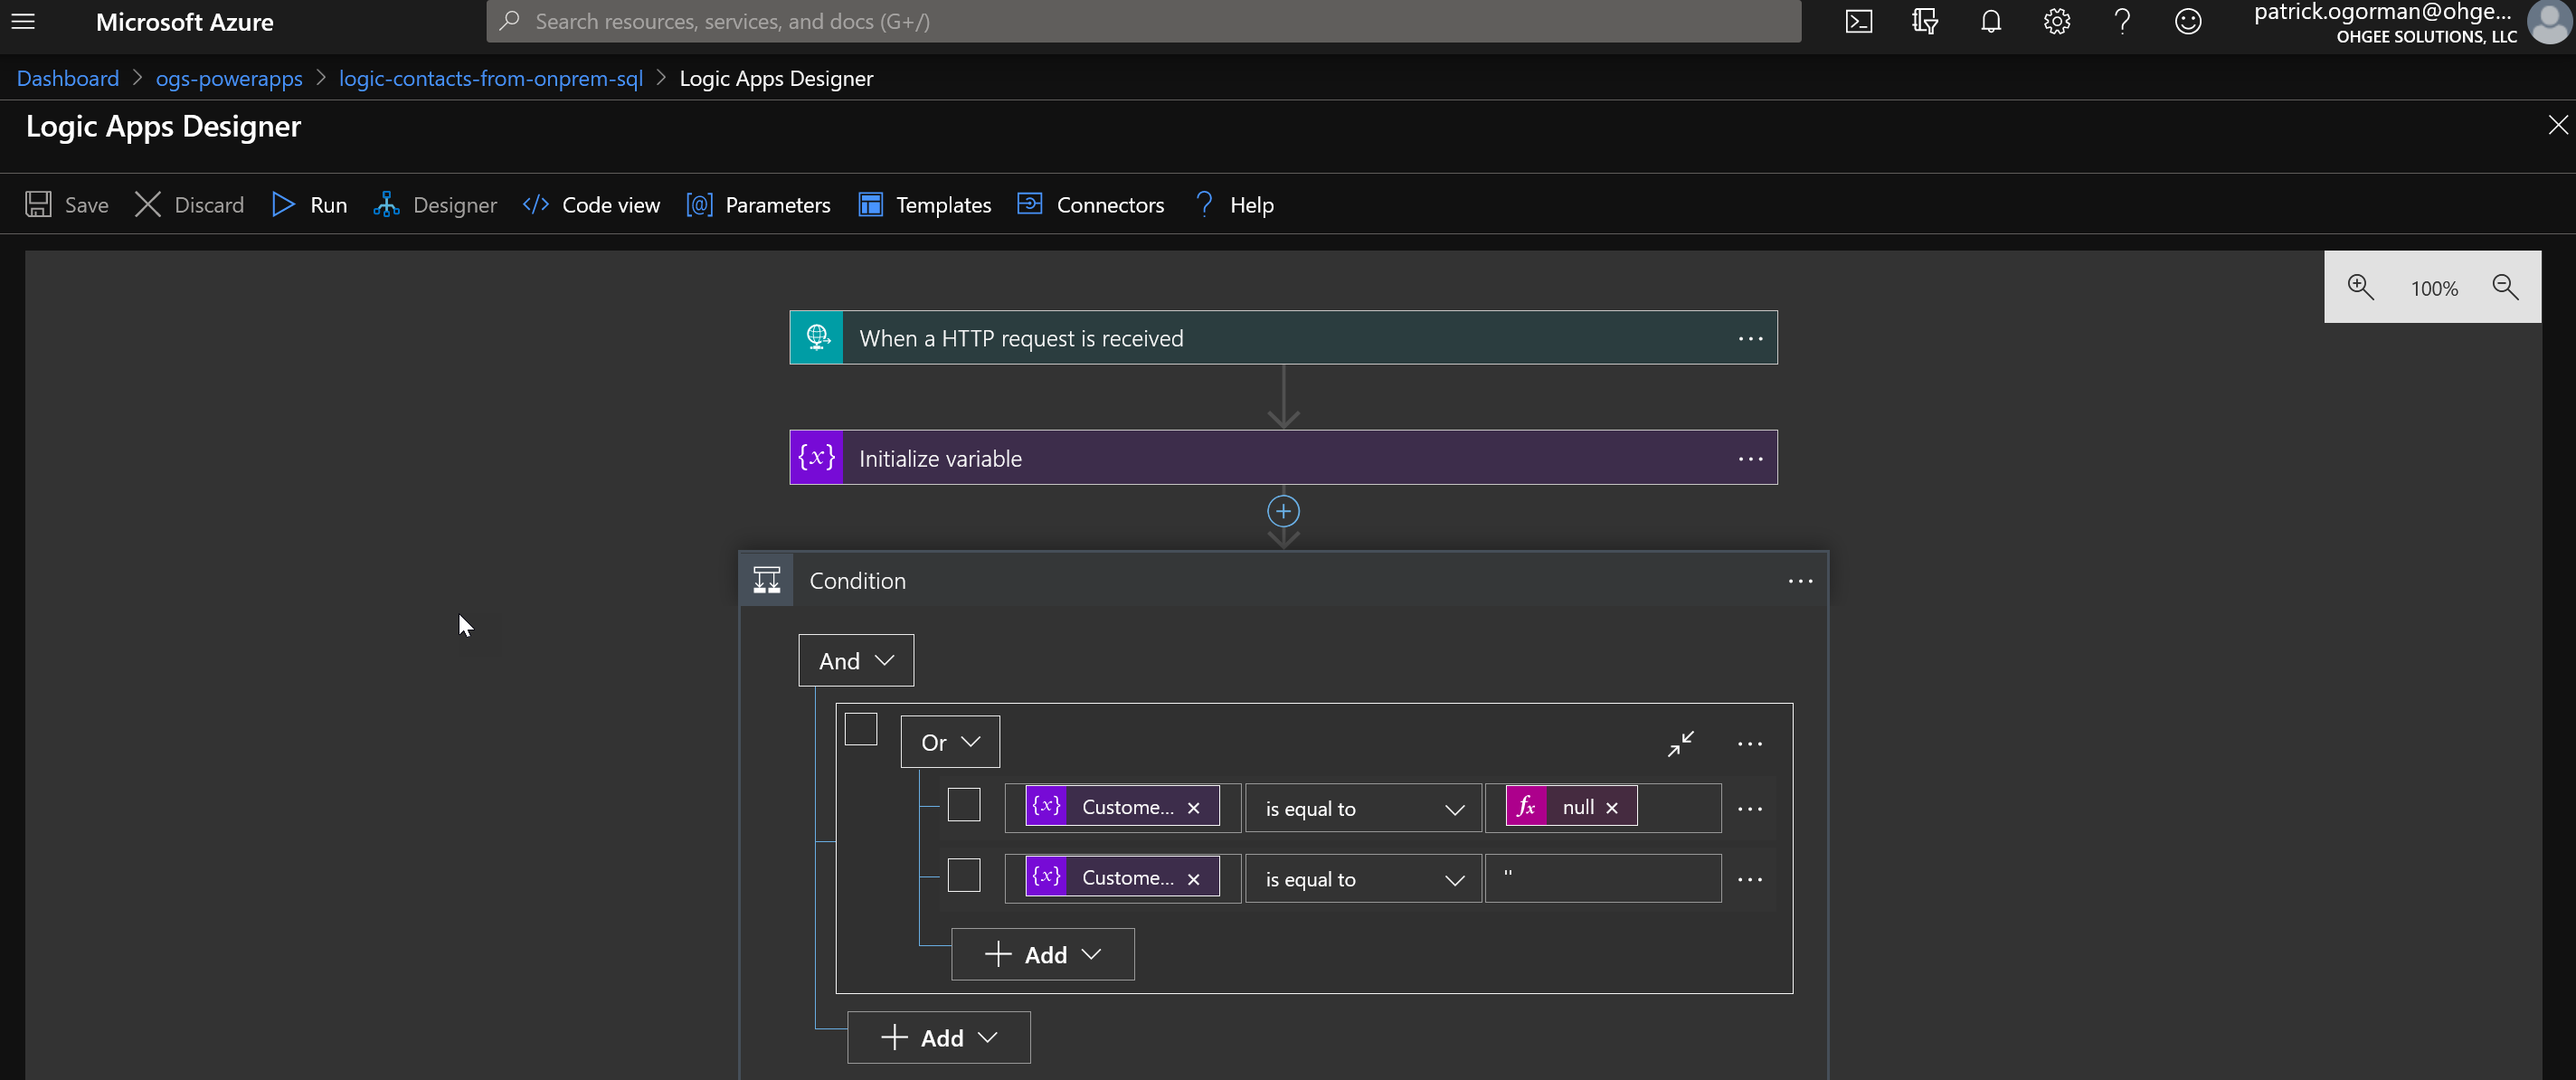
- Add a new Condition step to the Logic App (Controls -> Condition) and change the operator to “Or”. Add a second line row to the condition step and configure as follows.
-
- CustomerIdVariable is equal to null
- CustomerIdVariable is equal to 0
- Where null is a function, and CustomerIdVariable is set from the Dynamic content. Save the Logic App.
-
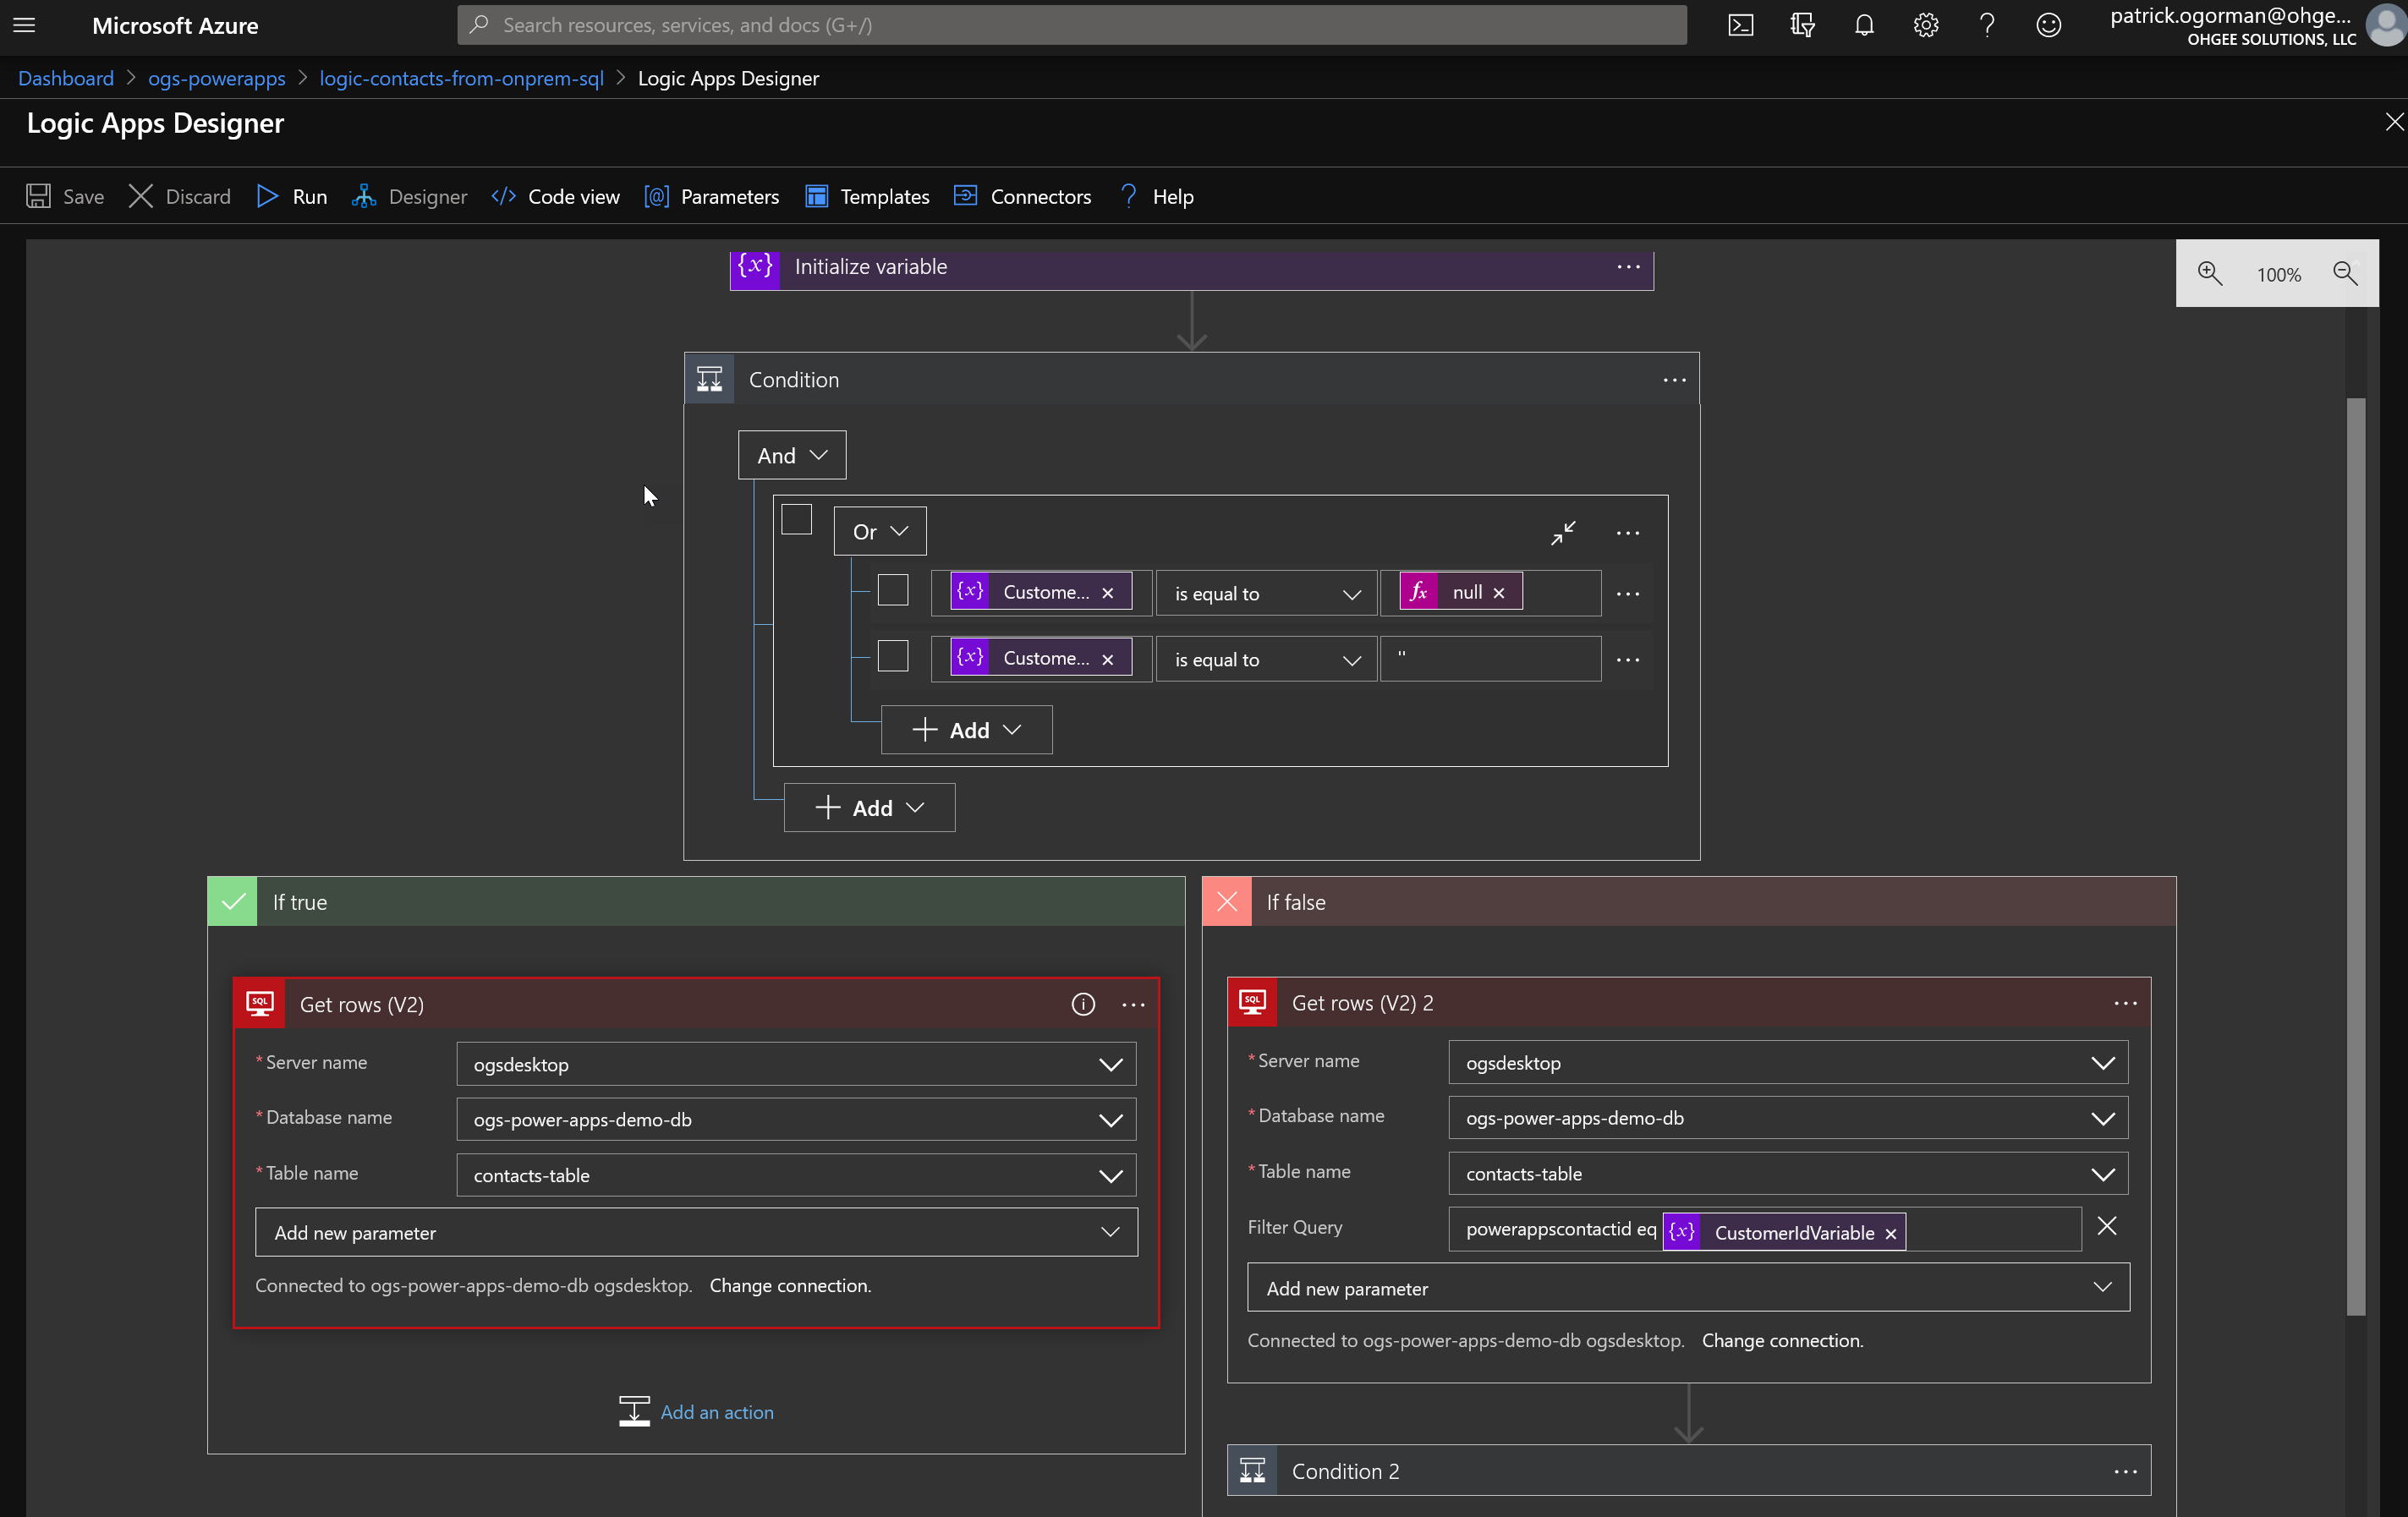
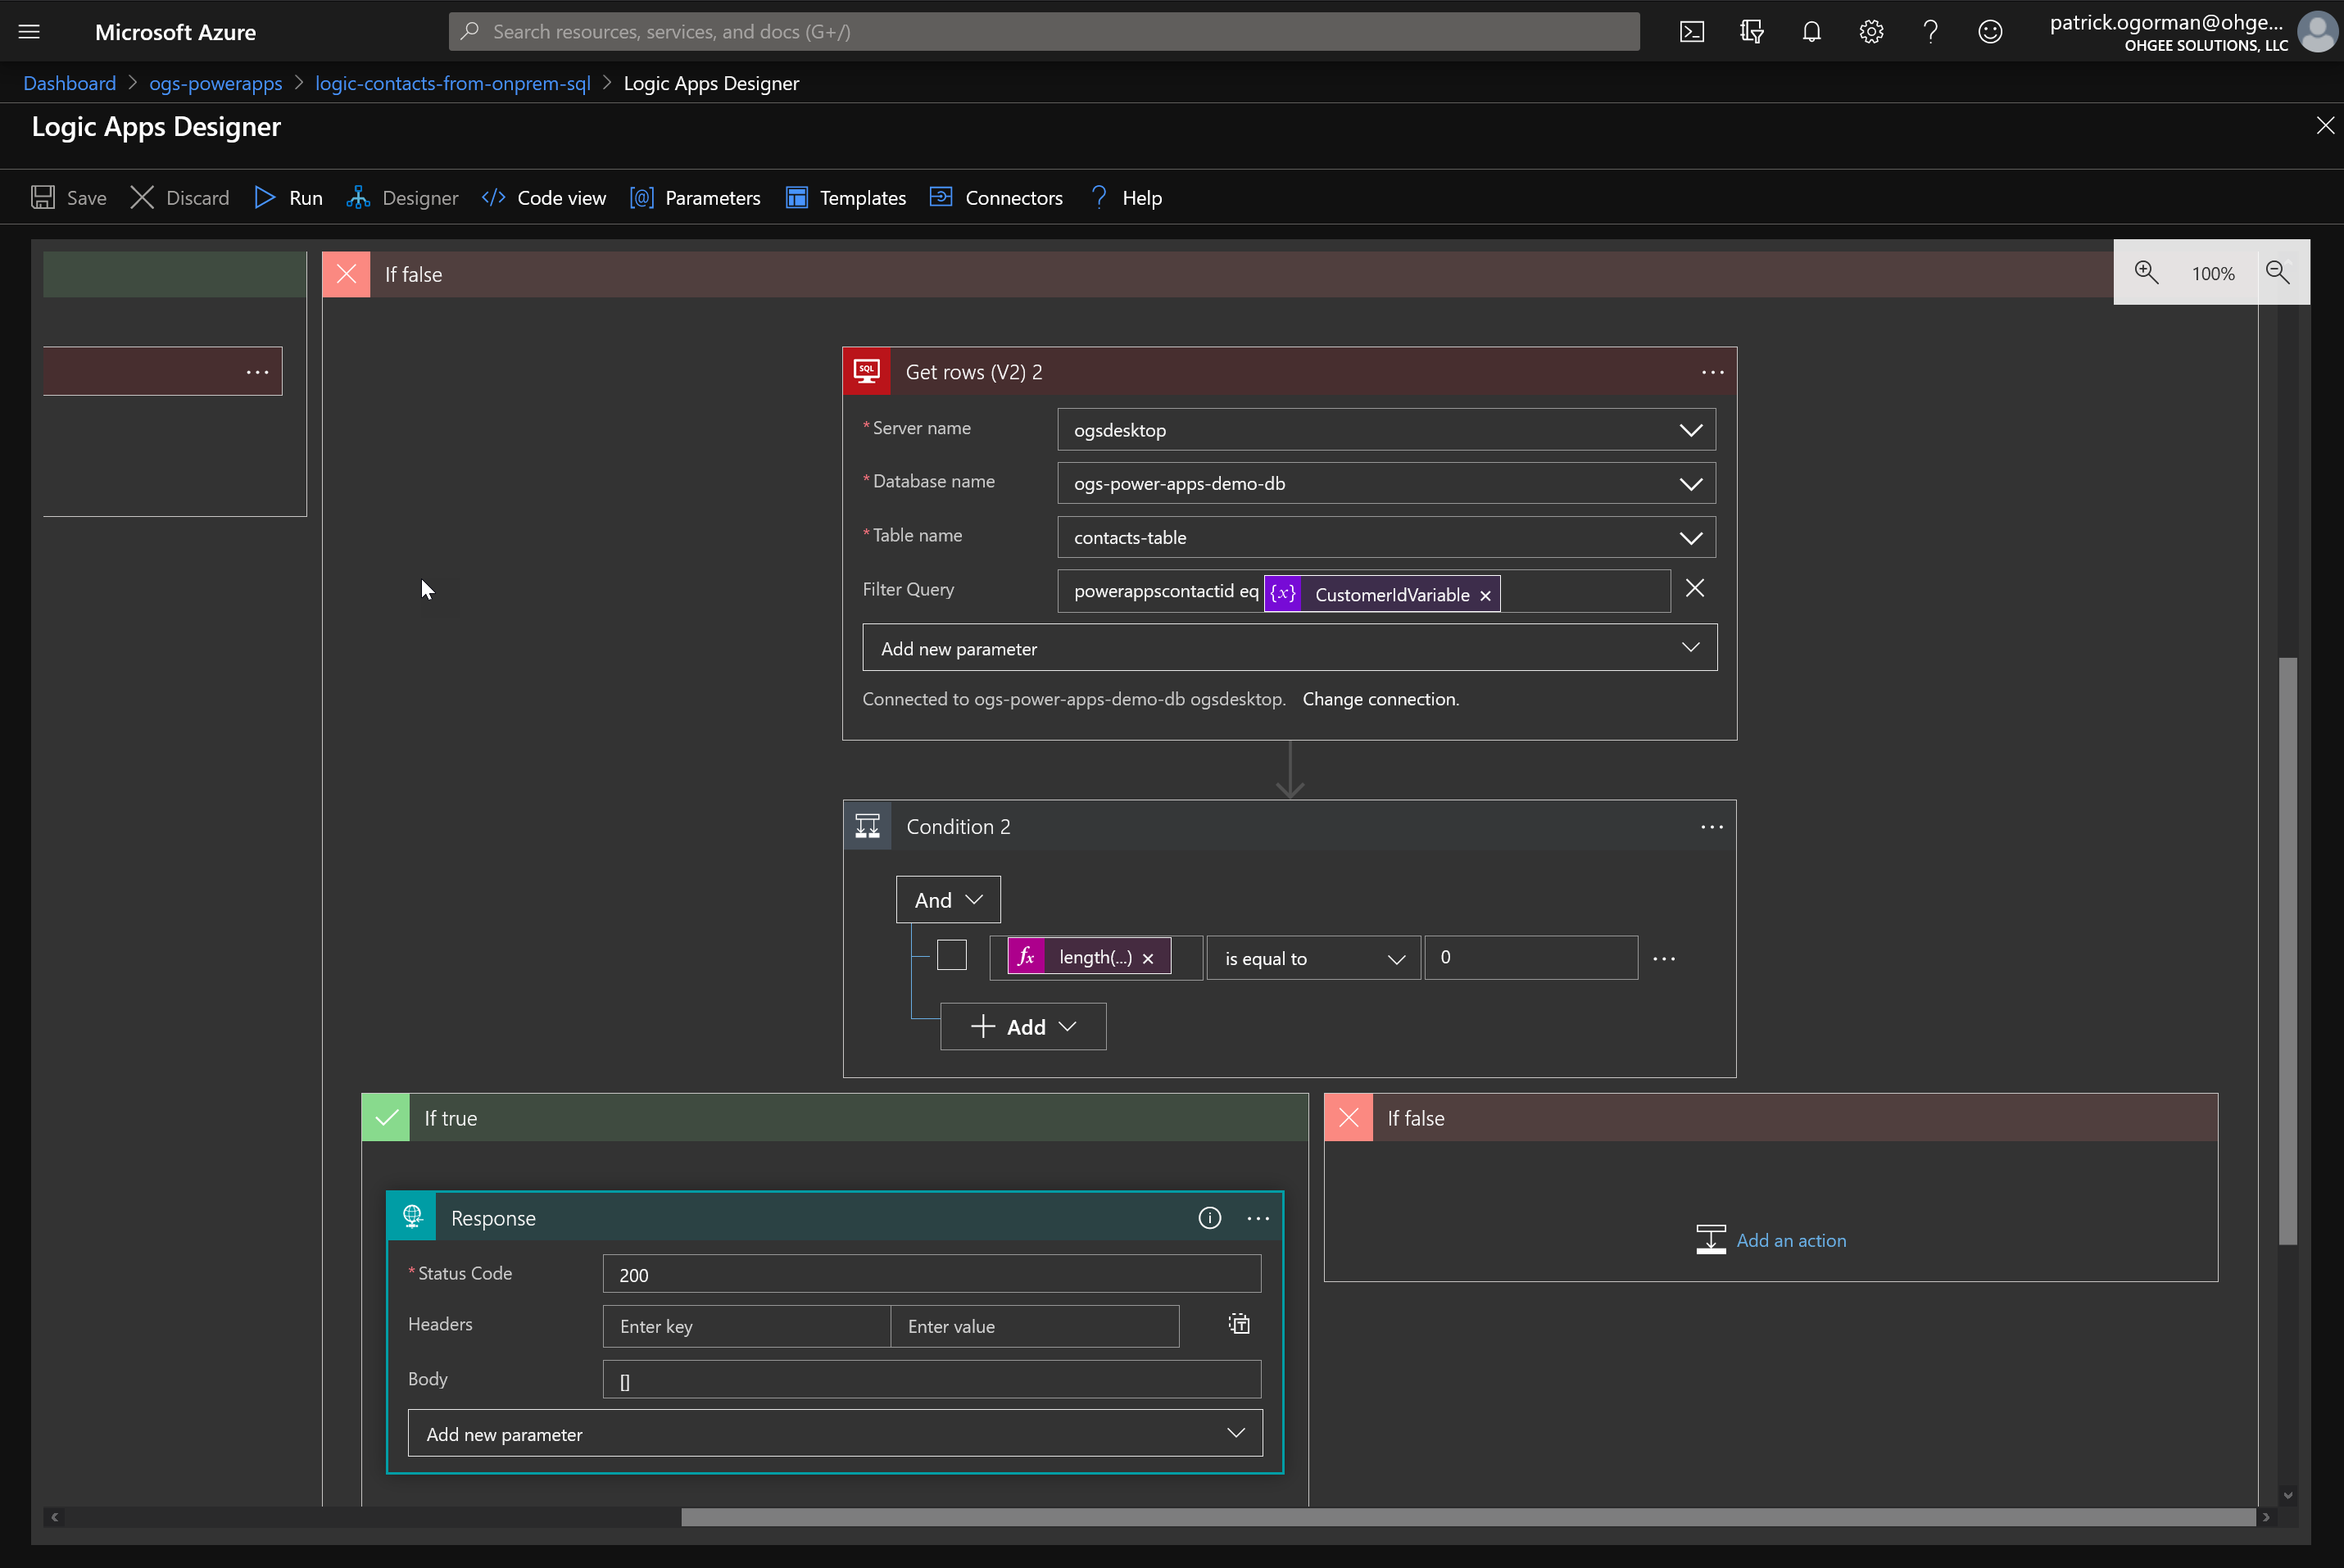
- In the “true” block, add a SQL Server, Get rows (V2) action. We will need to set up a new connection here so let’s do that. Since we were sure to set up the On-Premises Gateway in the same Azure Subscription, you should see the gateway automatically available in the Connection Gateway dropdown. We are using Windows Authentication for authenticating to the SQL Server.
- Once the connection is created, set the server name, database name, and table name on the SQL Server Get rows (V2) action. Save the Logic App.
- Repeat this process for the False side of the conditional, using the same connection that was created in a previous step. When creating this action, click the Add new parameter button and add a Filter Query parameter.
- Set the Filter Query parameter to powerappscontactid eq CustomerIdVariable where the CustomerIdVariable is filled in using the Dynamic content. Save the Logic App.
- After the Get rows (V2) action in the False side of the conditional, add another conditional. Use the following expression for the conditional.
length(body(‘Get_rows_(V2)_2’)?[‘value’]) is equal to 0.
Where the first part is an expression. - For this new conditional we’ll leave the False side empty, but we want to add a Response Request action to the True side. Configure the Response to use Status Code 200, and [] as the Body. Save the Logic App.
- Finally, outside of the conditionals, we’ll add another Response Request Action with a Status Code of 200. For this response, we’ll use Dynamic content and send back the ‘values’ from both SQL Server Get rows (V2) actions.
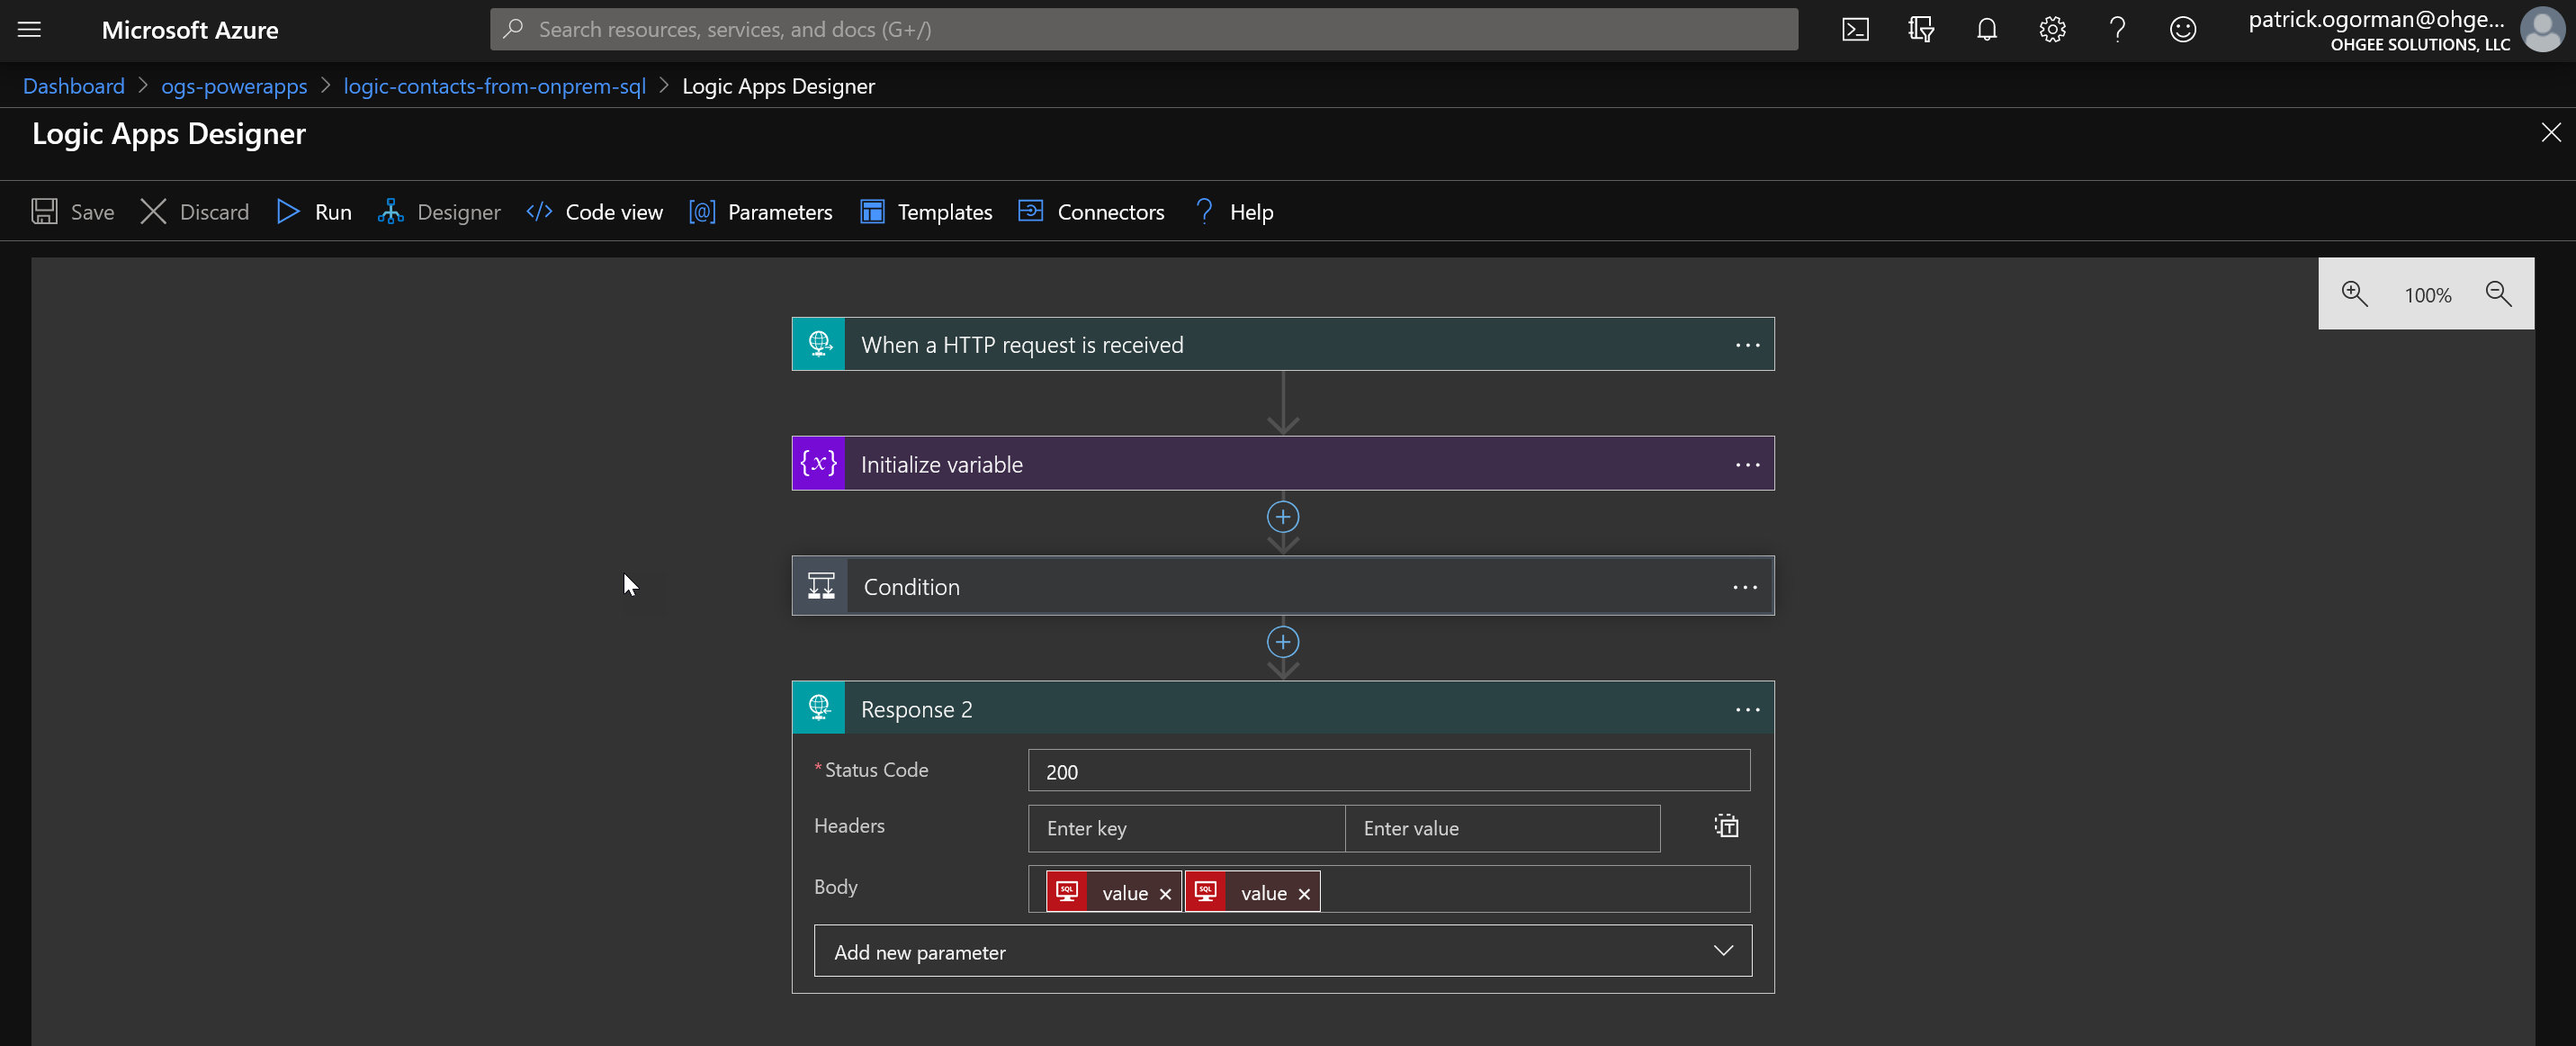
- The Logic App should look like this.
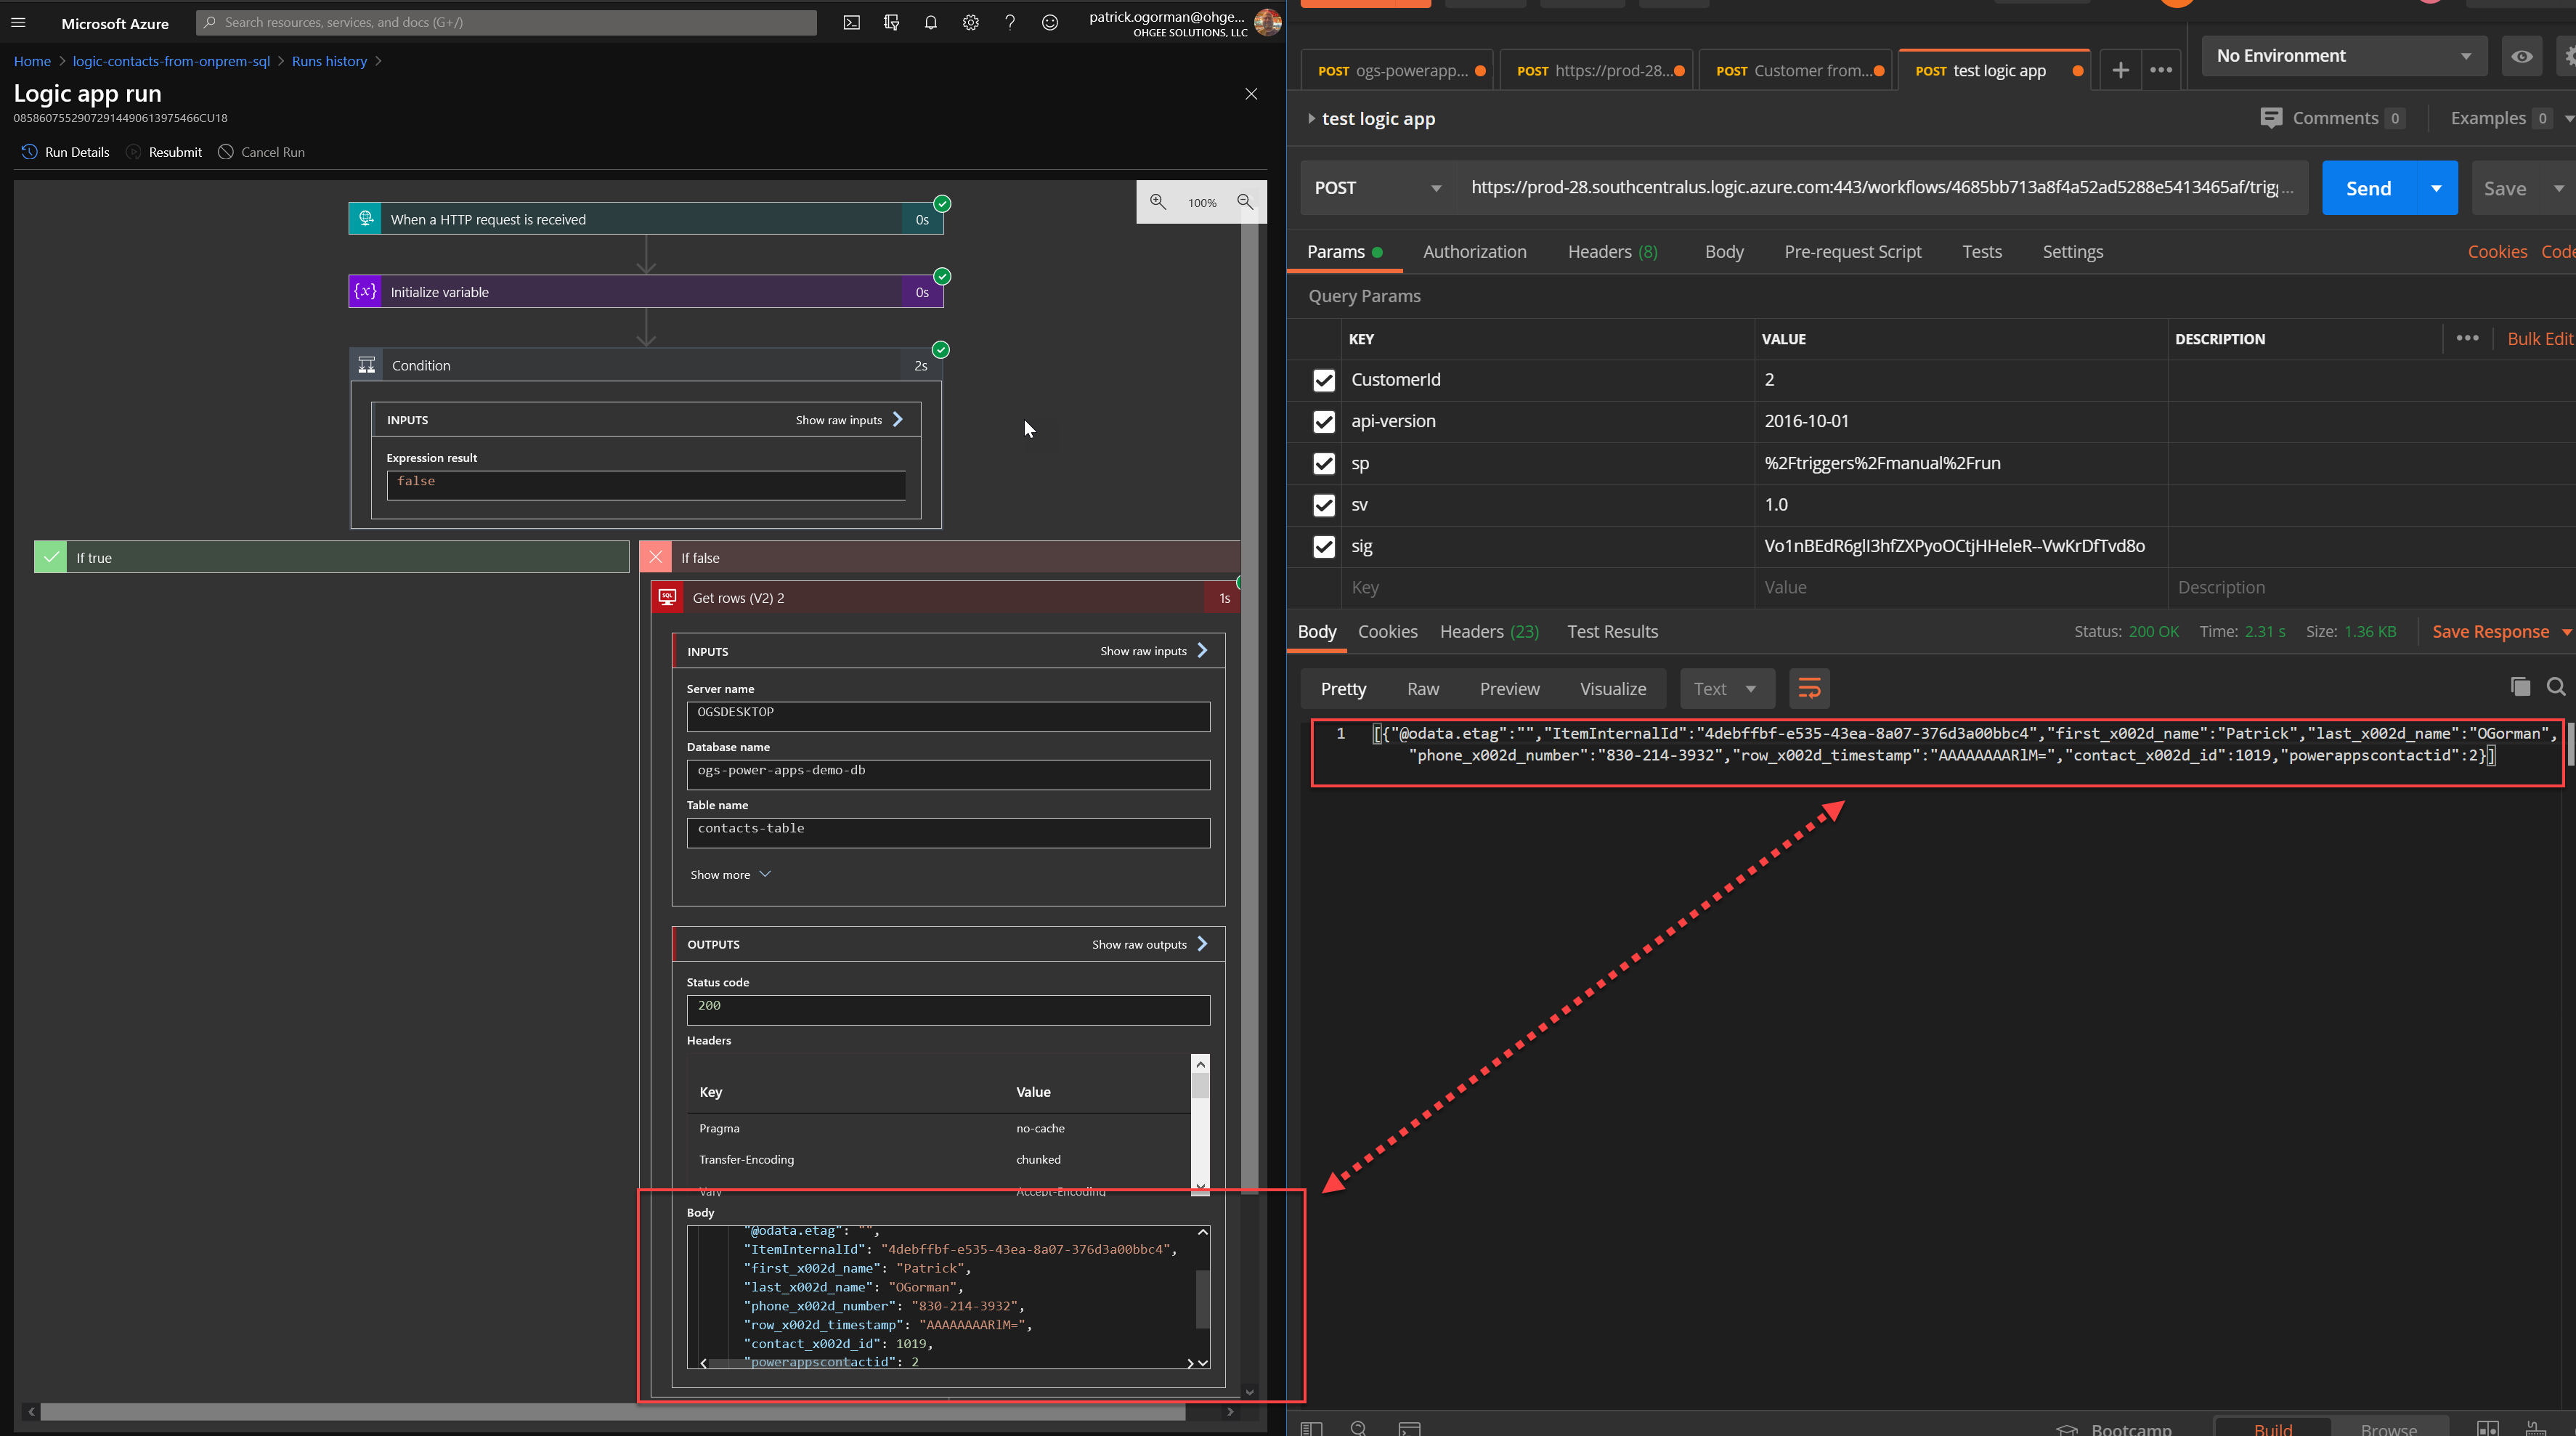
- Time to save and test your Logic App. We’re going to use Postman to do that since we haven’t set up our API yet in Azure API Management. Open up Postman and start a new request. Use HTTP Post and the URL from the “HTTP Request Received” trigger on your Logic App. I also tweaked that URL to include our CustomerId query string parameter.
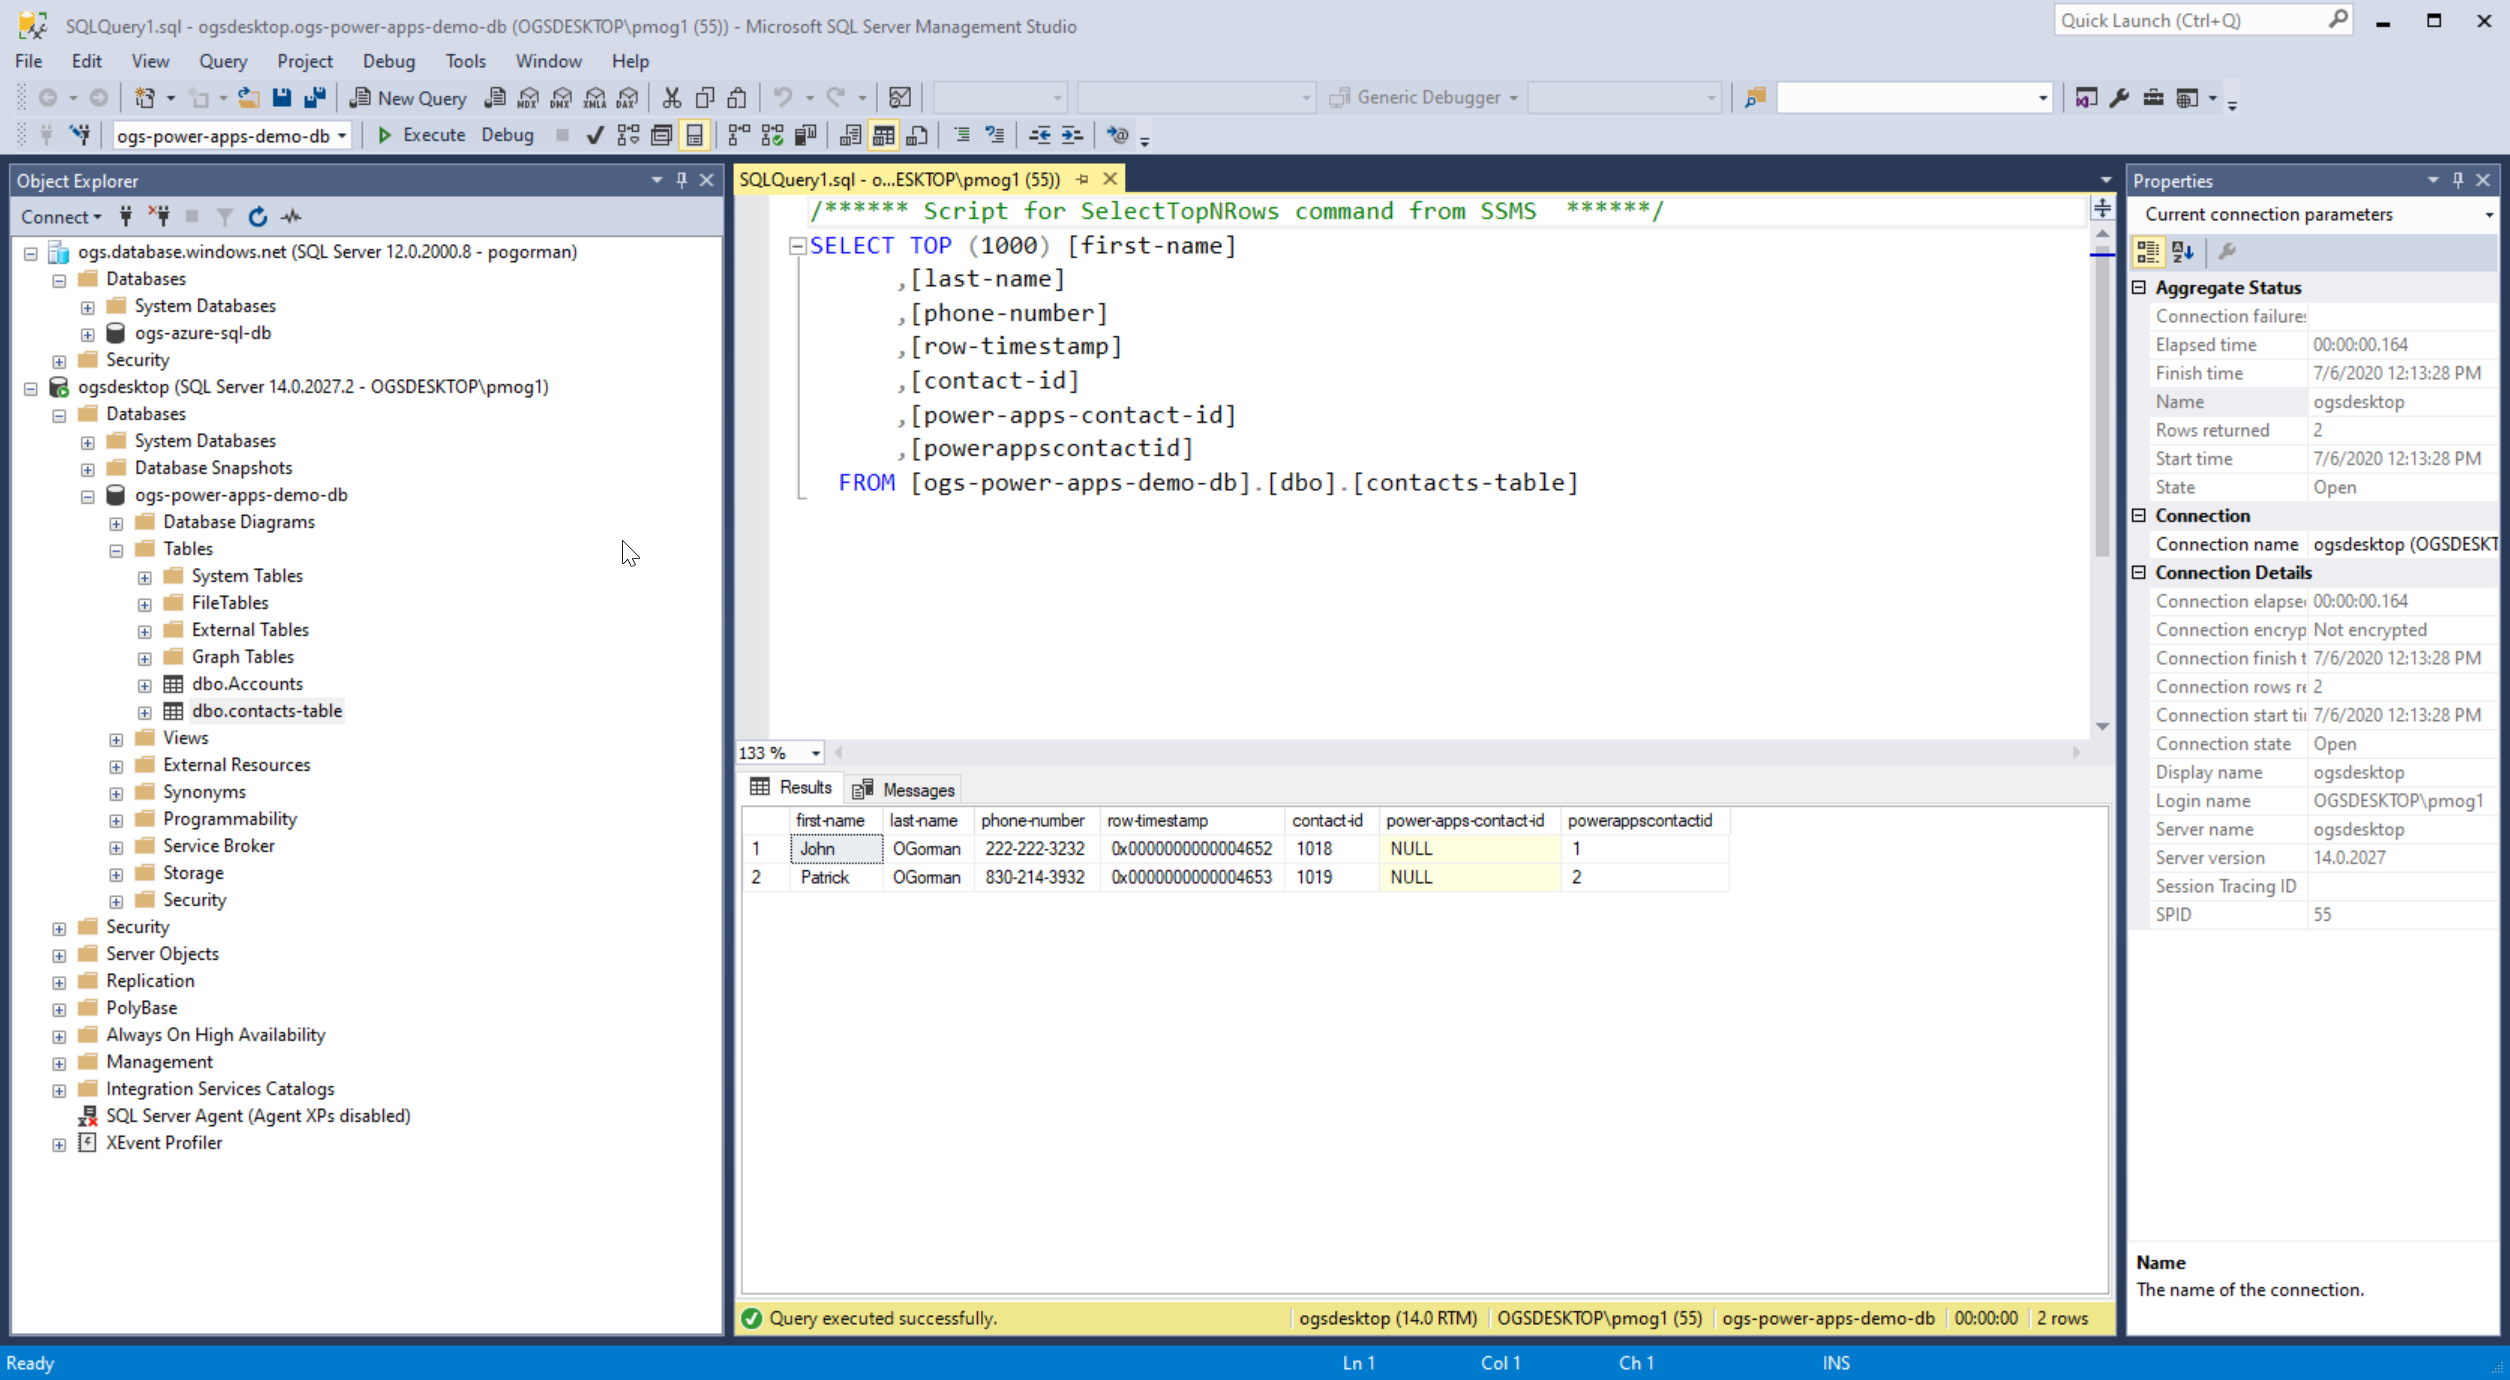
Once the URL is put into Postman, the other parameters should be auto-populated in your Postman environment. Here is a snippet of the URL that shows how I included the CustomerId, followed by a screenshot of the Logic App run (after completion), the Postman results, and the contents of the table displayed in SQL Server Management Studio.
…triggers/manual/paths/invoke?CustomerId=2&api-version=2016-10-01…
Conclusion
I hope this helped demonstrate how quickly you can start querying data in your on-premises data stores from a cloud resource like an Azure Logic App. Please keep in mind that you’ll most likely want to secure this Logic App since right now, anyone can send a request to it. We’ll cover that in more detail in another write-up.