What is Managed Identity?
The password lifecycle can be tedious. Between securely storing, rotating regularly, and ensuring their complexity, they add a hefty burden to IT teams. In comes the use of managed identities, a free feature that supports the ability to authenticate with resources that use Azure Active Directory (AAD). There are two types of managed identities:
- System-assigned: An identity is created within Azure AD and is tied to the lifecycle of that specific resource. Only that resource can use the identity; once that resource is deleted, so is the identity.
- User-assigned: You can create your own managed identity, which can be assigned to multiple resources. You must maintain the lifecycle of that identity, though. When a user-assigned resource is deleted, that identity is not deleted from Azure AD.
For this article’s purposes, we will focus on system-assigned identities. For more information, check out Microsoft’s managed identities for Azure resources article. If you’re interested in learning more about creating a password-less strategy with Microsoft security, check out Derek Morgan’s article.
Setting Up the Virtual Machine with Managed Identity
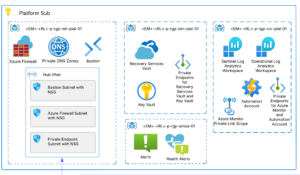
The scope of this post will not cover how to set up an Azure VM. For more information on that, you can find instructions at Microsoft Learn. System-assigned managed identity can be configured through a variety of methods.
Pre-VM Creation
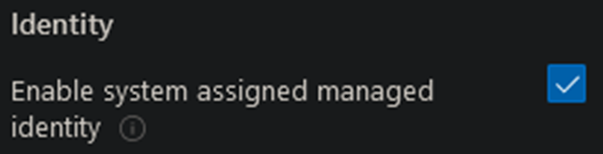
When creating a VM in the Azure Portal, the Management tab will have an ‘Identity’ checkbox that should be selected. This will create the Azure AD identity without any permissions.
Post-VM Creation
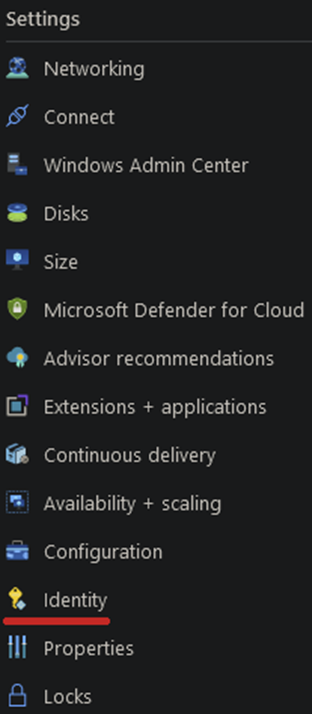
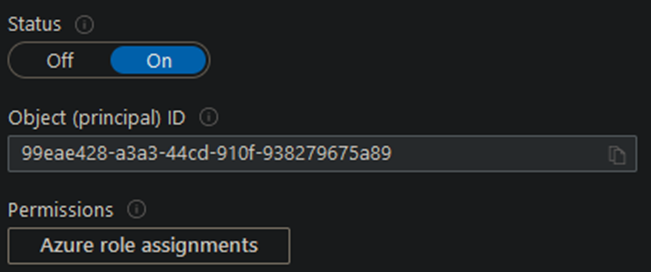
If you already have an existing VM, you can set up a managed identity by selecting Identity under the Settings blade of your chosen VM.
You’ll be given the option to choose System assigned or User assigned. For now, we’ll stick with the System set, select ‘On’ under the Status, and then click ‘Save.’
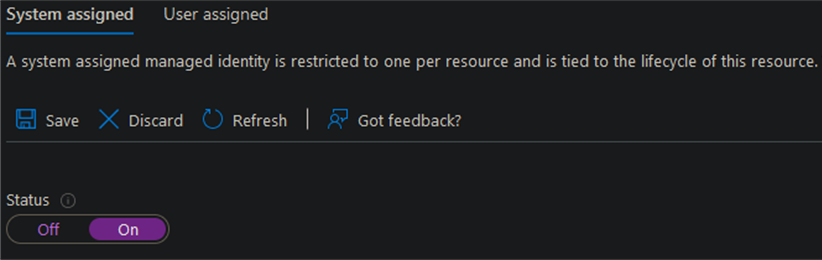
A prompt will appear asking for confirmation. Click ‘Yes.’

Initially, your managed identity doesn’t have permission to do anything in your Azure environment. So, the next step is to set one more Azure role assignment by clicking ‘Azure role assignments.’
You will then click on Add role assignment, which is currently in preview at the time of this writing, and select your scope (subscription/resource group/resource) and role (Owner, Contributor, etc.). Use whichever role best meets your needs; this can also include custom roles!
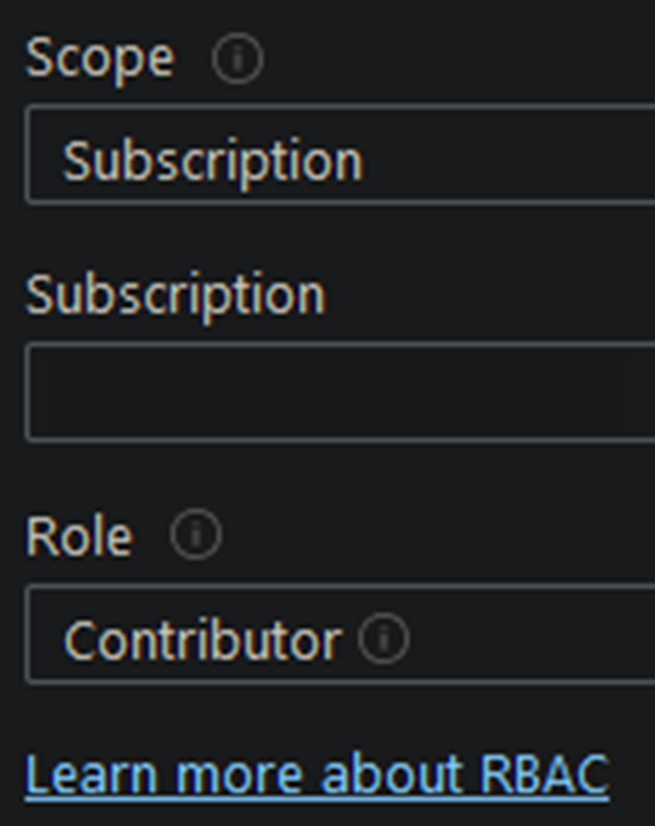
Then save! Your VM now has a managed identity configured with your desired permissions.
Bicep and Terraform IaC
There’s a good chance that if you’re setting up a managed identity on a VM, you intend on deploying IaC. This can result in the classic chicken and egg problem. This leaves you with a few options:
- Use Microsoft’s managed build agents to deploy your initial IaC
- Configure a managed identity manually following the above directions and then use this code for future VM creations.
For brevity, we’ll just link to some resources from the significant IaC languages:
- Bicep: RBAC and Virtual Machines
- Terraform: RBAC and Virtual Machines
- Pulumi: RBAC and Virtual Machines
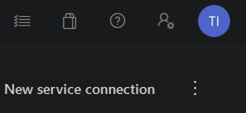
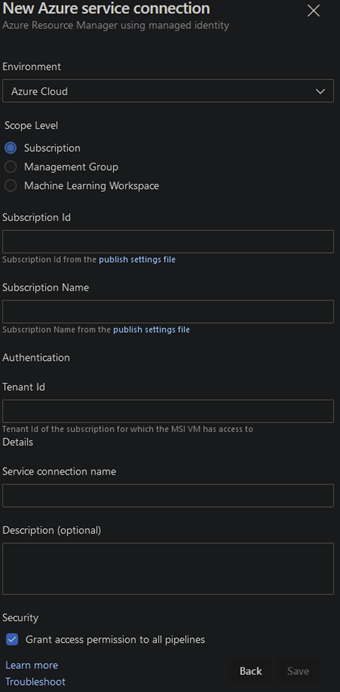
Create Service Connection in ADO
Azure DevOps > Project Settings > Service Connections > New Service Connection > Azure Resource Manager > Managed Identity
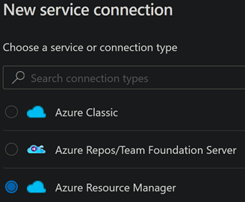
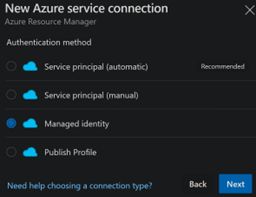
Be sure to choose the right Scope Level to match what you chose when setting the role assignment.
Configuring the VM
We’ll focus on configuring the VM with two programs, ADO Pipeline Agent and PowerShell Core, to run our sample Pipeline below.
ADO Pipelines Agent for Agent Pool Build and Releases
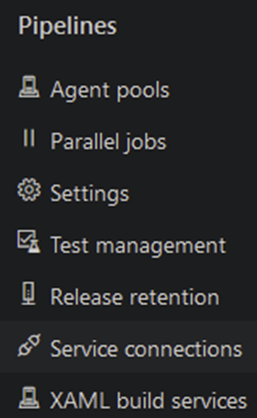
- ADO > Project Settings > Agent pools > Add Pool
- Pool type = Self-hosted
- Name can be any string. I like env_pool (e.g., dev_pool, prd_pool).
- Description is optional.
- Select your new pool > New agent
- You’ll be presented with a window that looks like this. It is easier if you can access this from the VM itself, then you don’t need to transfer the file.
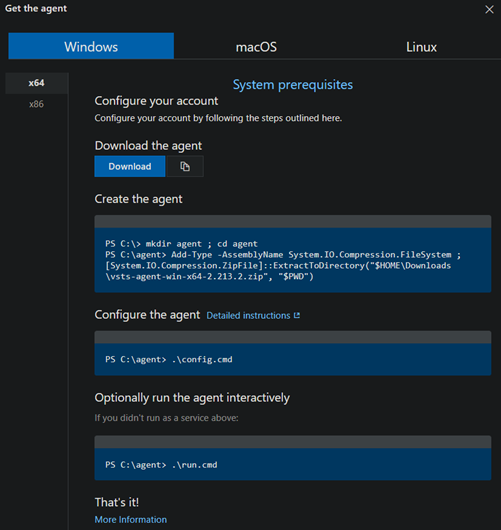
- Run .\config.cmd and answer the following prompts:
Enter server URL > https://dev.azure.com/organization
Enter authentication type (press enter for PAT) > Enter
Enter personal access token > ******
Enter agent pool (press enter for default) > PoolName
Enter agent name (press enter for VMNAME) > Enter
Enter work folder (press enter for _work) > Enter
Enter run agent as service? (Y/N) (press enter for N) > Y
Enter enable SERVICE_SID_TYPE_UNRESTRICTED for agent service (Y/N) (press enter for N) > N
Enter User account to use for the service (press enter for NT AUTHORITY\NETWORK SERVICE) > Enter
5. If the installation was successful, you will see something like this:
If the install was successful, you will see something like this:
Service vstsagent.organization.PoolName.VMNAME successfully installed
Service vstsagent.organization.PoolName.VMNAME successfully set recovery option
Service vstsagent.organization.PoolName.VMNAME successfully set to delayed auto start
Service vstsagent.organization.PoolName.VMNAME successfully configured
Enter whether to prevent service starting immediately after configuration is finished? (Y/N) (press enter for N) > N / Enter
Service vstsagent.organization.PoolName.VMNAME started successfully
ADO Pipelines Agent for Environment Deployments
- ADO > Pipelines > Environments > Select environment (or create a ‘New Environment’ with a resource type of virtual machines) > Add resource > Virtual Machines > Next > Copy the script seen in Step 1.
- This will create a short-lived Personal Access Token (PAT) with the following scope:
- Environment: Read & Manage
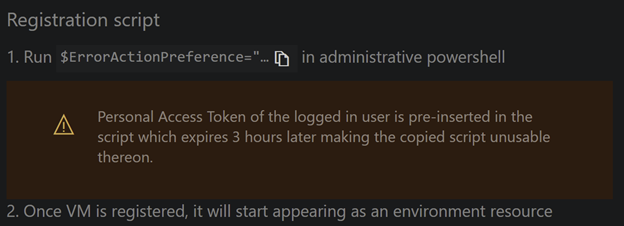
- RDP/Bastion into the VM and run the provided script in an Administrative PowerShell window. You will receive the following prompts:
 a. Enter Environment Virtual Machine resource tags. (Y/N) (press enter for N) > N / Enter
b. Enter enable SERVICE_SID_TYPE_UNRESTRICTED for agent service (Y/N) (press enter for N): N / Enter
c. Enter the User account to use for the service (press enter for NT AUTHORITY\SYSTEM): Enter
d. Enter whether to prevent service from starting immediately after the configuration is finished. (Y/N) (press enter for N): N / Enter
- If the installation was successful, you would see something like this:
Service vstsagent.organization.environment.virtualmachinename successfully installed
Service vstsagent.organization.environment.virtualmachinename successfully set recovery option
Service vstsagent.organization.environment.virtualmachinename successfully set to delayed auto start
Service vstsagent.organization.environment.virtualmachinename successfully set SID type
Service vstsagent.organization.environment.virtualmachinename successfully configured
Service vstsagent.organization.environment.virtualmachinename started successfully
Software
One of the main benefits of hosting your build agent is that you can pick what software and which version you run. Our pipeline example will require PowerShell Core and Azure CLI to run on the build agent. Instructions for installing these tools can be found on PowerShell Core’s GitHub page as well as Azure CLI’s GitHub Page.
Important note: A VM restart might be required for the ADO Pipelines agent.
Create and Run a Pipeline
In ADO, we’ll now be able to create a new pipeline. Below is a sample pipeline. Be sure to replace the commented sections with what you have created.
- Name: Name of the environment you used or created.
- resourceName: Name of the virtual machine you setup the ADO Pipelines agent on.
- resourceType: This will be either ‘virtualMachine’ or ‘kubernetes.’ In this case ‘virtualMachine’
- azureSubscription: The name of the service connection you created in ADO. Note: This is not the name of your Azure subscription. The name is, in my opinion, a bit misleading.
Here is a sample of YAML code:
trigger: none

stages:
- stage: test
  displayName: 'test'
  jobs:
  - deployment: test
    displayName: 'test'
    environment:
      name: 'dev' # Name of environment.
      resourceName: 'vmName01' # Name of virtual machine resource.
      resourceType: 'virtualMachine' # Type of environment resource.
    strategy:
      runOnce:
        deploy:
          steps:
          - task: AzureCLI@2
            inputs:
              azureSubscription: 'serviceConnectionName' # Connection name
              scriptType: 'pscore'
              scriptLocation: 'inlineScript'
              inlineScript: 'az account show'
              workingDirectory: '$(Build.SourcesDirectory)'
Once run, you should receive checkmarks with an output of the ‘az account show’ command that was ran on your new build agent with your managed system assigned identity.
Conclusion
We reviewed quite a bit in this article and walked through several steps to set up and use an Azure System Assigned Managed Identity on a Virtual Machine with Azure DevOps. I hope this helps give you the confidence to embrace managed identities!