![]()
If you didn’t catch the first two parts of this series, you can do that here and here. In this part, we’ll get a little more technical and use Microsoft Flow to do some pretty cool things.
Remember when we talked about the size and quality of the images we take with our Power App and store as the entity image? When saved as the Entity Image for a CDS/D365 item, the image loses quality and is no longer good for an advertisement photo. This is done automatically and as far as I can tell, the high-res image is gone once this conversion takes place (someone please correct me if I’m wrong on that!). On the flip side of that, it doesn’t make a whole lot of sense to put all this tech together only to have my end users be required to take two pictures of an item, one for hi-res and one for low-res. We don’t want to store a high-res in a relational database for 10,000 plus items because the database could bloat immensely.
Microsoft Flow and SharePoint to the rescue!
PRO TIP: Dynamics 365 will crop and resize the image before saving it as the entity image. All entity images are displayed in a 144 x 144 pixel square. You can read more about this here. Make sure to save/retain your original image files. We’re going to stick ours in a SharePoint Picture Gallery App.
Objective
Create a Microsoft Flow that handles…
- Pulling the original image off the Dynamics record and storing it in SharePoint.
- Setting the patch image to the Entity Image for the Dynamics record
- Create an advertisement list item for the patch
- Save the URLs for the ad and image back to the patch record
Create the Flow
We’re going to write this Flow so that it’s triggered by a Note record being created.
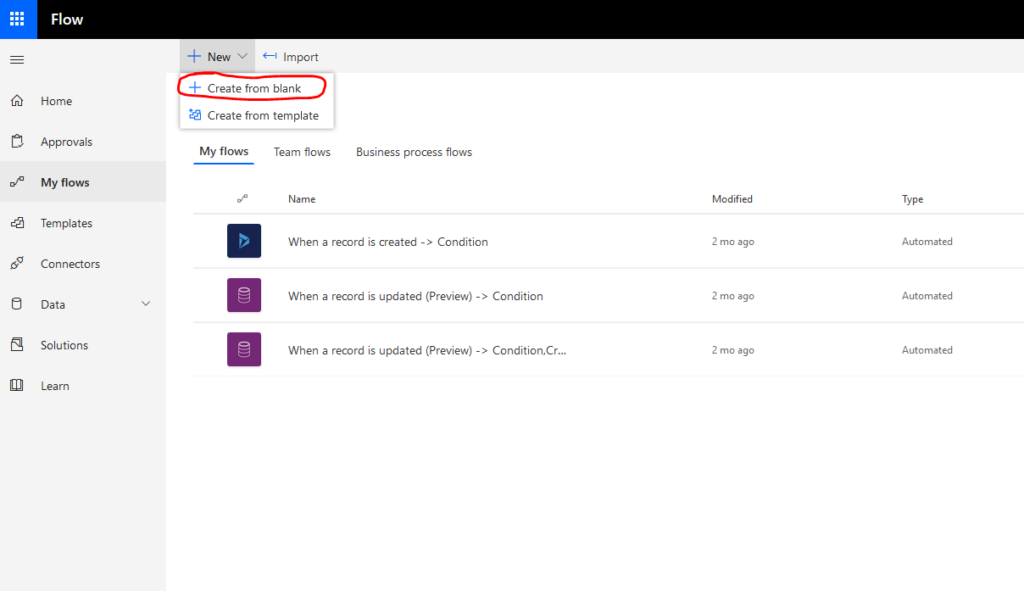
- Navigate to your Microsoft Flow environment, and click on My Flows.
- Click the New button at the top and select Create from blank .
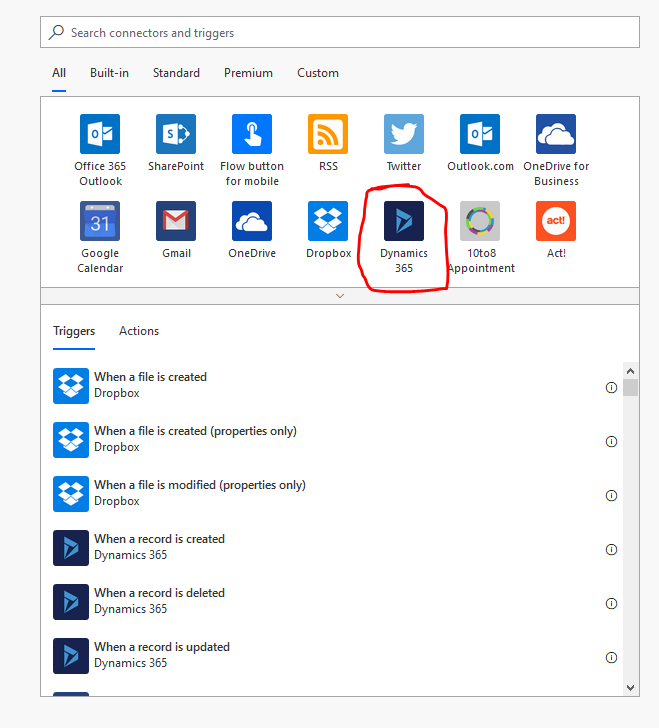
- On the next page, click “Search hundreds of connectors and triggers” at the bottom of the page.
- Select Dynamics 365 on the All tab for connectors and triggers.
- Select the “When a record is created” trigger.
- Set the properties for Organization Name and Entity Name. Entity Name should be “Notes”.
- Save the Flow and give it a name.
Verifying a Few Things
- Add a new step and select the Condition item.
- The Condition should check to see if the Note has an attachment. We do this using the “Is Document” field.
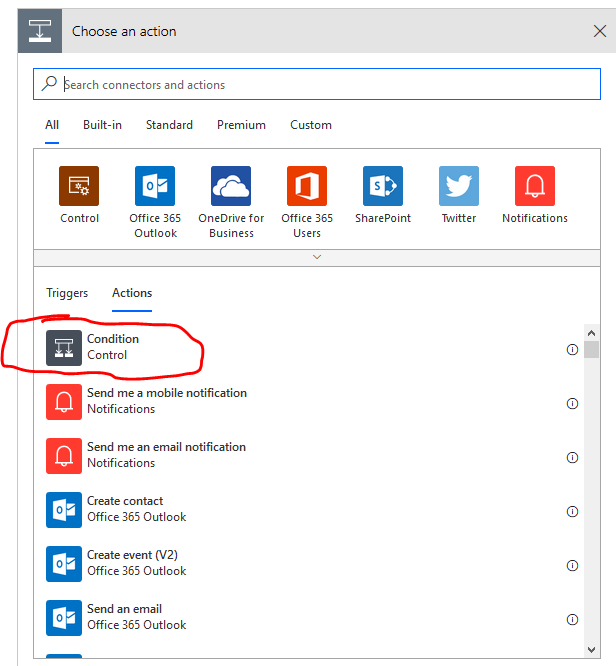
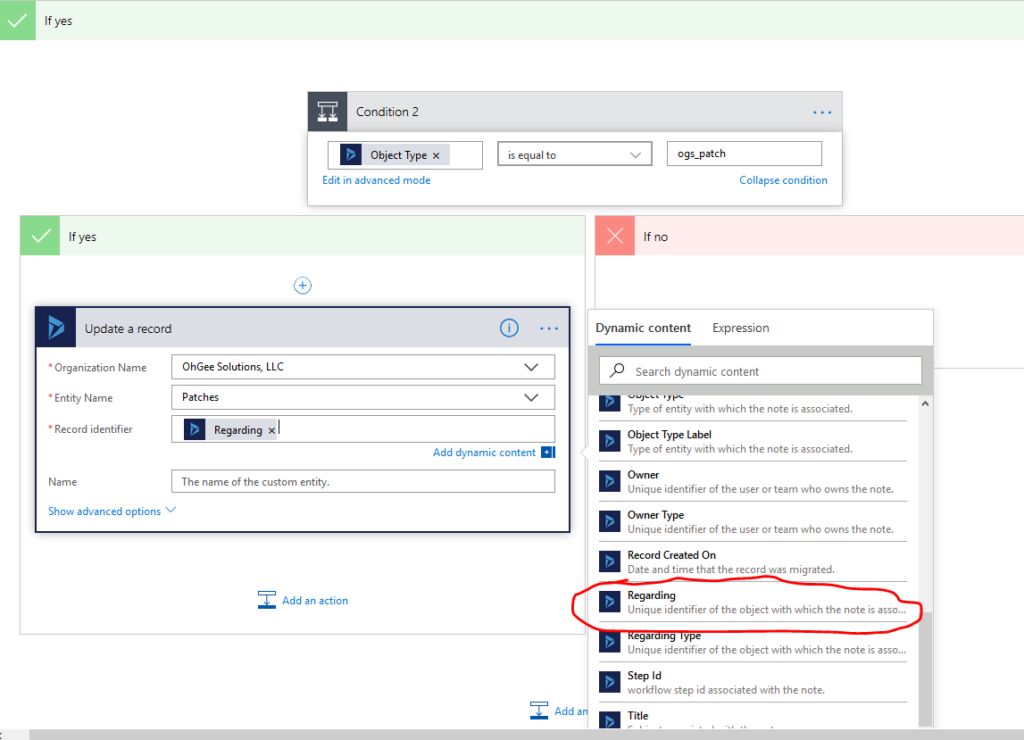
- In the “Yes” side of the conditional we want to check if the Object Type is a Patch (ogs_patch in this case).
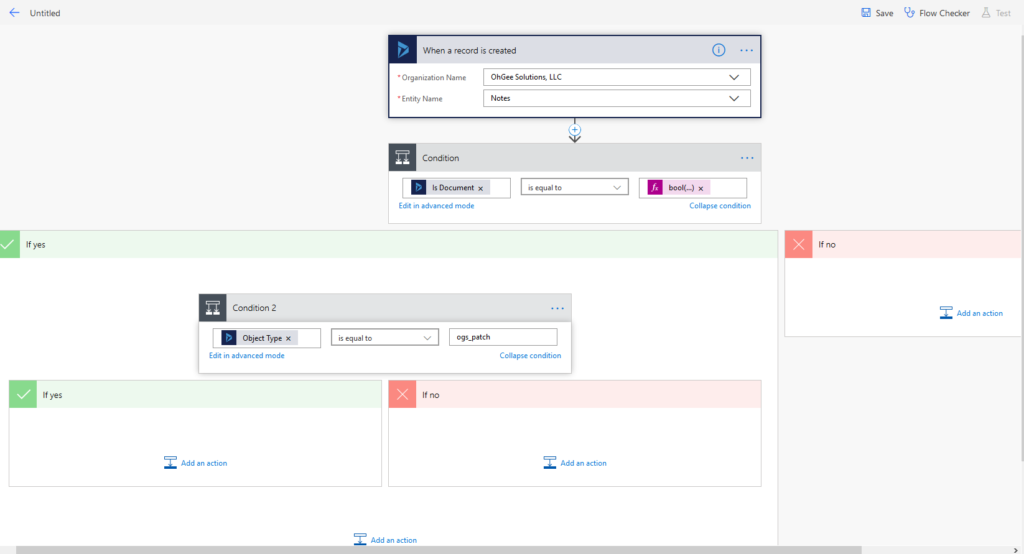
At this point, if the Flow has made it through both conditionals with a “Yes”, we know we are dealing with a new Note record that has an Attachment and belongs to a Patch record.
Update the Patch Record
Now we want to update the batch record’s Entity Image field with the attachment. First we need to get a handle on the Patch record. We’ll do that by adding an Action to the Yes branch of our new Conditional.
- Add a Dynamics 365 Update a Record Action.
- Set the Organization Name, Entity Name, and Record identifier accordingly. For our Patch Record identifier, we’ll use the Regarding field in the Dynamic content window.
- Click on Show advanced options and find the Picture of Patch field.
- For the Picture of Patch field we need to get the document body of the attachment and convert it from Base-64 encoding to binary. We do this using the “Expression” area again. Use the “base64ToBinary” function to convert the document body like so.

- Save your work! I can’t tell you how many times I had to retype that function.
Create Our SharePoint Items & Clean-up
Now that we’ve updated our entity image with the uploaded patch picture we want to do a couple of things, but not necessarily in sequence. This is where we’ll use a parallel branch in our Flow.
Dealing with a Parallel Branch
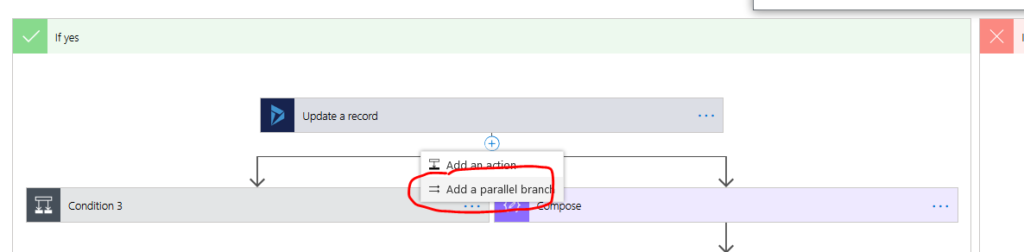
- Under the last Update a Record action, add a Conditional. After adding this Conditional hover over the line between the Update action and the new conditional. You should see a plus sign that you can hover over and select “Add a parallel branch.”
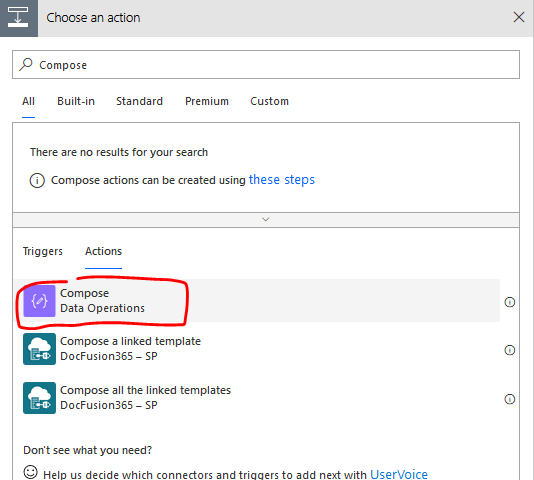
- Select this and add a Compose action. You may need to search for the Compose action.
PRO TIP: With Modern Sites in SharePoint, we now have three solid options for displaying images in SharePoint. The Modern Document Library allows viewing as tiles and thumbnails within a document library, the Picture Library which has often been the place to store images prior to the Modern Document Library, and then we can simply just display an image, or images, on a page directly.
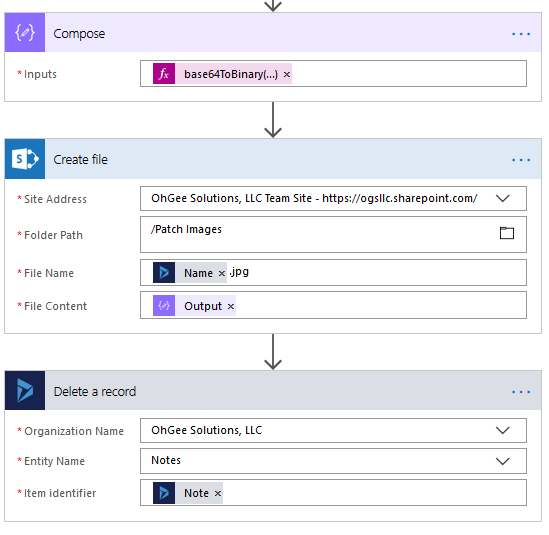
Saving the Attachment as an Image in SharePoint
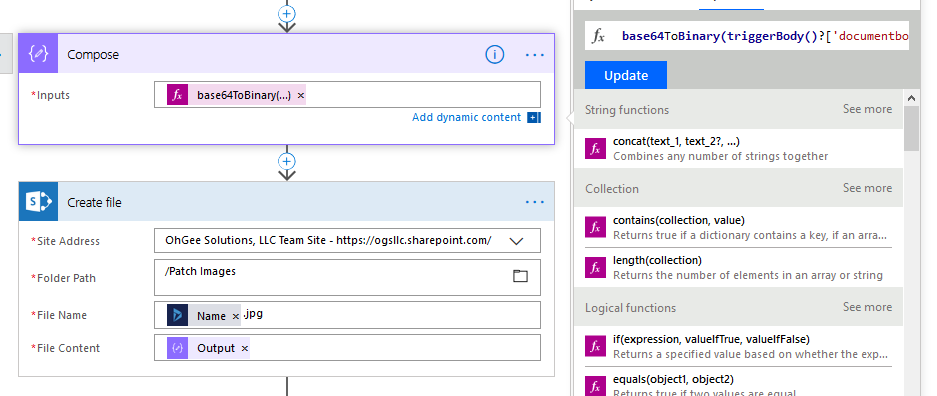
- Let’s deal with Compose branch first. Our compose will have the same function as our Picture of Patch did above for the Input field. base64ToBinary(triggerBody()?[‘documentbody’])
- After the Compose, we’ll add a Create File Action for SharePoint and use the name from our Patch record as the name for our image in SharePoint. I’m using a Picture Gallery App in SharePoint and for now, only using the .JPG file type. The File Content should use the Output from our Compose Action.
Delete the Note
- Finally, we want to delete that Note from Dynamics (and the Common Data Service) so that the image attachment is no longer taking up space in our Common Data Service. Add a Dynamics Delete a Record Action after the SharePoint Create file action. Set the Organization Name, Entity Name, and use the Dynamics content for Note as the Item identifier.
Creating Our Advertisement
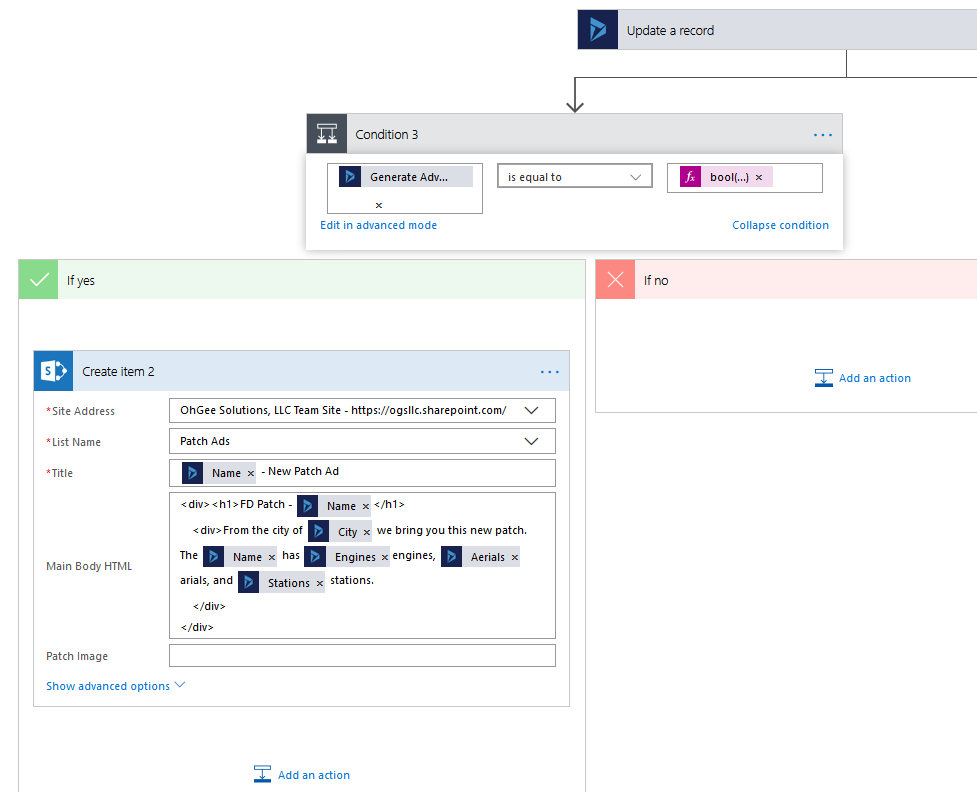
Let’s jump back to the new Conditional we added after the Update a record Action where we set the entity image.
- Set the conditional to check for the Generate Advertisement field being set to true.
- If this is true, add a SharePoint Create Item Action and let’s set some values. What we’re doing here is creating a new SharePoint List Item that will contain some starter HTML for a Patch advertisement.
- Save our work!
Updating Our Patch Record With Our URLs From SharePoint
- Under the SharePoint Create Item Action for creating the Ad, AND after the SharePoint Create file action for creating the picture in the Picture Gallery, we’re going to add Dynamics Update record Actions that will be identical with one difference.
- The Organization Name, Entity Name, Record Identifier (set to Dynamic Content “Regarding”) should be the same.
- On the Ad side, the Update record should set the SharePoint Ad for Patch field to “Link to Item”.

- On the image side, the Update record should set the SharePoint Image for Patch to the “Path”

Seeing It In Action
Of course, I’ve been saving my work so let’s go ahead and give this a whirl.
- At the top right of your Flow you’ll see a Test button. We’re going to click that and select “I’ll perform the trigger action.”
- To make this more interesting, I’m going to run this from SharePoint! I’ll update a patch and kickoff my Flow from the embedded Power Apps Canvas App on my SharePoint home page.
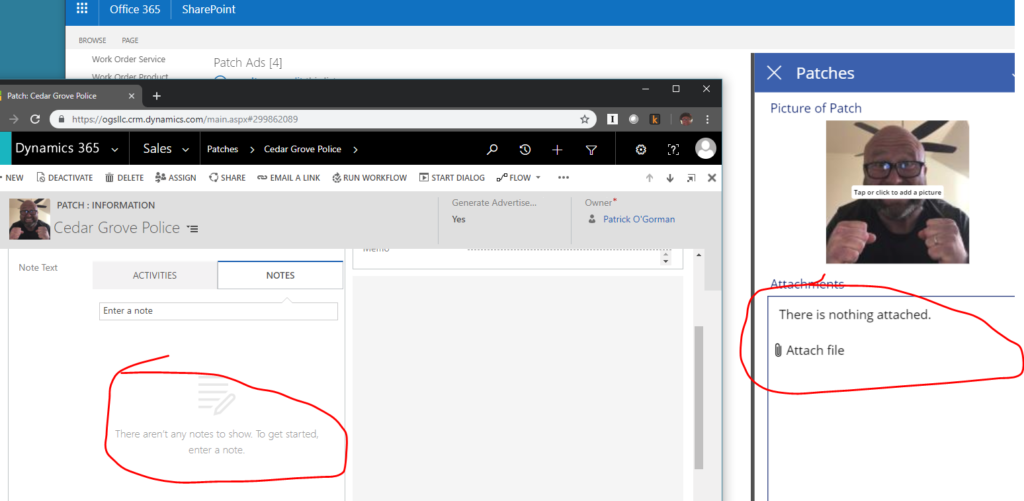
- I select the patch, then I click the edit button (pencil icon at the top right).
- Notice the Attach file link and the Generate Advertisement switch. We’ll use the first for our image and the second for generating our ad item in SharePoint.
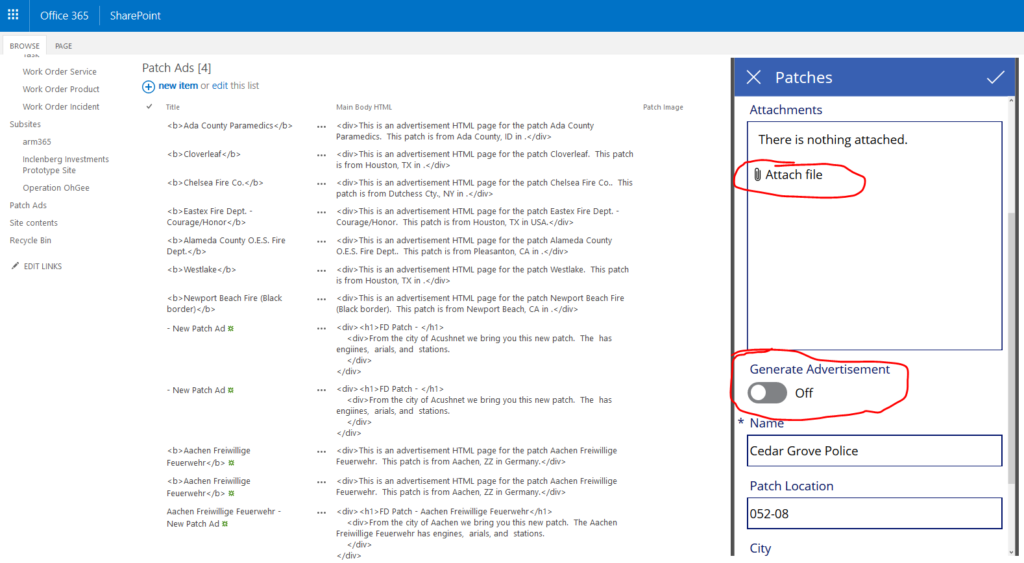
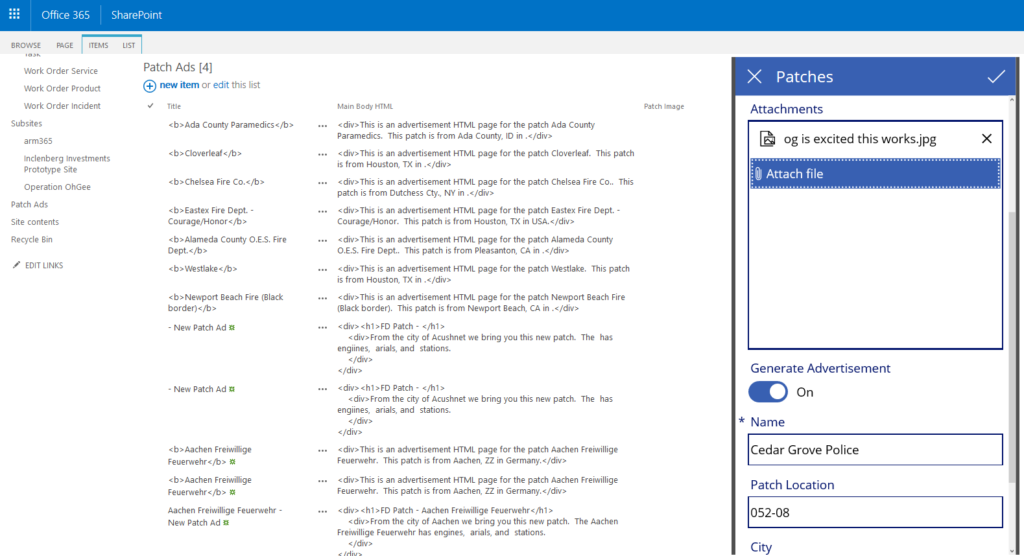
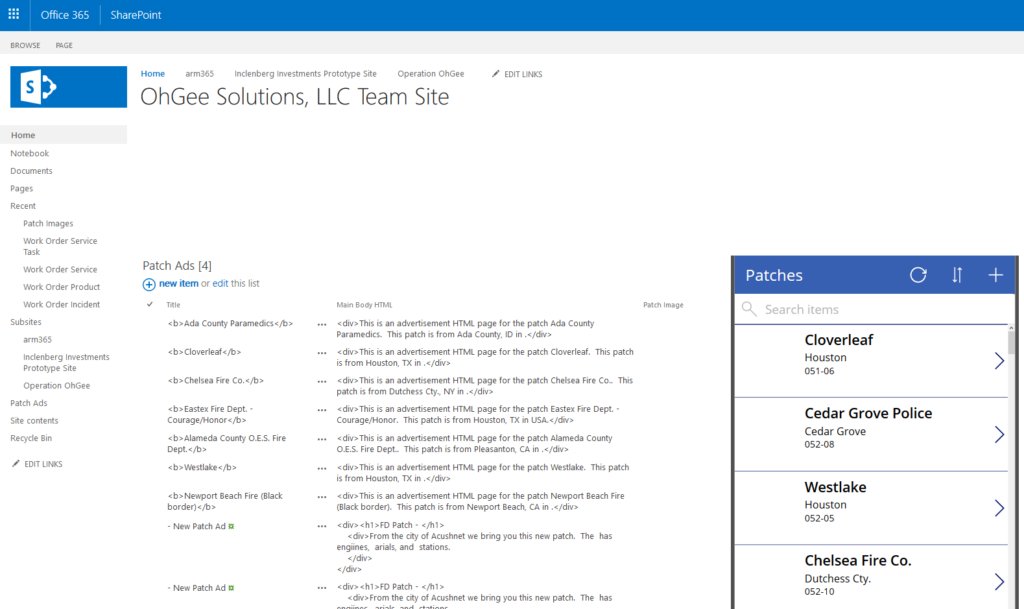
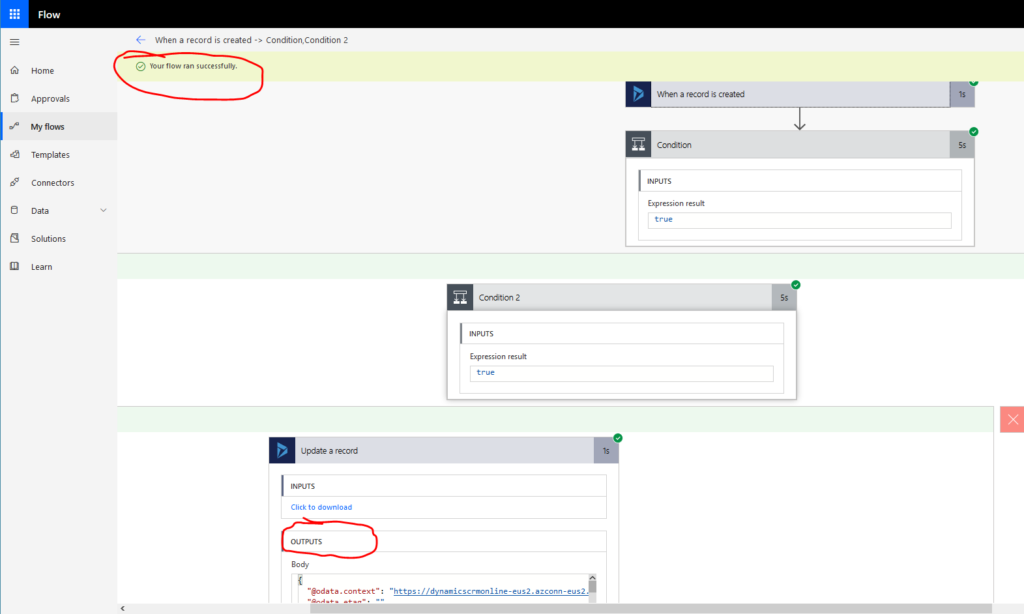
- Finally, I click the checkmark at the top right to save my changes. This kicks off our Flow in less than a minute, and when we navigate back over to the Flow we can see that it completed successfully.
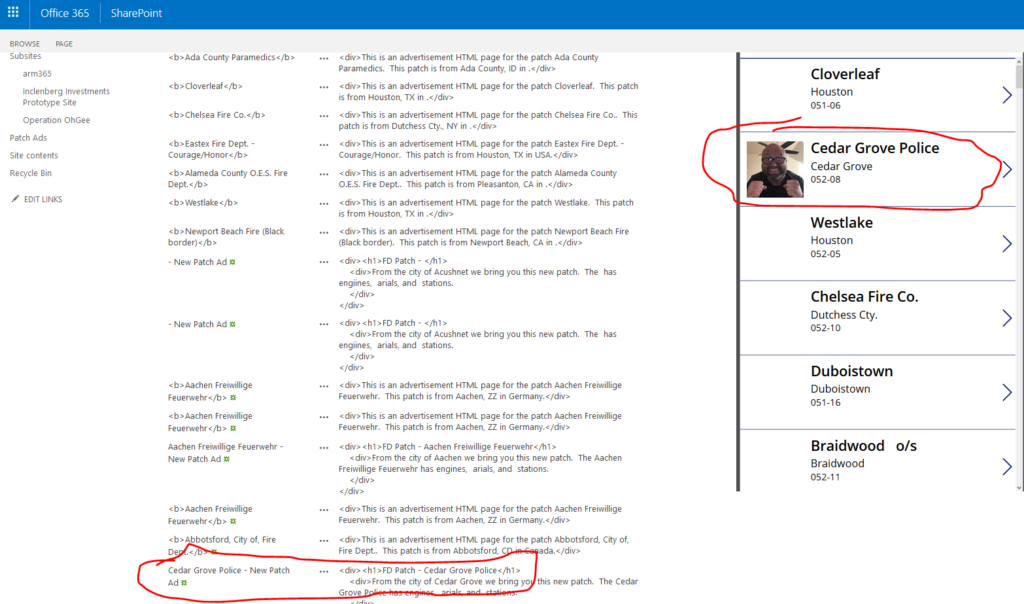
- I’ll hop back over to SharePoint to make sure that my ad was created and my entity image was set. I’ll also make sure the high-quality image made it to the SharePoint Picture Library and the Note was deleted from the Patch record in Dynamics. I also want to make sure the URLs for the ad and image in SharePoint were set back to the Patch record.
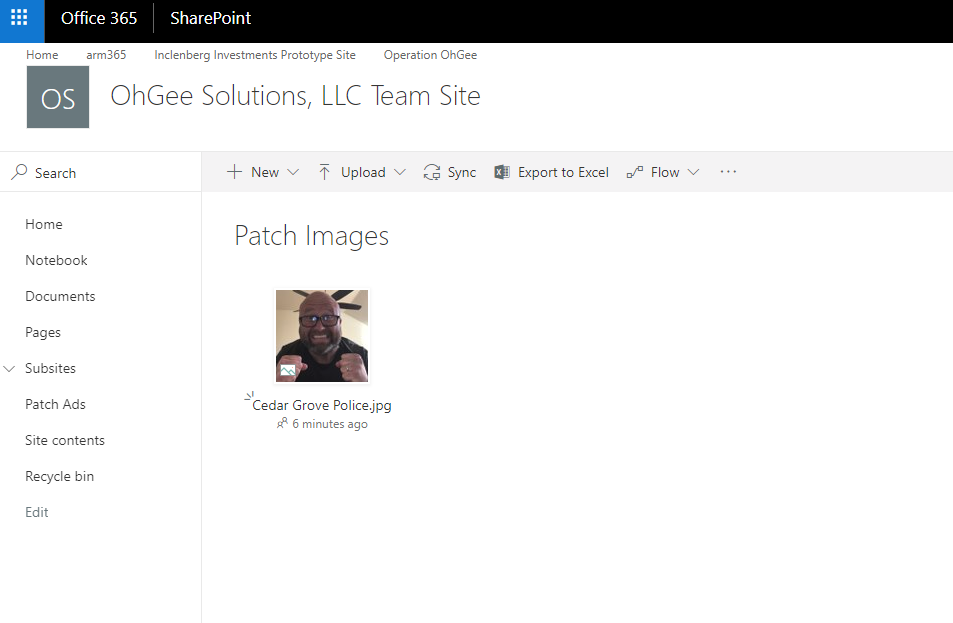

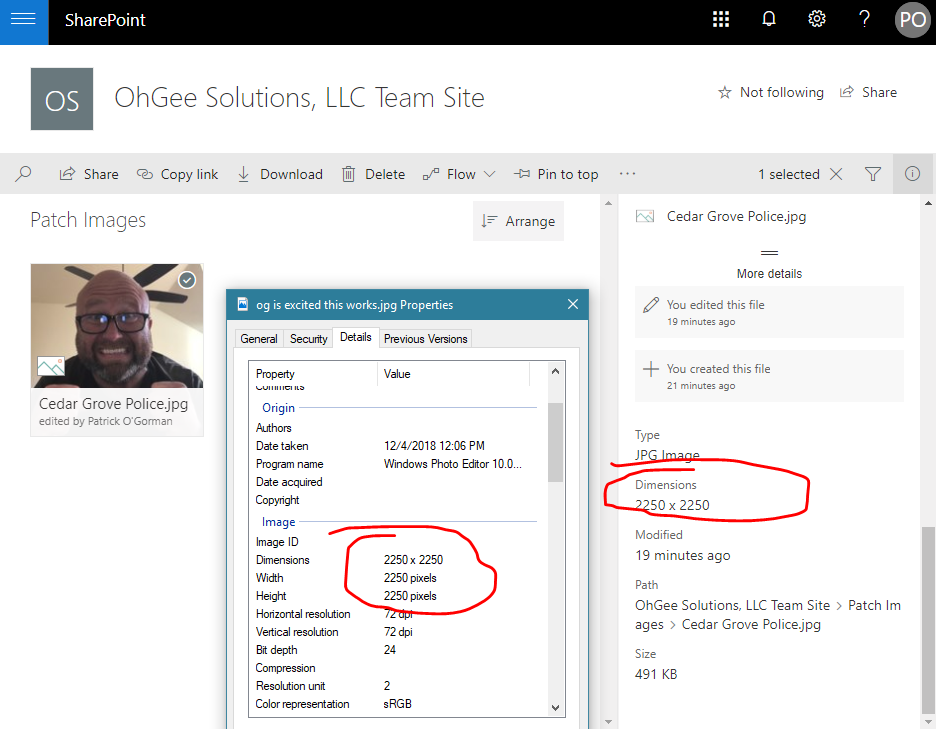
One last thing: When we store the image in a SharePoint Picture Gallery App we can retain the dimensions, size, and quality of the original image, unlike when storing the image as a Dynamics 365 entity image. Check out the properties in the next screen shot and compare that to the properties on the SharePoint page in the same screen shot.
Conclusion
I hope you are enjoying this series and continue to tune in as the solution for our dad’s beloved patch collection grows. I constantly see updates and upgrades to the Power Platform so I know Microsoft is working hard on making it even better.