![]() SharePoint Server 2013 offers a completely new architecture for Workflow utilizing Workflow Foundation 4.5. I’ve already covered the high-level changes in a previous post called “What Changed in SharePoint 2013 Workflow? Pretty Much Everything” and discussed how a SharePoint 2010 Workflow project would be designed differently in my post titled “Redesigning a SharePoint 2010 Workflow Project for SharePoint 2013.” Both of these posts discuss the new reliance on web services for data in SharePoint Workflow. While it’s obvious that Visual Studio workflows would interact with web services, SharePoint Designer 2013 offers web service communication, as well. This post will detail the new actions available in SharePoint Designer 2013 for interacting with web services and how to use them. New SharePoint Designer Objects – Call Web Service and Dictionary
SharePoint Server 2013 offers a completely new architecture for Workflow utilizing Workflow Foundation 4.5. I’ve already covered the high-level changes in a previous post called “What Changed in SharePoint 2013 Workflow? Pretty Much Everything” and discussed how a SharePoint 2010 Workflow project would be designed differently in my post titled “Redesigning a SharePoint 2010 Workflow Project for SharePoint 2013.” Both of these posts discuss the new reliance on web services for data in SharePoint Workflow. While it’s obvious that Visual Studio workflows would interact with web services, SharePoint Designer 2013 offers web service communication, as well. This post will detail the new actions available in SharePoint Designer 2013 for interacting with web services and how to use them. New SharePoint Designer Objects – Call Web Service and Dictionary
SharePoint Designer 2013 introduces four new actions that you’ll use when accessing data via web services.
- Call HTTP Web Service
- Build Dictionary
- Count Items in Dictionary
- Get Item from Dictionary
The “Call HTTP Web Service” action is the action used to actually make the request to a service. There are several parameters that can be set including: request body, request headers, response content, response headers, URL, and HTTP method. While I won’t go into the details of HTTP response and request, you can read up on it here, you’ll need to know that both the request and response headers and contents will use the new Dictionary objects to provide or contain them.
The Dictionary object allows you to store an array of key/value pairs. These pairs can be used to store many types of data such as business objects like Employee or Client. In the context of web service interaction, they’ll hold the header properties or content data passed to and from a service. The three actions noted will allow you to create a Dictionary object (Build Dictionary), get the number of items in a Dictionary, and get a specific item from the Dictionary. In the next section, you see how these are used.
Accessing Web Services – An Example
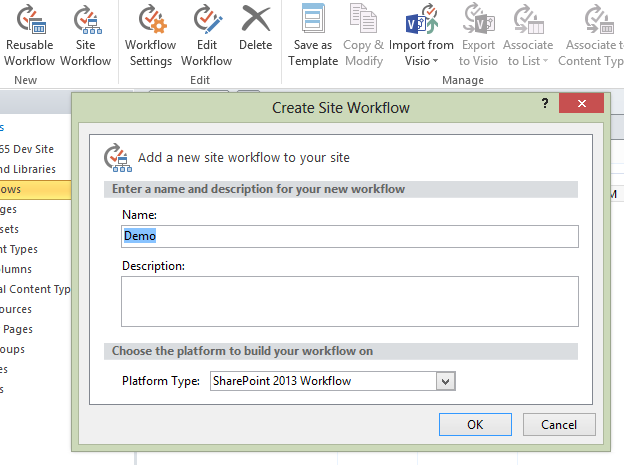
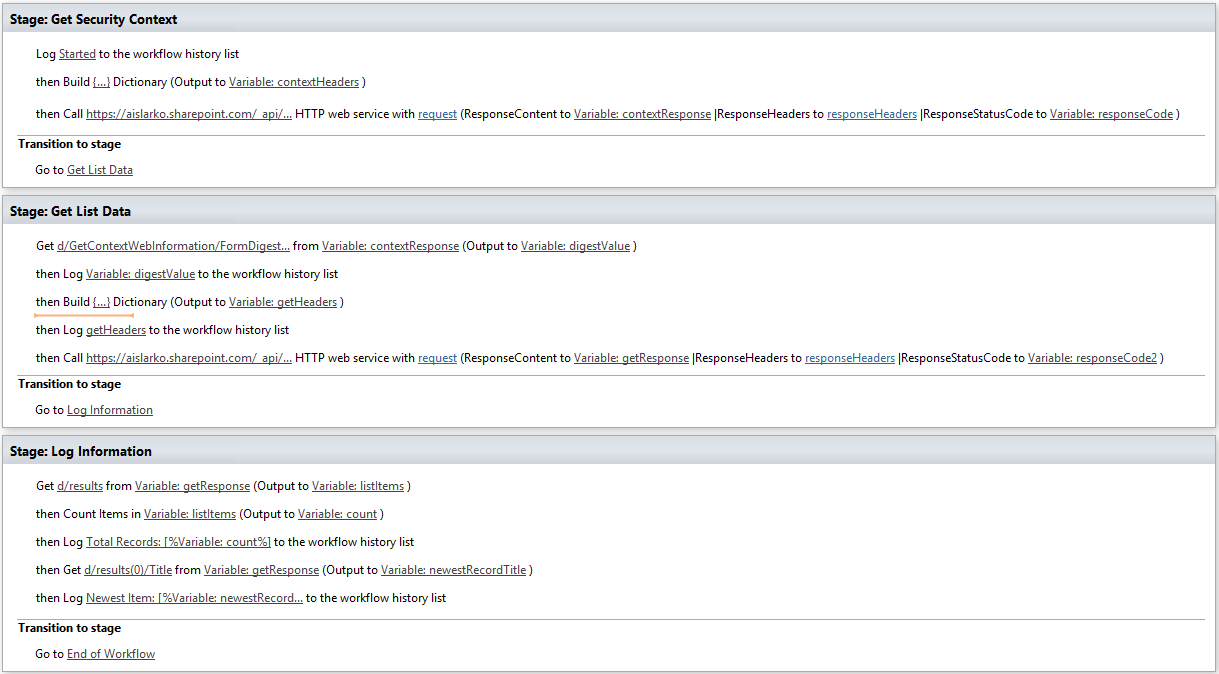
The example for this post will be using the SharePoint 2013 web services to get a collection of items from a list, log the number of items, and log the newest item’s title. This will be a Site workflow instead of a List workflow since it doesn’t really need to be fired when items are created or modified. This will be split into 3 different workflow stages: Get Security Context, Get List Data, and Log Information.
Stage One: Get Security Context
When working with the SharePoint REST services you need to authenticate the requests.
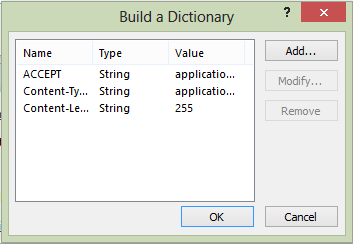
There is a service available to take care of this. This step will build a Dictionary object for the request headers and then call the service to get the security token. First we’ll create a new Dictionary action, output it to a variable called contextHeaders, and create entries for Accept, Content-Type, and Content-Length headers. For Accept and Content-Type, we want to use “application/json; odata=verbose.” SharePoint 2013 REST calls require the second parameter, “odata=verbose,” because while the OData specification supports other options, SharePoint’s services do not.
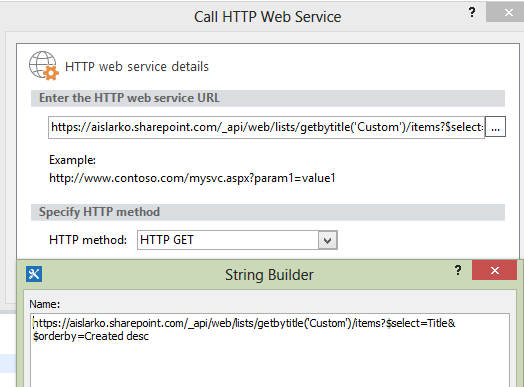
Next, we’ll create a “Call HTTP Web Service” action to get the token. In Image 3, you see the URL to get the token is using the new /_api path to the SharePoint REST services.
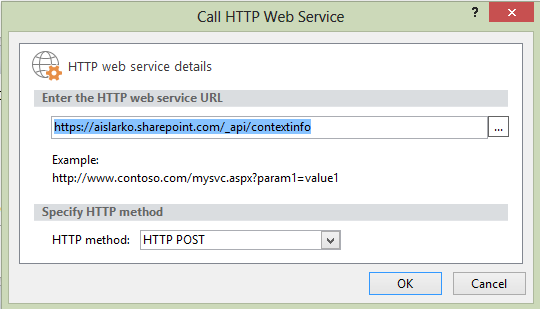
Also, you must use the POST method to get this token. While you would expect to use a GET call, the reason for POST is to improve security against “shady” requests. Next, we’ll need to assign a variable to the ResponseContent of the action. This is a Dictionary object we’ll call contextResponse. Finally, we need to set the RequestHeaders property of the action to our contextHeaders dictionary.
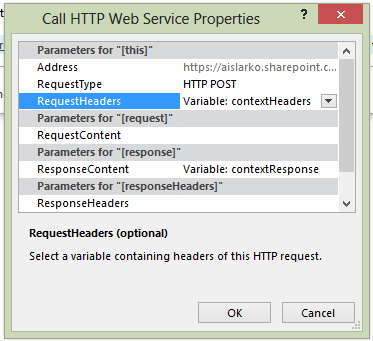
Right-click on the action and select “Properties…” to access the action’s properties window. Also, we’ll set the Transition to stage section to “Get List Data.”
Stage Two: Get List Data
This stage will get the token value, build the request headers, and get the list data. First, we’ll get the token from the contextResponse variable. To do this, create a Get an Item from a Dictionary action. As you see in Image 5, we provide a path to the FormDigestValue entry of the contextResponse of “d/GetContextWebInformation/FormDigestValue” and save it to a string variable called digestValue.

Next, we build another Dictionary object called getHeaders. This is similar to the contextHeaders except we don’t use Content-Length and we include X-RequestDigest, which is set to our digestValue.

We then create our call to the list using a GET Method, storing the ResponseContent in a Dictionary called getResponse and setting the RequestHeaders in the action’s properties (see Stage One above) to getHeaders. You’ll note that our URL has select and orderBy parameters on the end of it. This is so we get just the data we need (Title in this case) to keep the response size as small as possible as well as ordering it from newest entries to the oldest.
Finally, we’ll transition to the Log Information stage.
Stage Three: Log Information
Our final stage will log the number of items in the list and the newest item’s title to the Workflow History list. The getResponse Dictionary has a tree structure with the actual list item data not being at the root of that tree. The data is actually in a node called “results.”

To get our count, we need to extract that node, a Dictionary itself, from getResponse. We’ll create another Get an Item from a Dictionary action that saves this collection of results from getResponse to a new Dictionary called listItems using a path of “d/results”. We can then use a Count Items in a Dictionary action to store the number of results in listItems to an Integer variable called count and then log that to the history list.
Next, well get the Title of the newest record which, because of the orderBy on the request URL in the last stage, is the first record. We’ll create our third Get an Item from a Dictionary action with a path of “(0)/Title” from our listItems Dictionary and store it to a string variable of newestRecordTitle. We use “(0)” to get a record at the first position in the collection. If you’re wondering why it’s 0 and not 1, the reason is that collections, or arrays, in most modern programming languages use 0-based arrays. We’ll log that to our history list and transition the stage to End of Workflow.
Example Results
After publishing, I ran the workflow in my Office 365 site and as you can see in Image 9, it produces exactly what’s expected.
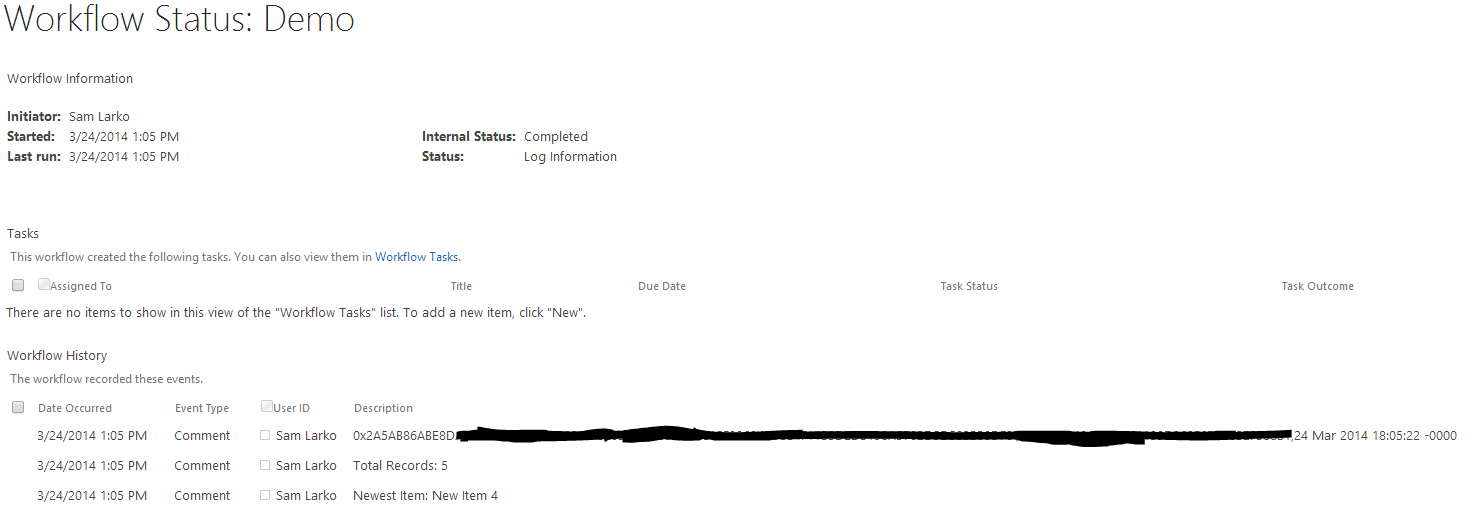
The Internal Status is Completed and we have three records in the Workflow History list: our FormDigestValue (most is blacked out to protect my environment), the total records in the list, and the newest item’s title.
Conclusion
While this wasn’t a real world example, it should help you understand how to use the new actions that are available for working with web services. Even though I used SharePoint’s web services, these will work with others. For instance, let’s say you have a site where you track Sales leads. Once a lead reaches a certain stage (i.e. “Request for Proposal created”), then you want to create the client and/or project in your Microsoft Dynamics CRM or Salesforce system. These products offer services that you could use to create these through the workflow. Your organization may have web services it uses for custom developed solutions.
In this case, you should be able to interface with those services to push data to or pull data from those applications in the same way (consult the development team on how to use these).