![]() With the wide variety of updated features available through Office 365, organizations can now create robust, beautiful intranets right out-of-the-box. In contrast to SharePoint classic sites, SharePoint modern sites have a clean interface, are responsive and adaptive to mobile devices, and offer significant performance improvements.
With the wide variety of updated features available through Office 365, organizations can now create robust, beautiful intranets right out-of-the-box. In contrast to SharePoint classic sites, SharePoint modern sites have a clean interface, are responsive and adaptive to mobile devices, and offer significant performance improvements.
In the past, many intranets were built as a single large site collection with multiple levels of sub-sites underneath. The modern infrastructure can be flatter, with each department as its own site collection, but connected together through a SharePoint hub site.
Key features of a modern hub site — which make it an ideal starting point for an intranet — include:
- Cross-site navigation: consistent top navigation among associated sites
- Content roll-up: aggregated news and content among associated sites
- Consistent look-and-feel: a common theme / branding for associated sites
- Scoped search: search content within associated sites
Now let’s walk through the process of creating a new, modern intranet in SharePoint. (Note that for the sake of length and readability, we’ll be publishing this process in three parts here on the blog. The entire guide will be available as a handy download, however, once the series has concluded!)
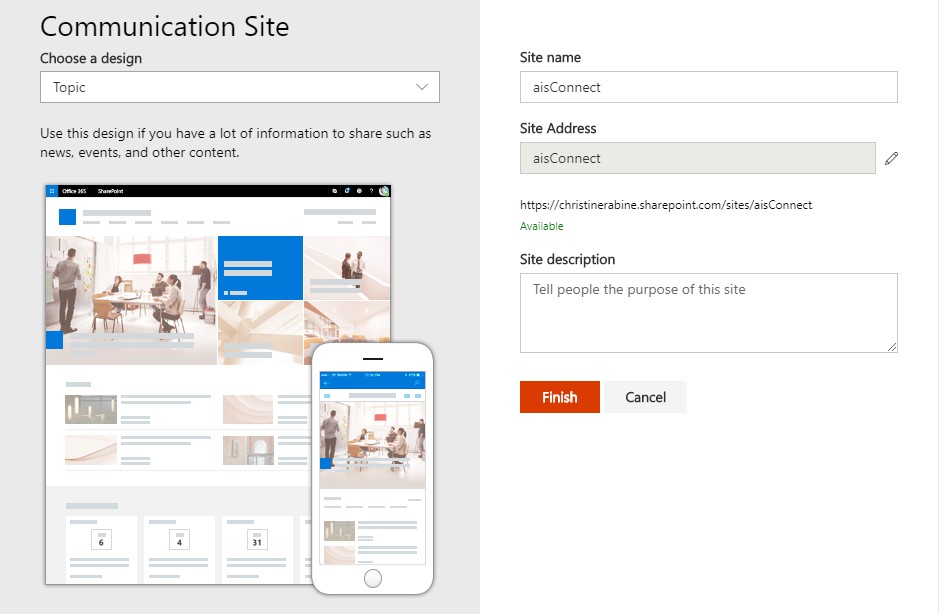
To start, create a new SharePoint site using a modern communication site design.
Once the site has been created, it can be converted into a hub site by using SharePoint Online Management Shell (aka, PowerShell for SharePoint in Office 365). A SharePoint administrator or above in Office 365 should run a PowerShell cmdlet similar to this:
Register-SPOHubSite https://contoso.sharepoint.com/sites/aisConnect
(Substitute the aisConnect URL with the full-path address of the site that you want to convert into a hub site.)
For more information about creating hub sites, see Create SharePoint hub sites using PowerShell.
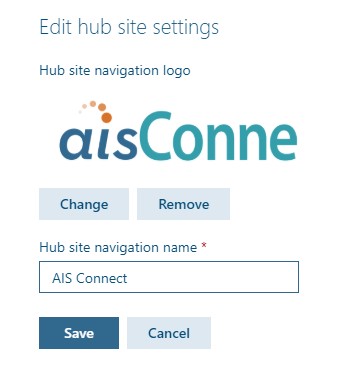
Once the site has been converted into a hub site, you can then add a logo, update the theme, and edit the global navigation.
Navigate to the site, select the gear icon and choose Hub site settings to add a logo and modify the hub name.
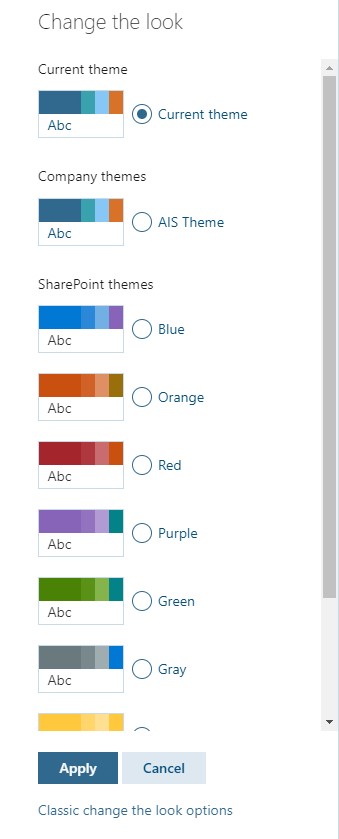
Select the gear icon and choose Change the look to change the theme. You can choose a preconfigured theme, or a custom one that has been made available to site owners. (For more information on theming, see SharePoint Site Theming.)
Click Apply once you have chosen your theme. The theme will be inherited by all of the sites associated with the hub.
To edit the top global navigation (that like your theme, all associated sites will inherit), click the Edit link next to it. There you can add, edit, and move links around as needed. (For more information about editing navigation, see Customize the navigation on your SharePoint site.) A sample hub navigation is shown below, with various departments grouped by team type:
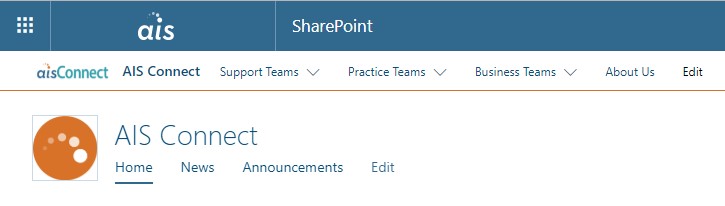
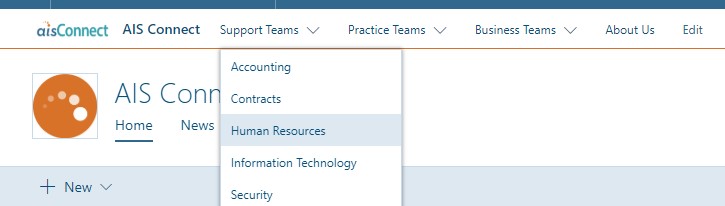
In this sample infrastructure, each department has its own modern communication site joined to the hub. Content within the departmental sites will be rolled up to the hub site as needed.
To optimize content rollup capabilities and search refinements throughout the associate sites, it’s important to maintain consistent values to filter and sort by. This can be accomplished by utilizing:
- Managed metadata taxonomy term store for term sets
- Content type hub for site columns that reference those term sets, and content types with those site columns
- Managed properties mapped to those site columns
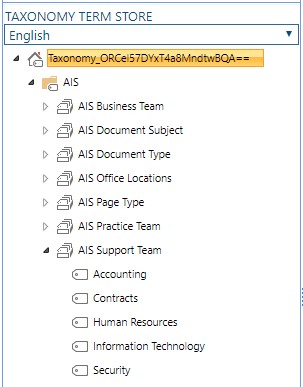
Go to Site Settings > Term store management (under Site Administration) to create term sets that contain the main terms that you will want your users to filter and sort by.
Here’s an example that includes terms for each department within the Support Teams grouping.
To build out the custom site columns and content types that your sites will use, go to your tenant’s Content Type Hub, with the URL similar to this:
https://contoso.sharepoint.com/sites/contentTypeHub
(Substitute the contoso.sharepoint.com part of the URL with the address of your tenant.)
Before building out your site columns and content types, think about the types of content that you want to roll up throughout sites in your hub. For example, we may want to filter documents by type, subject, and/or another indicator for visibility. We may also want to filter news pages by department. The columns you will want to filter by should be built first.
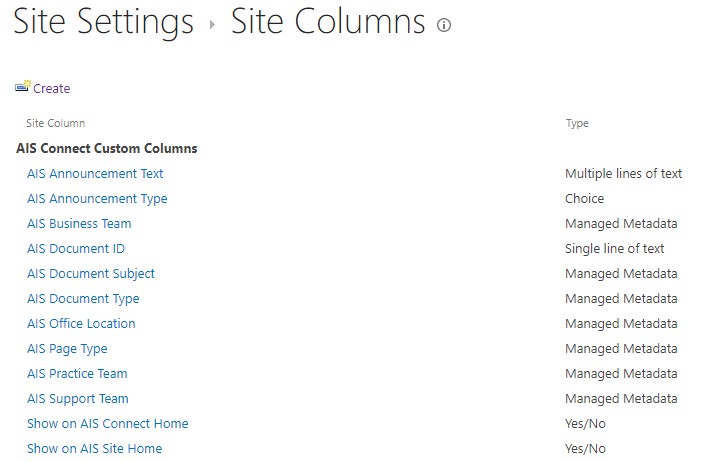
In your content type hub, go to Site Settings > Site columns (under Web Designer Galleries). Click Create to make a new site column.
In the example below, the column will be for users to select a department from a term set, so Managed Metadata is the chosen type. It’s also a good idea to put any new columns in a custom group, so that they can be easily found later.

For this column, users should be able to select multiple departments, so we’ve checked Allow multiple values. Under Term Set Settings, the appropriate departmental term set is chosen.

Click OK once you have set up your site column as needed, then continue adding site columns for the various fields that you want to filter and sort content by.
This example shows the multiple columns we created for this group of sites in the hub:
Now that the site columns are created, we need to create the content types that will use those columns. Go to Site Settings > Site content types (under Web Designer Galleries). Click Create to make a new site content type.
In this example, we create a custom content type that inherits from Site Page (which is a page within a modern site). As before, it’s a good idea to place custom content types in a custom group, for easier findability.
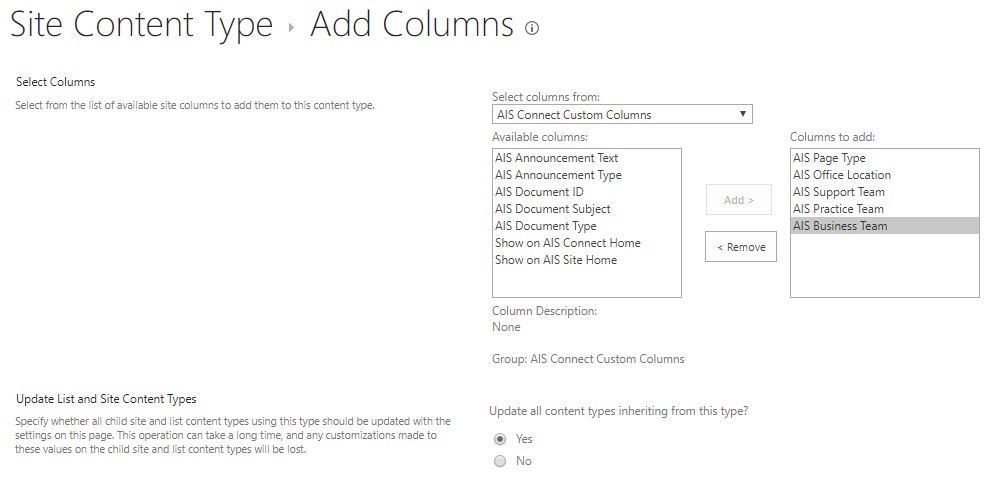
Once you have created your content type, scroll down to the Columns section and click Add from existing site columns. Choose the custom site columns you want to be able to filter the page by, then click OK when done.
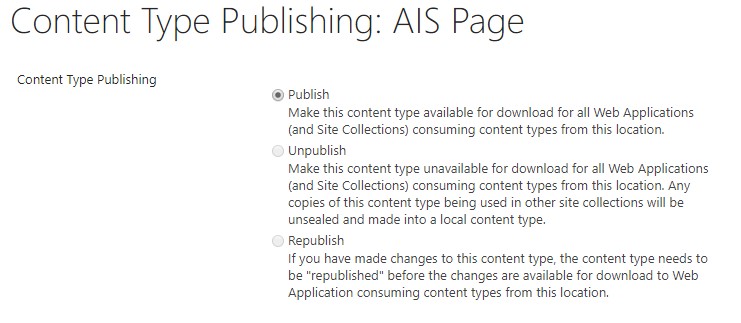
Once all your site columns are added and you are ready to make this content type available to all sites in your tenant, click Manage publishing for this content type.

Publishing the content type will allow it to be used in any of the sites in your hub.
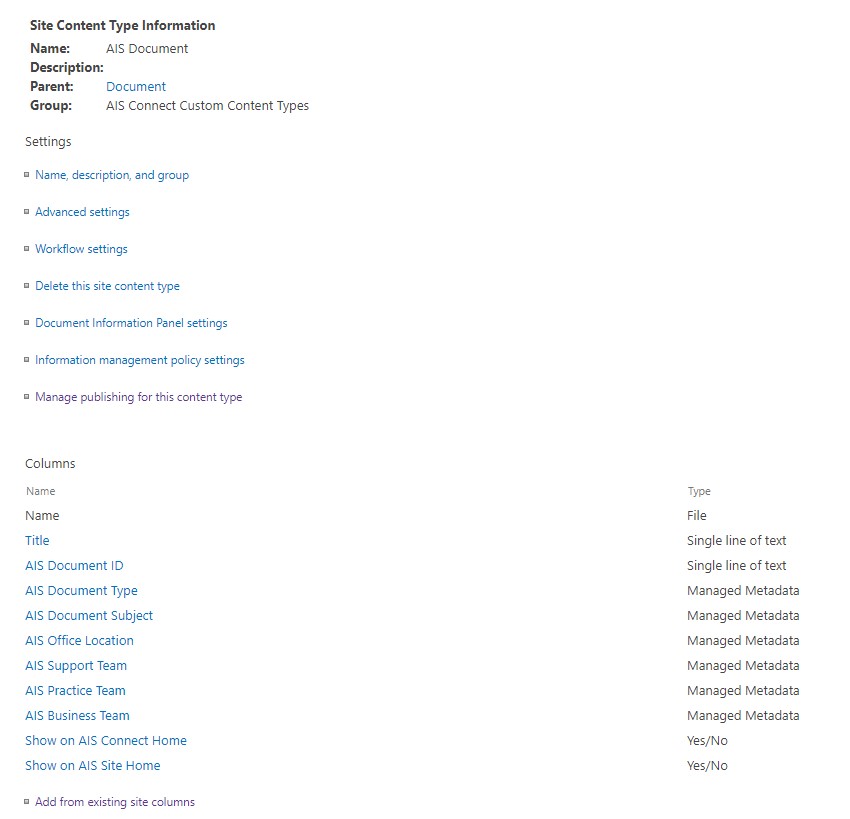
Repeat similar steps for each content type that you want to use in the sites in your hub. Another example for a custom document content type is shown below:
Depending on when the service runs, you may have to wait a bit for the content type hub to push the content types and site columns down to all your site collections.
In our next post, we’ll cover how to set up each individual site in the hub.