Creating SharePoint Sites From a Dynamics CRM Plugin
With more and more companies adopting both Dynamics CRM and SharePoint into their corporate technology stacks, I’ve found myself integrating the two technologies more often than ever before. It’s quite cool. These are two extremely powerful systems and they both do what they are designed to do very well. I’m not going to go in-depth about what the differences are between these products…they are in totally different software “genres.” Apples and oranges. However, I want to point out one thing SharePoint gives you that many clients ask for again and again: Subsites.
Subsites are SharePoint sites that belong to a root SharePoint Site Collection. An example of this would be a corporate intranet SharePoint Site Collection (https://intranet) with SharePoint Subsites for each division in the corporation, e.g. Marketing (https://intranet/sites/marketing), Accounting (https://intranet/sites/accounting), etc. There are pros and cons to breaking these Subsites out into their own Site Collections (so they can have their own content database), but quite often you see this hierarchical approach.
Another very common use of SharePoint Subsites is for things like item level management, for instance a project. You may have a SharePoint Site Collection named Projects (https://projects), and you may require a new SharePoint Team Site for any new projects that come online so as to provide an environment where a team can collaborate on said project, and maintain any data or documents about the project in a central location. This can best be described with URLs —https://projects/sites/Project1, https://projects/sites/Project2 and so on.
![]() So how does Dynamics CRM play into my scenario? What if you’d like to leverage this same functionality for things like Accounts, Contacts or Leads? Pick an Entity from CRM — for the purposes of this blog the Entity is somewhat arbitrary, but we’ll use the Account Entity so we have something to focus on. Every new Account I create may or may not require an environment where teams can collaborate and store data and documents for this new Account. Dynamics CRM gives us SharePoint Document Management out of the box. But what if I need more? What if my company maintains a site ‘template’ that can be used to create a new, standardized website (SharePoint Subsite) for any new Accounts that come online? A place where a team can collaborate and have the freedom to deal with unstructured data and content in a central location?
So how does Dynamics CRM play into my scenario? What if you’d like to leverage this same functionality for things like Accounts, Contacts or Leads? Pick an Entity from CRM — for the purposes of this blog the Entity is somewhat arbitrary, but we’ll use the Account Entity so we have something to focus on. Every new Account I create may or may not require an environment where teams can collaborate and store data and documents for this new Account. Dynamics CRM gives us SharePoint Document Management out of the box. But what if I need more? What if my company maintains a site ‘template’ that can be used to create a new, standardized website (SharePoint Subsite) for any new Accounts that come online? A place where a team can collaborate and have the freedom to deal with unstructured data and content in a central location?
In this blog I’ll show you how to leverage the SharePoint Client Object Model in a Dynamics CRM Plugin to create a SharePoint Team Site for new Accounts that come online.
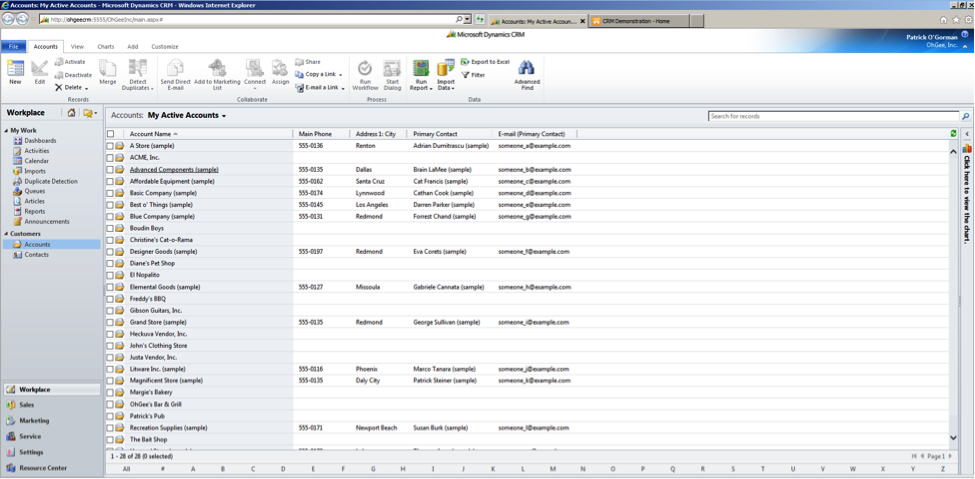
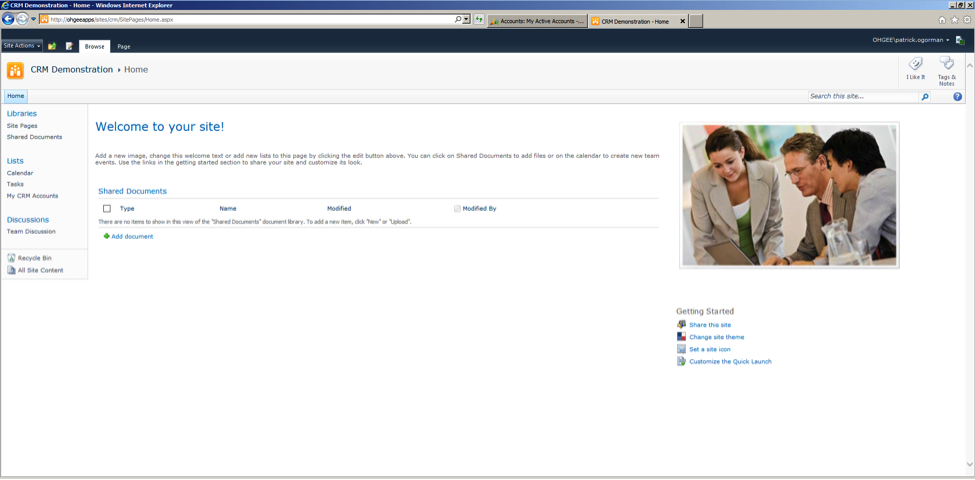
Here are screenshots of my CRM and SharePoint environments:
Assumptions
- You are familiar with customizing Entities in the CRM system
- You have access to a SharePoint 2010 and CRM 2011 environment and have administrative rights to those environments
- You have access to Visual Studio as a development environment
Pre-Requisite Steps
1. Make sure you have the Dynamics CRM 2011 SDK on your file system. The SDK can be downloaded here.
2. Make sure you have a copy of the SharePoint.Client.dll and the SharePoint.Client.Runtime.dll binaries. You can download the redistributable for these files from here. Or you can copy them over from your SharePoint Server’s 14-hive (14\ISAPI). When you install the redistributable, the DLLs are placed in your global assembly cache.
BUILDING THE SOLUTION IN VISUAL STUDIO
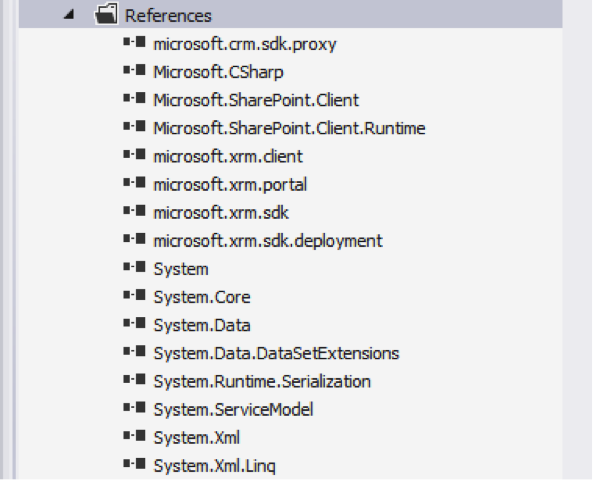
3. Create a new Class Library project in Visual Studio (I am using VS 2012 for this blog). Add the references seen in the screenshot to your project.
4. Add the following “using” statements to the top of your class file:
using System.Net;
using Microsoft.SharePoint.Client;
using Microsoft.Xrm.Sdk ;
Note: I’ve also added a “using” statement for shorthand access to the SharePoint Client Object Model classes.
using SP = Microsoft.SharePoint.Client
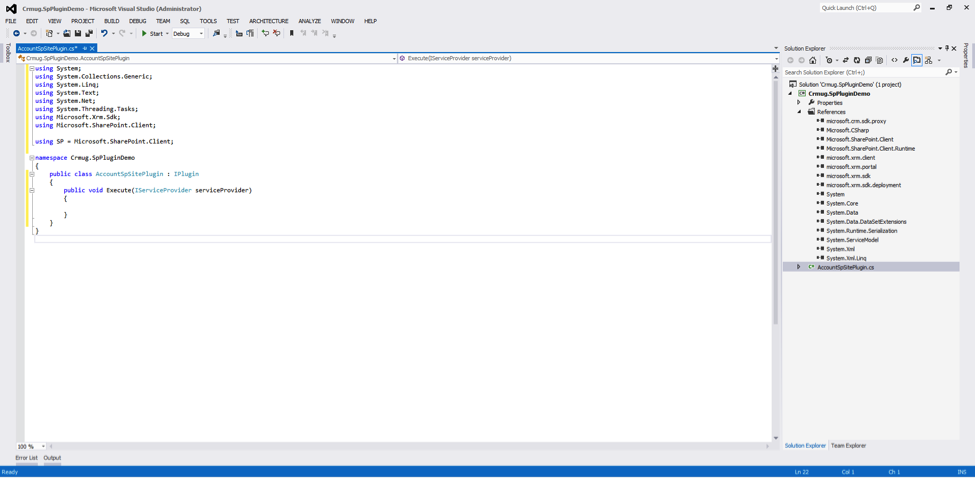
5. Have your new class implement the IPlugin Interface.
Your environment should now look similar to this:
6. Replace the Execute method with the code below:
public void Execute(IServiceProvider serviceProvider)
{
string entityName = string.Empty;
string entityId = string.Empty;

IPluginExecutionContext context =
     (IPluginExecutionContext)serviceProvider.GetService(typeof(IPluginExecutionContext));

if (context.InputParameters.Contains("Target") && context.InputParameters["Target"] is Entity)
{
    	Entity entity = (Entity)context.InputParameters["Target"];

       	//the plugin was not registered correctly if the entity's logical name is not account
       	if (entity.LogicalName != "account")
        		return;

       	//if they didn't opt to create a site we can back out of here
       	if (entity.Attributes["new_createaccountmanagementsite"].ToString() == "False")
               	return;

     	//we'll use the entity's name and id for the subsite's title and URL respectively
       	entityName = entity.Attributes["name"].ToString();
       	entityId = entity.Attributes["accountid"].ToString();

       	//I don't like braces in my URLs so I'm simply removing them here
      	entityId = entityId.Contains("{") ? entityId.Replace("{", "") : entityId;
      	entityId = entityId.Contains("}") ? entityId.Replace("}", "") : entityId;

       	//the uri for our SharePoint Site Collection where we'll add our Subsites
       	Uri uri = new Uri("https://ohgeeapps/sites/crm");

       	//you'll want to figure out what credentials to use
       	NetworkCredential nc = new NetworkCredential(<username>, <password>, <domain>);

   	try
   	{
   		//get a handle on the SharePoint context
           	using (ClientContext spClientContext = new ClientContext(uri))
           	{
             	//assign the credentials defined above to our SharePoint context
                    	spClientContext.Credentials = nc;

                        //we use a WebCreationInformation object to create the new Subsite
                        WebCreationInformation wci = new WebCreationInformation();
                        wci.Url = entityId;
                        wci.Title = entityName + " Account Management";
                        wci.Description = "Account management site for " + entityName + ".";
                        wci.UseSamePermissionsAsParentSite = true;
                        //here we are using the standard SharePoint Team Site site template
                        wci.WebTemplate = "STS#0";
                        wci.Language = 1033;

//add/create the new web based on the information provided in the
WebCreationInformation class instance
                        Web newWeb = spClientContext.Site.RootWeb.Webs.Add(wci);

                        spClientContext.ExecuteQuery();
             	}
     	}
      	catch
       	{
          	//if this fails either the site already exists or something else went wrong
               	return;
      	}

       	//save the URL of the new Subsite to the Account entity's Account Management Site Url field
    	entity.Attributes["new_accountmanagementsiteurl"] = "https://ohgeeapps/sites/crm/" + entityId;

       	//use the Organization web service to update the Account record
      	IOrganizationServiceFactory factory =
(IOrganizationServiceFactory)serviceProvider.GetService(typeof(IOrganizationServiceFactory));

IOrganizationService service = factory.CreateOrganizationService(context.UserId);

     	service.Update(entity);
    }
}
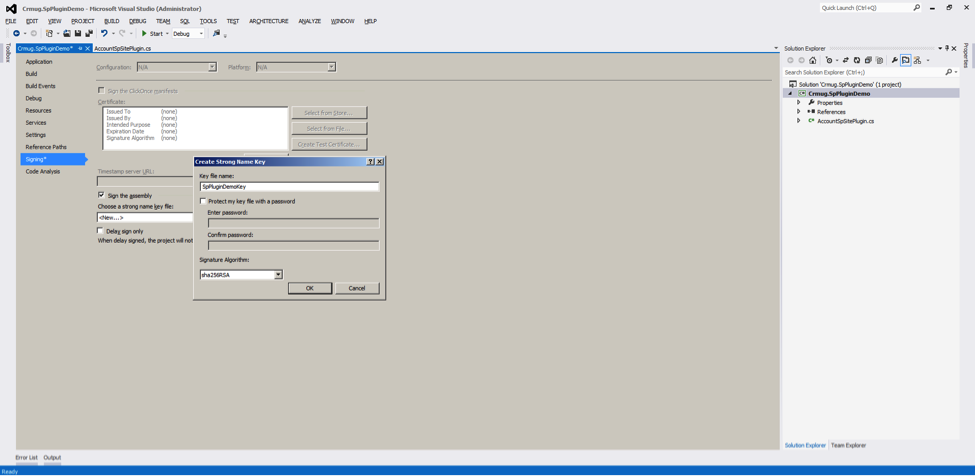
7. Give the project a strong name key using the project properties screen and the “New” option. You can give the key any name you want. Make sure to uncheck the “Protect my key with a password” checkbox.
8. Build your solution in Visual Studio to create the plugin DLL.
Customize the CRM Account Entity
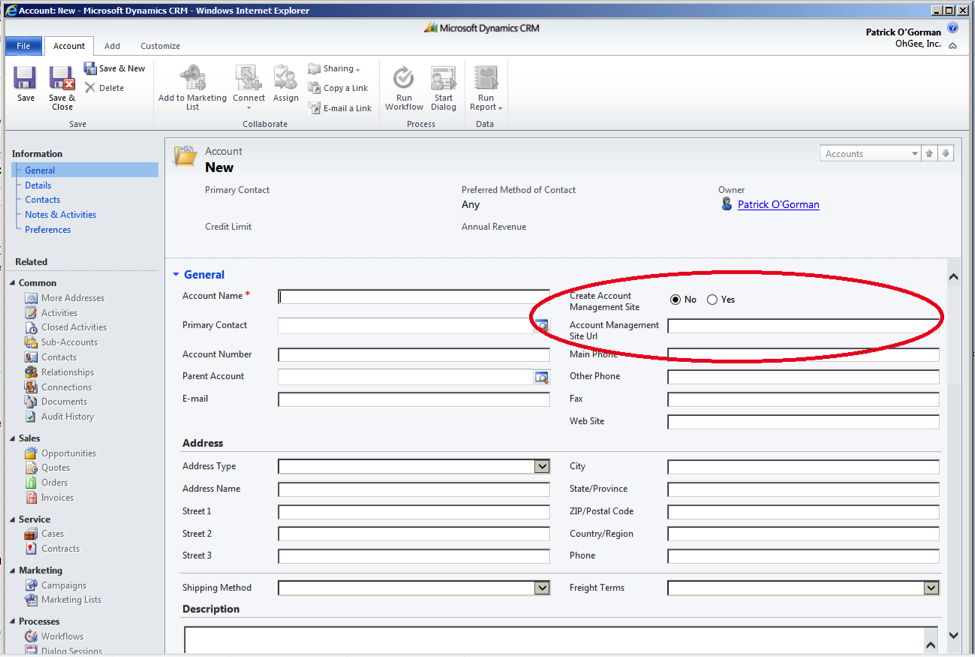
9. Add the following fields to the Account Entity and Publish your customizations.
- AccountManagementSiteUrl (Single Line of Text)
- CreateAccountManagementSite (Two Options)
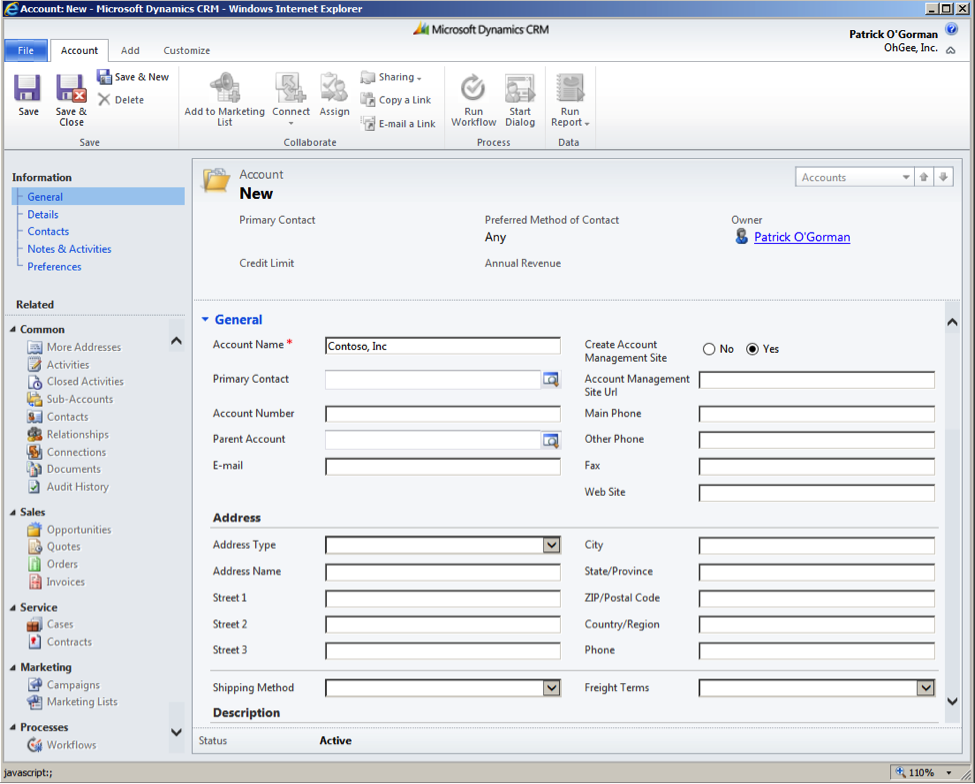
10. Add the two fields you created in the previous step to the Account Entity’s main form and Publish your customizations. Your “new” Account form should look something like the screenshot below.
Register the new Plugin
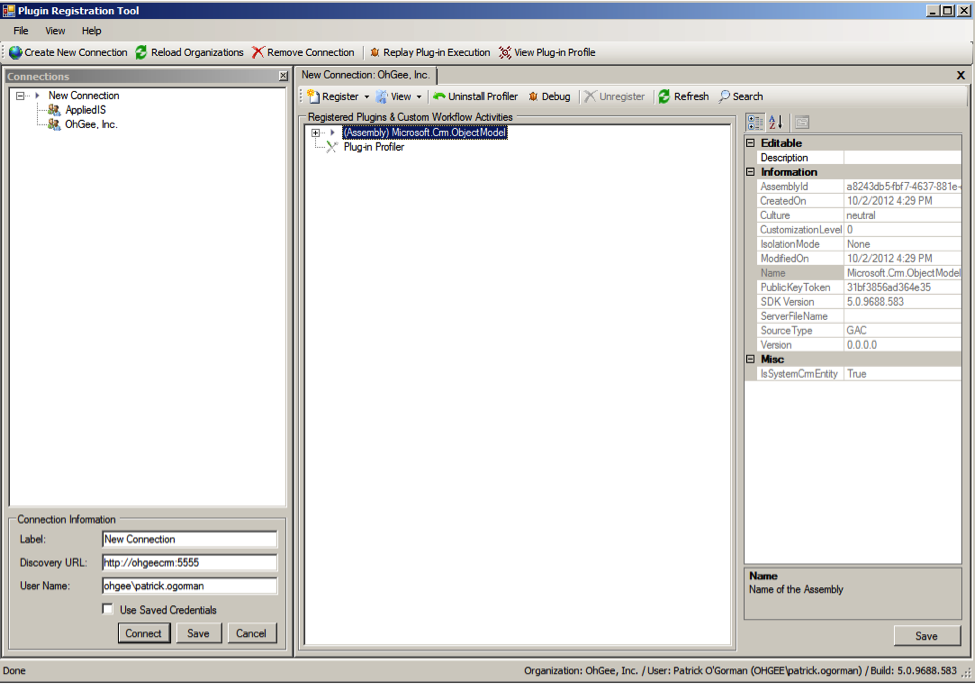
11. Run the Plugin Registration Tool that can be found in the bin directory of the CRM SDK folder structure. Connect to your CRM instance where the Plugin will be registered. If you don’t have any Plugins currently registered, your environment should look something like the screen shot below:
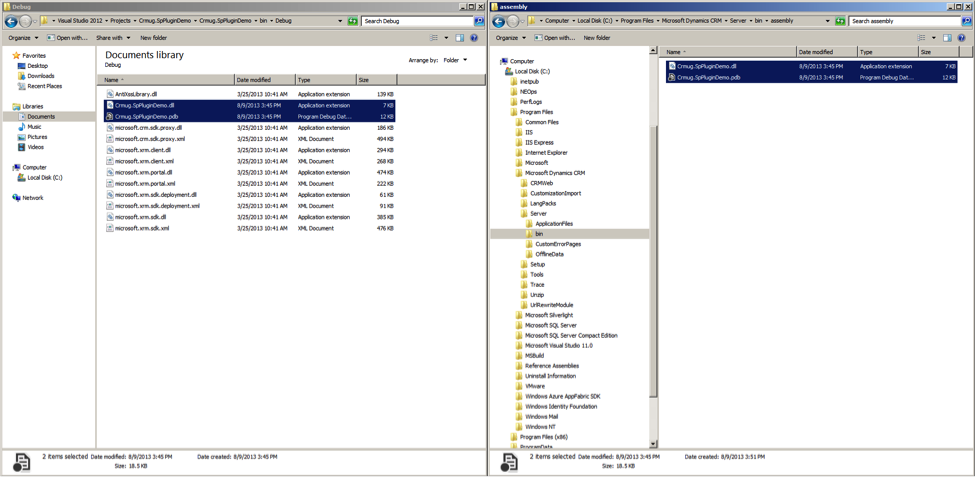
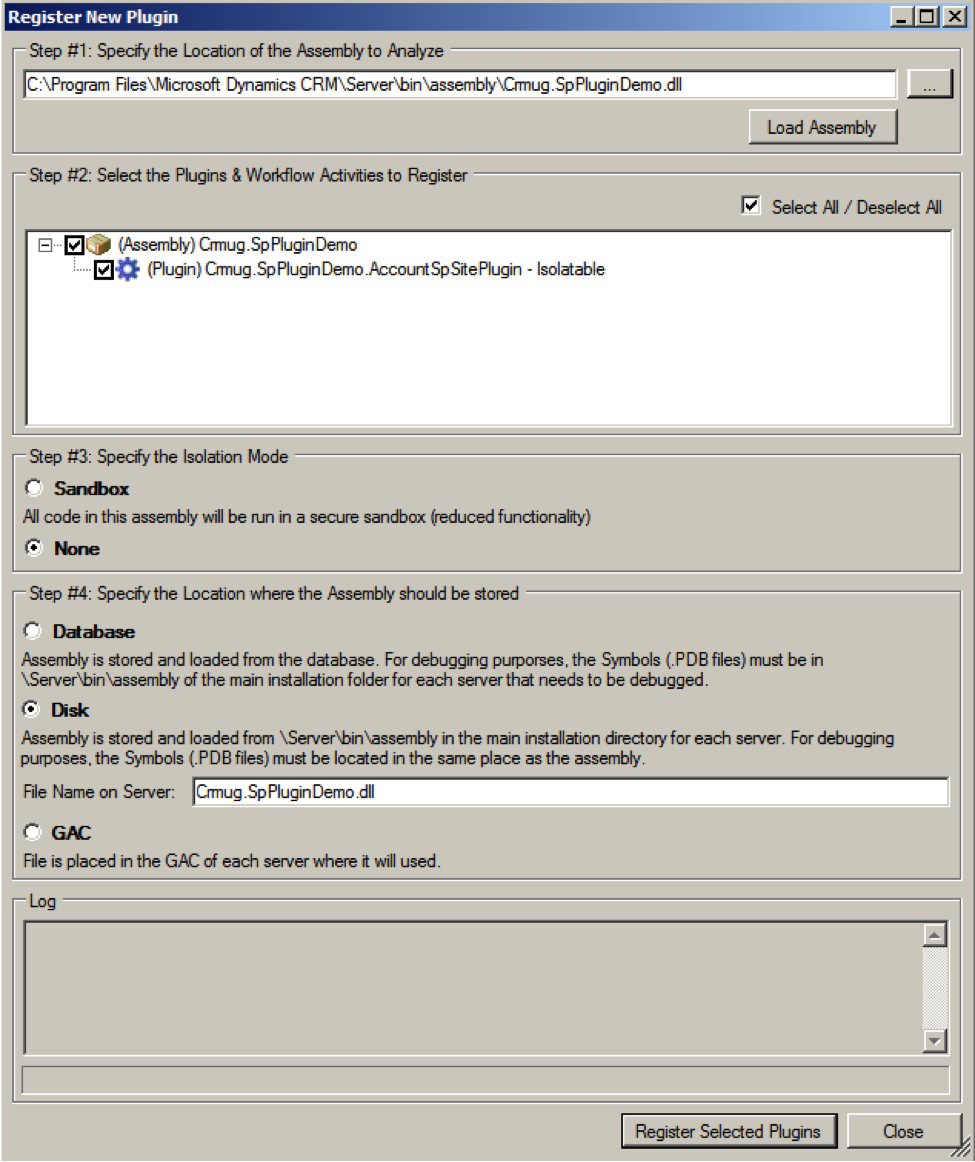
12. For many reasons I am simply going to register this Plugin using the “Disk” option. This means we have to copy our DLL (and if you want to debug the Plugin, the .PDB file) to the Program Files\Microsoft Dynamics CRM\Server\bin\assembly folder before registration.
13. Using the Plugin Registration Tool, register the new DLL from the assembly folder. Make sure the “Disk” option is selected if you want to be able to easily troubleshoot, unregister or debug this plugin.
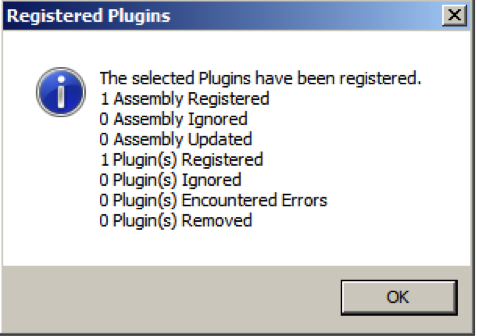
 14. Once you click the “Register Selected Plugins” button, if successful, you should see a dialog that looks something like this:
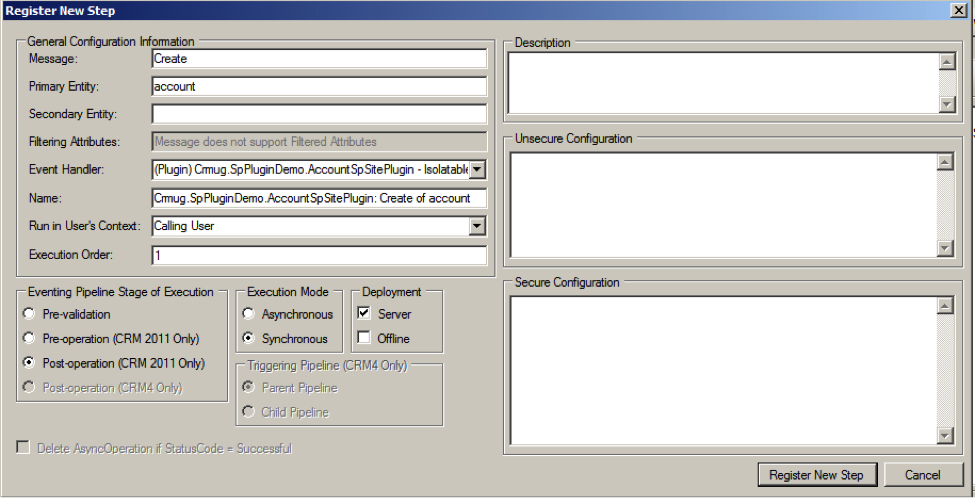
15. Now that the assembly is registered, we’ll want to register a “Step.” Expand the Assembly node that was just entered in the Plugin Registration Tool and right-click the child node underneath it. Select “Register New Step.”

16. Use “Create” for the Message type and “account” for the Primary Entity. Leave everything else as it is and click the “Register New Step” button.
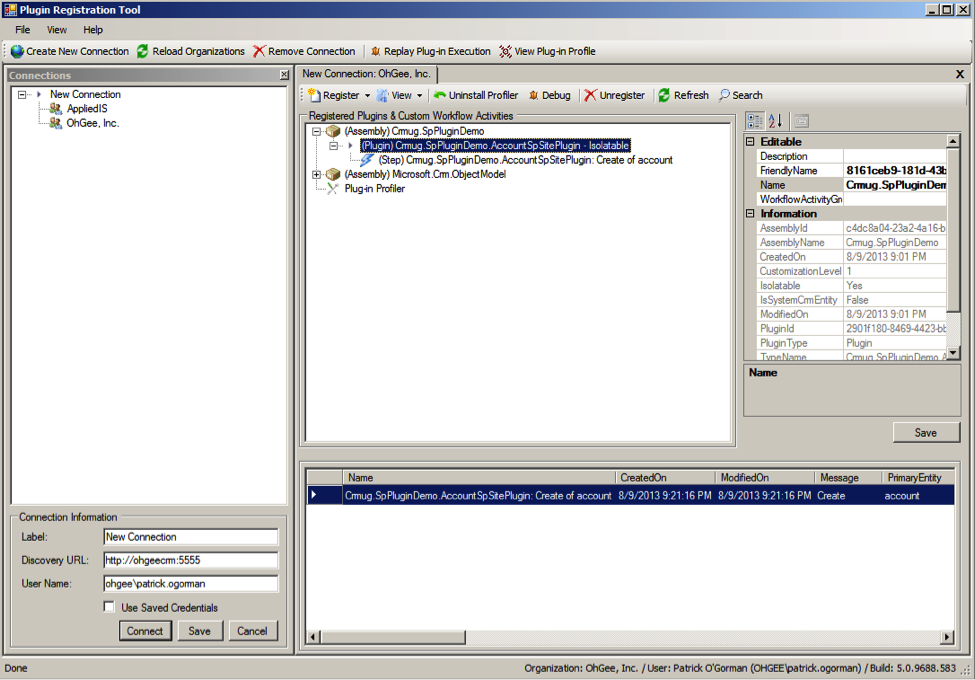
Your Plugin Registration Tool should now look something like the screenshot below:
Testing it out!
17. Go back to your CRM environment and create a new Account. Make sure to select the “Yes” radio button for creating the Account Management Site. Click Save.
18. When the Account has been saved, you should see a new URL in the Account Management Site URL textbox, provided if everything worked correctly:
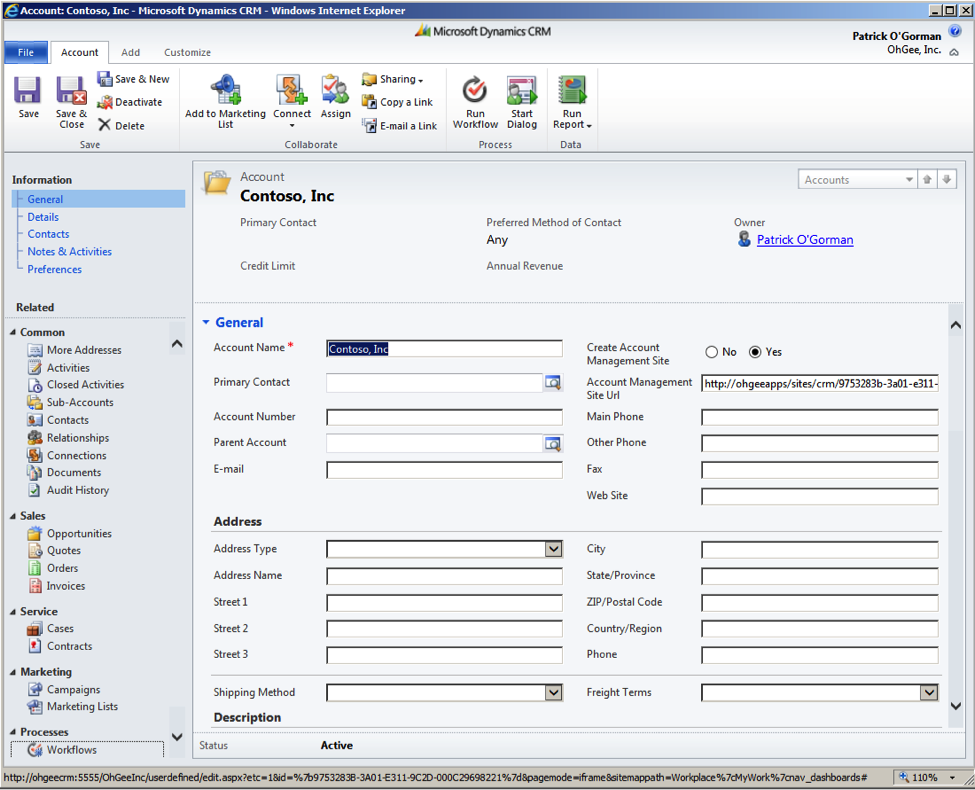
19. Copy and paste the URL into your browser to access your SharePoint Site for this Account:

Conclusion
In this blog we’ve discussed a simple way of further integrating SharePoint with Dynamics CRM 2011 that goes beyond what is offered out-of-box. We also shown how to set up a Visual Studio Plugin Project so that you can not only develop a custom Plugin and register it using the Registration Tool, but also how to access the necessary binaries required for interaction with your SharePoint environment.
This was a very simple example of the power offered by the SharePoint Client Object Model and CRM Plugins, but that was my intent: To show you a simple example and hope that it generates some ideas that will allow you to bring even more powerful solutions to your enterprise using SharePoint and Dynamics CRM.