The landscape for Power BI licensing is complex and evolving. To begin to grasp the structure and detail, let’s break it down. Today I am asking: what are the capabilities of using a free license?
Really, It’s Free
More than one path exists to obtain a free account. For our exploration in this article, I will use two:
- Individual Free Account
- Office 365 (Dev Tenant) Member Free Account
Let’s frame this in a story with two fictional characters. Cary Small started a small one-person business during the pandemic and wants to send a graph of her sales data to her small business Meetup group friends. Max Rockatansky is her friend. As an employee for a small company that subscribes to Microsoft 365, he was assigned a free account by the M365 tenant admin.
Fictional Characters
| Free Account User | Source of Free Account | Different Experience in Power BI |
| Cary Small | Individual Free Account | Cannot publish to public |
| Max Rockatansky | Assigned account by M365 tenant admin* | Publish to public if admin has allowed it |
*admin name Imperator Furiosa 😀
Let’s See This in Action
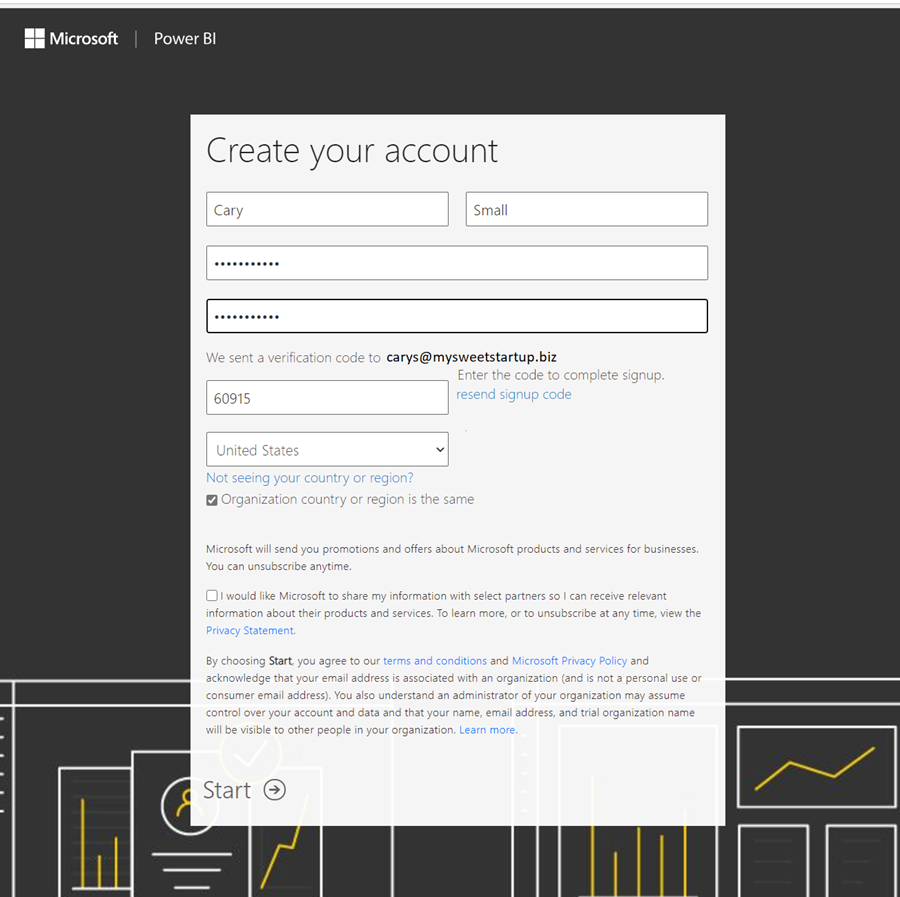
Cary created her Individual Free account from a personal domain name email address to try out Power BI, let’s say carys@mysweetstartup.biz. A link to create this type of account is in the Links section at the end of this article. Email addresses from free email companies such as Gmail, Hotmail, or Outlook.com are not accepted. This account type is interesting because it is the free-est of the free; no Office 365 membership is needed.
Power BI Desktop
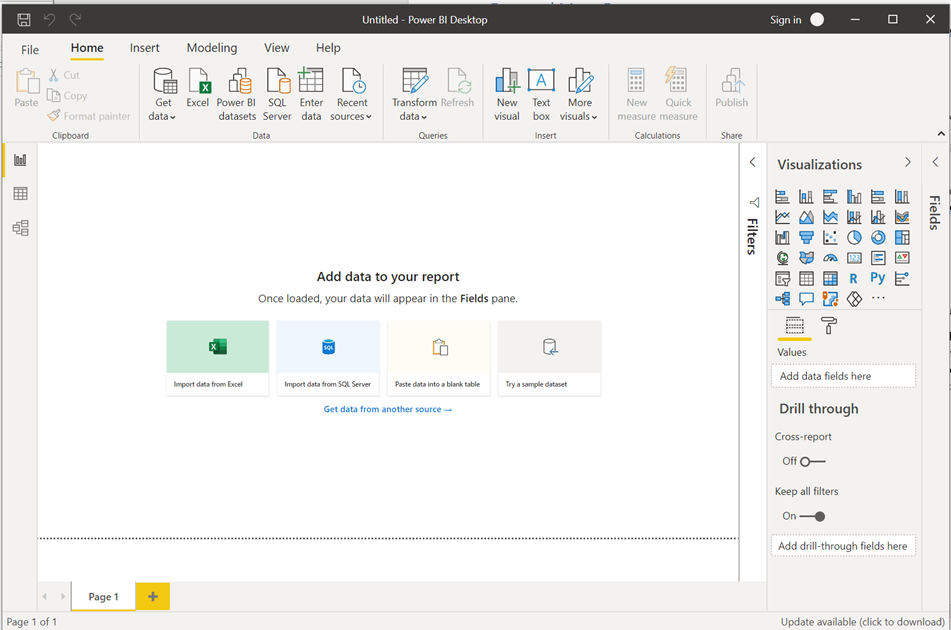
With her new account, the starting point for Cary is to install the Power BI Desktop application. This application is free to download, install and use, even without ever logging in to any account. A link to the download is included at the end of this article. Power BI Desktop is the starting point to generate and shape reports and visualizations.
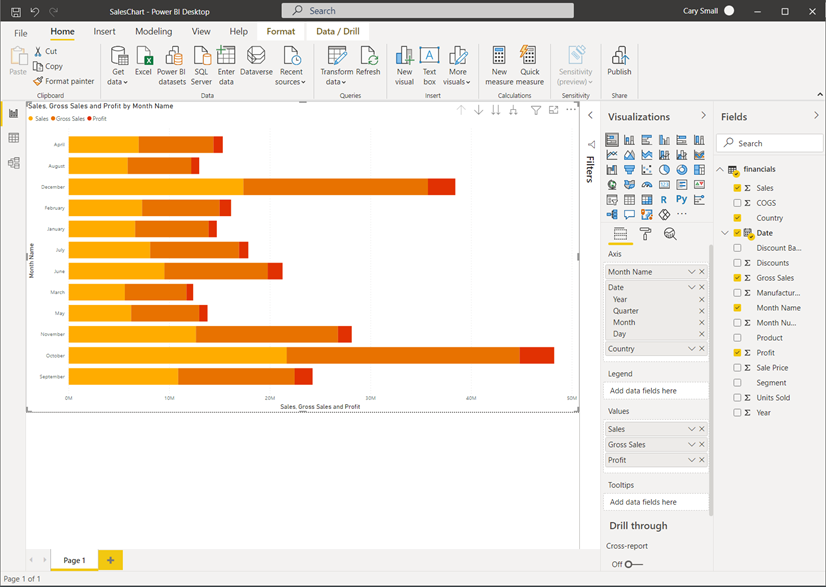
Here Cary imports her spreadsheet of sales data. She can transform it and create a visualization or report all before logging in. Within an hour, Cary has completed her graph of sales data:
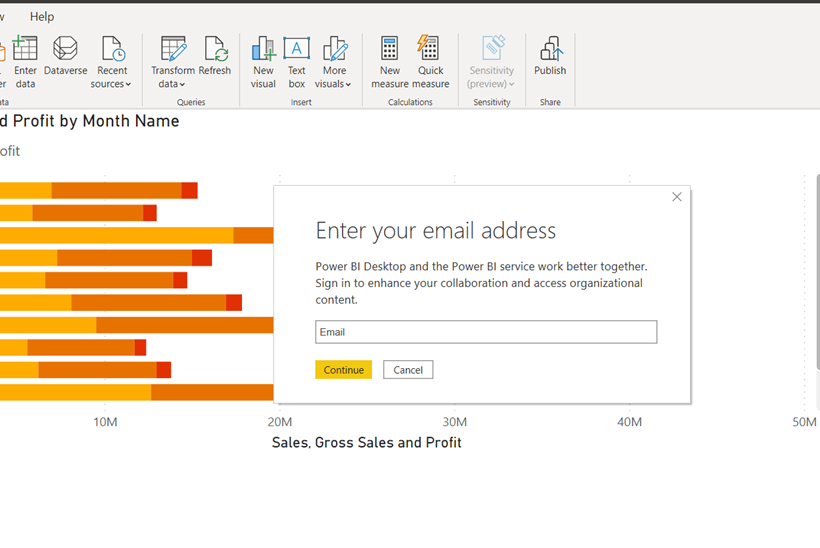
Now she wants to share it with her Small Business Meetup friends. The report must be published to the Power BI Service. Navigate to Home -> Publish in the menu. Cary will then see a prompt to log in to her Free Account.
A dialog wants to know a destination. The only option for the free account is My Workspace. My Workspace is accessible to only the account owner. It does not allow for collaboration with publishing to Workspaces or App Workspaces as these are features available from paid subscriptions. Cary then selects My Workspace and clicks Next.

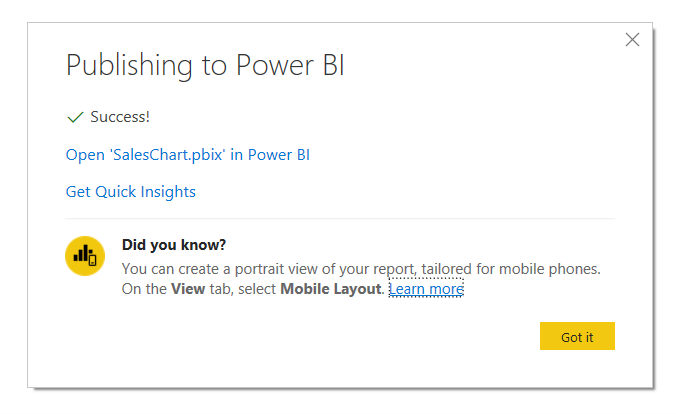
Success! Her report was published to My Workspace in the Power BI Service. A dialog appeared with the link to open the Power BI website.
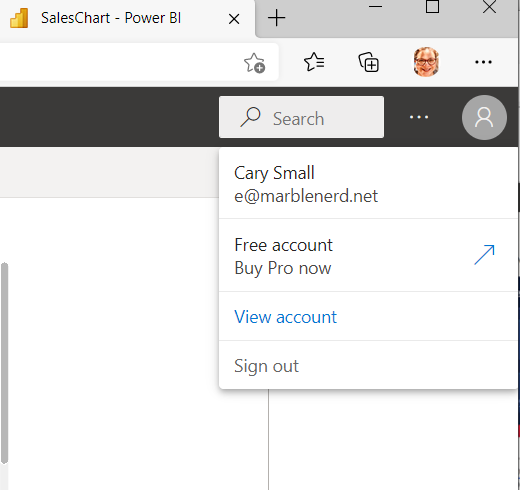
Profile and Account Status
Once on the Power BI site, click on your profile in the upper right corner. The dropdown detail will show your status: Free account, with a prompt to purchase a Pro upgrade.
Sharing the Report
Now that Cary’s report is published, she can explore her options for sharing the chart. Under the Export menu item are options to export to PowerPoint, a PDF, or to Analyze in Excel and be emailed as file attachments.
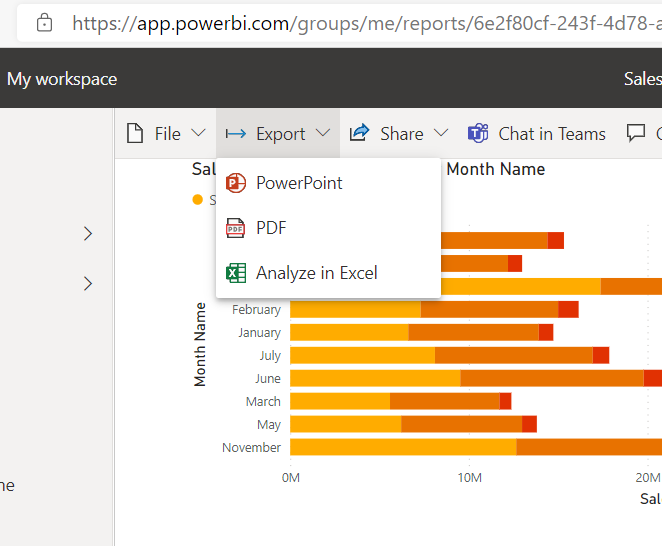
For a free account, this functionality feature is nice, but there is more to be offered.
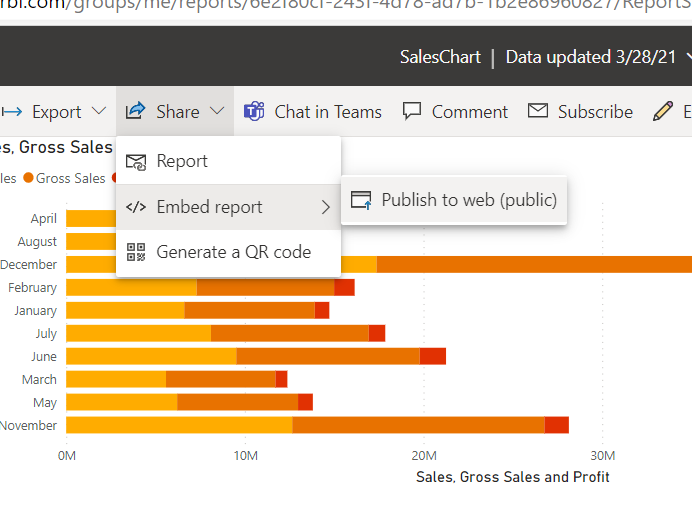
Under the Share menu, she finds three options (Figure 9). The first option will email a link. When she clicks it, a Pro license requirement pops up. The last option is a QR code that requires the device to be logged into Power BI. Neither of those is helpful. But the middle one, Embed report, offers a selection to Publish to the web (public) so, she tries it.

Hitting a Roadblock
We hit another impediment:
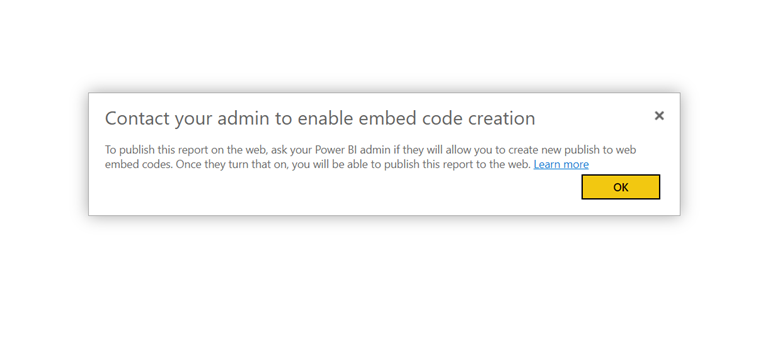
Recently, an admin setting added to Power BI requires an admin to permit sharing publicly explicitly. As an Individual Free Account, Cary has no admin to approach. Her account is not in a tenant that she can access. At this point, Cary can share only by exporting a file. She thinks this is pretty good for free! But she would also like to embed the report in her free GitHub Pages website.
Max comes for help
Cary calls her friend Max for help. Unfortunately, Max does have the capability to publish a public Power BI report. To do this, he must gain access to Cary’s computer, so they start a Zoom meeting and steps below:
- Close the browser window to apps.powerbi.com.
- Return to Power BI Desktop – Cary signs out.
- Max will sign in.
- Publish again, choose My Workspace.
- On the Power BI Service website, sign out as Cary and sign in Max.
- Choose Embed -> Publish to Web.
- Now they see a better dialog (Figure 12):
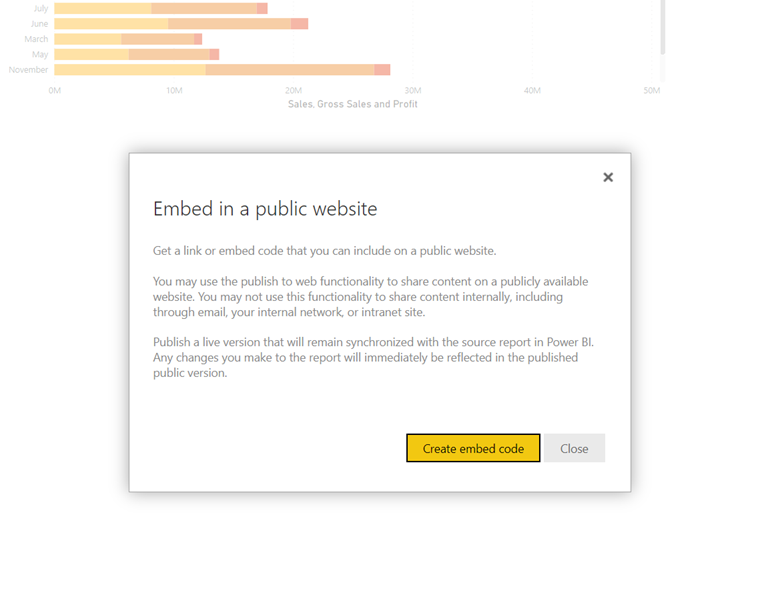
Click Create Embed Code. A dialog will caution you to be careful! “Public” means completely public so that any sensitive data will be compromised. But in our case, this is all for the sake of IT and is not real! Let’s go! Click Publish.
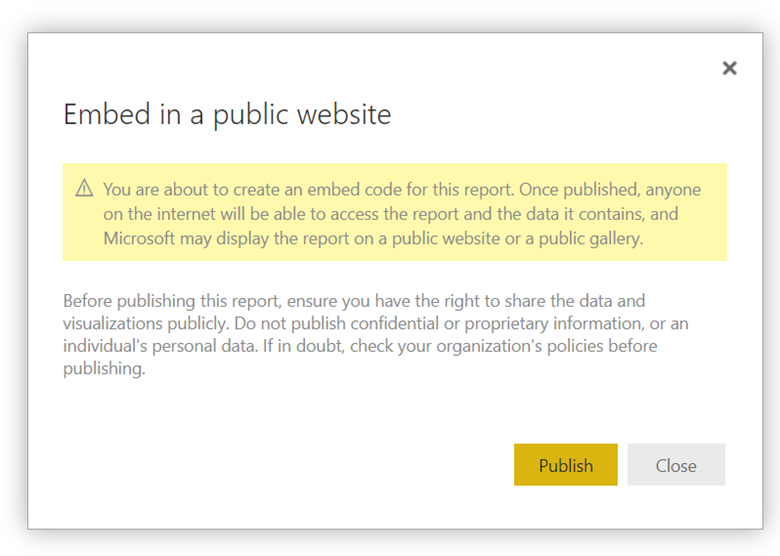
Success! You now have both an iframe tag and a link that you can email. Cary tested by emailing the link to her phone and clicked the link. The report opened directly to the chart with no impediment, no login. She then embeds the link on her startup website, opens Max’s LinkedIn page, and writes him a glowing compliment.
Getting started with PowerBI
A startup business might not be ready to invest in Premium Space or Pro licenses. With an Office 365 account, the option to use the free license also offers report sharing. The sharing is limited, and there is no collaboration option, but the business can still convey data visualizations. This is a great place to get started with Power BI.
Links
- Desktop download: Power BI Desktop—Interactive Reports | Microsoft Power BI
Individual Account Sign Up: Sign up for the Power BI service as an individual – Power BI | Microsoft Docs - Microsoft Article with more info about Free Licenses: Feature availability for users with free licenses – Power BI | Microsoft Docs
- Publish to web: Heads up: The Publish to web default is changing and it affects who can create public embed codes | Microsoft Power BI Blog | Microsoft Power BI