Kubernetes Implementations Steps
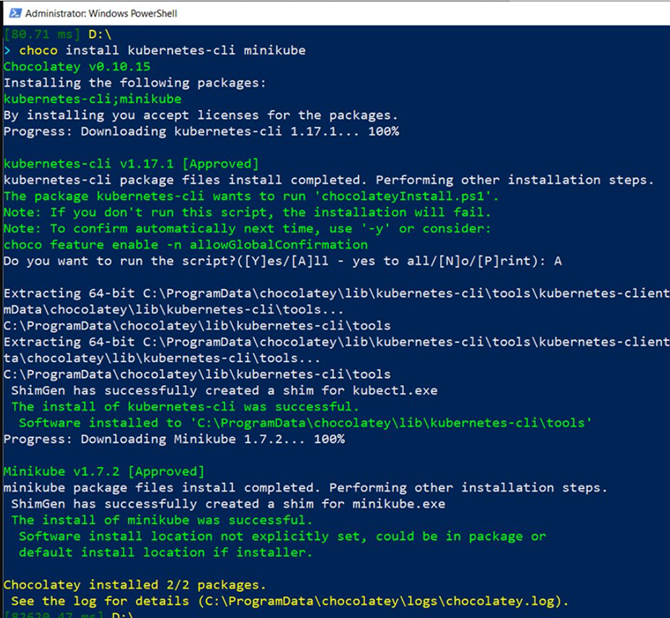
To install and set up Kubernetes on Windows, load kubectl and install minicube. Minicube is a tool that enables us to run a single node cluster in a VM on a machine.
Choco Install Kubernetes-cli Minicube
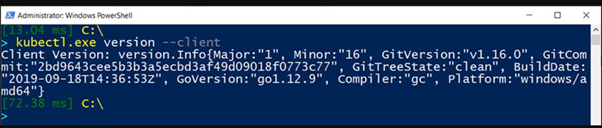
Now, run the following command and verify that kubectl is installed on your machine:
kubectl.exe version –client
Next, spin up a worker machine — or node — in Kubernetes. It can be a physical or virtual machine. To do this, use the following command to start minicube:
Minicube Start
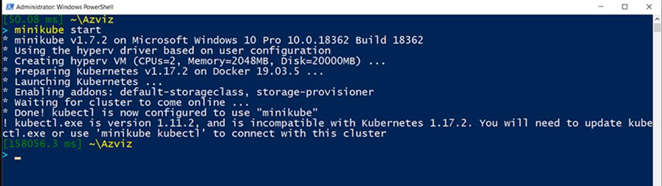
Since we are installing Kubernetes on Windows, use Hyper-V to launch a VM and set up a Kubernetes cluster on the VM.
This will complete the setup.
Running Kubernetes containers
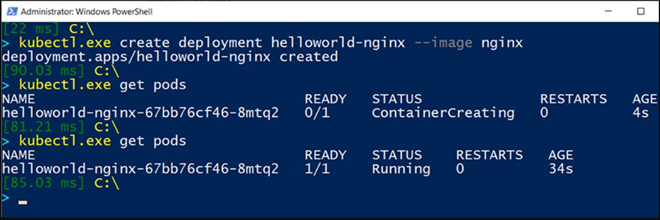
To start containers, use the Kubernetes command below to create a deployment. Provide a name for the deployment and the container image to deploy.
kubectl.exe create deployment my-nginx –image nginx
When a deployment is created, Kubernetes builds pods to host application instances.
Enter get pods just after running the previous command to catch the Container Creating status as pods are deployed:
kubectl.exe get pods
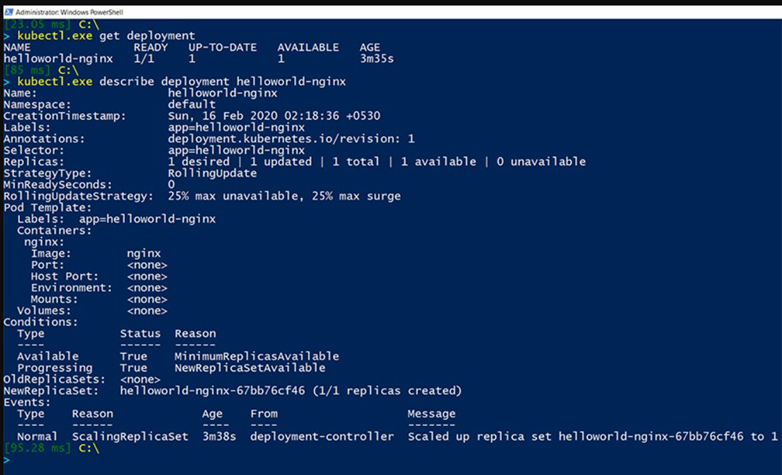
Use the describe keyword with the deployment name, as shown below, to see more detailed information about deployments:
kubectl.exe get deployment
kubectl.exe to describe deployment helloworld-nginx
In this Kubernetes implementation tutorial, we run only one container or Nginx server, but sometimes it is necessary to accommodate increased workload and traffic. In that case, scale up the number of application instances. This can be achieved using kubectl scale deployment with a –replicas parameter:
kubectl.exe scale deployment helloworld-nginx –replicas 4
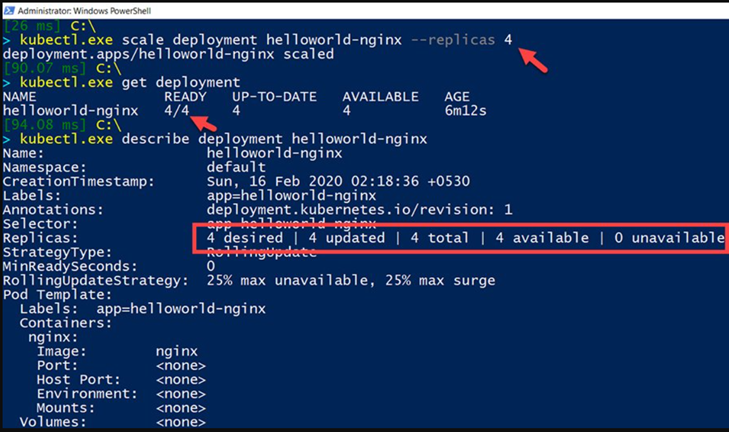
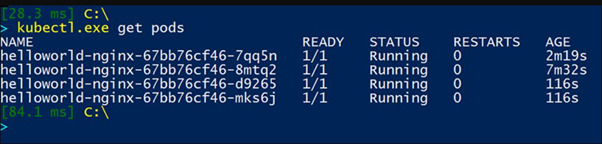
Now, check the Kubernetes pods; there should be four containers running on the node:
Deploy your app
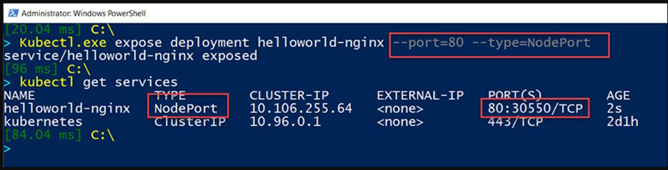
Now there is an application running in multiple containers with their IP addresses. Next, expose them outside the cluster so that the application is accessible:
Kubectl.exe expose deployment helloworld-nginx –port=80, type=NodePort
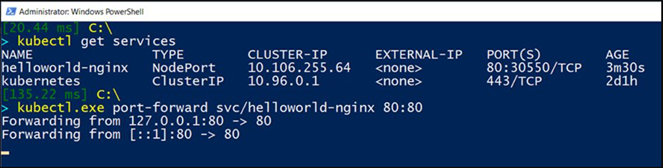
Verify this via the kubectl get services command. This will return a service type of Node Port to expose port 80 on each node of the Kubernetes cluster. This service is an abstraction layer that load balances, and groups more than one pod in a cluster that shares an IP address.
To open this application in a web browser, create a proxy to connect the local port to the cluster port, which we exposed using the NodePort service in the previous step:
kubectl.exe port-forward svc/helloworld-nginx 80:80
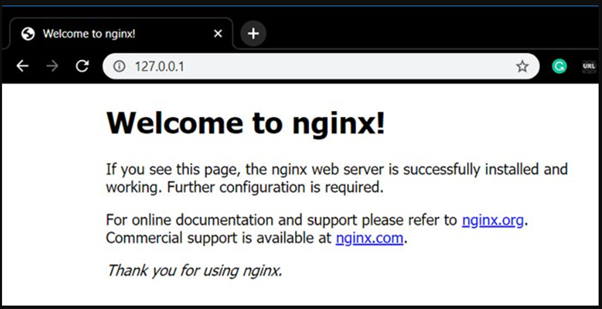
Go to the web browser and open http://127.0.0.1/ or http://localhost/ to see the homepage of the Nginx web server deployed in Kubernetes containers.
Test the Kubernetes Control Plane
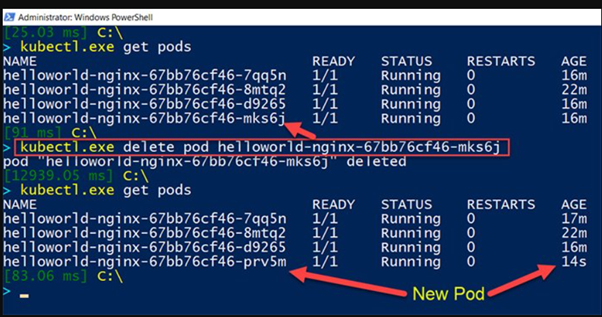
Lastly, test that the Kubernetes control plane, or master server, can maintain the desired state of the pods that run on the node server. To check this, use the following command to forcibly delete one of the pods that run the application instance.
kubectl.exe delete pod helloworld-nginx-67bb76cf46-mks6j
This undesired state will be identified, and Kubernetes will immediately run a new instance of the application in a container:
AN OVERVIEW OF KUBERNETES AND K8 CLUSTERS
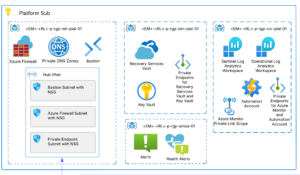
Learn how Kubernetes is different from traditional models, how it has evolved and how to set up a Kubernetes cluster on the Microsoft Azure Cloud.