Build Native Applications with Power Apps
One of the more sought-after functionalities lacking in low/no-code solutions is the capability to package it as a native mobile app. Such functionality is finally possible as Microsoft opened it for general availability for all customers, conveniently named “Wrap” for Power Apps. Here are some of its features:
- Package together multiple canvas apps in the same mobile app.
- Manage these apps with Microsoft Intune.
- It is much more accessible for end users from their devices.
- It allows code signing for both iOS and Android. (For both platforms, the steps to achieve this are pretty much the same, with only a few differences)
To accomplish this project, you need to have a general understanding of:
- Azure AD and App registrations (Tutorial: Register an app with Azure Active Directory (Microsoft Dataverse) – Power Apps | Microsoft Learn)
- Visual Studio App Center (https://appcenter.ms/apps)
- Power Platform solutions
This post will walk you through how to use “Wrap” to package app(s) for an iOS device. An Apple developer account and a MacBook are required to complete the code-signing process.
Install Wrap and fill in details
To begin, Wrap should be installed on the Power Platform environment. Power Platform Admin privileges are needed to complete this step.
- Package your app(s) into a solution.
- Click the now available WRAP option.
- If you are packaging multiple Apps, use the one with the landing screen.
- Start populating information.
- Keep saving so you don’t lose anything!

- GENERAL: In the general tab, fill in the ‘display name’ and select the secondary Apps. Go to the Azure portal, and register your App. Under Essentials, copy the Application Client ID. To configure the Bundle Id, we will go to the ‘Authentication’ tab and select the multi-tenant and platform.
- Display options: All the customizations go here: branding, icons, logo, and background color for the mobile App.
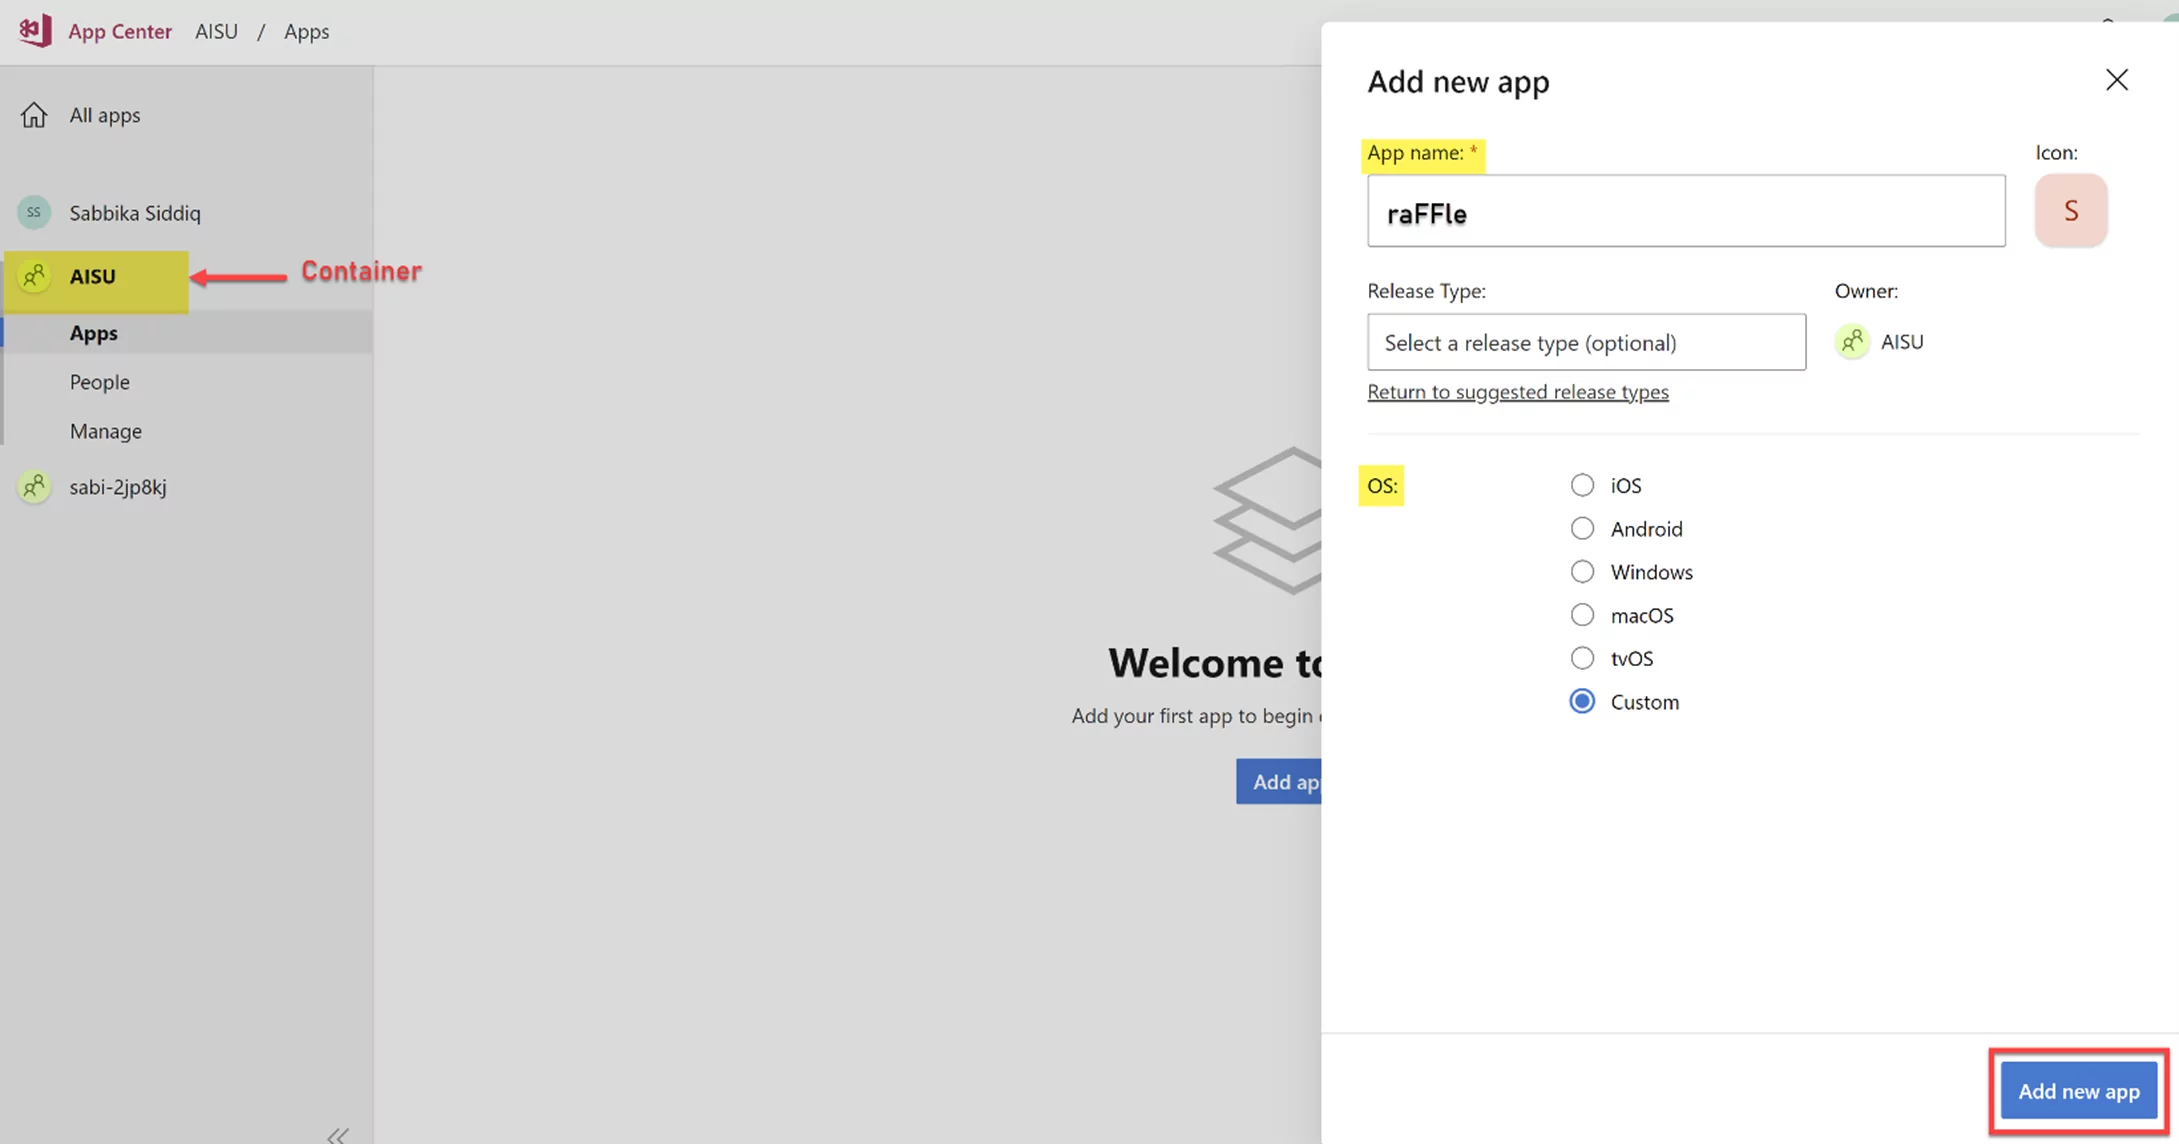
- Publishing settings: Sign in and create your organization in the ‘Visual studio App center.’ Build the container where our App will live in separate containers for different OS. Add New App and Select Custom for iOS. Get the iOS App center URL (till the App name). Generate a ‘New API token’ from the settings, fill out the description and give access. Save it in a safe place, as it’ll be gone forever.
Allow the registered App in your environment using PowerShell modules
Check the PowerShell version 5.1 or below, and it should be remote-signed. If you are prompted to accept the change to the Installation Policy value of the repository, accept [A] Yes to all modules for each module. You should have Global tenant admin privileges to execute these commands. Running these Power Apps cmdlets allows you to interact with your Application Platform without going through the admin portal in a web browser.
$psversiontable.psversion
get-executionpolicy
Install-Module -Name Microsoft.PowerApps.Administration.PowerShell
Install-Module -Name Microsoft.PowerApps.PowerShell -AllowClobber
Add-PowerAppsAccount
add-adminallowedthirdpartyapps -applicationid
Configure API permissions in Azure
Add the following API permissions to our app in the Azure portal: Dynamics CRM, Power Apps Service, and Azure API connection. If there are any missing API connections, they can be swiftly installed by running commands in the Azure cloud shell.
Build
In the build tab, you can see your build status and manage them. Commence the Build process after filling in all the fields. When the build process is complete, it should show up in our App center.

Code signing Power Apps wrap package for iOS
Now all the rest of the magic happens within the Apple developer portal. Sign on with the same account that you’ll use for XCode.
- Go to the ‘Certificates, id, and profile’ and register App Id. Enable ‘Associated domains,’ ‘iCloud capability,’ ‘NFC tag reading,’ and ‘Push notifications.’ Select any other capabilities you may need for your App to work.
- On your MacBook, navigate to Keychain access and request a certificate. Go back to the portal and select ‘create a certificate. Upload the certificate that we just created using Keychain access and download it.
- Staying in the portal, go to ‘Devices’ and register your device and generate a Provisioning profile name from the profiles and download it.
- Navigate to the App Center on your browser and download the built App from the App center. Unzip it! Open the file with the bundle Id name with XCode and go through the wizard process for the distribution of the App. You’ll get the required IPA file.
- Plug in the device that you registered to your MacBook. Dragging the IPA file to the device will launch installation. Voilà! The App icon on the phone will be there to greet you! Sign in and opt-in/out for notifications just like a regular mobile app. Now you can easily access your App from the device without searching for it in the Power Apps.
It’s a Power Wrap!