


![]() Have you ever wanted a fresh SharePoint development environment? Have you ever needed to quickly create a test box, or wanted to prototype something specifically for a customer? In the past, in all of these scenarios, you’d face a very time-consuming process and quite honestly, one that has likely been a deterrent. In this blog post, I’m going to walk you through creating a SharePoint 2013 development environment, on Azure, utilizing the Visual Studio 2013 RC.
Have you ever wanted a fresh SharePoint development environment? Have you ever needed to quickly create a test box, or wanted to prototype something specifically for a customer? In the past, in all of these scenarios, you’d face a very time-consuming process and quite honestly, one that has likely been a deterrent. In this blog post, I’m going to walk you through creating a SharePoint 2013 development environment, on Azure, utilizing the Visual Studio 2013 RC.
Thanks to the good people at Microsoft, there is now a developer image on Azure that comes with SharePoint 2013 and Visual Studio 2013 Ultimate RC, already installed. Before we get too far along, I do have to warn you that you’ll need either an Azure or MSDN subscription. If you don’t have an Azure subscription, you can activate your MSDN Azure benefit and receive up to $150 USD in free, monthly Azure credits. If you are careful to shut down your VM at the end of each work day, then you should be able to use this VM as your day-to-day development machine without eating up all of your credits.
FREE HALF DAY SESSION: APP MODERNIZATION APPROACHES & BEST PRACTICES
Transform your business into a modern enterprise that engages customers, supports innovation, and has a competitive advantage, all while cutting costs with cloud-based app modernization.
Now we will take a look at how to provision the VM. Currently, there are two options: Use the management portal or PowerShell. You can follow this step-by-step guide if you’d like, but I’m going to give you an abbreviated version of the management portal option, with the small tweak of installing AD directly on our VM.
Provision Using the Windows Azure Management Portal
All you need to do to create a new virtual machine from the Azure Management Portal is to navigate to https://manage.windowsazure.com and follow the steps outlined below.
- Log on to the Windows Azure Portal
- Look for the plus sign (+ NEW) at the bottom left of the Portal page
- Next, select Compute -> Virtual Machine -> From Gallery
- Move down the image list and select the Visual Studio 2013 Ultimate RC image
- Click the arrow, located in the lower right-hand corner of the screen
Now, just navigate through the wizard to create the VM. One thing to note is that while you could possibly get by with a Large instance, you’ll have a better SharePoint development experience if you create an X-Large instance. After you have entered the necessary information, you should see the provisioning screen start to spin. The provisioning time varies, but you can probably count on anywhere from five to10 minutes from start to finish.
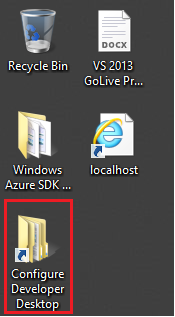
Once the provisioning step is complete, you will need to RDP into your new VM and once that’s done, you should see a ‘Configure Developer Desktop’ folder on your desktop. Inside you will see a ‘Scripts’ folder that contains all of the PowerShell scripts needed to finish configuring your development environment.
Microsoft has given you two options. You can configure a standalone version of SharePoint 2013 or one that leverages Active Directory. Here is where I’ll simplify things a little bit. The VM that we have been working with to this point is not a Domain Controller. For the sake of simplicity, we will promote this server to a DC before running our scripts to provision SharePoint. If you don’t know how to do this already, you can use this easy-to-follow guide to get AD up and running. After this, all we have to do is kick off our PowerShell script and sit back and wait. There will be a few minutes of churn, but if all goes well you will soon see something like this:
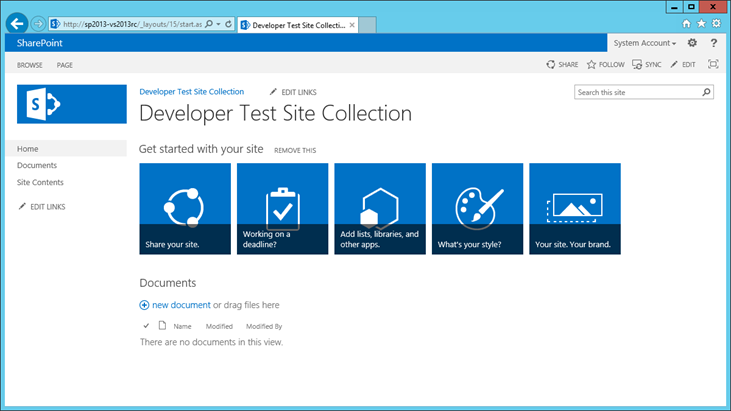
In addition to a SharePoint developer site being created, as you can see, all of our SharePoint templates are available in Visual Studio 2013. There’s nothing left for you to install before you begin doing SharePoint 2013 development in the cloud.

Advantages to Developing in the Cloud
Developing in the cloud might take some getting used to. I know that I’ve struggled with the concept a little bit myself. But there are some distinct advantages:
- Access from anywhere
- Prevents “contamination” of your machine or local network
- Reduction in the cost of developer equipment (RDP on a lesser machine)
- Reduction in the cost of on-prem server infrastructure
- Developers are more productive (less time spinning up development VMs)
Hopefully this post has given you the tools and resources that you need and now you’ll give it a try. If you do, please provide us with some feedback in the comments section below!


